Heat Shields for Vehicles
Vehicle heat shields for vehicles block and redirect radiant heat; use an air-gap metal shield near exhaust parts and adhesive insulation only on cooler body panels, because location matters more than thickness. Ignore a bad shield and you can get rattles, cooked wiring, hot floors, damaged paint, and sometimes a fire risk. This guide matches each shield type to its job, materials, mounting methods, and the right repair or replacement by heat source and location.
How vehicle heat shields work as a system


Radiant heat, conducted heat, and trapped heat under the body
A vehicle does not have one heat problem. It has several.
Exhaust parts throw off radiant heat, hot pipes conduct heat into brackets and nearby metal, and tight underbody spaces trap hot air after a climb, a tow, or slow traffic. I have seen catalytic converters heat the floor above them without ever touching it, simply because the converter shell radiates into the tunnel and the body stores that heat.
That is why exhaust shielding, floor shielding, firewall protection, and line protection need to be treated as one thermal-management system. Each part deals with a different heat path.
Why air gap often matters more than material thickness
Near exhaust parts, spacing usually does more work than extra thickness. A thin formed metal shield with a stable air gap can reduce radiant heat more effectively than a thicker sheet placed close to the pipe.
The reason is simple. Reflective metal faces the heat source, the air gap interrupts direct transfer, and the body side stays cooler. Lose that gap because a clip rusted away or the shield warped, and performance drops fast.
For many factory exhaust heat shields, the formed shape is there for a reason. It creates stand-off distance and stiffness so the shield keeps that gap while the vehicle vibrates.
The difference between shielding heat and insulating a panel
A metal exhaust shield reflects and redirects heat away from nearby parts. An insulation mat slows heat moving into a body panel. Those are different jobs.
Reflective foil insulation and adhesive-backed mats work best on cleaner, cooler panel surfaces such as a floor pan, rear floor, or firewall skin, where the product is rated for the panel temperature. They are usually a poor choice for direct attachment to exhaust parts unless the product was built and rated for that exact use.
That is the mistake I see in many DIY repairs. People treat every hot area like it needs more material, when the real need is often the right gap, the right mount, or line clearance.
Do all cars have heat shields, and are they necessary?
Most cars have heat shields in some form, though the coverage varies by layout and heat load. In practice, manufacturers put formed shields where radiant heat can overheat the floor, firewall, fuel tank area, or nearby lines, and they rely on clearance and airflow where temperatures stay in bounds. They are necessary whenever heat exposure exceeds what nearby parts can safely handle.
Why some areas get formed shields while others rely on clearance
If a muffler sits far from the floor and gets plenty of airflow, the vehicle may need little more than space. Put a catalytic converter close to the tunnel, though, and a formed metal shield becomes far more likely because converter shells run hotter and radiate harder.
Firewall areas near downpipes and turbo plumbing often need shielding because hoses, wiring, paint, and cabin materials sit on the other side. The floor above an exhaust tunnel may use both a metal underbody shield and an insulation layer inside or on the panel.
What changes on trucks, motorcycles, older vehicles, and performance builds
Trucks usually have more vertical space under the body, but towing and long uphill loads can keep exhaust temperatures high for longer periods. Cars with compact tunnels often need tighter heat control at the floor and under-seat area.
Motorcycles are their own case. The rider’s leg, boots, side covers, and luggage can sit very close to the pipe, so compact formed covers and stand-off shields matter more than broad floor insulation.
On older vehicles, I usually find the same trouble spots: rusted studs at the tunnel shield, missing speed nuts around the converter guard, and floors that were patched in a way that changed the original air gap. Performance builds create another problem, aftermarket headers, larger catalytic converters, and rerouted exhaust can wipe out the clearance the factory design relied on.
When modified or lowered vehicles need extra heat protection
Lowered cars often move the exhaust closer to the floor on compression, especially near the rear axle and tunnel. Custom systems can also swing more on soft hangers and hit shields that once had enough margin.
Brake lines, fuel lines, wiring looms, and hoses become risk areas when exhaust routing changes. In these builds, heat protection is about both temperature and movement. A shield that looks acceptable at rest may fail once the suspension cycles and the exhaust torques over.

Where each heat shield belongs on a vehicle
Exhaust heat shields at the catalytic converter, muffler, and tunnel
An exhaust heat shield protects nearby parts from exhaust heat and usually sits around the catalytic converter, muffler, tunnel, or firewall area. Factory pieces are often formed aluminum or stainless steel and usually depend on an air gap to work.
Converter shields are often a high priority because converters run hot and are often located close to the floor, lines, or body seams. Muffler shields often manage longer-duration floor warming at the rear floor and cargo area.
Floor and rear-floor shields for cabin heat control
A vehicle floor heat shield limits heat transfer into the cabin and protects underbody coatings. The common problem spots are the exhaust tunnel, under-seat area, and rear floor above the muffler or resonator.
These areas may use a metal underbody shield, an insulation mat on the body panel, or both. If a driver feels a hot floor at one footwell or under the rear seat, this is usually the area to inspect first.
Firewall shielding near the engine and downpipe area
Firewall protection handles engine-bay heat load, especially near manifolds, turbo hardware, and downpipes. The firewall sees radiant heat from one side while paint, seam sealer, wiring, and cabin trim sit on the other.
In this location, reflective barriers on the engine side and insulation on the panel can both matter, but only if the products are rated for the actual temperatures present.
Protection for brake lines, fuel lines, wiring, and hoses
Lines and looms usually need local protection rather than a giant panel. If a brake line or fuel line passes near exhaust routing, the first fix is usually to improve clearance. The second is a proper stand-off shield or line-specific sleeve where clearance cannot be restored.
This matters on modified cars, lowered cars, motorcycles, and older vehicles with bent replacement lines. The line must maintain clearance from both the exhaust and the shield. A shield that touches the line can still conduct enough heat to cause trouble.
What can be used as a heat shield on a vehicle?
Use formed stainless steel or aluminum shields near exhaust parts, reflective foil or adhesive-backed insulation on cooler body panels, and line sleeves or small stand-off guards for hoses and lines. The wrong material fails fast, especially if it touches the exhaust or depends on low-temperature adhesive near high radiant heat.
Formed metal shields: stainless steel and aluminum
Stainless steel is generally a good choice for vibration, corrosion, and sustained heat. It is a strong choice near converters, headers, and underbody locations exposed to water, salt, and road debris.
Aluminum reflects radiant heat well and forms easily, so it is commonly used in underbody shields. Its weakness is strength retention near extreme heat and long-term fatigue if poorly supported.
For a replacement panel, shaped metal with stand-offs beats a flat sheet bolted tight to the floor.
Ceramic composites, reflective foils, and adhesive-backed mats
Ceramic composite barriers can work where temperatures are high and space is limited, especially on firewall or motorsport-style panel barriers. Reflective foil products help with radiant heat on body panels but need a clean surface and enough distance from direct exhaust heat.
High-temp adhesive-backed mats are best treated as panel insulation, not universal exhaust shielding. They can reduce floor temperature and noise on the body side, but many will fail if stuck to dirty metal, placed too close to a converter, or exposed to direct splash and abrasion underneath.
When wrap-style protection for nearby lines makes sense
Small brake or fuel lines near exhaust routing may need a line sleeve, reflective wrap, or a local shield mounted between the line and the pipe. That is different from wrapping the exhaust itself.
The aim is to cut radiant exposure while preserving clearance. On motorcycles and custom builds, a compact line shield with stand-offs often works better than trying to cover the whole hot part.
What should never be improvised near direct exhaust heat
Do not improvise with household foil, roofing products, plastic spacers, standard washers, low-temp adhesive pads, or random sheet scraps mounted without spacing. These repairs fail from heat, vibration, corrosion, or all three.
A poor patch can also hide the real problem, such as a broken mount, exhaust contact, or a floor pan already heat-damaged.
What heat shield material is best for cars?
The best material depends on location, air gap, and temperature exposure. Stainless steel is usually the safer choice close to very hot exhaust parts, aluminum works well for formed reflective shields with space around them, and adhesive-backed insulation belongs on cooler panels rather than directly on exhaust components.
Choosing by heat source, distance, and exposure time
Short bursts of heat during a pull are different from long highway towing or repeated stop-and-go heat soak. A floor panel near a muffler may need broad reflection and insulation. A converter zone may need compact, corrosion-resistant metal with reliable spacing.
Ask four questions:
- Is the main threat radiant heat, conducted heat, or trapped hot air?
- How much air gap is available?
- Is the heat load continuous or brief?
- Will the material face salt, water, impact, or flex?
Continuous temperature rating versus short-term peak rating
Continuous rating matters more than peak rating for underbody parts. A shield that sees sustained tunnel heat or repeated hot shutdown cycles needs a realistic continuous rating.
That is where DIY choices often go wrong. A mat that survives one short test may soften, delaminate, or sag after months of normal use.
Corrosion, vibration, and road-debris tradeoffs by material
Stainless steel lasts well under salt and splash. It is a solid pick for long-term underbody service and for custom brackets. Aluminum is lighter and highly reflective, but it needs smart support to avoid cracking or drumming.
Ceramic composite barriers resist heat well but can be less forgiving if struck or bent. Foil-faced mats can help on floors and firewalls but are vulnerable underneath the vehicle unless protected.
Why direct-contact areas and body-panel areas need different materials
Direct-contact or near-contact exhaust zones demand formed metal, controlled spacing, and high-temp hardware. Body-panel areas can use insulation mats if the panel temperature stays within the product’s continuous rating and the surface prep is right.
That split matters. A material that works on the cabin side of a floor pan may fail quickly on the exhaust side near a catalytic converter.
Mounting methods that keep shields effective
Clips, clamps, bolts, standoffs, and heat-resistant washers
Mounting hardware is part of the shield system. Factory shields often use stamped clips, threaded studs with washers, or bolts into body or exhaust brackets. Universal repairs may use stainless clamps, bolts with stand-offs, and heat-resistant washers.
Choose hardware by what the shield mounts to. If the shield belongs on the body, mount it to the body structure. If it is designed as a local guard around a pipe, clamps may be appropriate. Mixing those approaches without thinking through movement can create contact and noise.
How mounting hardware controls spacing and vibration
A fastener does more than hold a panel up. It sets stand-off height, limits flutter, and keeps the shield from creeping into the exhaust.
Missing fasteners change the heat behavior immediately. One lost clip can let a panel bow downward, touch the pipe, rattle at idle, and run hotter because the intended air gap is gone.
Common hardware failures after rust, exhaust work, or impact damage
Rust eats studs and washers. Exhaust replacement work can leave shields bent or only partly reattached. Road debris and minor impacts can peel a panel down at the leading edge.
Watch for cracked spot-welds, enlarged mounting holes, broken clamp bands, and washers that have pulled through thin metal. Those failures point to more than noise. They usually mean the shield has already lost its shape or spacing.
Vehicle heat-shield decision matrix by problem location
Decision matrix
| Problem location | Main heat source | Best shield type | Preferred mounting method | Useful air gap | Common failure signs | Repair threshold |
|---|---|---|---|---|---|---|
| Exhaust tunnel | Radiant heat from pipe or converter, trapped tunnel heat | Formed aluminum or stainless underbody shield; optional floor insulation on panel side | Factory clips or bolts with stand-offs and heat-resistant washers | Maintain original stand-off; even a small controlled gap matters | Idle rattle, hot floor, shield sagging toward pipe, missing clips | Re-fasten if metal is sound; replace if warped into contact or mount holes are torn |
| Floor pan or rear floor | Muffler and resonator heat soak over time | Metal floor shield paired with adhesive-backed insulation on cooler panel areas | Body-mounted clips or bolts; adhesive mat only on clean rated surface | Air gap under metal shield plus full mat adhesion on panel | Cabin heat under seats, melted undercoating, loose mat edges | Patch mat only if panel is sound; replace metal shield if corrosion or shape loss is present |
| Firewall | Downpipe, manifold, turbo, engine-bay heat soak | Reflective barrier or composite firewall shield; local metal stand-off shield near hot side | Bolts, stand-offs, mechanical retainers; adhesive only where product allows | More gap on hot side beats extra thickness alone | Burning smell, scorched paint, brittle loom covering, hot footwell | Replace if insulation is baked hard, adhesive has released, or nearby wiring shows heat damage |
| Catalytic converter zone | Very high radiant heat close to body and lines | Stainless or formed OE-style metal shield | Studs, clips, bolts, or dedicated clamp system that preserves spacing | Stable stand-off is mandatory | Sharp metallic rattle, shield touching shell, scorched floor seam sealer | Replacement is safer if shield touches converter, studs are gone, or corrosion has thinned the panel |
| Motorcycle pipe area | Pipe radiant heat near rider, plastics, luggage, or brake line | Compact stainless or aluminum stand-off pipe shield; line sleeve where needed | Band clamps, stand-off brackets, small bolts into guard mounts | Small but consistent gap between pipe and shield | Discolored side cover, burned luggage, hot leg area, clamp creep | Reposition if clamps slipped; replace if shield cracked, pipe contact exists, or nearby parts have begun to melt |
How to choose between metal shielding, adhesive insulation, line protection, and custom fabrication
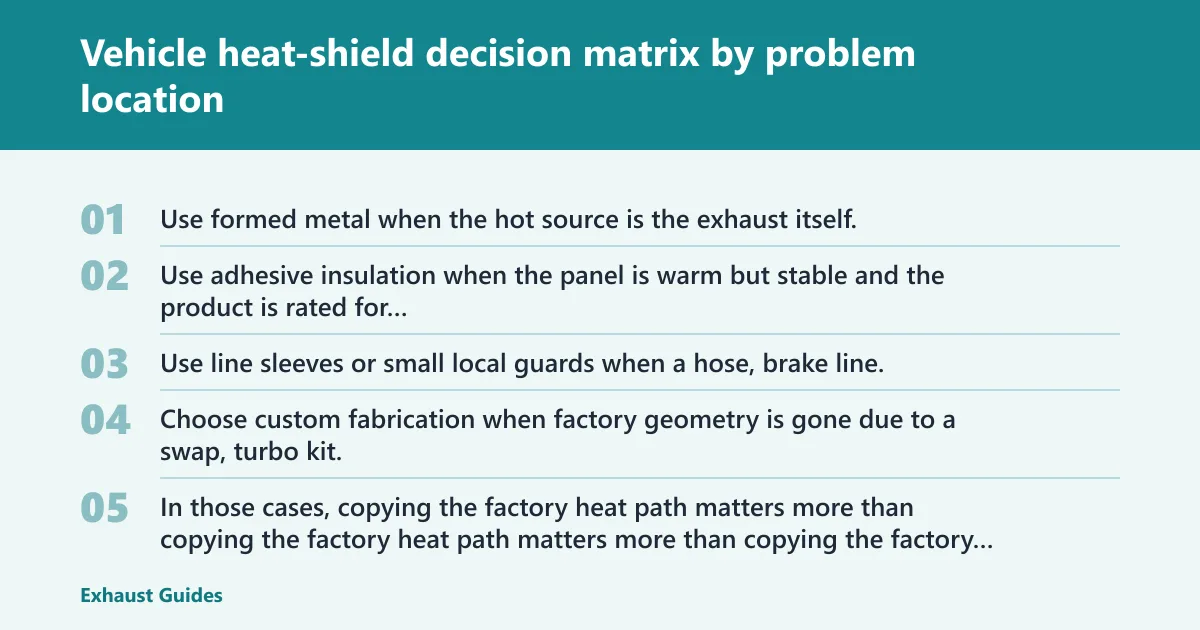
Use formed metal when the hot source is the exhaust itself. Use adhesive insulation when the panel is warm but stable and the product is rated for that panel location. Use line sleeves or small local guards when a hose, brake line, or fuel line is the part at risk.
Choose custom fabrication when factory geometry is gone due to a swap, turbo kit, lowered ride height, or rerouted pipes. In those cases, copying the factory heat path matters more than copying the factory material alone.
How to inspect a failing heat shield and decide on repair or replacement
Rattle, corrosion, warping, melted insulation, and missing fasteners
A rattle at idle over a certain rpm range often means a loose shield, but the inspection should go past the noise. Look for corrosion around holes, warped edges, missing clips, melted insulation, and witness marks where the shield has been touching the exhaust.
Also inspect nearby coatings, wiring loom, hoses, and line clips. If those show browning, melting, or hardening, the heat issue has already spread beyond the shield itself.
How to spot exhaust contact, prior collision repair, and bad patch jobs
Contact leaves polished marks on the pipe, converter shell, or shield face. Collision repair may show different fasteners side to side, bent floor seams, crushed tunnel sections, or undercoating laid over missing brackets.
Bad patch jobs stand out too: giant washers on thin rusted metal, self-tapping screws into weak sheet, loose clamps around non-round areas, or adhesive material stuck where splash and heat will strip it off.
When re-fastening is enough and when replacement is the safer move
Re-fastening is reasonable when the shield metal is still sound, the original shape remains, and the missing hardware is the only fault. Use hardware that restores the original spacing.
Replacement is the safer move when corrosion has thinned the panel, mounting holes are torn, the shield touches the exhaust, the mounting points are distorted, or nearby parts already show heat damage. Patching a shield in those conditions often brings the noise down, but it does not restore heat control.
Checks after repair
- Verify clearance to exhaust along the whole shield, not just at one edge.
- Check brake lines, fuel lines, wiring, and hoses on both hot and body sides.
- Inspect suspension travel areas on lowered cars and rear axle movement zones.
- Confirm clamps and bolts cannot rotate into contact after heat cycles.
- Recheck after a few drive cycles for fresh witness marks or new rattles.
Do heat shields really reduce cabin heat and component damage?
Yes, when the shield matches the heat source and keeps its air gap. A proper tunnel or floor shield can cut hot-floor complaints, while firewall and line shields reduce exposure to wiring, hoses, paint, and fuel or brake components. They are less effective when exhaust routing, tune issues, or contact problems overwhelm the design.
What changes at the floor pan, firewall, and under-seat area
At the floor pan, the usual result is lower cabin heat and less underbody coating stress. At the firewall, the benefit is often lower heat soak into loom coverings, seam sealer, and footwell areas. Under the rear seat or cargo floor, shields can reduce heat buildup from the muffler during long drives.
Why line protection matters even when cabin heat seems normal
A vehicle can feel normal inside and still have a local heat problem at a brake line clip, fuel hose, or wiring branch. That is common on modified and lowered vehicles where one small area lost its clearance.
Heat damage to a line is often quiet until it is expensive.
Limits of shielding when exhaust routing or tune issues create excess heat
Shields are not a cure for every hot-condition complaint. An exhaust sitting too close to the floor, a failed hanger, a blocked converter, or a tune problem that drives exhaust temperature too high can push any shield past its margin.
When there is burning smell, severe discoloration, or repeated shield warping, find the root cause before replacing parts again.
Frequently asked questions
What can be used as a heat shield?
For vehicle use, formed stainless steel or aluminum is the normal choice near exhaust parts, while reflective foil insulation and high-temp adhesive-backed mats fit cooler body panels. Brake and fuel lines may use sleeves or small stand-off guards. Improvised household materials should stay out of direct exhaust areas.
What can I use for a heat shield?
Use a shield that fits the location. Near a catalytic converter or pipe, that usually means a metal shield with an air gap and proper hardware. On a floor pan or firewall skin, a rated insulation mat may help. Choose by heat source, spacing, and continuous temperature rating.
Do all cars have heat shields?
Most do, but not in the same places or to the same extent. Some areas use formed shields, while others rely on clearance and airflow. Trucks, motorcycles, older vehicles, and modified cars often need different strategies because their packaging, load, and exhaust routing differ from a standard passenger car.
Are heat shields necessary?
Yes, wherever exhaust or engine heat sits close enough to threaten the floor, firewall, paint, wiring, hoses, fuel lines, or brake lines. A missing shield may start as a rattle problem, but the larger risk is heat exposure. Removal without a replacement plan is rarely the right fix.
What are car heat shields made of?
Common materials include aluminum, stainless steel, ceramic-composite barriers, reflective foil insulation, and adhesive-backed high-temp mats. Factory exhaust shields are often thin formed metal with a built-in air gap. Floor and firewall areas may add insulation layers where panel temperatures stay within product ratings.
Do heat shields reduce cabin heat?
They can, especially at the exhaust tunnel, rear floor, firewall, and under-seat area. A working metal shield reduces radiant heat load, and a suitable insulation layer can slow heat entering the cabin panel. If cabin heat remains high, inspect exhaust clearance, converter condition, and missing fasteners before adding material.