Exhaust Gasket Leak Symptoms and Fixes
If the leak is loudest cold, changes with throttle, and leaves soot at one flange, suspect an exhaust gasket; if the noise stays fixed after a retorque check, inspect for warped flanges or cracks before replacing parts. Ignoring an exhaust leak can create a carbon monoxide hazard, and an upstream leak can skew oxygen-sensor readings enough to affect fuel trims and trigger the check engine light. This guide maps the symptoms to the likely failure, then shows how to confirm a gasket leak and fix it without swapping the wrong piece.
What an exhaust gasket does


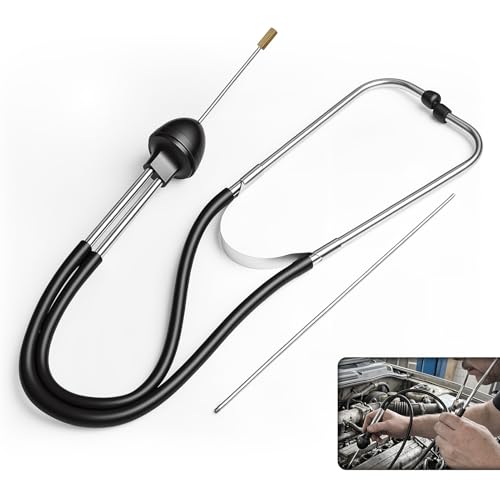
An exhaust gasket seals two mating surfaces in the exhaust path. A common gasket is the exhaust manifold gasket, which sits between the manifold and the engine or cylinder head near the front of the exhaust; another is the exhaust flange gasket, which is crushed between two flat flange faces.
Those joints leak first because they must stay sealed while they heat up, cool down, and flex with vibration. A gasket can fail on its own, but the hardware around it often causes the real problem. Corrosion, warped faces, and broken studs can hold the joint open even when a new gasket is installed.
Exhaust manifold gasket location and role
The exhaust manifold gasket seals the manifold to the head. When it leaks, the noise is often near the engine bay and can be mistaken for valve train tick. A damaged exhaust manifold gasket can also cause odd popping sounds, reduced acceleration, and lower fuel economy, especially when the leak is upstream of the oxygen sensor and the engine starts compensating for false readings.
Exhaust flange gasket location and role
An exhaust flange gasket sits between flat flange faces. A worn flange gasket can cause exhaust leaks and ticking, especially where road salt, heat cycles, and vibration have corroded the joint. Black soot around a pipe connection is a leak clue.
Why leaks show up at joints first
Joints fail before straight pipe sections because they depend on clamping force. Once fasteners stretch, rust swells the hardware, or a flange warps, exhaust can escape at the seam. That is why a leak often appears as a tick, hiss, or soot ring right at the connection.
Exhaust leak symptoms and likely causes
An exhaust leak can sound like ticking, hissing, or rumbling. It can also cause exhaust smell, soot, vibration, power loss, and poor fuel economy. When the leak is upstream of the oxygen sensor, the sensor may read the wrong exhaust oxygen level and the engine may react with fuel-trim changes or fault codes. Strong fumes in or near the cabin are especially urgent because exhaust can contain carbon monoxide.
Ticking, hissing, and rumbling by leak location
A sharp tick on cold start can point to a small leak near the manifold or an early flange leak. A cold-start tick usually means a small leak is opening before the exhaust metal expands. Exhaust leak ticking can sound like a lifter tick, which is why location matters. A hiss often points to a smaller leak under pressure, while a deeper rumble more often comes from a larger opening or a leak farther back in the system.
A leak before the muffler can raise volume. If the sound comes from the front of the exhaust and gets quieter as the engine warms, the joint is more suspect than the pipe.
Soot, odor, vibration, power loss, and fuel economy clues
Soot at a joint means exhaust is escaping there. Smell matters too. Exhaust odor near the engine bay points to a front-side leak; odor in the cabin raises a carbon monoxide concern and needs a faster response. Vibration at one seam or bracket often points to hardware that has loosened or a flange that no longer sits flat.
Noise and power loss can occur with a broken exhaust gasket, but they are not equally common on every vehicle or every leak size. A broken exhaust gasket can reduce acceleration and fuel economy, especially if the leak is upstream of the oxygen sensor and the engine adjusts fuel delivery around bad readings.
Check engine light and oxygen sensor effects
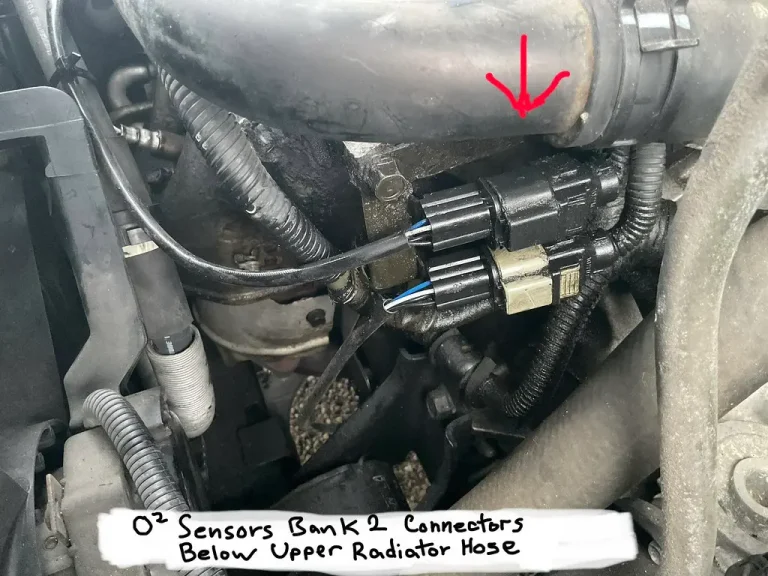
A check engine light can come on with an exhaust leak, but the light often points to the sensor or fuel trim issue first rather than naming the gasket. If the leak is ahead of an oxygen sensor, outside air can skew the reading and trigger fault codes. That matters more when the leak is close to the front of the exhaust than when it is far downstream.
Exhaust leak matrix
| Symptom | Likely leak location | Confidence level | Next check |
|---|---|---|---|
| Sharp ticking on cold start | Exhaust manifold gasket or front flange | High | Listen at the front of the exhaust before the engine fully warms, then inspect for soot and loose hardware |
| Soot at the joint | Flange gasket, warped flange, or loose fasteners | High | Check the mating faces and the studs or bolts for corrosion, breakage, or uneven clamping |
| Smell in cabin | Front exhaust leak or underbody seam | High | Stop driving if fumes are strong, then inspect for leaks near the engine bay and floorpan |
| Power loss | Manifold gasket, upstream flange, or large pipe crack | Medium | Check for leaks ahead of the oxygen sensor and look for broken studs or a warped flange |
| Check engine light with exhaust noise | Upstream leak affecting sensor readings | Medium | Read the fault codes, then inspect the exhaust path before the sensor and the affected joint |
| Ticking that stays fixed after warmup | Cracked pipe, manifold crack, or broken stud that prevents clamping | Medium | Inspect the full joint and the tube path in order: manifold, flange, studs/bolts, then pipe body |
| Noise from one exact flange with uneven gap | Warped flange or crushed gasket that no longer seats evenly | High | Check flatness with a straightedge and compare both mating faces before ordering parts |
| Black soot before the oxygen sensor | Leak-before-sensor | High | Prioritize the leak source ahead of the sensor because it can affect fuel trims and codes |
| Black soot after the oxygen sensor | Leak-after-sensor | Medium | Inspect for noise, fumes, and rust damage, but expect less impact on fuel-trim readings than an upstream leak |
Why does my exhaust tick on cold start?
A cold-start tick usually means a small leak is opening before the exhaust metal expands. As parts heat up, the joint can seal more tightly for a few minutes, which is why exhaust leak noise can quiet down after five minutes. That pattern points to a front-side joint more than a deep pipe crack.
Metal expansion and temporary sealing changes
Cold metal shrinks. If a gasket is weak, the flange is warped, or the fasteners are not clamping evenly, the leak can be loud until heat changes the fit. That is why drivers often notice a sharp tick on cold start.
Why ticking near the front of the exhaust matters most
Ticking near the front of the exhaust deserves attention because it is where the manifold gasket and the first flange seals live. If the noise comes from the rear or from a long tube section, the cause is more likely a pipe crack, a seam split, or a damaged hanger point than a simple gasket failure.
What a cold-start tick does not prove
A cold-start tick does not prove the gasket alone is bad. Warped flanges, broken studs, and rusted pipe ends can make the same sound. Say your sedan ticks for 30 seconds on startup and the sound fades as the engine warms. That pattern fits a leak, but the exact part still needs a joint-by-joint check.
How to tell if the leak is from the gasket or the pipe
Start with the leak pattern, then move to the hardware. Soot right at the seam points toward a gasket or flange problem. Soot along the tube points more toward a crack. If the joint looks dry but the flange face is uneven, the hardware may be the real fault.
Soot at the joint versus soot along the tube
Black soot around a pipe connection is a leak clue. If the soot forms a ring around the joint, the flange or gasket is suspect. If the soot runs in a line along the pipe body, inspect for a crack, split seam, or pinhole farther from the seal.
Warped flange, broken studs, and corroded hardware
Exhaust hardware can fail even when the gasket still looks intact. A warped flange will not clamp flat. Broken studs leave uneven pressure. Rust can lock the joint half open. Those faults can mimic a bad gasket and should be checked before parts are replaced.
A common first-timer mistake is installing a new exhaust gasket but reusing warped studs, which can leave the joint leaking and the exhaust ticking. The leak returns because the surface still will not seal.
Simple off-car checks for flatness and fit
With the exhaust cool and the engine off, separate the joint and inspect both faces. Lay a straightedge across the flange face and look for rocking or gaps. Check whether the bolt holes are elongated, whether the studs are straight, and whether the pipe section lines up without forcing it into place. If the flange is visibly bowed or the faces are pitted, the gasket is not the only repair.
Can an exhaust gasket leak trigger a check engine light?
Yes. An upstream exhaust leak can skew oxygen sensor readings and lead to fuel-trim changes or fault codes, which may light the check engine lamp. The lamp often reflects the sensor’s bad information, not the gasket itself. That is why code reading and leak location should be checked together.
Why the light often points to the sensor or fuel trim first
If fresh air reaches the oxygen sensor before the exhaust stream leaves the pipe, the sensor can report a leaner condition than the engine actually has. The control system may respond by changing fuel delivery. In that case, the warning light may appear even though the root problem is an exhaust leak.
When drivability changes make the leak more urgent
If the light comes with weak acceleration, rough running, or strong exhaust smell, the leak is more urgent. Those symptoms mean the leak may be large enough to affect sensor readings and cabin air. A front-side leak with fumes is not a wait-and-see problem.
Fix the source, not just the symptom. Confirm the leak location first, then inspect the joint, hardware, and mating surfaces. Replace the gasket only after you know the flange or manifold is still usable. If the hardware is bent, rusted through, or broken, replacing the gasket alone will not hold.
- Start with the engine off and the exhaust cool. Follow the vehicle manual before lifting, never work under a vehicle held only by a jack, and check local laws if the repair affects lighting, noise, or emissions equipment.
- Trace the noise or soot to one joint. Use the symptom pattern: front-side ticking and soot at the seam point toward a manifold or flange leak; soot on the tube points toward a crack.
- Remove the damaged joint and inspect both sealing faces. Look for warping, deep rust, cracks, and broken studs.
- Replace any failed hardware at the same time. That usually means the gasket, bolts or studs, and any flange, pipe section, or manifold face that cannot clamp flat.
- Reassemble according to the vehicle manual. If the manual calls for new fasteners, use them. If it calls for a specific tightening sequence, follow that order exactly. This is especially important for one-time-use exhaust hardware and for joints that must be tightened in stages or in a cross pattern.
- Verify the repair by rechecking the joint for soot, tick, and smell after the engine reaches operating temperature.
When sealant is wrong and when flange repair is needed
Do not use sealant where the design depends on a dry gasket and flat metal faces. Sealant cannot correct a warped flange or a cracked pipe. If the flange is bent, the pipe is split, or the stud holes are damaged, repair or replace the hardware instead of trying to paste over the fault.
Suppose a small coupe has a loud tick from the front manifold, a soot ring at one flange, and a check engine light after highway driving. The gasket may be part of it, but broken studs or a warped flange could be the reason the new seal would fail again.
What causes exhaust gasket failure?
Heat cycles, vibration, corrosion, and poor clamping are the common causes. Road salt can attack bolts and flanges. A loose or uneven joint can chew up the gasket face. A damaged exhaust manifold gasket or flange gasket can also fail after a previous repair if the mating surfaces were not checked for flatness.
Broken studs and seized fasteners are especially common repair realities. If the fastener cannot pull the joint together evenly, the gasket is forced to seal a gap it was never meant to bridge.
Frequently asked questions
What are the symptoms of an exhaust gasket leak?
The usual signs are ticking, hissing, rumbling, exhaust smell, soot at the joint, vibration, weak acceleration, and worse fuel economy. A leak can also affect oxygen sensor readings and turn on the check engine light. Noise on cold start is one of the most useful clues.
How can I tell if the leak is from the gasket or the pipe?
Look at where the soot sits. Soot at the joint points to the gasket, flange, studs, or mating faces. Soot along the tube points more toward a crack or seam split. A warped flange or broken stud can imitate both, so inspect the hardware before buying parts.
Why does my exhaust tick when the engine is cold?
Cold metal contracts, so a weak joint can leak more until heat expands the parts. That is why the tick is often loudest at startup and quieter after a few minutes. A cold-start tick near the front of the exhaust usually points to a manifold or flange leak.
Can an exhaust gasket leak cause a check engine light?
Yes. If the leak is upstream of the oxygen sensor, it can change the sensor’s reading and lead to fuel-trim changes or fault codes. The light often points to the sensor data problem first, even though the real fault is an exhaust leak at the joint.
Can a bad exhaust gasket reduce power or fuel economy?
Yes, it can. Power loss and worse fuel economy are possible, and they are more likely when the leak is near the front of the exhaust and can alter oxygen sensor readings.
How do I find an exhaust leak without taking everything apart?
Listen on a cold start, then inspect for soot, smell, and vibration at each joint. A sharp tick at the front, black soot at a flange, or fumes near the cabin points you to the right area. Start with the easiest visible seam before removing parts.
What should I replace besides the gasket to fix the leak?
Replace damaged studs, bolts, flanges, and any cracked pipe section or manifold face that will not seal flat. If the joint is warped or rusted open, a new gasket alone will not fix it. Follow the vehicle manual for the correct parts and order of repair.
Do I need to replace one-time-use exhaust hardware?
Yes, if the vehicle manual calls for new fasteners, new nuts, or single-use sealing hardware, replace them instead of reusing stretched parts. That guidance is common on manufacturer service procedures because reused hardware may not clamp the joint evenly the second time.
Can I use smoke or soapy water to find the leak?
Use caution. Smoke testing can help locate an exhaust leak when done properly, but it should be done with the engine off and only with equipment intended for diagnostics. Soapy water is not a good choice on a hot exhaust and can miss small leaks or create a slipping hazard, so visual inspection and sound clues still matter most.
What is the best visual inspection order?
Start at the manifold, then move to the nearest flange, studs or bolts, pipe seams, and the next downstream joint. Check for soot, rust trails, broken hardware, and uneven gaps in that order so you do not miss an upstream leak that is affecting the downstream system.
What is an exhaust gasket?
An exhaust gasket is the seal between two exhaust mating surfaces, usually at the manifold or a flange joint. Its job is to stop exhaust gas from escaping where metal parts bolt together. When it fails, the first clues are usually ticking, soot, smell, or a check engine light.
Blown head gasket vs leaking head gasket
A leaking head gasket may show early coolant loss, minor misfire, or pressure issues before major damage appears. A blown head gasket is usually a more serious failure with stronger overheating, smoke, or fluid mixing symptoms. If the symptom set is exhaust tick and soot at a flange, the exhaust joint is the better place to inspect first.