
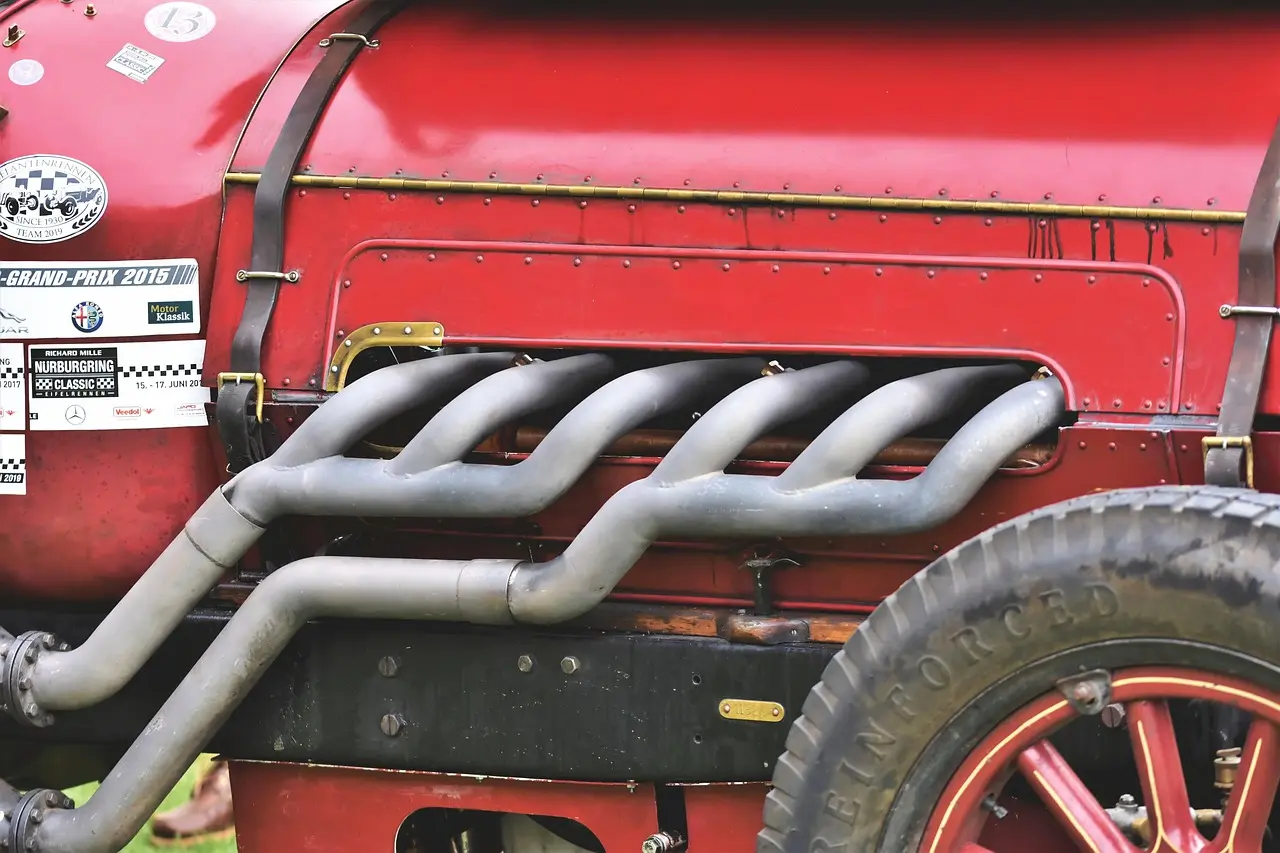
Exhaust Manifold Specs Guide
Decode exhaust manifold specs by splitting the must-match fit dimensions, port shape and spacing, bolt pattern, flange thickness, and outlet size and location, from runner size and length, which can vary. Miss one and you can end up chasing leaks, warped flanges, snapped studs, or a manifold that collides with the frame, steering shaft, or starter. This guide shows how to verify head-side fit, outlet and gasket compatibility, hardware, flatness, and clearance before you buy.
An exhaust system carries hot combustion gases from the engine or stove to a safer discharge point away from the machine and the operator. In an engine, that path starts at the cylinder head and exhaust manifold, and it may include a catalytic converter that cuts hydrocarbons, carbon monoxide, and nitrogen oxides, a turbocharger placed in the exhaust stream to increase power, and a muffler or silencer to cut noise. Because those gases run hot and can contain hydrocarbons, carbon monoxide, and nitrogen oxides, the parts need to survive sustained heat and must be routed clear of fuel lines, wiring, insulation, and other flammable materials.
The spec map: what must match and what can vary


Non-negotiable fitment specs
These are pass/fail specs. If they miss, the manifold is wrong even if the listing says it fits the vehicle.
- Cylinder head side: port count, port shape, port height and width, center-to-center port spacing, bolt pattern, bolt hole diameter, stud location, flange size, flange thickness, and sealing-face flatness.
- Hardware: thread diameter, thread pitch, usable stud or bolt length, shoulder length where used, and torque spec source for the application.
- Gasket: port opening shape and size, bolt-hole alignment, and gasket type such as multi-layer steel or composite.
- Outlet side: outlet or collector size, downpipe flange pattern, donut versus flat gasket interface, outlet clocking, and catalyst position relative to the manifold.
- Clearance: steering shaft, frame rail, engine mount, starter, spark plug boots, O2 sensor location, heat shields, wiring, and nearby hoses.
Performance-relevant specs that can vary
These matter, but they do not decide exact fit by themselves. Runner length, runner diameter, collector merge style, and whether the part is cast iron or stainless tubular can change tuned exhaust behavior and heat handling. Tuned exhaust matters for efficiency, but I put those specs behind head match and outlet match any time I am buying one.
Why buyers mix up port size, flange size, and outlet size
Listings often post one or two dimensions and skip the rest. Port size is the opening each cylinder sees. Flange size is the full mounting face, including bolt-hole placement and sealing surface. Outlet size is the connection to the downpipe or catalyst. One can match while the other two miss.
The pass or fail workflow used before ordering
- Confirm exact application: engine code, model year split, emissions package, catalyst position, and drivetrain packaging.
- Measure the cylinder head face first, not the old manifold first.
- Record port count, shape, size, and center-to-center spacing.
- Measure bolt spacing center-to-center and note hole diameter or stud size.
- Check gasket shape and sealing window.
- Measure outlet size, flange pattern, and downpipe clocking.
- Check flange thickness and flatness.
- Map clearance points at the vehicle.
- Only then compare manifold material, runner layout, and finish.
My rule in the shop is simple: if I cannot prove the head side, the gasket, the outlet, and the clearance, I do not order the part. I use the vehicle itself, the cylinder head face, the old gasket if it is undamaged enough to compare, and the factory service information for torque sequence and hardware callouts. Catalog fit notes help, but they do not overrule measured dimensions.
| Measurement field | How I record it | Why it matters |
|---|---|---|
| Port size | Height × width for each port, plus shape | Confirms the sealing window and port alignment at the head |
| Bolt spacing | Center-to-center for every adjacent fastener and any vertical offset | Shows whether the flange will drop on without force |
| Thread pitch | Fastener diameter and pitch, such as M8 × 1.25 or 3/8-16 | Prevents wrong hardware, stripped threads, or poor clamp load |
| Flange thickness | Head-side flange thickness and outlet flange thickness | Affects sealing, warp resistance, and usable stud length |
| Outlet pattern | Bolt count, flange style, gasket type, and clocking | Determines whether the downpipe or catalyst will bolt up |
| Clearance | Nearest gap to steering shaft, frame, starter, boots, shields, and sensor access | Catches interference before installation |
📊 Exhaust system regulations vary by country, including China 5, EURO 5, and BS-4. Source: Exhaust system.
For buying and installation decisions, I do not rely on Wikipedia. I verify emissions-package differences from the underhood emissions label, OEM parts catalog notes, and the factory service manual for the exact engine code and model-year split. I verify torque values and tightening sequence from the OEM service manual or a manufacturer service publication, because those sources control the actual hardware and clamp-load requirements.
What specs do I need to match on an exhaust manifold before buying?
The specs that usually have to match are the cylinder-head port count, port shape and size, port spacing, bolt pattern, flange thickness, gasket interface, outlet flange pattern, and outlet location. After that, verify stud or bolt thread pitch and length, then confirm clearance to the steering shaft, frame, starter, plugs, and catalyst.
Cylinder head side specs that must line up
Start at the head face. Count the ports. Then identify the port shape, which may be round, oval, D-port, a siamesed pair, or rectangular with radiused corners. Measure each port opening height and width at the head, because the head is the fixed part. A manifold opening slightly larger than the head can work if the gasket still seals and the roof and floor line up cleanly. A manifold opening smaller than the head is usually a hard no when it leaves a step at the sealing edge. (en.wikipedia.org)
Center-to-center spacing matters as much as port size. I have seen manifolds with the right port count still miss because the outer ports sat off-center by a small amount. That shows up as gasket overhang on one side and bolt holes that need to be forced into place.
When I measured a transverse four-cylinder manifold for a close-coupled catalyst application, the listing looked right until I checked port spacing and found the outer pair off by a few millimeters. On the bench that sounded minor; at the head face it moved the gasket enough to expose the port roof. That is exactly the sort of near-match that becomes a leak and a return.
Hardware and gasket specs that decide whether it will seal
Thread pitch gets missed constantly. Measure stud diameter, thread pitch, and usable length. If the manifold flange is thicker than stock, the old hardware may bottom out or leave too few threads engaged. If the new flange is thinner, shoulders and spacers can clamp badly.
The gasket tells the truth. Lay the gasket against the head and then against the manifold. Check that the bolt holes drop on cleanly and that the gasket opening does not hang into the port roof, floor, or divider. Multi-layer steel gaskets often react to movement and heat cycles differently than composite gaskets, but either type still needs the same sealing window.
If you need a refresher on sealing surfaces and why leaks repeat, compare your notes against our guide to exhaust manifold gasket leak symptoms. I use the same soot-track and crush-pattern checks before I decide whether the manifold is wrong, the gasket is wrong, or the flange is moving.
Outlet and downpipe specs that decide whether it will bolt up
Outlet size alone is not enough. The downpipe connection style must match too. A flat two-bolt flange and a donut-seat outlet are generally not interchangeable, even when the nominal outlet diameter looks similar. Clocking matters as well. A rotated outlet can place the downpipe into the floorpan, crossmember, or catalyst shell.
A catalytic converter can be part of the assembly to cut hydrocarbons, carbon monoxide, and nitrogen oxides, and on many vehicles its position is part of fitment. Some applications place the catalyst directly after the manifold, others farther downstream. That changes flange orientation, sensor lead reach, and heat shield shape.
Vehicle packaging details that change fit on the same engine
Same engine does not always mean the same manifold. Model year splits, emissions packages, front-wheel drive versus rear-wheel drive packaging, and automatic versus manual layouts can change the outlet, catalyst, heat shield, or O2 sensor bung location. Direct-fit suppliers often sort by those differences for imports and domestic vehicles, but I would never let a listing replace measurement.
I have also run into truck and SUV applications where the manifold casting looked interchangeable until I checked steering-shaft and frame-rail clearance. If you are cross-shopping, our overview on exhaust manifold vs header helps explain why routing and packaging can differ even when the head-side flange appears similar in photos.
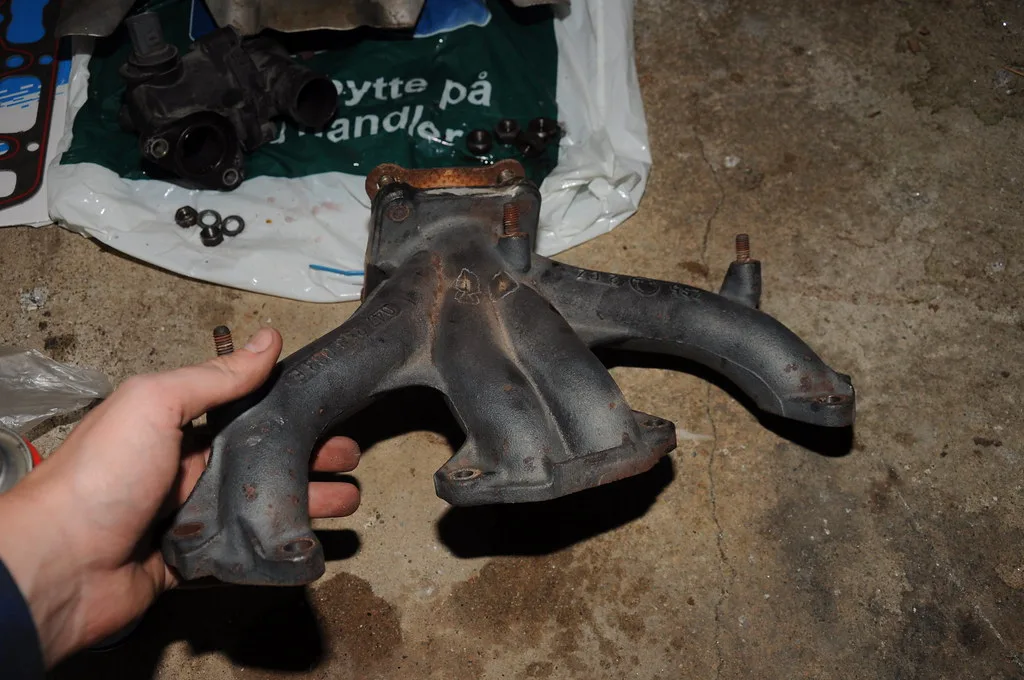
How do I tell if an exhaust manifold matches my cylinder head?
A manifold matches the cylinder head when the port count, port shape, port opening size, center-to-center spacing, and bolt pattern all line up without forcing bolts or leaving the gasket unsupported. The usable check is done at the head face first, then against the gasket, then against the candidate manifold flange.
Checking port count, shape, and opening size
Count ports on the head and on the manifold. Then trace the shape. D-port versus oval confusion is common in blurry photos. Measure the head port height and width with calipers, as close to the gasket seat as access allows. Then compare those numbers to the manifold opening.
A slight oversize on the manifold side can be acceptable if the gasket still seals on all sides and the divider walls line up. A mismatch that leaves the gasket hanging into the gas stream or exposes a ledge at the roof or floor is a poor bet for sealing and flow.
Measuring center-to-center port spacing
Use the center of one port to the center of the next. On round or nearly round ports, center is straightforward. On oval or rectangular ports, measure the full width and height, mark the midpoint, then measure midpoint to midpoint. Record each spacing, not just the overall distance from first to last port.
That catches heads with uneven grouping or siamesed center ports. It also exposes manifolds that copied the outer shape but missed the internal divider location.
Matching bolt pattern to the head face
Ports can look right while the bolt pattern is wrong. Measure every bolt hole center-to-center, top to bottom and across the flange. If the head uses studs, measure stud centerlines rather than the old manifold holes, especially when the old part has been wallowed out from years of movement.
Check bolt hole diameter too. A flange hole that is too small will not pass over a stud cleanly. A hole that is too large can still bolt up, but it reduces locating accuracy and can let the manifold shift during tightening.
When the hardware side is questionable, I also compare the manifold to our notes on exhaust manifold bolts so I do not confuse fitment with a hardware problem. Wrong thread pitch and short engagement can mimic a flange mismatch.
When a slight port mismatch is usable and when it is a hard no
Usable: manifold port is a touch larger than the head, bolt pattern aligns freely, and the gasket seals with no exposed edge. Hard no: manifold port is smaller than the head at the gasket line, divider walls are misaligned, bolt pattern requires prying, or the roof and floor miss badly enough to expose gasket material to direct exhaust flow.
How do I measure exhaust manifold bolt spacing correctly?
Measure bolt spacing center-to-center from the fixed mounting points on the head or from a clean flange, using calipers when possible and a tape only for larger spans. For slotted holes, measure the slot centerline. Record hole diameter separately so bolt spacing and bolt clearance do not get confused.
Tools and setup for accurate center-to-center measurements
Calipers are the main tool here. A tape measure is acceptable for overall end-to-end checks, but it is too crude for hole spacing on most passenger-vehicle manifolds. Clean rust and gasket residue from the flange first. Dirt changes the reading more than most buyers expect.
If the part is still on the vehicle, use exposed stud centerlines where possible. If access is poor, measure from the outside edge of one stud to the same outside edge of the next stud. Equal stud diameters cancel the offset and give center-to-center spacing.
Measuring round holes, slotted holes, and stud locations
For round holes, measure from hole center to hole center. If a hole is too large to catch directly with calipers, measure from left edge to left edge of the next hole, then confirm with right edge to right edge. The two numbers should agree.
For slotted holes, find the midpoint of the slot in the direction that matters for mounting. Record both slot length and slot width. A manifold with slotted holes can fit several applications, but the head still decides whether the slot gives usable adjustment or hides a wrong pattern.
For studs, use stud centerlines. If the studs are corroded, measure diameter in an undamaged section before using edge-to-edge methods.
Bolt hole diameter, clearance, and flange tolerance
Bolt spacing tells you where the fastener sits. Bolt hole diameter tells you how much movement the flange allows during install. Record both. A candidate manifold that matches bolt spacing but uses smaller bolt holes may bind on the studs. A candidate with much larger holes may technically fit but locate poorly and stress the gasket during tightening.
Common measurement mistakes that lead to bad orders
- Measuring edge-to-edge on unequal studs and assuming it equals center-to-center.
- Using the old warped manifold as the master reference instead of the head.
- Ignoring slotted-hole midpoint and recording slot end-to-end as spacing.
- Skipping vertical offset on staggered bolt patterns.
- Rounding too aggressively when comparing online listings.
What is the difference between exhaust manifold port size and flange size?
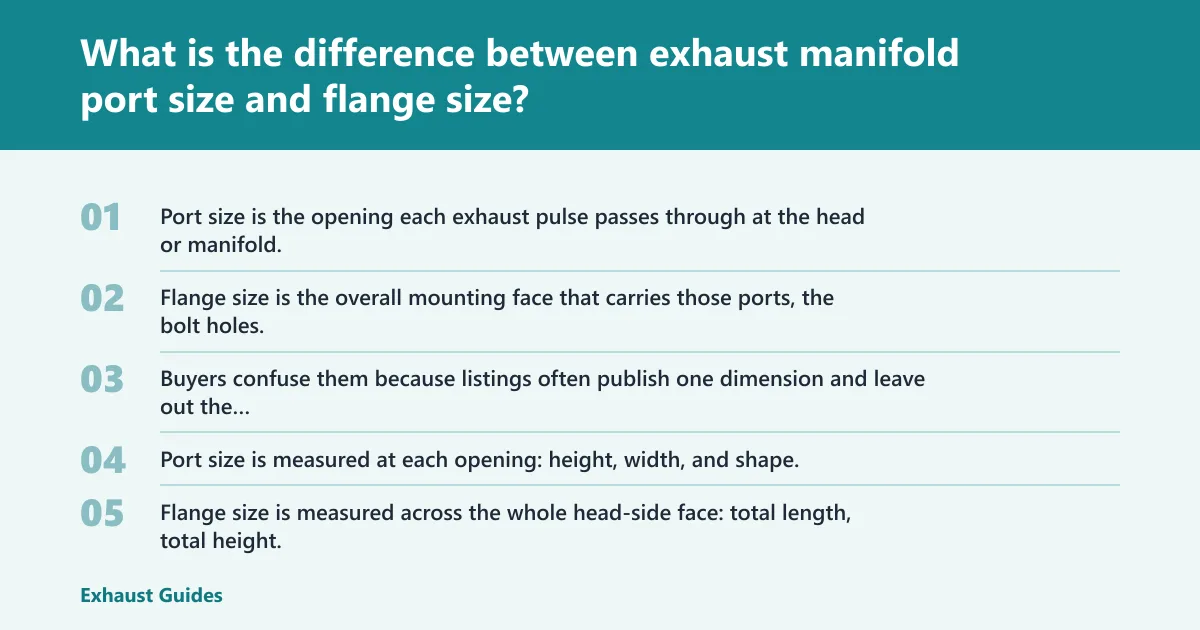
Port size is the opening each exhaust pulse passes through at the head or manifold. Flange size is the overall mounting face that carries those ports, the bolt holes, and the gasket sealing area. Buyers confuse them because listings often publish one dimension and leave out the sealing surface details.
Port opening dimensions versus overall flange dimensions
Port size is measured at each opening: height, width, and shape. Flange size is measured across the whole head-side face: total length, total height, thickness, bolt-hole position, and the width of sealing land around each port. A manifold can have the right port shape yet still fail because the flange puts the holes in the wrong place.
Why flange thickness and flatness matter more than buyers expect
Thin flanges move more under heat. Exhaust parts need to survive high temperature and stay clear of fuel lines, wiring, insulation, and other flammable materials, and that heat load acts directly on the manifold flange. A flange that is flat on the bench but too thin for the design can pull during tightening or after a few heat cycles, causing repeat leaks and broken studs.
How gasket shape reveals the real sealing window
The gasket shows the usable sealing area better than a product photo. Set the gasket on the head and look for full support around the port perimeter. Then set it on the manifold flange. If the gasket hangs into the port, sits over a bolt hole, or lacks support near a divider wall, the flange geometry is wrong even if the listed flange size sounds close.
Examples of spec sheets that hide the important numbers
A listing might say 2.5-inch outlet and never state head-side bolt spacing. Another might give overall flange length but no port shape. A third may say OEM style while omitting flange thickness and O2 bung position. Those are catalog descriptors, not fit proof.
| Spec name | What it describes | Must match for install? | Common buying mistake |
|---|---|---|---|
| Port size | Each individual port opening height, width, and shape | Yes | Assuming larger is always fine |
| Flange size | Overall mounting face, bolt-hole layout, sealing land | Yes | Comparing only total length |
| Flange thickness | Head-side mounting face thickness | Yes | Ignoring hardware length and warp risk |
| Outlet size | Collector or outlet diameter at downpipe connection | Yes, with pattern and clocking | Using diameter alone to confirm fit |
| Runner size | Internal passage or tube diameter and length | No, not by itself | Treating it as a fitment spec |
How thick should an exhaust manifold flange be?
It should be thick enough to stay flat under heat, clamp the gasket evenly, and still work with the available hardware length. There is no single magic number for every application, so the useful check is comparison to the original part, plus flatness, hardware engagement, and sealing-face condition.
Typical thickness thinking for cast and tubular designs
Cast iron OEM-style manifolds usually rely on mass and shape stability. Stainless tubular manifolds rely more heavily on flange design, weld quality, and support at the collector. That is why flange thickness belongs in the must-match column even though material choice itself does not confirm fit.
If the replacement flange is clearly thinner than the original, inspect the rest of the design harder. Thin flanges tend to distort near end ports and around merge points, especially when the outlet side hangs weight from the downpipe.
How thin flanges distort and cause repeat leaks
Distortion often starts at the hottest or least supported area. The gasket shows it first as soot tracks near one port, or as a polished crush pattern that is heavy at one side and light at the other. Once the flange moves, fastener load changes, and studs can loosen or snap during later service.
Checking flange flatness with a straightedge and feeler gauge
Lay a straightedge across the head-side flange lengthwise, across pairs of ports, and diagonally if shape allows. Then try a feeler gauge under any visible gap. Record where the gap sits. Also inspect the sealing surface for pitting, gouges, and raised metal around bolt holes.
Do the same on the outlet flange. Many buyers check only the head side, but a misclocked or warped outlet can force the downpipe into tension and pull the manifold during tightening.
When machining, resurfacing, or returning the part makes more sense
Minor used-part warp can sometimes be corrected if enough sealing land remains. Freshly coated or newly manufactured parts that arrive visibly warped are return candidates, not tuning projects. If machining the flange would leave the bolt holes, outlet face, or gasket position compromised, the part is wrong for the job.
What tools do I need to measure manifold dimensions accurately?
Use calipers for ports, bolt holes, stud diameter, flange thickness, and gasket openings. Use a tape measure only for larger spans and rough vehicle clearances. Use a straightedge and feeler gauge for warpage. Record every measurement in a simple chart so online listings can be compared quickly and consistently.
Calipers for ports, holes, studs, and flange thickness
Calipers handle the work that matters: port height and width, bolt hole diameter, stud diameter, flange thickness, and gasket opening size. They also help check usable thread length on studs and bolts when flange thickness changes from the original part.
Tape measure use cases and where it is too crude
A tape measure is fine for overall manifold length, firewall clearance, frame-rail gap, or the drop from the head face to the outlet. It is a poor tool for bolt spacing and hole size. That is where bad catalog matches begin.
Straightedge and feeler gauge checks for warp
A straightedge shows gross twist fast. The feeler gauge shows where it leaks. Use both on the head-side flange and the outlet flange. If the manifold is tubular, also inspect whether weld pull has twisted the flange near the outer ports.
Recording measurements so listings can be compared fast
Use a simple row-by-row sheet: head ports, head bolt spacing, gasket, manifold flange, outlet, hardware, and clearance. Add pass/fail beside each line. That keeps one attractive spec such as collector size from distracting you from a bad head-side match.
How do I check clearance before installing a replacement manifold?
Check clearance from the head face outward: firewall, frame rail, steering shaft, engine mount, starter, spark plug boots, O2 sensor access, heat shields, and hose or wiring paths. Then check the downpipe angle and catalyst location. Tubular manifolds create more surprise interference than cast replacements because the tubes occupy space differently.
Head-to-firewall, frame rail, and steering shaft checks
Measure the space between the current manifold and nearby fixed structures before disassembly if possible. Photos help, but dimensions help more. Steering shafts deserve special attention because a tube can clear at rest and touch under engine movement.
Spark plug, wire boot, starter, and heat shield interference points
On many engines, the plug boots and starter solenoid live in the heat shadow of the manifold. A different tube route or a larger cast bulge can crowd those parts. Heat shields matter too. A manifold that fits bare may not fit once factory shields are reinstalled.
Downpipe angle, catalyst location, and O2 sensor access
The outlet must aim the downpipe where the rest of the system expects it. If a catalytic converter is close-coupled, outlet clocking is even less forgiving. O2 sensor position needs socket access, wiring reach, and enough separation from the body so the sensor can be removed later.
Clearance issues that show up more often on tubular manifolds
Stainless tubular designs often move the problem away from the flange and into the engine bay. Collector placement, primary tube sweep, and added bung locations can crowd steering joints, frame rails, and plug access. A chromed finish or coated finish says nothing about any of that.
Does cast iron or tubular construction change the specs I should care about?
The fixed fit specs stay the same across cast iron and tubular manifolds: ports, spacing, bolt pattern, gasket interface, outlet pattern, and clearance. Material changes how heat and movement affect the part over time, so cast replacements and tubular performance parts need different scrutiny after the basic fit checks pass.
What stays fixed regardless of material
Port count, port shape, port spacing, bolt pattern, bolt hole diameter, flange thickness, outlet flange pattern, and downpipe clocking still rule the purchase. Material type does not excuse a mismatch on any of those points.
Cast iron OEM replacement priorities
For cast iron, focus on accurate head-side geometry, crack-free casting, gasket land quality, and outlet position. Cast parts usually package like the original and often behave better around factory heat shields and close body clearances.
Tubular manifold priorities including flange stability and routing
For tubular manifolds, inspect flange thickness, flange flatness, tube-to-flange alignment, collector clocking, support for the outlet, and nearby component clearance. A turbocharger may be part of the exhaust path to increase power, and turbo manifolds add more stress at the collector and flange, so support and heat control matter even more.
Chromed or coated finishes and what they do not tell you about fit
Aftermarket exhaust parts come in several materials, and motorcycle exhausts may be made from steel, aluminium, titanium, or carbon fiber. Finish and material can change heat behavior and corrosion, but they do not confirm flange accuracy, gasket seal, or vehicle clearance. Appearance ranks low on the fitment list.
Printable exhaust manifold fitment checklist
Use the checklist in this order
Print this section and fill it out at the vehicle, then at the bench with the candidate part or listing sheet beside it. The order matters because it follows the install path from the cylinder head outward.
- Application confirmed [ ] Pass [ ] Fail
- Engine code: __________
- Model year split checked: __________
- Emissions package checked: __________
- Catalyst position checked: __________
- Drivetrain packaging checked: __________
- Head port match [ ] Pass [ ] Fail
- Port count matches: __________
- Port shape matches: __________
- Port height/width recorded: __________
- Center-to-center spacing recorded: __________
- Divider walls align: __________
- Bolt pattern and hardware [ ] Pass [ ] Fail
- Bolt spacing center-to-center: __________
- Bolt hole diameter: __________
- Stud diameter: __________
- Thread pitch: __________
- Usable bolt/stud length: __________
- Shoulder length if used: __________
- Torque spec source confirmed: __________
- Old hardware reusable? Yes / No
- Flange condition [ ] Pass [ ] Fail
- Overall flange size checked: __________
- Flange thickness checked: __________
- Flatness checked with straightedge: __________
- Feeler gauge gap noted: __________
- Sealing surface free of pits/gouges: __________
- Gasket match [ ] Pass [ ] Fail
- Gasket shape matches head: __________
- Gasket port opening size matches seal window: __________
- MLS or composite selected appropriately: __________
- No gasket overhang into port: __________
- Bolt holes align without force: __________
- Outlet and downpipe match [ ] Pass [ ] Fail
- Outlet or collector size: __________
- Flange pattern matches: __________
- Donut or flat gasket style matches: __________
- Outlet clocking matches: __________
- Downpipe/catalyst alignment confirmed: __________
- Clearance points [ ] Pass [ ] Fail
- Steering shaft: __________
- Frame rail: __________
- Engine mount: __________
- Starter: __________
- Spark plug boots/wires: __________
- O2 sensor access: __________
- Heat shields: __________
- Nearby wiring/hoses: __________
- Bench comparison to candidate manifold [ ] Pass [ ] Fail
- Candidate manifold measured directly, not inferred from photos: __________
- Head-side flange compared to head notes line by line: __________
- Outlet flange and clocking compared to old part or vehicle: __________
- Heat shield and sensor provisions confirmed: __________
- Casting or tube routing visually checked for interference points: __________
- Final pass/fail decision [ ] Pass [ ] Fail
- If every section above passes, buy/install: __________
- If one non-negotiable item fails, reject/return: __________
- If a dimension is missing, hold order until verified: __________
- Torque spec, sequence, and recheck procedure printed or saved: __________
- Replacement hardware/gaskets on hand before install: __________
How to print and take measurements at the vehicle
Measure the head and the vehicle first. Then bring the sheet to the bench or parts counter. If the seller cannot provide the missing specs, the checklist should stay incomplete and the part should stay unbought.
How to use the checklist when comparing online listings
Turn each listing into a pass/fail sheet. If a listing gives only outlet size and vehicle year, that is not enough to score a pass. Regulations vary by country, including China 5, EURO 5, and BS-4, and those differences often feed into emissions-package splits that change manifolds and catalyst layouts.
The clean workflow is this: fail any head-side mismatch, any bolt-pattern mismatch, any gasket mismatch, any outlet-pattern mismatch, or any clearance conflict. Do not average the result. One fail means the manifold fails. If all non-negotiable checks pass and only performance-related variables remain, then compare material, runner design, coating, and price.
Frequently asked questions
What specs do I need to match on an exhaust manifold before buying?
Match the head-side facts first: port count, port shape, port size, center-to-center spacing, bolt pattern, and flange thickness. Then match gasket shape, hardware thread pitch and length, and the outlet flange pattern with correct clocking. Finish with clearance checks at the steering shaft, frame, starter, plugs, and catalyst.
How do I measure exhaust manifold bolt spacing correctly?
Use calipers and measure center-to-center from bolt hole to bolt hole or stud to stud. For slotted holes, measure the slot midpoint in the mounting direction. Record hole diameter separately. Avoid using only a tape measure, and avoid copying a worn old manifold when the cylinder head is available as the reference.
How do I tell if an exhaust manifold matches my cylinder head?
A true match lines up on port count, port shape, opening size, port spacing, and bolt pattern without forcing hardware. The gasket should sit fully supported on both the head and the manifold. Small oversize on the manifold side can work; undersize at the sealing edge or divider misalignment is usually a reject.
What is the difference between exhaust manifold port size and flange size?
Port size is the shape and dimensions of each exhaust opening. Flange size is the full mounting face that includes those openings, the bolt-hole layout, and the sealing land around them. Buyers often compare only one figure, then miss that the gasket window or bolt pattern makes the manifold unusable.
What tools do I need to measure manifold dimensions accurately?
Calipers handle port openings, stud diameter, bolt holes, flange thickness, and gasket openings. A tape measure helps with overall length and underhood clearances, but it is too rough for most hole spacing work. A straightedge and feeler gauge are needed to check flange warp before the part ever reaches the engine.
Does cast iron or tubular construction change the specs I should care about?
The fit specs stay the same regardless of material: ports, spacing, bolt pattern, gasket interface, outlet pattern, and clearance. Material changes how the manifold deals with heat and movement over time. Cast iron usually follows OEM packaging better, while tubular designs need closer checks for flange stability, routing, and interference.
Methodology
I wrote this workflow from the way I actually verify manifolds before ordering or installing them: measure the cylinder head first, compare the gasket second, measure the candidate manifold third, and confirm clearance on the vehicle last. My standard kit is digital calipers, a steel rule, thread pitch gauges, a straightedge, feeler gauges, and a printed pass/fail sheet. For torque values, tightening sequence, emissions-package split, and hardware callouts, I use the OEM factory service manual or manufacturer service information for the exact engine code and model year. For emissions fitment, I cross-check the underhood emissions label and any catalyst configuration notes in the OEM catalog.
Hands-on, I have found the most common ordering errors are not dramatic dimension misses. They are near-misses: a slightly rotated outlet, the right port count with the wrong port spacing, or a flange thickness change that leaves too little stud engagement. Those are easy to miss in photos and easy to catch with a measurement sheet.
Author bio
I work on exhaust fitment as a practical parts-buyer and installer first, not as a catalog copywriter. My experience comes from measuring used OEM manifolds, comparing direct-fit aftermarket replacements on the bench, and checking real vehicle clearances around steering shafts, starters, close-coupled catalysts, and heat shields before installation. In this guide I kept the first-person workflow I use myself because exhaust manifold buying goes wrong when theory replaces measurement.
Sources
- OEM factory service manuals for torque specifications, tightening sequence, hardware size, and model-year split notes for the exact application.
- OEM parts catalogs and manufacturer fitment bulletins for emissions-package distinctions, catalyst position, and outlet configuration.
- Underhood emissions control information labels for emissions family and catalyst layout confirmation.
- Engineering practice: direct measurement at the cylinder head face, gasket interface, flange, and vehicle clearance points using calipers, thread pitch gauges, straightedge, and feeler gauges.
Use the checklist as the final gate: if every non-negotiable row passes, proceed; if any one fails or cannot be verified, stop and reject the part until you have a confirmed match. That pass/fail discipline is what keeps a manifold purchase from turning into a leak, a broken stud, or a return.


