How Does Exhaust Manifolds in Greenville NC: Proven Fixes
The exhaust manifold in your Greenville, NC vehicle likely needs repair or replacement if you hear loud noises, smell exhaust fumes inside, or notice poor engine performance. Common fixes involve replacing cracked gaskets, tightening loose connections, or installing a new manifold to restore safe, efficient exhaust flow for your car.
Hello there! I’m Monowar Shohag, and I understand that dealing with car noises can be stressful, especially when you aren’t sure where the sound is coming from. The exhaust manifold is a vital part that handles your engine’s very first step in sending spent gases away. When it fails, the problems—loud rumbling, bad smells, and lost power—can really shake up your daily drive here in Greenville, NC.
Don’t worry! You don’t need to be a master mechanic to handle this. We are going to break down exactly what the exhaust manifold does, what signs tell you it’s failing, and the proven, easy-to-understand fixes you can tackle. By the end of this guide, you’ll feel confident knowing how to address exhaust manifold issues safely and effectively.
Understanding Your Exhaust Manifold: The Engine’s First Exit Door
Before we fix anything, let’s quickly look at what the exhaust manifold actually is and why it matters so much to your car’s health. Think of it as the traffic cop right at the engine’s exit ramp.
What is the Exhaust Manifold’s Job?
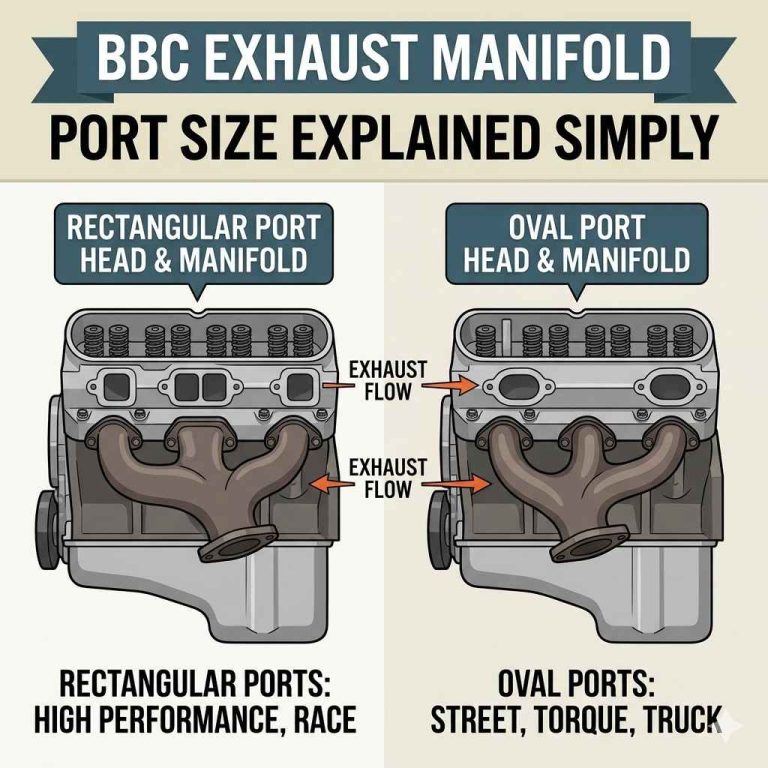
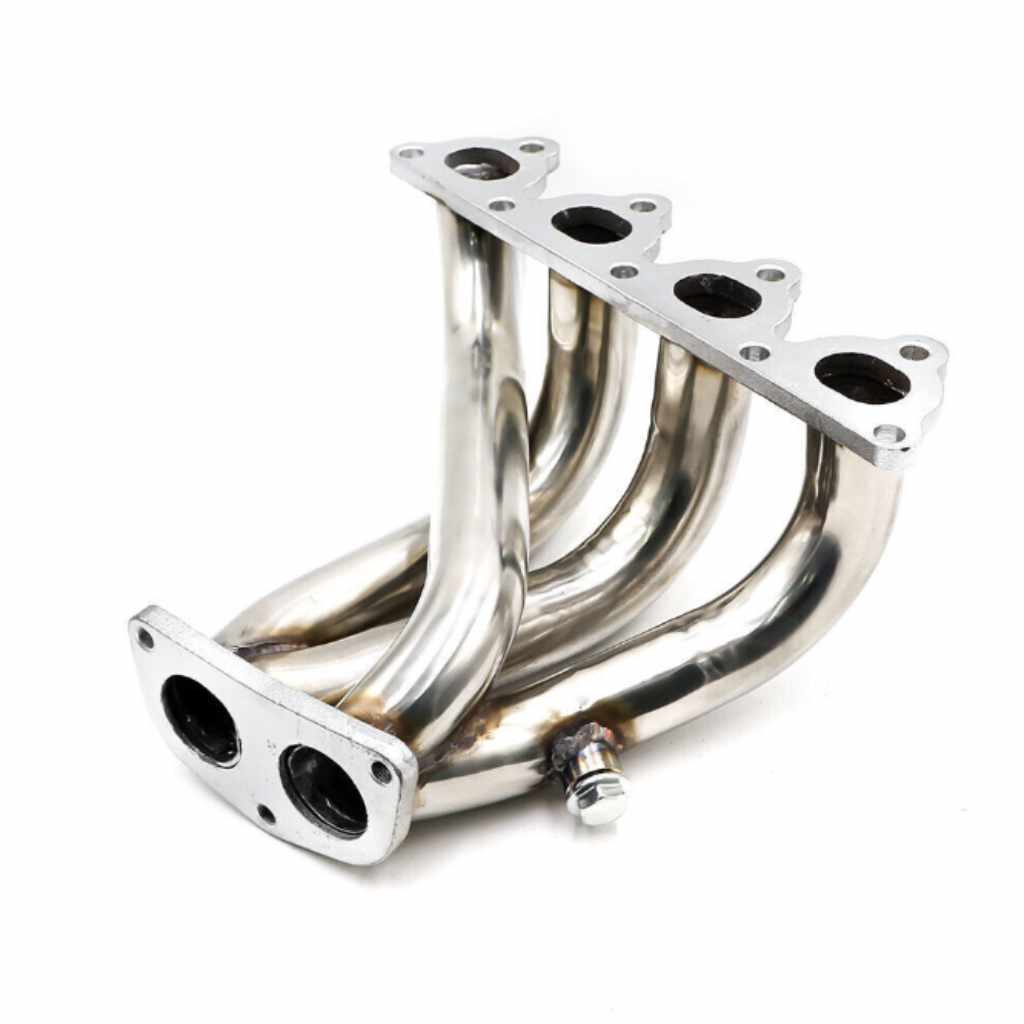
The exhaust manifold is bolted directly onto the side of your engine’s cylinder head. Its main job is simple but crucial: it safely collects the hot, toxic exhaust gases (like carbon monoxide) from each cylinder and gathers them into one pipe leading toward the rest of your exhaust system (like the catalytic converter and muffler).
- Collection: It quickly gathers gases from distinct cylinders.
- Sealing: It must maintain a tight, leak-proof seal against the hot cylinders.
- Direction: It smoothly directs these gases to the downpipe, starting the cleaning process before they exit the tailpipe.
Why Greenville, NC Drivers Need to Pay Attention
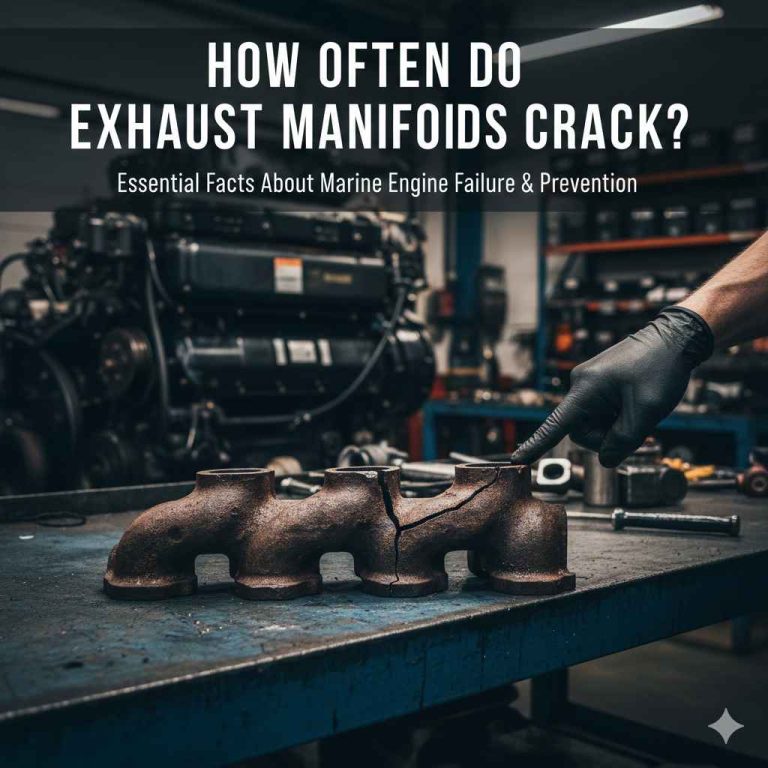
Living and driving in the Greenville area means dealing with various road conditions—from stop-and-go traffic on Charles Boulevard to longer highway stretches on the I-264 corridor. These conditions put stress on your engine and exhaust parts. High heat and frequent temperature changes cause metal to expand and contract, which is the number one reason exhaust manifolds crack or warp over time.
Signs Your Exhaust Manifold Needs Attention
A failing exhaust manifold won’t often leave you stranded, but it causes noticeable issues that impact performance, fuel economy, and safety. Ignoring these signs is never a good idea because leaking exhaust fumes inside the cabin can be dangerous. Here are the key symptoms to watch for on the roads of Pitt County.
1. Loud, Unusual Engine Noises
This is often the first thing drivers notice. A small leak near the engine sounds very different from a muffler leak at the back of the car. The sound is usually described as:
- A loud ticking, tapping, or puffing sound that gets louder when you accelerate.
- A “chuffing” sound that might sound like a small, rapid heartbeat coming directly from the engine bay.
These noises occur because the high-pressure exhaust gas is escaping out of a crack or past a bad gasket before it can travel smoothly through the pipe.
2. The Smell of Exhaust Fumes Inside the Car
This is the most concerning symptom. If you smell rotten eggs (sulfur) or strong gasoline/exhaust fumes when you are sitting at a stoplight, the exhaust gases are leaking out near the engine and being sucked into the car’s ventilation system. This is dangerous, as exhaust contains carbon monoxide (CO), which is odorless and poisonous. If you suspect this, pull over safely and do not run the engine inside an enclosed space.
3. Poor Engine Performance and Fuel Economy
Your car’s computer (ECU) relies on sensors, particularly the Oxygen (O2) sensors, to measure how the engine is running. If the manifold is leaking before the O2 sensor, the sensor gets a false reading that the engine is running “lean” (too much air, not enough fuel).
The computer then tries to compensate by dumping in more fuel, leading to:
- Reduced miles per gallon (MPG).
- Sluggish acceleration or hesitation when pressing the gas pedal.
- The “Check Engine” light coming on, usually with codes related to the O2 sensor or air/fuel mixture.
4. Visible Corrosion or Damage
If you or your trusted Greenville mechanic can safely look underneath the hood, look for signs of physical damage.
| Visual Sign | What It Means |
|---|---|
| Dark soot streaks | Exhaust gas is blowing out of a leak point and staining the metal housing. |
| Cracks in the cast iron/steel | The manifold itself has fatigued due to extreme heat cycles. |
| Rusty, missing, or damaged bolts | Gasket seals are failing because the clamping force is gone. |
Step-by-Step: Troubleshooting Exhaust Manifold Issues (Greenville DIY Prep)
Before diving into repairs, safety is paramount. Exhaust systems get extremely hot. Always let your vehicle cool down completely—ideally overnight—before beginning any inspection or repair work. If you work on your car frequently, you can purchase specialized tools from local auto parts stores near Greenville, such as those on Memorial Drive or Dickinson Avenue.
Tool Checklist for Inspection and Minor Fixes
For basic inspection and tightening, you will need:
- Safety Glasses and Gloves (Crucial!)
- Wrenches and Socket Set (Metric and Standard, depending on your vehicle)
- Torque Wrench (Essential for proper reassembly)
- Penetrating Oil (Like PB Blaster) to loosen stuck bolts
- Inspection Mirror and Flashlight
Inspection Procedure
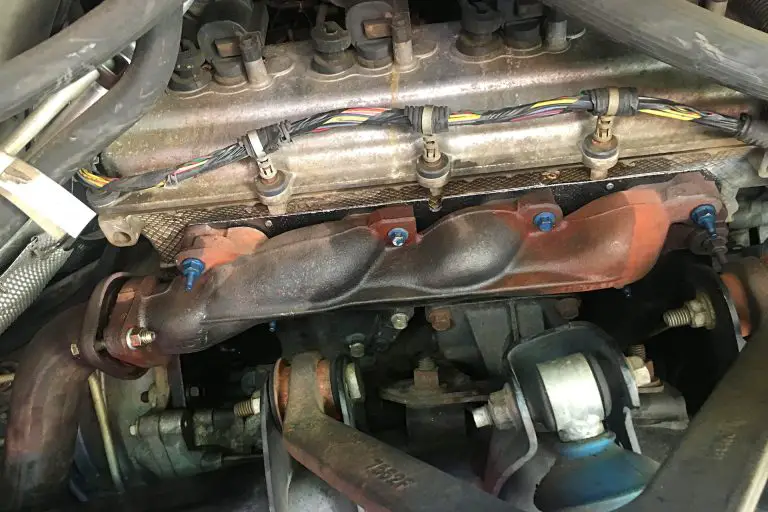
- Visual Check: With the engine cold, lift the hood and look closely at where the manifold bolts to the engine. Look for black soot trails leading away from the gasket surface or cracks on the manifold itself.
- Tap Test: Gently tap the manifold with a small, plastic-handled tool. A solid ‘thud’ is good. A hollow, thin sound might indicate a thin spot ready to crack.
- Listen Test (Warm Engine): With extreme caution and safety gear on, start the cold engine. Have a helper listen carefully near the manifold as you quickly give the engine a few revs. You should hear the telltale puffing sound clearly.
- Check for Loose Bolts: Try gently wiggling the manifold while the engine is cold. If it shifts, the mounting bolts or nuts are loose.
Proven Fixes for Common Exhaust Manifold Problems
Based on your inspection, the fix usually falls into one of three categories: tightening, gasket replacement, or full manifold replacement. We will walk through these approachable fixes.
Fix 1: Tightening Loose Manifold Bolts (The Easiest Fix)
If your symptoms are minor and you see loose nuts, this is the place to start. Loose bolts allow exhaust gas to escape past the seal.
Procedure for Tightening:
- Safety First: Ensure the engine is cold. Disconnect the negative battery terminal to prevent accidental shorts if you are working near sensors.
- Locate Bolts: Identify all the bolts or nuts securing the manifold to the engine head.
- Apply Penetrant: Spray those stuck bolts liberally with penetrating oil and let it soak for at least 15 minutes. This is crucial, especially in humid North Carolina weather, as rust easily seizes these parts.
- Tighten in Sequence: You must tighten the bolts in the specific firing order sequence recommended by your vehicle manufacturer. Look up this pattern online or in your owner’s manual. This pattern ensures even pressure across the gasket.
- Use Torque Specs: Do not just tighten until it feels tight. Use a torque wrench to tighten each bolt to the manufacturer’s exact specification (measured in foot-pounds or Newton-meters). Over-tightening will warp the manifold or break the bolt; under-tightening will still leak. Information on proper torquing procedures can often be found through OEM service manuals or reliable sites like those associated with the SAE International standards for automotive engineering.
- Retest: Start the engine and listen for the ticking noise to disappear.
Fix 2: Replacing the Exhaust Manifold Gasket
If tightening doesn’t work, the gasket—the soft material that seals between the manifold and the engine head—is likely blown or degraded and needs replacement.
Tools Needed for Gasket Replacement:
- Full socket and wrench set
- Jack and jack stands (for better access, if necessary)
- New manifold gasket
- Scraper or wire brush
- New manifold bolts (highly recommended)
Procedure for Gasket Replacement:
- Preparation and Disconnection:
- Ensure the engine is cold and the battery is disconnected.
- If working from below, raise the car safely onto jack stands on level ground. Never rely only on a jack.
- Unbolt the rest of the exhaust system connecting to the manifold’s outlet (usually requires accessing the flange where the manifold meets the downpipe/catalytic converter).
- Disconnect any O2 sensors plugged into the manifold or upstream piping. Labeling these connections helps tremendously!
- Manifold Removal:
- Carefully remove all manifold mounting bolts. Note that these are often severely rusted. If a bolt breaks, you will need to stop and address stud removal (which is significantly harder).
- Gently wiggle the manifold free from the engine head. Spray penetrating oil around any remaining studs and allow time to work.
- Surface Cleaning (Critical Step!):
- This is the most important part for a lasting seal. Use a plastic scraper or soft wire brush (brass is safest) to carefully clean all old gasket material, rust, and carbon deposits from the engine cylinder head mating surface.
- The surface must be perfectly flat and clean. Use a shop rag to wipe away all debris before it falls into the engine cylinders. If debris falls in, you must carefully vacuum it out.
- Installation:
- Place the new gasket over the studs or dowels on the cylinder head. Ensure it lines up perfectly.
- Carefully place the manifold on top of the new gasket.
- Install new (or cleaned) bolts. Tighten them slowly, following the proper firing order sequence and using the specified torque settings, just as described in Fix 1.
- Reassembly and Testing: Reconnect the O2 sensors and the rest of the exhaust system. Double-check all connections. Start the engine and listen for leaks.
Fix 3: Replacing the Entire Exhaust Manifold
If you find visible cracks in the metal of the manifold itself, or if the studs holding it in place are broken off and inaccessible, replacing the entire unit is the best long-term fix. This job is more involved, especially dealing with rusted fasteners.
When to Replace the Whole Unit:
- The manifold casting is cracked.
- Multiple exhaust ports are warped, preventing a good seal even with a new gasket.
- Bolts break off during removal, requiring specialized drilling and extraction tools.
Procedure for Full Replacement:
- Safety and Preparation: Follow steps 1 and 2 from the Gasket Replacement section above (disconnection, vehicle lifting, battery disconnect).
- Exhaust System Disassembly: You will need to disconnect the manifold from the front of the exhaust pipe (often called the collector pipe or the direct connection to the catalytic converter). This flange is notorious for rust. Use plenty of penetrating oil.
- Bolt Extraction Challenge: This is where most DIY repairs stall. If the old bolts snap off flush with the engine head, you cannot simply torque down a new manifold. You will need screw extractors or professional machine shop services to drill out the broken studs without damaging the threads in the engine head.
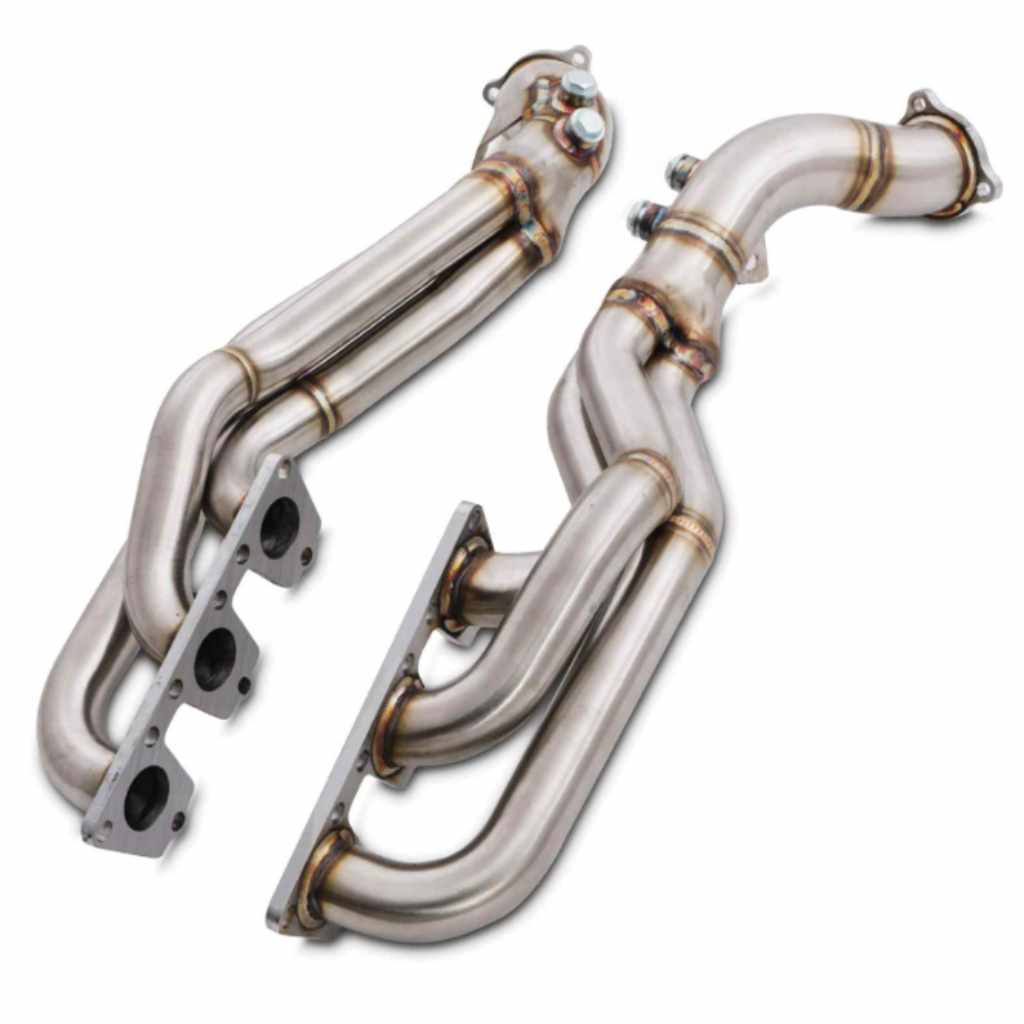
- Preparation of the New Unit: Compare your old manifold to the new one. Ensure it is the correct part for your specific engine (e.g., 4-cylinder vs. V6).
- Installation: Clean the cylinder head surface thoroughly (as detailed in Fix 2). Install the new manifold using a brand-new gasket. Tighten all fasteners using the specified torque sequence.
- Reassembly: Reconnect the exhaust downpipe to the manifold flange, using new gaskets or seals if required by the new manifold design. Reinstall O2 sensors (use anti-seize compound on the threads of the O2 sensors before screwing them in).
Common Issues Specific to Greenville Drivers and Fixes
Because of the heat and humidity we experience, certain issues crop up more frequently here in Eastern North Carolina.
Dealing with Heat-Soaked Studs and Bolts
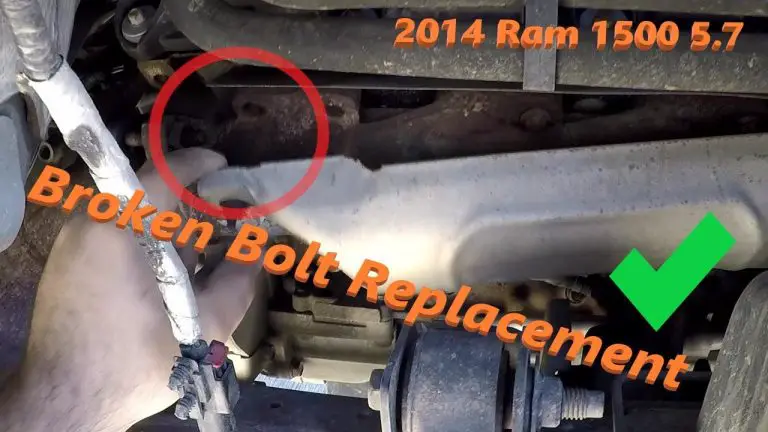
The constant expansion and contraction caused by long summer drives and then quick cooling causes extreme corrosion on the bolts connecting the manifold to the engine. If you manage to break a bolt head off, here is a quick overview of the harder fix:
| Broken Bolt Scenario | Recommended Action |
|---|---|
| Bolt head snaps off, leaving some stud visible | Grip carefully with locking pliers, apply heat (locally, if possible), and try to turn it out slowly using penetrating oil. |
| Bolt snaps off flush with the head | Drill a pilot hole in the center of the broken stud and use a quality screw extractor (left-hand drill bits help). If unsure, stop here. |
| Stripped threads in the head | Requires removal of the cylinder head or drilling out the old thread and tapping in a Heli-Coil or similar thread insert. This usually requires professional help. |
Manifold Flange Warping
If you have had several exhaust leaks in the same spot, sometimes the metal flange of the manifold itself warps slightly, meaning even a new gasket won’t seal perfectly. If you are replacing the manifold, always opt for a high-quality, thicker replacement, which can better handle the heat cycles in our climate.
Safety Guidelines for Working on Exhaust Systems
Working on the exhaust system means dealing with tremendous heat, toxic fumes, and heavy metal parts. Please observe these basic safety guidelines whether you are working in your driveway in Greenville or a DIY garage:
- Cool Down: Wait several hours after driving. Even what looks rusty can hold significant heat deep inside.
- Ventilation: If you must start the engine for a quick test, ensure you are outdoors or in a garage with the main door fully open. Never run the engine in a closed space.
- Eye and Hand Protection: Always wear safety glasses. Exhaust components can throw sharp rust flakes when worked on.
- Proper Support: If you raise your vehicle, use high-quality jack stands rated for your car’s weight. Check that the stands are placed on solid, level ground—not soft dirt or grass.
- Battery Disconnect: Disconnect the negative battery cable before working on electrical components like O2 sensors to prevent short circuits.
Frequently Asked Questions (FAQs) About Exhaust Manifolds
Q1: How much does it usually cost to fix an exhaust manifold leak in Greenville, NC?
A: Simple gasket replacement (if bolts don’t break) might cost $200–$400 in labor plus parts ($50–$100). If the entire manifold needs replacement, especially dealing with frozen bolts, costs usually range from $500 to over $1,200, depending on the vehicle make and model.
Q2: Can I drive my car if the exhaust manifold is leaking slightly?
A: For a very minor leak, yes, cautiously. However, if you smell fumes inside the car, you must stop driving immediately and get it repaired, as carbon monoxide exposure is a serious health risk.