How to Test Boat Exhaust Manifolds Properly
It can be tricky figuring out the best way to test your boat’s exhaust manifolds, especially if you’re new to boat maintenance. Lots of people wonder if they’re doing it right or if they might miss something important. This guide makes it simple. We’ll walk you through the whole process step-by-step so you can feel confident.
Why Testing Boat Exhaust Manifolds Matters
Checking your boat’s exhaust manifolds is super important for keeping your engine running well and preventing big problems. If these parts fail, it can lead to serious damage, costly repairs, and even make your boat unsafe to use. This section explains why these checks are a regular part of boat upkeep and what happens if you skip them.
We’ll cover the basic signs that might mean your manifolds need a look.
Understanding Exhaust Manifolds
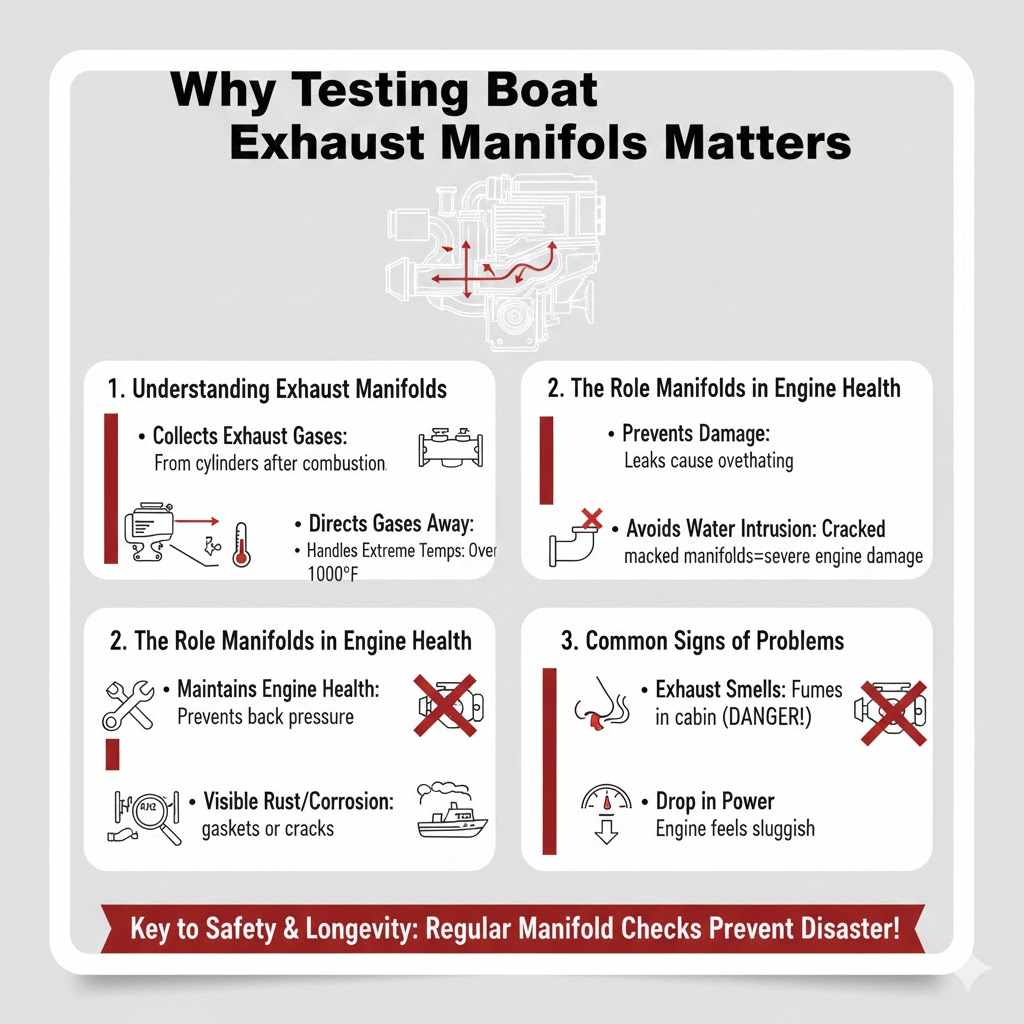
Exhaust manifolds are the parts of your boat’s engine that collect exhaust gases from the cylinders. They then guide these hot gases away from the engine and into the exhaust system. Think of them like the engine’s lungs, helping to breathe out the used air.
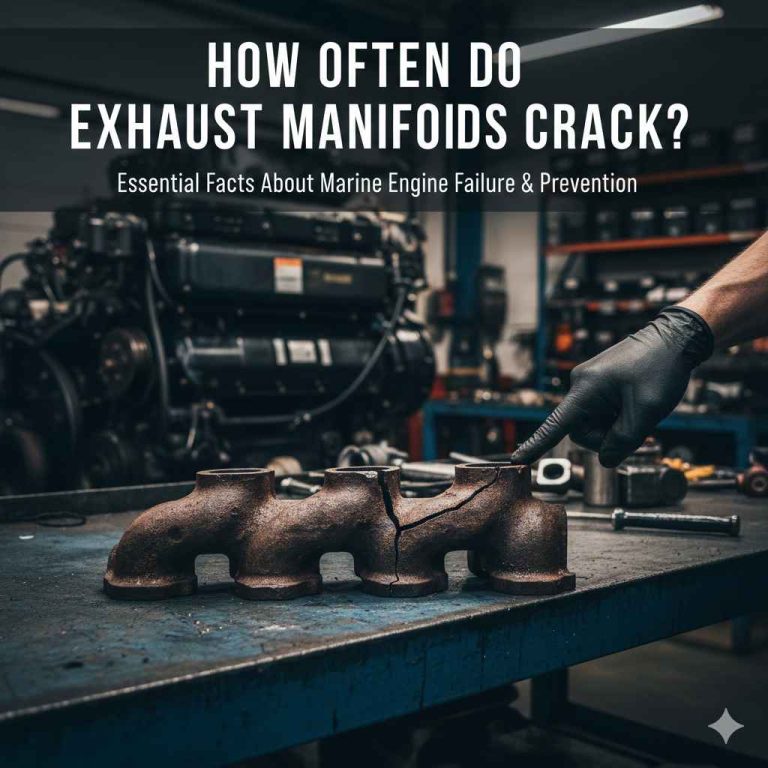
They are usually made of strong metal, often cast iron, to handle the extreme heat and corrosive environment. Because they are constantly exposed to hot exhaust and often saltwater, they are prone to corrosion and cracking.
The Role of Manifolds in Engine Health
Properly functioning exhaust manifolds are vital for your engine’s overall health. They help maintain the right back pressure in the exhaust system, which is important for engine performance. If a manifold leaks, it can allow exhaust gases to escape into the engine compartment.
This is not only dangerous due to toxic fumes but can also lead to overheating of other engine components. Water can also enter the engine through a cracked manifold, causing severe internal damage like rust and seizing.
- Collecting Exhaust Gases: The primary job is to gather hot exhaust fumes from all engine cylinders. This happens right after combustion. This collection needs to be efficient to keep the engine running smoothly.
- If gases aren’t collected properly, they can back up and affect engine power.
- Directing Gases to Exhaust System: Once collected, the manifolds send these gases towards the exhaust pipes and out of the boat. This path is carefully designed to manage noise and emissions. Any blockage or leak in this pathway can disrupt the engine’s operation and create safety hazards.
- Handling Extreme Temperatures: Exhaust manifolds are exposed to very high temperatures, often exceeding 1000 degrees Fahrenheit (538 Celsius). The materials used must withstand this heat without warping or failing. Repeated heating and cooling cycles can stress the metal over time.
Common Signs of Exhaust Manifold Problems
Noticing certain signs can help you catch manifold issues early. You might hear unusual noises, see smoke where it shouldn’t be, or smell exhaust fumes inside your boat. Keep an eye on your engine’s performance too.
A drop in power could be a symptom. Regular visual checks are your first line of defense.
- Strange Noises: Often, a cracked or leaking exhaust manifold will make a hissing or puffing sound, especially when the engine is running. This noise comes from exhaust gases escaping under pressure. It’s a sound that usually isn’t part of a healthy engine’s soundtrack and can be quite noticeable, especially at idle or under load.
- Visible Rust or Corrosion: Look closely at the manifolds themselves. You might see patches of rust, especially around the gaskets or any cracks. In saltwater environments, corrosion is a common enemy.
- It can weaken the metal over time, making it more likely to fail. Pay attention to any pitting or discoloration.
- Exhaust Smells: If you smell exhaust fumes inside your boat, it’s a serious warning sign. This means gases are leaking into the engine compartment or the cabin. Carbon monoxide, which is a byproduct of combustion, is odorless and colorless but deadly.
Never ignore this smell.
How to Test Boat Exhaust Manifolds Properly
Learning How to Test Boat Exhaust Manifolds Properly is a key skill for any boat owner. It ensures your engine stays healthy and safe. This section will walk you through the actual testing process.
We’ll cover the tools you might need and the steps to take. This guide is designed to be clear, making a potentially complex task much more manageable.
Preparation for Testing
Before you start testing, make sure you have everything you need. This includes safety gear like gloves and eye protection. You’ll also want to gather any tools that might be necessary, such as a wrench or a flashlight.
It’s best to do this when the engine is cool, so you don’t risk burns. Having a clear workspace also helps. Make sure you can easily access the manifolds.
Gathering Necessary Tools and Safety Gear
Safety is always the top priority when working on your boat’s engine. You should wear sturdy gloves to protect your hands from grease and sharp edges. Safety glasses are a must to keep your eyes safe from any debris or fluids.
A good flashlight is essential for seeing into dark engine spaces. You might also need a basic socket set or wrenches if you plan to inspect gaskets or remove any components. Having a fire extinguisher nearby is always a wise precaution.
- Safety Glasses: Protect your eyes from dirt, debris, or any unexpected spray of liquids. When working with engines, small particles can easily become airborne. These glasses should fit snugly to provide a good seal around your eyes.
- Work Gloves: Thick, durable gloves will prevent cuts, abrasions, and protect your hands from grease and oil. Some gloves offer heat resistance, which can be useful if you accidentally touch a warm engine part, though it’s best to work on a cool engine.
- Flashlight: A bright, reliable flashlight is crucial for illuminating dimly lit areas of the engine compartment. You need to see clearly to spot any cracks, leaks, or corrosion. Headlamps are also very useful as they leave your hands free.
- Basic Tool Kit: A few common tools like a socket wrench set, screwdrivers, and pliers can be helpful. You might need to remove heat shields or other small parts to get a better view. Ensure your tools are clean and in good working order.
Visual Inspection Techniques
A thorough visual check is often the first and most important step. You’re looking for anything that seems out of place. This includes cracks, rust, signs of leaks, or loose components.
Take your time and examine every part of the manifolds and their connections. Good lighting is key here.
Detailed Examination of Manifold Surfaces
Carefully inspect the entire outer surface of each exhaust manifold. Look for any visible cracks, especially along the casting lines or at stress points. Cracks can be hairline and easy to miss, so a good light source is critical.
Also, check for any signs of discoloration, which could indicate overheating. Pay close attention to areas where the manifold bolts to the engine head and where it connects to the exhaust riser.
- Checking for Cracks: Use your flashlight to scan the manifold’s surface. Run your fingers gently over suspect areas if safe to do so. Cracks are often more visible on the outside but can sometimes be hidden.
- Any crack, no matter how small, should be considered serious.
- Identifying Corrosion and Pitting: Look for areas where the metal appears eaten away or weakened. Pitting is common, especially in saltwater environments. This type of damage reduces the thickness of the metal, making it more prone to failure under pressure and heat.
- Spotting Leaks and Stains: Check for any black soot or dark stains around gaskets, bolts, or potential crack locations. These are signs that exhaust gases have been escaping. Water stains can also indicate coolant leaks if your manifolds have cooling passages.
Inspecting Gaskets and Connections
The connections between the manifold and the engine, and the manifold and the riser, are common failure points. Examine the gaskets for signs of blowing out or deterioration. These are rubber or composite seals designed to prevent leaks.
If they look compressed, cracked, or have been blown out, they need to be replaced. Also, ensure all bolts are present and appear to be properly tightened, though avoid overtightening them.
- Gasket Condition: The gaskets create a seal between different components. If a gasket is damaged, exhaust gases will escape. Look for signs of black soot or residue on or around the gasket edges.
- A degraded gasket may appear brittle or crumbly.
- Bolt Integrity: Make sure all the bolts holding the manifold in place are present and not corroded or broken. Loose bolts can cause leaks. However, if a bolt is seized or broken, it can be a sign of a bigger issue, such as corrosion-induced stress.
- Riser Joint: The exhaust riser is the part that usually turns upwards before connecting to the exhaust hose. The joint between the manifold and the riser is another common place for leaks and corrosion. Inspect this area thoroughly for any signs of leakage or degradation.
Performing a Water Flow Test
A water flow test checks if the cooling passages in your exhaust manifolds are clear and working correctly. These passages help keep the manifolds from overheating. Blocked passages can lead to rapid failure.
This test involves running the engine and checking the water flow through the system.
Setting Up for the Water Flow Test
Before starting the engine, ensure the cooling system has enough water. For a boat on a trailer or out of the water, you’ll need to use “rabbit ears” or a flushing attachment connected to a hose to supply water to the raw water intake. If the boat is in the water, the raw water intake should be submerged.
Make sure the engine’s raw water strainer is clean and open.
- Water Source: For boats not in the water, use a garden hose connected to a “muff” or “ears” that fit over the raw water intake. Ensure a steady supply of fresh water. For boats in the water, make sure the intake is below the waterline and unobstructed.
- Cooling System Check: Verify the engine coolant level is correct if it’s a closed cooling system. For raw water cooled engines, ensure the intake seacock is open and the raw water strainer is free of debris. Blockages here will prevent water from reaching the manifolds.
- Engine Start-Up: Once ready, start the engine. Allow it to run for a short period, typically 1-2 minutes, to let the water circulate. Do not let the engine run dry, as this can quickly cause damage.
Observing Water Flow and Temperature
As the engine runs, observe the water exiting the exhaust outlets. It should be a steady stream. More importantly, check the temperature of the exhaust manifolds and the exhaust risers.
They should feel warm, not excessively hot to the touch. If they are too hot to touch comfortably, it indicates a problem with the cooling system or blockages within the manifolds.
- Exhaust Water Stream: Watch the water coming out of the exhaust pipes. It should be a consistent flow, not sputtering or intermittent. This indicates the raw water pump is working and water is circulating through the engine and cooling jackets.
- Manifold Temperature: Carefully touch the external surface of the exhaust manifolds. They should be warm but not scalding hot. If one manifold is significantly hotter than the other, it suggests a cooling issue specific to that side of the engine.
- Use a temperature gun for a more precise reading if available.
- Riser Temperature: The exhaust risers, which connect the manifolds to the exhaust hoses, can get very hot. However, if they feel excessively hot to the touch or if steam is escaping, it’s a sign of overheating and potential internal issues.
Checking for Internal Blockages
Sometimes, the problem isn’t visible from the outside. Internal blockages in the cooling passages can be just as detrimental. This section covers how to check for these hidden issues, which often require more hands-on work.
Removing Manifolds for Internal Inspection
If external checks and water flow tests suggest internal problems, the next step might be to remove the exhaust manifolds for a closer look inside. This is a more involved process. You’ll need to disconnect exhaust hoses, remove heat shields, and unbolt the manifolds from the engine block and exhaust risers.
Keep track of all bolts and components removed.
- Disconnecting Components: Carefully unbolt the exhaust hoses from the risers and remove any heat shields covering the manifolds. Make sure to have a container ready to catch any residual coolant or water.
- Unbolting Manifolds: Loosen and remove all bolts securing the manifolds to the engine heads and the exhaust risers. Sometimes, these bolts can be seized due to rust; penetrating oil can help. Note the size and location of each bolt.
- Lifting Manifolds Off: Once all bolts are removed, gently lift the manifolds off the engine. They can be heavy and awkward, so it’s best to have a helper. Be careful not to damage the engine head gasket surface.
Methods for Clearing Blockages
Once a manifold is removed, you can inspect the internal cooling passages. Use a stiff wire or a thin rod to probe for blockages. Flush the passages with water.
If you find significant buildup of rust, scale, or debris, you might need to use a descaling solution designed for marine cooling systems. A thorough cleaning is essential to restore proper cooling.
- Probing Passages: Use a piece of stiff wire or a thin, flexible rod to gently probe into each cooling passage within the manifold. Feel for any resistance that indicates a blockage. Work the wire back and forth to break up any buildup.
- Flushing with Water: After probing, connect a hose to one end of a passage and flush with water. Observe the water flow from the other end. It should be strong and clear.
- Repeat this for all passages and check that the water exits freely.
- Using Descaling Solutions: For stubborn blockages, marine-grade descaling solutions can be effective. Follow the product’s instructions carefully, as these chemicals can be potent. Always wear appropriate safety gear when handling them.
Rinse thoroughly after use.
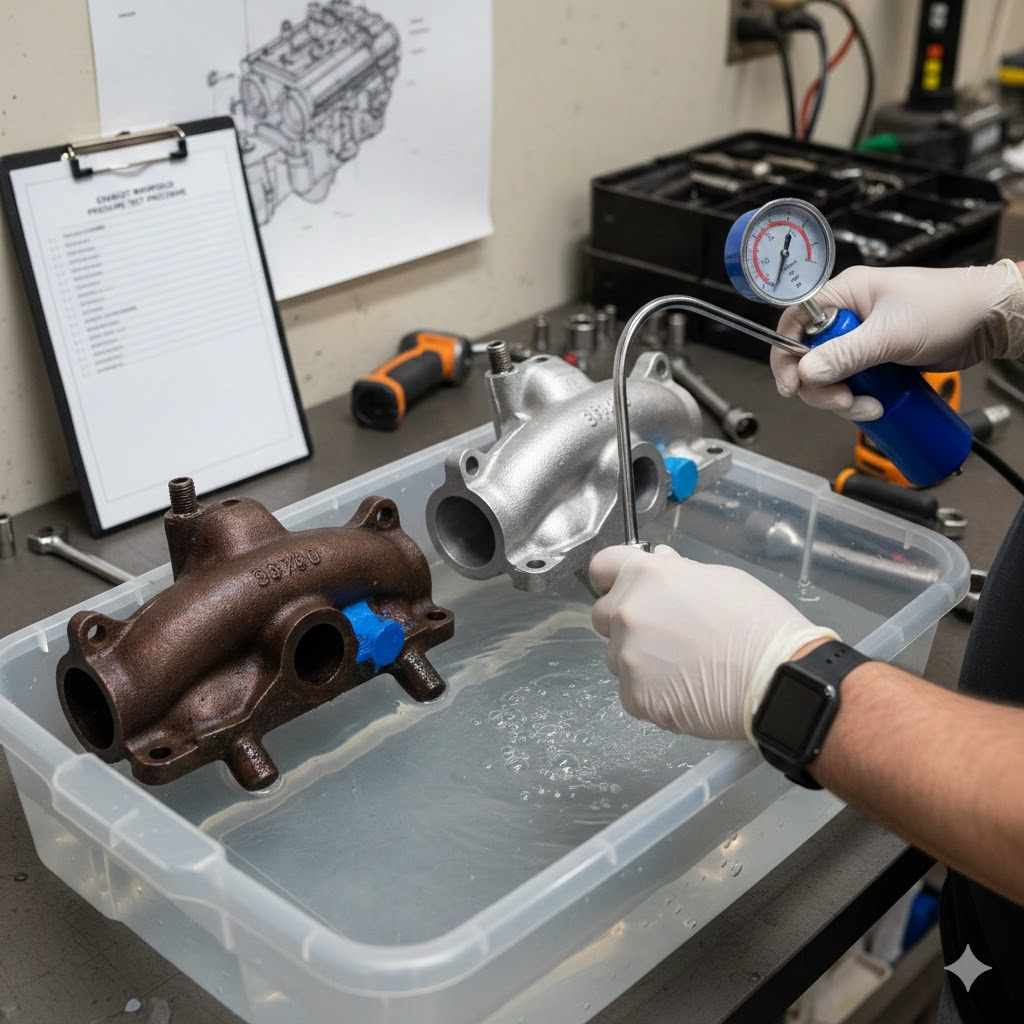
Using a Pressure Test Kit
A pressure test is another reliable way to find leaks, especially hairline cracks that are hard to spot visually. This method involves pressurizing the cooling passages of the manifold and checking for drops in pressure.
How a Pressure Test Works
A pressure testing kit typically includes a pump, a gauge, and adapters to connect to the manifold’s cooling passages. You seal off all openings except one, then introduce compressed air or water at a specific, low pressure. If the pressure gauge shows a drop, it means there’s a leak somewhere in the manifold.
This is a very effective way to pinpoint even small issues.
- Connecting the Kit: Attach the appropriate adapter from your pressure test kit to a suitable opening on the manifold, usually where a coolant line connects. Ensure a secure seal.
- Pressurizing the System: Use the hand pump to slowly introduce air or water into the manifold’s cooling passages. Do not over-pressurize. Follow the kit’s instructions for the correct pressure level, which is usually quite low.
- Monitoring the Gauge: Watch the pressure gauge closely for several minutes. If the pressure begins to drop, it indicates that air or water is escaping through a leak. You might be able to hear a hissing sound near the leak, or you can use soapy water to create visible bubbles at the leak site.
Interpreting Pressure Test Results
A stable pressure reading over a set period means your manifold is sealed and free of leaks in its cooling system. If the pressure drops, you’ll need to find the source of the leak. This could be a crack in the casting or a faulty gasket connection.
Once found, the manifold may need repair or replacement, depending on the severity of the leak.
- Stable Pressure: If the pressure remains steady, it’s a good sign that the internal cooling passages are intact and there are no significant leaks. This suggests the manifold is likely in good condition regarding its cooling ability.
- Falling Pressure: A consistent drop in pressure means there is a leak. You can often pinpoint the location by listening for hissing or by applying a soapy water solution to the outside of the manifold. Bubbles will form where the leak is occurring.
- Action Based on Results: If a leak is found, you must address it. Small external leaks at gasket surfaces might be fixed by replacing the gasket and tightening properly. However, leaks from cracks within the manifold casting itself usually mean the manifold needs to be replaced.
Maintenance and Prevention Strategies
Regular maintenance and smart preventive measures can significantly extend the life of your boat’s exhaust manifolds. Catching issues early and taking proactive steps can save you a lot of money and headaches down the road. This part of the guide focuses on what you can do between tests to keep things in top shape.
Regular Flushing and Cleaning
If your boat is used in saltwater, rinsing the cooling system regularly is crucial. This washes away salt and other corrosive elements that can attack the metal of your exhaust manifolds. A good flush after each use, or at least periodically, makes a big difference in preventing corrosion.
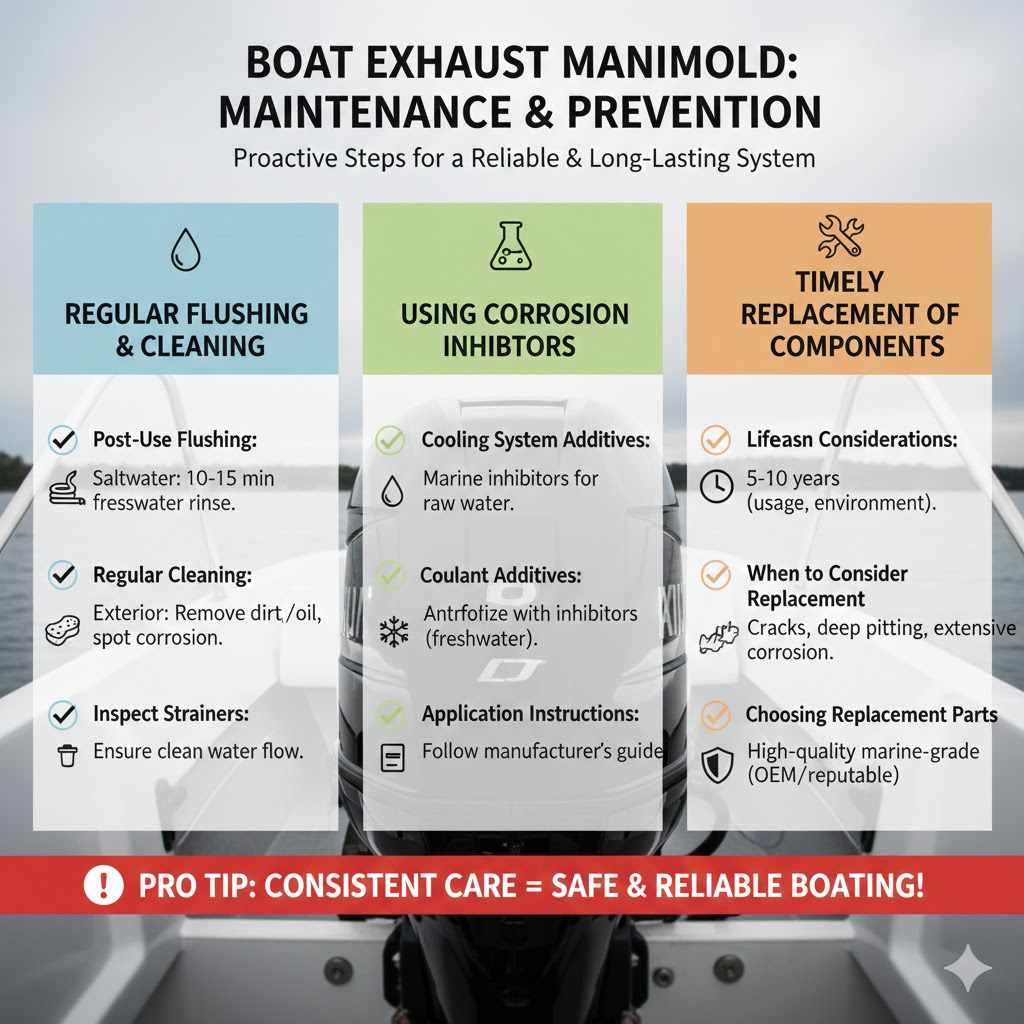
- Post-Use Flushing: After each outing, especially in saltwater, connect a freshwater hose to your engine’s flushing port and run the engine for about 10-15 minutes. This helps remove salt deposits from the engine block, manifolds, and cooling system.
- Regular Cleaning: Periodically clean the exterior of the exhaust manifolds to remove any dirt, oil, or debris. This makes it easier to spot any new corrosion or leaks during your visual inspections. A clean engine bay is a safer engine bay.
- Inspect Strainers: Ensure your raw water strainer is clean and free of debris. A clogged strainer can restrict water flow, leading to overheating of the manifolds and other cooling system components.
Using Corrosion Inhibitors
Specialized corrosion inhibitors can be added to your cooling system to provide an extra layer of protection against rust and corrosion. These chemicals help form a protective barrier on the metal surfaces within the cooling passages, slowing down the degradation process.
- Cooling System Additives: For raw water-cooled engines, specific marine corrosion inhibitors can be added to the raw water circuit. These products are designed to neutralize the corrosive effects of salt and other minerals.
- Coolant Additives: If your boat has a freshwater-cooled engine with heat exchangers, make sure the antifreeze mixture contains the correct type and amount of corrosion inhibitors. These formulations are specifically made for marine engines.
- Application Instructions: Always follow the manufacturer’s instructions for the specific corrosion inhibitor you are using. Overdosing or using the wrong type of inhibitor can sometimes cause its own set of problems.
Timely Replacement of Components
Even with the best maintenance, exhaust manifolds do not last forever. They are a wear item. Knowing when to replace them is just as important as knowing how to test them.
Age, hours of use, and operating environment all play a role in their lifespan.
- Lifespan Considerations: Exhaust manifolds typically last between 5 to 10 years, but this can vary greatly depending on the boat’s usage, the marine environment (saltwater vs. freshwater), and how well the cooling system is maintained. High-hour engines may require more frequent replacement.
- When to Consider Replacement: If you find significant cracks, deep pitting, or extensive corrosion during your inspections, it’s time to consider replacement. Don’t wait for a failure to occur. Proactive replacement can prevent costly engine damage.
- Choosing Replacement Parts: When replacing manifolds, opt for high-quality marine-grade replacements. Some aftermarket options may be cheaper but might not offer the same durability or fitment as OEM or reputable marine brands. Consider the type of manifolds (cast iron, stainless steel) and risers best suited for your engine and operating conditions.
Frequently Asked Questions
Question: How often should I test my boat exhaust manifolds?
Answer: It’s a good idea to visually inspect your exhaust manifolds at least once a year, or before the boating season begins. A more thorough water flow test or pressure test might be done every 1-2 years, or if you notice any signs of problems like unusual noises or smells.
Question: Can I use my boat with a cracked exhaust manifold?
Answer: No, it is very dangerous to use a boat with a cracked exhaust manifold. The cracks can allow deadly carbon monoxide gas to leak into the boat. They can also allow water to enter the engine, causing severe internal damage and potentially leading to engine seizure.
Question: What is the difference between an exhaust manifold and an exhaust riser?
Answer: The exhaust manifold collects exhaust gases from the engine cylinders. The exhaust riser is typically attached to the end of the manifold and directs the exhaust gases upwards, often containing a water jacket for cooling. It’s the part that usually connects to the exhaust hose.
Question: How do I know if my exhaust manifold needs replacing?
Answer: Signs include visible cracks, deep corrosion or pitting, blow-by (soot streaks) around gaskets, or if the manifold overheats during a water flow test. If a pressure test shows a consistent loss of pressure, replacement is often necessary.
Question: Are stainless steel exhaust manifolds better than cast iron ones?
Answer: Stainless steel manifolds are generally more resistant to corrosion than cast iron. However, they can be more expensive and may not dissipate heat as effectively. Cast iron is durable and cost-effective but more susceptible to rust in saltwater environments.
Wrap Up
Testing your boat’s exhaust manifolds properly involves careful visual checks, water flow tests, and sometimes pressure tests. Regularly inspecting for cracks, corrosion, and leaks is key to preventing damage. Proper maintenance like flushing and using inhibitors also helps.
If you find issues, address them promptly to keep your engine safe and running smoothly for many seasons.