Proven Cost: Essential Exhaust Manifold Repair
Proven Cost: Essential Exhaust Manifold Repair for Beginners. Repairing a leaking exhaust manifold is crucial for performance and safety. Costs vary widely based on vehicle type (like a 2008 Ford Expedition), part quality, and whether you hire a professional or DIY, typically ranging from $200 to over $1,000 in total.
Has your car started making a loud ticking or puffing noise, especially when you first start the engine? That often points to a leaky exhaust manifold. This part connects your engine to the rest of your exhaust system, and when it cracks or the gaskets fail, you lose power, waste fuel, and let harmful gases escape. It can feel like a big, scary repair, but it doesn’t have to be! As your trusted guide, Monowar Shohag, I’m here to break down exactly what this job involves, what it costs, and how you can confidently tackle it. We will walk through the signs of failure, the average repair costs, and the simple steps to get your vehicle running quietly and efficiently again. Let’s demystify exhaust manifold repair and put money back in your pocket.
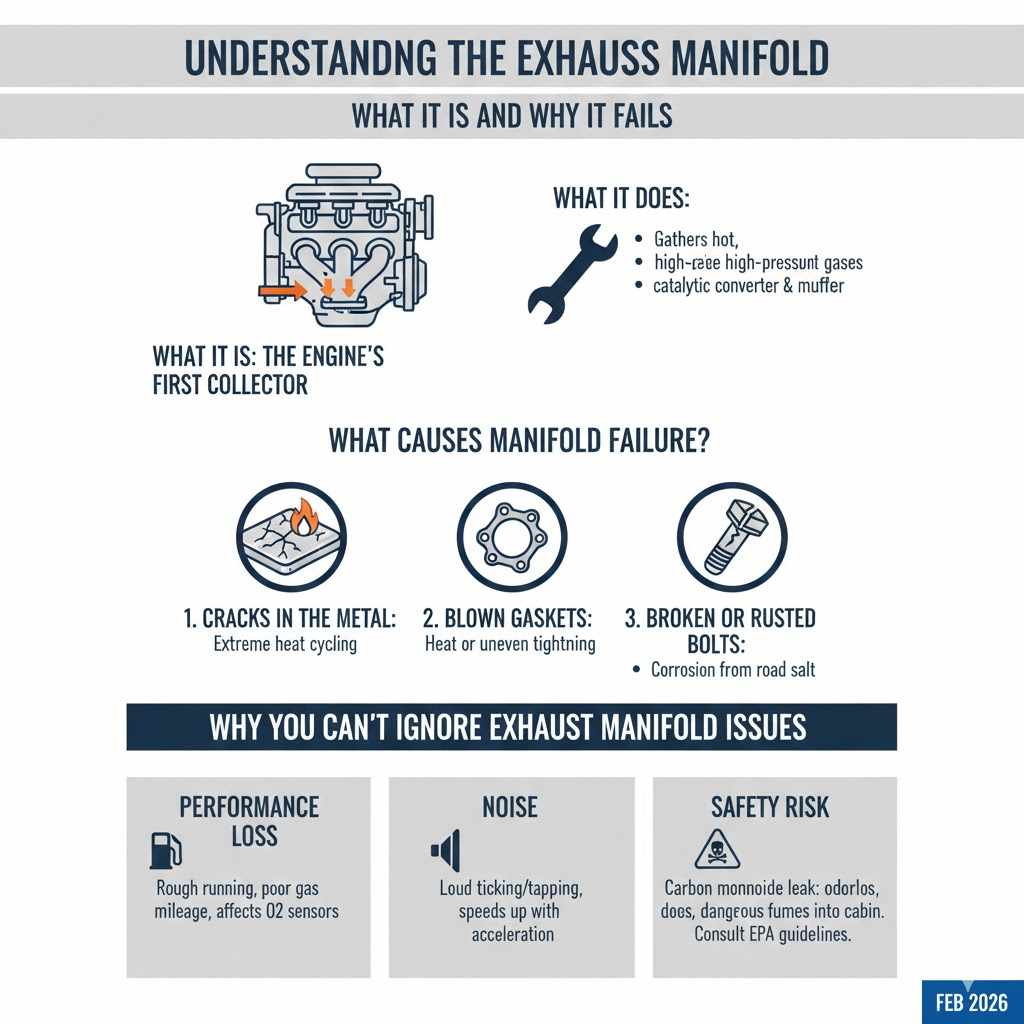
Understanding the Exhaust Manifold: What It Is and Why It Fails
The exhaust manifold is one of the hardest working parts under your hood. Think of it as the first collector for all the dirty air (exhaust gases) leaving your engine’s cylinders. It takes that hot, high-pressure gas and guides it toward the catalytic converter and muffler.
What Causes Manifold Failure?
These parts endure incredible stress. They heat up extremely hot and then cool down every time you drive, causing constant expansion and contraction. This thermal cycling is the main culprit.
Common failure points include:
- Cracks in the Metal: Over many years, the extreme heat cycling can cause the cast iron or steel manifold itself to crack.
- Blown Gaskets: The gasket seals the connection between the manifold and the engine cylinder head. These gaskets can degrade due to heat or uneven tightening, causing leaks.
- Broken or Rusted Bolts: The bolts holding the manifold in place can rust or snap off, especially in areas where road salt is used. This is a very common and frustrating issue.
Why You Can’t Ignore Exhaust Manifold Issues
Ignoring a leak isn’t just about noise. It affects performance and safety.
- Performance Loss: A leak throws off the engine’s air/fuel mixture sensors (oxygen sensors), making your car run rough and use more gasoline.
- Noise: The sound is loud, often described as a ticking or tapping noise that speeds up when you accelerate.
- Safety Risk: Exhaust gases contain carbon monoxide, which is odorless and dangerous. A significant leak can allow these fumes into the cabin. For safety information on exhaust gases, consult resources like the Environmental Protection Agency (EPA) guidelines regarding vehicle emissions.
The Proven Cost Breakdown: How Much Does Exhaust Manifold Repair Really Cost?
When figuring out the cost of fixing an exhaust manifold, you must consider two main categories: parts and labor. The total cost depends heavily on your vehicle’s make, model, engine size, and location. For example, getting quotes on how much to do manifolds on a 2008 Ford Expedition will yield different results than a smaller sedan.
Parts Cost Estimates
The manifold itself is usually made of cast iron or stainless steel. Quality matters here; cheaper parts might crack sooner.
| Component | Estimated Part Cost (DIY/Budget) | Estimated Part Cost (OEM/Premium) |
|---|---|---|
| Exhaust Manifold (Per Side) | $75 – $150 | $180 – $350 |
| New Manifold Gaskets (Set) | $20 – $40 | $40 – $75 |
| New Bolts/Studs (If needed) | $15 – $30 | $30 – $60 |
| Oxygen Sensors (If damaged or replaced proactively) | $40 – $80 each | $100 – $180 each |
Labor Cost Breakdown
Labor is often the largest chunk of the repair bill. Replacing an exhaust manifold is often time-consuming because the manifold is bolted close to the engine block, making access difficult. Many broken manifold bolts require specialized drilling, which adds significant time.
- Standard Replacement: A straightforward swap (if no bolts break) usually takes a professional mechanic 2 to 4 hours.
- Complicated Replacement (Broken Bolts): If the bolts are seized or broken—a common scenario on older vehicles—the job can stretch to 6 to 10 hours as the technician must carefully extract the broken studs without damaging the cylinder head.
Average Total Repair Cost by Scenario (Parts + Labor):
| Repair Scenario | Estimated Total Cost Range |
|---|---|
| Simple Gasket Replacement (No Cracks/Broken Bolts) | $200 – $450 |
| Standard Manifold Replacement (Few minor issues) | $400 – $700 |
| Complex Replacement (Broken Bolts, Severe Rust, 2008 Ford Expedition Example) | $700 – $1,300+ |
For an older, high-mileage vehicle like a 2008 Ford Expedition, you should budget closer to the higher end of these ranges, as rust and seized components are almost guaranteed when dealing with components exposed to high heat for over a decade.
DIY vs. Professional Repair: Making the Right Choice
Deciding whether to tackle this yourself or pay a shop depends on your skill level, tools, and confidence, especially when dealing with those stubborn bolts.
The DIY Route: Savings and Risks
If you love working on cars and have the patience for seized bolts, the DIY route saves you hundreds in labor.
Tools You Will Likely Need for DIY Repair:
- Safety gear (Gloves, safety glasses).
- Jack and jack stands (never rely only on a jack!).
- Wrenches and socket set (metric and standard).
- Penetrating oil (like PB Blaster or Kroil) – essential for soaking old bolts.
- Torque wrench (to tighten new bolts correctly).
- If bolts break: Screw extractors, an electric drill, and potentially a specialized left-hand drill bit set.
DIY Pros and Cons
| Pros (DIY) | Cons (DIY) |
|---|---|
| Significant labor cost savings. | High risk of breaking exhaust manifold bolts. |
| Full control over part quality. | Requires specialized tools (like extractors) if bolts break. |
| Builds valuable mechanical skills. | Time-consuming, especially if you need to remove broken bolts. |
Professional Repair: Peace of Mind
Hiring a trusted mechanic ensures the job is done right, often with warranties on parts and labor.
When to Hire a Professional
If you hear any hint of clicking, smell exhaust fumes, or suspect the bolts are heavily rusted, calling a professional is often wise. Mechanics have specialized tools designed to remove broken studs from engine heads without causing expensive collateral damage.
Step-by-Step Guide: Essential Exhaust Manifold Replacement
This guide focuses on the replacement process assuming you are replacing the entire manifold due to a crack or severe gasket leak. Always work on a cool engine. Safety first!
Phase 1: Preparation and Access
Before you touch a wrench, make sure the engine is cold—ideally, it hasn’t run for 12 hours. Exhaust parts retain heat for a very long time.
- Safety First: Park on a flat, level surface. Engage the parking brake and place wheel chocks behind the rear wheels.
- Disconnect Battery: For safety and to prevent electrical shorts (especially near oxygen sensors), disconnect the negative battery terminal.
- Raise and Secure the Vehicle: If you need access from underneath (common for passenger-side manifolds), safely lift the car using a jack and secure it firmly on high-quality jack stands. Never work under a car supported only by a jack.
- Locate and Unplug Sensors: Identify the oxygen (O2) sensors located in the manifold or the exhaust pipe just past it. Carefully unplug their electrical connectors. Labeling them helps tremendously later.
- Remove Heat Shields: Many manifolds have metal heat shields bolted over them to protect nearby wires and plastic components. Remove these shields first, as they block access to the manifold bolts.
Phase 2: Removing the Old Manifold
This is where patience becomes your most important tool. Penetrating oil is your best friend here.
- Soak the Bolts: Generously spray every single manifold bolt and nut with a high-quality penetrating oil. Let it soak for at least 30 minutes, or ideally, spray it periodically over a few hours or even overnight.
- Attempt Removal: Start with the outer bolts first, moving toward the center. Use a six-point socket for the best grip. Apply slow, steady pressure. If a bolt starts turning easily, great! If it moves stiffly or stops turning, stop immediately.
- Dealing with Stuck Bolts: If a bolt won’t budge, do not force it to the point of snapping. Re-soak it, try gently tightening it a tiny bit (sometimes this breaks the rust seal), and then try loosening it again. If it snaps, you must stop the main replacement process and focus on drilling the remaining stud out (a complex task best left to experienced DIYers or professionals).
- Remove the Old Manifold: Once all accessible bolts are removed, carefully pull the old manifold away from the engine head. Be careful not to damage the delicate threads in the head itself.
Phase 3: Cleaning and Installation
A clean mating surface is absolutely essential for a leak-free seal.
- Scrape the Old Gasket: Use a plastic scraper or a very sharp razor blade held nearly flat against the engine head surface to carefully scrape away every trace of the old gasket material. Avoid gouging the soft aluminum or iron of the cylinder head.
- Inspect Threads: Briefly inspect the bolt holes. If you are using an easy-out tool, you will be tapping the stud out. If you are lucky and all studs came out clean, run a thread chaser (not a tap!) gently into the holes to clean out rust and debris.
- Position the New Gasket: Place the new gasket onto the cylinder head studs. Some gaskets have a specific “this side up” orientation—check the instructions!
- Install the New Manifold: Carefully place the new manifold over the studs and gasket. Hand-tighten the first few bolts just enough to hold it in place.
- Torque Sequence: This step is critical for preventing leaks. You must tighten the bolts in a specific pattern (usually working from the center bolts outward) and to the manufacturer’s specified torque setting. Check the service manual for your specific engine (e.g., the torque specs for a V8 in an Expedition). Uneven tightening warps the gasket.
- Reconnect Everything: Reinstall the heat shields, plug the oxygen sensors back in (ensuring wires are away from hot pipes), and reconnect the battery.
Troubleshooting Common Manifold Repair Hurdles
Even experienced mechanics run into issues here. Knowing these potential problems ahead of time helps you prepare mentally (and financially).
The Broken Bolt Nightmare
This is the single most common reason a simple job turns into an all-day ordeal. Bolts rust into the threads of the cylinder head, and when you apply torque, the stud snaps off, leaving the threaded portion stuck deep inside.
Solutions for Broken Studs:
- Heat Treatment: Sometimes, applying heat with a torch to the metal around the broken stud (not the stud itself) can help the surrounding metal expand and loosen its grip.
- Drilling Out: This requires centering a small drill bit perfectly in the center of the broken stud, using a left-hand drill bit (which might spin the stud out while drilling), or using a screw extractor (Easy-Out). If the drill bit breaks inside the stud, the repair becomes exponentially more difficult and expensive.
Oxygen Sensor Issues
O2 sensors often get damaged during removal or are simply too old to function correctly after being exposed to a severe exhaust leak.
Pro Tip: If your vehicle has high mileage (over 100,000 miles) and the O2 sensors are near the manifold, proactively replacing them is often smart. While it adds $100-$300 to the parts cost, it saves you the time and labor of tearing everything apart again later when the old sensor inevitably fails.
Warped Manifold Surface
If the old manifold cracked because it was significantly overheated, the metal surface might be warped. Bolting a new gasket to a warped manifold guarantees a new leak.
If you suspect warping, you can take the old manifold to a machine shop for resurfacing (milling). This costs about $50–$100 per side but ensures a perfectly flat mounting surface. If the replacement manifold is cheap cast iron, it might be easier to just buy a new, better-quality replacement part.
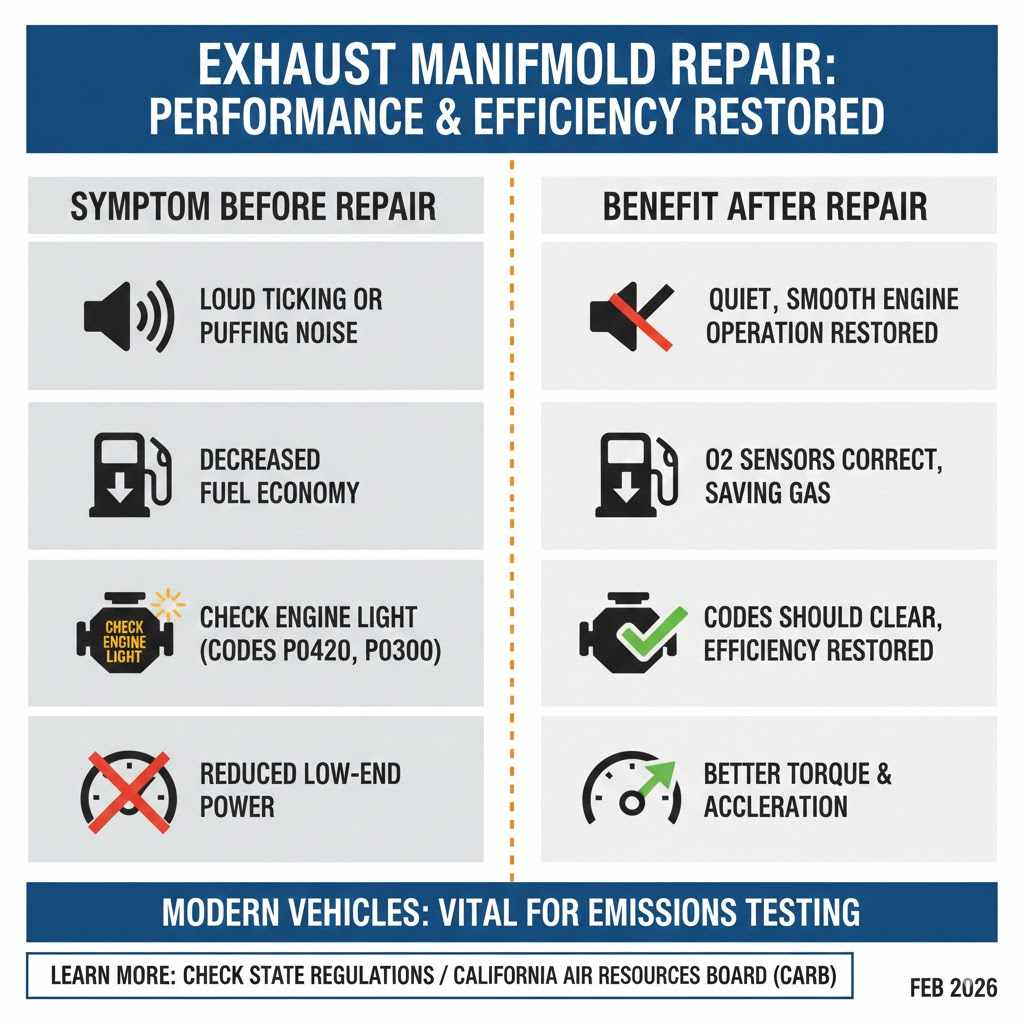
Performance and Efficiency After Repair
The results of a successful exhaust manifold repair are immediate and satisfying.
| Symptom Before Repair | Benefit After Repair |
|---|---|
| Loud ticking or puffing noise | Quiet, smooth engine operation restored. |
| Decreased fuel economy | O2 sensors read correctly, restoring optimal air/fuel ratio and saving gas. |
| Check Engine Light (Codes P0420, P0300) | Codes should clear, indicating proper exhaust flow efficiency. |
| Reduced low-end power | Restored cylinder pressure leads to better torque and acceleration. |
For modern vehicles, especially those using complex engine management like newer trucks or SUVs, ensuring the exhaust system is sealed is vital for passing emissions testing. You can learn more about vehicle emissions testing standards by checking your state’s regulations or resources provided by the California Air Resources Board (CARB) for national context on strict emission requirements.
Frequently Asked Questions (FAQ) for Beginner Exhaust Repairs
Q1: Can I drive my car with a leaking exhaust manifold gasket?
A: Yes, you can drive it short distances, but it is not safe or efficient. The noise will be irritating, you will waste fuel, and the engine computer will likely adjust the fuel mixture poorly. More importantly, dangerous exhaust fumes could enter the cabin.
Q2: How long should an exhaust manifold repair take a professional mechanic?
A: If the bolts come out easily, the job is often quoted between 2 to 4 hours. If bolts are seized and must be drilled out, plan for a minimum of 5 to 8 hours of labor time.
Q3: Is it better to replace the manifold or just the gasket?
A: If the manifold itself is cracked or severely warped, you must replace the entire manifold. If the manifold is intact and only the gasket has failed (rarely), you can replace just the gasket, but usually, if you are doing the labor, replacing the manifold along with the gasket is recommended for long-term reliability.
Q4: Why is my car ticking loudly only when the engine is cold?
A: This is the classic sign of a manifold leak. As the metal heats up, it expands. This expansion can temporarily seal the small crack or gap in the gasket, causing the ticking noise to disappear or quiet down once the engine reaches full operating temperature.
Q5: Will replacing the manifold fix a Check Engine Light related to misfires (P030X codes)?
A: If the exhaust leak is severe enough, it can sometimes pull fresh air into the exhaust stream right before the oxygen sensor, confusing the computer and mimicking a lean condition or misfire. Replacing the manifold often resolves these false codes, but if the misfire code returns, you likely have a separate ignition or fuel issue requiring further diagnosis.
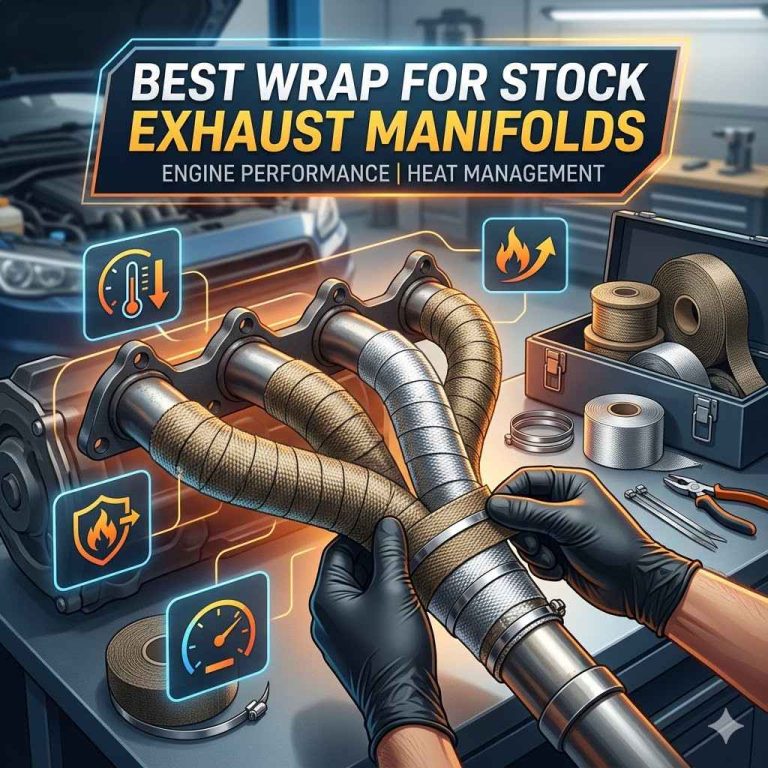
Q6: What is the cheapest way to stop an exhaust leak temporarily?
A: For a very minor pinhole leak, some people use exhaust putty or wrap the area with high-temperature exhaust repair tape. However, these are temporary fixes. They will burn off or fail quickly, especially on a high-pressure component like the manifold, and they will not solve performance issues caused by O2 sensor confusion.
Conclusion: Confidence in Your Exhaust System
Fixing a leaking exhaust manifold might sound intimidating, especially when you look up specifics like how much to do manifolds on a 2008 Ford Expedition and see higher estimates due to age and potential bolt issues. But by understanding the process, preparing for the potential pitfalls (like stuck bolts), and having a clear budget for parts versus labor, you can navigate this repair successfully.
Whether you choose to invest in professional peace of mind or confidently tackle the job yourself with the right preparation, resolving that irritating ticking noise is key to restoring your vehicle’s performance, fuel economy, and safety. Remember, every successful repair, no matter how small, builds your confidence as a car owner. Keep your exhaust sealed, keep your engine breathing easy, and enjoy the quiet ride!