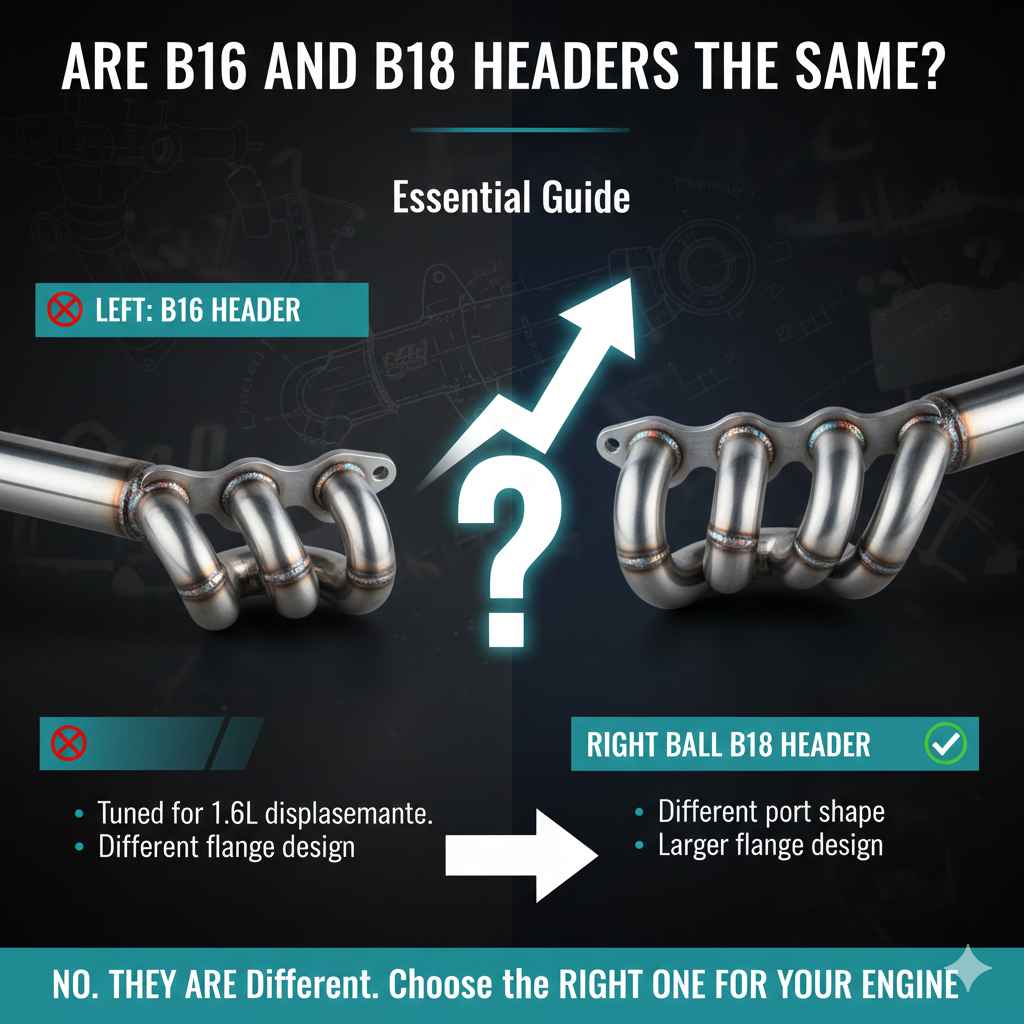
Are B16 And B18 Headers The Same? Essential Guide
No, B16 and B18 headers are generally not the same. While they share the same engine family (Honda B-series), differences in displacement, port size, and exhaust manifold design mean that direct swapping is risky and often results in poor performance or incorrect fitment. Always verify part numbers specific to your engine code.
Welcome! If you’re working on your Honda B-series engine, you might be staring at your old exhaust header, wondering if a header from a slightly different engine model will fit. It’s a very common question, especially when shopping for used performance parts. Trying to match up engine components can feel confusing, but don’t worry. I’m Monowar Shohag, and I’m here to make this simple.
The differences between parts for a B16 and a B18 engine are subtle but very important for your car’s health and performance. We will clear up exactly why these headers are different and how to make sure you buy the right one every time. By the end of this guide, you will understand exhaust fitment like a pro. Let’s dive into the heart of the Honda B-series exhaust system!
The Big Question: Are B16 and B18 Headers The Same?
The short answer, as mentioned, is usually no. While both the B16 and B18 engines belong to the widely popular Honda B-series family—found in iconic cars like the Civic Si and Integra—they have key differences that affect how the exhaust header bolts up and flows.
To understand why they aren’t interchangeable, we need to look at what makes an exhaust header important. The header is the first crucial piece of your exhaust system. It collects the hot gases from the cylinder head ports and funnels them into one or two pipes. Its design dramatically impacts how easily your engine can “breathe,” which directly affects horsepower and torque.
Because the B16 and B18 engines, even within the same generation, have slight variations in cylinder head design and displacement, manufacturers design the headers differently to maximize efficiency for that specific motor size. Using the wrong one can lead to leaks, poor power delivery, or simply not bolting up at all.
Understanding the B-Series Family
Before comparing the parts, let’s quickly establish what we are talking about. The Honda B-series engines are known for their reliability and high-revving nature. They came in various sizes, most commonly:
- B16 Engines: Typically 1.6 liters (e.g., B16A, B16B). Known for high VTEC engagement and higher redlines.
- B18 Engines: Typically 1.8 liters (e.g., B18A, B18B, B18C). These include the non-VTEC models (LS/GSR) and the high-performance B18C/C1 found in the Integra Type R.
Even though they share the same basic mounting pattern in many applications, the internal and external dimensions are tweaked based on the engine’s overall volume and intended use.
Key Differences Between B16 and B18 Headers
The incompatibility often boils down to a few critical manufacturing details. If you are looking at aftermarket performance headers, these differences become even more pronounced as manufacturers tune the tube lengths and collector designs specifically for the displacement they are serving.
1. Exhaust Port Size and Spacing
The single most important difference relates to the holes where the header bolts to the cylinder head—the exhaust ports. While the bolt pattern might look similar (4 bolts per cylinder), the actual shape and size of the port opening can differ slightly between the B16 and various B18 heads. A header designed for a smaller port might choke a larger engine, while a header designed for a larger port might create turbulence and poor scavenging on a smaller engine.
2. Header Tube Diameter (Primary Tubes)
This is where performance tuning comes in. Header tubes are sized to match the engine’s displacement and operating RPM range:
- B16 (1.6L): These engines often thrive with slightly smaller primary tube diameters. This smaller diameter helps maintain exhaust gas velocity at lower RPMs, improving torque in the mid-range, crucial for street driving.
- B18 (1.8L): These larger displacement engines need slightly larger primary tubes to handle the increased volume of exhaust gas they produce, especially at higher RPMs where maximum horsepower is made.
If you swap a header meant for a B18 onto a B16, you risk losing low-end torque due to overly large tubes. If you put a B16 header on a B18, the smaller tubes will restrict exhaust flow, robbing you of peak horsepower.
3. Collector Design and Length
The collector is where the individual primary tubes merge into the downpipe. The length and design of this collector are often tuned for the specific engine’s volumetric efficiency.
For instance, a header designed for a high-revving B16B (like the one found in the Civic Type R) will prioritize length and scavenging tuned specifically for that 8,000+ RPM redline. A header for a stock B18A/B might be tuned for broader, more streetable power delivery.
4. Flange Thickness and Bolt Pattern Variations
While most B-series engines use a common 4-bolt flange pattern, subtle differences exist, especially when crossing between older OBD0/OBD1 systems and newer generations, or when comparing genuine OEM parts versus aftermarket units. A thicker flange might change the overall angle or clearance needed for the rest of the exhaust system (the downpipe).
OEM vs. Aftermarket: The Biggest Pitfalls
When dealing with factory parts, things are often standardized. However, when you start looking at aftermarket performance headers, the variations multiply. This is where most beginners get confused.
If you are simply replacing a rusted-out stock header with another stock header, finding the correct part number for your specific VIN is usually straightforward. If you are upgrading, pay close attention to the manufacturer’s description.
Table 1: Common B16 vs. B18 Header Considerations
| Component | Typical B16 (1.6L) Focus | Typical B18 (1.8L) Focus |
|---|---|---|
| Primary Tube Size | Smaller diameter for velocity | Slightly larger diameter for flow volume |
| Collector Tuning | Optimized for higher RPM scavenging (B16B) | Balanced for broader torque curve (B18A/B) |
| Overall Fitment Check | May require minor clearance adjustments on some B18 chassis | May hang lower or require modification to the downpipe angle |
How to Verify If a Header Will Fit Your Engine
As an automotive guide, my goal is to keep your project safe and successful. Guessing on major components like the header leads to frustration. Here is the step-by-step process to ensure you get the correct fitment, whether you are swapping an engine or buying performance parts.
Step 1: Identify Your Exact Engine Code
Never rely only on “it’s a B18.” You must know the precise code stamped on your engine block (usually near the distributor or timing belt area).
- Locate the Stamp: Open your hood and look carefully at the engine block casting. You are looking for a sequence like B16A, B18C1, or B18B.
- Confirm Engine Generation: Note if it is OBD0, OBD1, or OBD2. This impacts the oxygen sensor port location, which can sometimes cause fitment issues even if the primary bolt pattern matches.
Step 2: Consult Manufacturer Specifications
This is the most reliable method for aftermarket parts.
- Check Application Charts: Every reputable header manufacturer (like Skunk2, HKS, or an OEM supplier) publishes detailed application charts. Look specifically for your engine code (e.g., “Fits: B18C, B18C1”).
- Use Part Numbers: If you are buying a used header, ask the seller for the specific manufacturer’s part number. You can then cross-reference this number on the manufacturer’s website to confirm the intended application.
Expert Tip: Honda often reuses basic mounting structures. For example, many B18A1 (non-VTEC) and B18B1 headers might be nearly identical because they share similar block casting geometry. However, the B16s and the high-performance B18C series often deviate significantly.
Step 3: Compare OEM vs. Performance Headers
If you are swapping a stock header between cars, the differences are usually minimal but exist:
A stock B16 header is often a simple, compact cast-iron piece designed primarily to meet emissions standards quietly. A stock B18 header, depending on the vehicle (like an Integra LS), might be slightly longer or designed to accommodate different catalytic converter positioning required by that specific chassis.
When moving to performance headers, manufacturers often specifically tune the header primaries (the tubes coming off the head) to take advantage of the displacement difference. A 4-2-1 header designed for a B18 will have longer primaries than one designed for a B16, aiming to shift the power band appropriately for the larger motor.
Step 4: Physical Measurement Check (If Possible)
If you have both headers sitting side-by-side, use a reliable measuring tape or calipers:
- Measure the length of the longest primary tube from the flange face to the collector entry point.
- Measure the diameter of the primary tubes (if they are tubular headers).
- Check the exit angle of the collector flange relative to the mounting flange.
Even minor discrepancies here signal that the header is tuned differently and might cause issues down the road.
Why Swapping Headers Can Damage Performance or Fitment
It’s tempting to grab any header that looks like it bolts on, but this can lead to frustrating setbacks. Here’s what happens when you mismatch them:
Performance Issues (Choking or Poor Scavenging)
Exhaust tuning is all about gas dynamics. You want the exiting exhaust pulses to help pull the next pulse out of the cylinder—this is called scavenging. This only works effectively when the timing (tube length) is correct for the engine’s stroke and RPM range.
- B16 Header on a B18: The smaller tubes cause “choking.” The engine spends effort pushing exhaust gas through too small a pipe, leading to back pressure and a loss of top-end horsepower.
- B18 Header on a B16: The larger tubes cause the exhaust pulses to arrive at the collector too early or too spread out. This creates a vacuum wave that actually pulls exhaust back into the cylinder right as the intake valve opens (reverse flow), robbing power across the entire RPM range.
Fitment and Clearance Issues
Even if the cylinder head flange bolts up perfectly, the rest of the header pipes might interfere with other components:
- Transmission Case: On some chassis swaps, a header designed for a B18 might sweep closer to the transmission casing or oil pan drain plug than the B16 version, causing vibration or contact.
- Chassis Bracing and Heat Shields: Clearance issues often arise where the primary tubes merge or where the collector meets the downpipe. A header tuned for a different chassis configuration (even if both are Hondas) might hit the sway bar or transmission mount brackets.
Gasket and Sealing Problems
If the port shape is even slightly different, the gasket may not seal perfectly. This leads to exhaust leaks right at the most critical point of the system. Leaks here not only sound bad but can also confuse oxygen sensors, leading to poor fuel trims from the Engine Control Unit (ECU), potentially harming fuel economy and engine health. For reliable readings, ensure your O2 sensor placement is correct, as noted by resources like the U.S. Environmental Protection Agency regarding proper emissions controls.
Case Study: The B16A vs. B18C Comparison
Let’s look at two of the most commonly compared B-series engines: the B16A (found in older USDM/JDM Civics) and the B18C/C1 (found in Integras like the SiR or Type R).
Both are high-revving, VTEC engines. However, the B18C has significantly more displacement. When comparing high-quality 4-into-1 race headers:
The B18C header will almost always feature slightly longer runners and wider tubing compared to its B16A counterpart. The B18C is designed to move substantially more air, meaning its header has to be optimized for higher flow rates above 7,000 RPM, whereas the B16A header optimizes slightly earlier in the power band.
Installation Tips for Header Replacement (Safety First!)
Replacing an exhaust header is a very rewarding DIY job, but safety and preparation are key. Since you are dealing with the exhaust system, which is exposed to extreme heat, proper installation ensures longevity and prevents future leaks.
Tools and Preparation List
Before you begin, make sure you have these basics. Always wear safety glasses and gloves.
- New Header and Gaskets: Ensure you have the specific header for your engine code and new header-to-head gaskets.
- Jack and Jack Stands: Never work under a car supported only by a jack. Use high-quality jack stands on solid, level ground.
- Wrenches/Sockets: Metric socket set, including extensions. You will likely need a 12mm, 14mm, and possibly a 17mm socket for the manifold bolts.
- Penetrating Oil: A high-quality penetrating oil (like PB Blaster) is essential for rusted manifold bolts. Spray them down a day before you start.
- Torque Wrench: Absolutely necessary for reinstallation to prevent warping the flange or breaking bolts.
The Step-by-Step Removal Process
This assumes you are working on a standard front-wheel-drive B-series application where the header is accessible from above and below the engine bay.
- Safety Check: Ensure the car is cool (cold metal expands less, making bolts easier to remove without snapping). Disconnect the negative battery terminal.
- Access and Unbolt the Downpipe: Locate where the header connects to the rest of the exhaust system (usually a bolted flange just after the collector). Unbolt this connection first.
- Disconnect Sensors: Carefully unplug any oxygen sensors threaded into the old header or downpipe. If you have a primary O2 sensor, handle the wire carefully.
- Remove Heat Shields: If your old header has heat shields, remove the small bolts holding them on. Keep these if your new header does not include them.
- Remove Header Bolts: Working carefully, use your breaker bar or ratchet to loosen the 8 bolts connecting the header to the cylinder head. Work in a crisscross pattern, loosening slightly on each bolt until they come out easily. If they are stuck, apply more penetrating oil and wait.
- Remove Old Header: Gently wiggle the old header out. Be prepared; it might be heavier than expected, especially cast iron OEM parts.
The Step-by-Step Installation Process
Installing the new header requires precision, especially around torque specs, to avoid immediate leaks.
- Clean the Surface: Using a plastic scraper or fine emery cloth, carefully clean the cylinder head surface where the gasket sits. Ensure no old gasket material remains. This is crucial for a leak-free seal.
- Position the New Gasket: Place the new header gasket onto the head studs. Ensure it sits perfectly flat and is not misaligned.
- Mount the New Header: Carefully position the new header over the studs. If it’s a tubular design, you might need a helper to align the collector pipe while you thread the first few nuts by hand.
- Hand-Tighten Flange Bolts: Install all 8 manifold nuts/bolts by hand until they are snug. Do not tighten them fully yet!
- Torque Sequence: Use your torque wrench and tighten the bolts in a crisscross pattern, following the manufacturer’s recommended torque specification (typically around 16–20 ft-lbs for Honda B-series heads, but always verify the exact specification for your engine head material). Tighten in three stages: first pass to half the final torque, second pass to full torque, and a final check.
- Reattach Downpipe and Sensors: Bolt the header collector back to the downpipe flange using new gaskets if necessary. Reinstall and plug in all oxygen sensors.
- Final Checks: Reattach any heat shields and reconnect the battery.
- The “Heat Cycle”: Start the car and let it idle for 5–10 minutes. Watch and listen for any obvious exhaust leaks near the header flange. If you hear popping or puffing, shut down immediately, recheck torque, and look for damaged gaskets. Once leak-free, drive gently for the first few miles, as the metal settles.
The Importance of Chassis Compatibility
Sometimes, a header might technically fit the engine block (B16 vs. B18), but it won’t fit the car it’s bolted into. This is especially true when dealing with engine swaps or different chassis models that use the B-series engine.
Example: Civic vs. Integra Header Fitment
A B18 header designed for an Acura Integra chassis might have a collector angle optimized for the Integra’s tighter engine bay or different routing to clear the firewall. If you try to bolt that same header onto a Civic chassis, the collector might point toward the sway bar or firewall, causing fitment conflicts.
Performance header designs are generally optimized for the specific chassis they are advertised for. Even if the engine codes match, always check the vehicle application if you are buying a full header/downpipe assembly.
Frequently Asked Questions (FAQ) for B16/B18 Headers
Q1: Can I use a B16 header on a B18C engine without noticing a difference?
A: You will likely notice a difference, primarily a loss of top-end power. The B18C is a larger engine that needs more exhaust volume flow. Using the smaller B16 header will restrict flow (choke the engine) at high RPMs where the B18C wants to make peak power.
Q2: If the bolt pattern is the same, why won’t the gasket seal perfectly?
A: Even if the bolt pattern matches, the actual exhaust port shape cast into the head might differ slightly between the B16 and B18. If the header port opening is slightly larger than the head port, you create a small gap that traps carbon and leaks exhaust gases, leading to poor sealing and performance loss.
Q3: Is it safe to run an exhaust leak at the header flange?
A: No, it is not safe long-term. Exhaust leaks near the manifold can overheat nearby plastic components or wiring. More importantly, the upstream Oxygen (O2) sensor will read incorrect air/fuel mixtures, causing the ECU to run the engine rich, wasting fuel and potentially causing damage over time.
Q4: Do I need a different downpipe if I swap from a B16 header to a B18 header?
A: Almost certainly, yes. The collector outlet size and angle are specific to the header design. If you change the header, the flange that bolts to the collector will be different, meaning your old downpipe will no longer match up correctly.
Q5: How do I know if my header is tuned correctly for my engine?
A: A header tuned correctly for your displacement will show gains primarily in the intended power band. For example, a good street header (like a mild 4-2-1) should increase mid-range torque significantly without sacrificing too much top-end power. If you feel a massive dip in power somewhere, the tuning (tube length/diameter) might be wrong for your engine size.
Q6: Will an aftermarket header claiming to fit all B-series motors work fine?
A: Some universal or “universal fit” headers exist, often designed as a mild 4-into-1 aiming for a balance of streetable torque and power. While they often bolt up, they are usually a compromise. They will fit, but they will not extract the maximum potential power that a header specifically engineered for your 1.6L or 1.8L engine could achieve. For best results, choose one specific to your displacement.
Conclusion: Choosing the Right Header with Confidence
You’ve now seen that while the B16 and B18 engines are close cousins in the Honda family, their exhaust headers are distinct components tuned for their specific displacement and performance goals. The core takeaway is this: never assume interchangeability based only on the “B-series” label.
For a safe, high-performing setup, always confirm the exact engine code (B16A, B18B1, etc.) and cross-reference that against the header manufacturer’s application list. Whether you are dealing with stock cast iron or a gleaming new stainless steel header, getting the initial component right is the secret to a reliable, powerful exhaust system. Trust the specifications, clean your mounting surfaces, and use a torque wrench. With this knowledge, you can confidently choose or install the correct header for your B-series build, ensuring your engine breathes easy and performs beautifully for years to come.