How To Install A Performance Exhaust System
Installing a performance exhaust system can seem tricky for folks new to car work. You might worry about fitting parts or messing something up. But don’t sweat it!
We’ll walk you through how to install a performance exhaust system step by step. It’s easier than you think with the right guidance. Get ready to give your car a new sound and feel!
Preparing For Your Exhaust System Install
This first part is all about making sure you have everything ready before you even touch your car. Proper preparation saves a lot of headaches later on. We will cover the tools you need and how to get your vehicle set up safely.
Having the right gear and making sure your car is stable are key steps. This section sets the stage for a smooth installation process.
Gathering The Right Tools
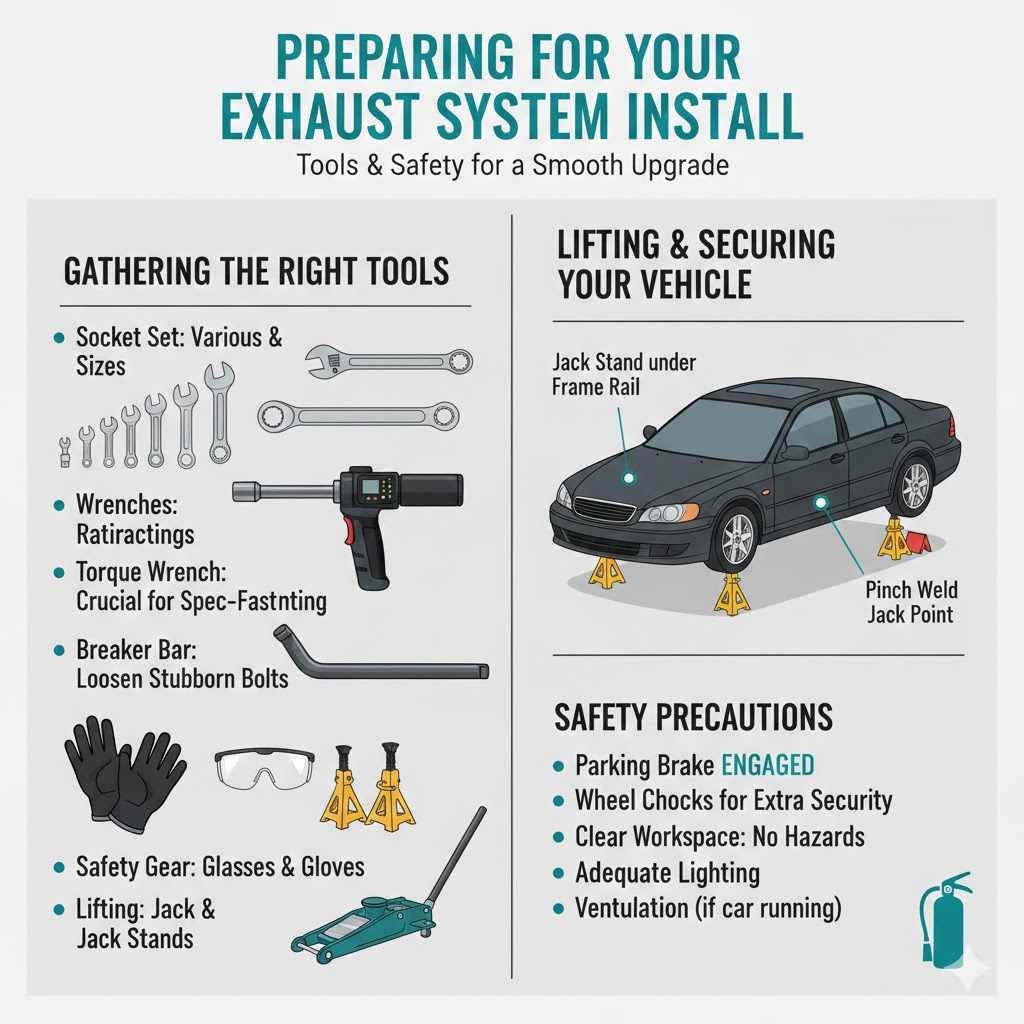
Before starting, collecting the necessary tools is vital for a smooth installation. You’ll need a socket set, wrenches, a torque wrench, and possibly a breaker bar for stubborn bolts. Safety glasses and gloves are a must to protect yourself.
You might also need jack stands and a car jack to safely lift your vehicle. Having everything in one place prevents interruptions and makes the job faster.
- Socket Set: A good set with various sizes, including deep sockets, will cover most nuts and bolts on your exhaust system. This allows you to grip fasteners effectively and apply the right amount of force. Different exhaust systems use different bolt sizes, so having a comprehensive set is important.
- Wrenches: Both open-end and box-end wrenches are useful for holding nuts while tightening bolts or accessing tight spots where a socket won’t fit. Ratcheting wrenches can speed up the process considerably.
- Torque Wrench: This is crucial for ensuring bolts and nuts are tightened to the manufacturer’s specifications. Overtightening can damage components, while undertightening can lead to leaks or parts coming loose. Using a torque wrench guarantees the system is secured correctly for optimal performance and safety.
- Breaker Bar: For exhaust systems that haven’t been touched in years, rusted or seized bolts are common. A breaker bar provides extra leverage to loosen these stubborn fasteners without damaging them or your tools.
- Safety Gear: Always wear safety glasses to protect your eyes from falling debris or sparks. Gloves protect your hands from sharp edges and grease. A sturdy pair of closed-toe shoes is also recommended.
Lifting And Securing Your Vehicle
Safely lifting and securing your vehicle is non-negotiable. You’ll need a robust car jack to raise the car high enough to comfortably work underneath. Once lifted, place sturdy jack stands under the frame or designated support points.
Never rely solely on the jack; it can fail. Ensure the car is stable and won’t wobble before getting underneath. This prevents serious injury.
For example, if you’re working on a sedan, you’ll want to place the jack under the reinforced pinch welds behind the front wheels and in front of the rear wheels. Then, position jack stands under the frame rails. Make sure the jack stands are at an equal height on both sides.
Safety Precautions For Underneath The Car
Working under a vehicle requires utmost attention to safety. Make sure the parking brake is engaged and the wheels are chocked to prevent any accidental rolling. Clear the area of any tools or objects that could be knocked over.
Ensure adequate lighting so you can see what you are doing clearly. This minimizes risks and allows you to focus on the task.
- Wheel Chocks: Placing wheel chocks behind the wheels that remain on the ground adds an extra layer of security against the vehicle rolling. This is especially important if you are working on a slight incline.
- Clear Workspace: Remove any flammable materials from the vicinity. If you are using cutting tools, have a fire extinguisher readily available. A clean workspace reduces tripping hazards and makes it easier to find your tools.
- Ventilation: If your vehicle is running for any reason during the process (which is generally not recommended for exhaust work), ensure there is ample ventilation to prevent carbon monoxide buildup.
Removing The Old Exhaust System
This section details the process of taking off your existing exhaust. It often involves dealing with rusted bolts and tight spaces. We’ll guide you through disconnecting the exhaust from the engine manifold down to the tailpipe.
Patience is key here, as some parts might be more stubborn than expected.
The stock exhaust system is usually quite heavy and can be held in place by several hangers and bolts. The first step is to locate all the mounting points. You’ll typically find bolts connecting sections of the exhaust pipes and rubber hangers that support the system’s weight.
It’s also common for rust to make these bolts difficult to remove.
Disconnecting Exhaust Sections
You will likely need to separate the exhaust into sections. This usually involves unbolting pipes at flanges or clamps. Sometimes, the pipes are rusted together, requiring a bit of force or a cutting tool.
Spraying penetrating oil on bolts beforehand can make this process much easier.
For instance, you might find two or three main sections: the muffler section, the mid-pipe, and the catalytic converter pipe. Each connection point will have bolts, often secured with nuts. These bolts are exposed to the elements, so they tend to seize up.
- Spraying Penetrating Oil: Apply a generous amount of penetrating oil to all bolts and nuts you intend to remove. Let it soak for at least 15-30 minutes, or even overnight for severely rusted parts. This oil seeps into the threads and helps break down rust.
- Careful Application of Force: When loosening bolts, use steady, even pressure. If a bolt feels like it might snap, stop and apply more penetrating oil. Sometimes, gently tapping the bolt head with a hammer can help break the rust’s grip.
- Cutting as a Last Resort: If a bolt absolutely will not budge, you may need to cut it off. An angle grinder with a cutting disc is effective, but use extreme caution to avoid damaging the surrounding vehicle components. Always wear protective gear when cutting.
Dealing With Rusted Bolts And Hangers
Rusted bolts and hangers are the bane of many DIY exhaust installations. If bolts are too far gone, you might have to cut them. For rubber hangers, sometimes a bit of lubricant helps them slide off the mounting posts.
If the hanger brackets are rusted onto the exhaust pipe, they may need to be cut off as well.
Consider the typical exhaust hanger. It’s a rubber isolator attached to the car’s frame, with a metal stud that inserts into a bracket welded to the exhaust pipe. Over time, the bracket rusts, and the stud can fuse with the rubber or the hanger itself can degrade.
Replacement hangers are often inexpensive if the old ones are too far gone.
- Heat Application: In some cases, applying heat from a propane torch to a rusted bolt or nut can expand the metal, helping to break the rust bond. Be extremely careful when using heat around fuel lines or other flammable components.
- Bolt Extractors: If a bolt head breaks off, specialized bolt extractors can be used to remove the remaining stud from its threaded hole. This usually involves drilling a pilot hole into the broken stud and then using the extractor to twist it out.
- Replacement Hangers: It’s a good idea to have replacement exhaust hangers on hand, especially if your old ones are cracked or severely degraded. These are relatively inexpensive and ensure your new exhaust is properly supported.
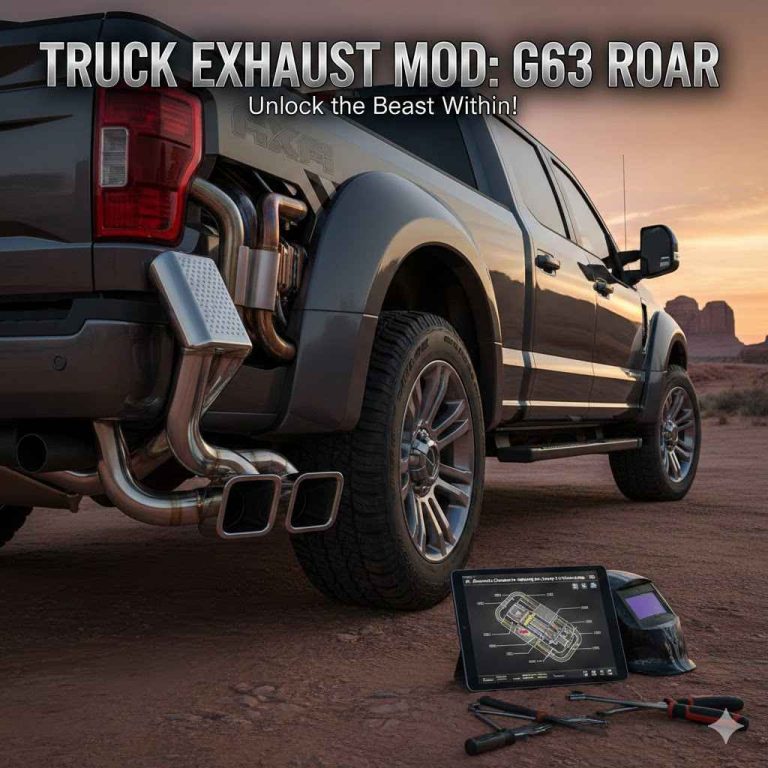
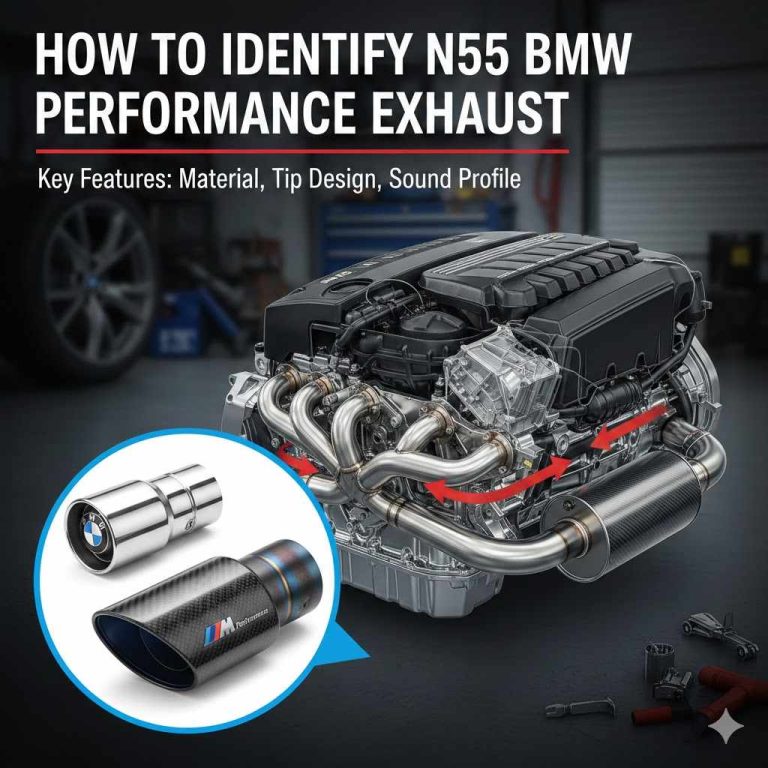
Installing The New Performance Exhaust System
Now for the exciting part: putting on your new performance exhaust. This involves assembling the new components, usually starting from the front and working your way back. We’ll cover how to align pipes, tighten clamps, and ensure everything is sealed properly.
This is where your car starts to sound and perform better.
A performance exhaust system is designed for better airflow, which means it can offer a slight boost in horsepower and torque. It also provides a more aggressive and pleasing exhaust note. The installation process, while similar to removing the old one, requires precision to ensure there are no leaks and that the system is securely mounted.
Mounting The New Components
Start by loosely fitting the new exhaust sections together. Attach the front-most pipe (often connecting to the catalytic converter or manifold) first. Then, connect the subsequent pipes, ensuring they align correctly with the hangers.
Don’t tighten everything down fully yet; leave some play to allow for adjustments.
Performance exhaust kits usually come with new gaskets and hardware. It’s important to use these to ensure a good seal at every connection point. Many systems use slip-fit connections or flange connections with bolts and gaskets.
The goal is to create airtight seals to prevent exhaust leaks, which can reduce performance and create unwanted noise.
- Dry Fit First: Before applying any sealants or fully tightening bolts, connect all the new exhaust pieces without tightening them completely. This allows you to check the fitment and alignment of each component. You can identify any potential clearance issues or misalignments at this stage.
- Use New Gaskets and Hardware: Whenever possible, use the new gaskets and hardware provided with your performance exhaust kit. Old gaskets can be compressed and brittle, leading to leaks. New hardware ensures proper torque and longevity.
- Proper Hanger Placement: Ensure that each exhaust hanger is correctly seated in its rubber isolator and that the exhaust system is hanging evenly. Misaligned hangers can cause the exhaust to vibrate against the car’s body, creating rattling noises or even damage over time.
Connecting Pipes And Ensuring A Seal
When connecting pipes, use new clamps or bolts as provided. If using clamps, ensure they are tightened evenly and securely. For flange connections, insert new gaskets between the flanges before bolting them together.
Tighten bolts in a crisscross pattern to ensure even pressure and a good seal.
Exhaust leaks can happen at any connection point. This is why the seal is so important. A leak not only affects performance but can also allow harmful exhaust fumes into the cabin.
Many performance systems use specialized exhaust sealant at flange connections for an extra layer of protection against leaks.
- Exhaust Clamps: These are commonly used to join sections of exhaust pipe. Make sure the clamp is positioned correctly over the pipe and that it’s tightened evenly. Some clamps require specific torque settings, so check your exhaust system’s instructions.
- Flange Connections: If your system uses flanges, clean the mating surfaces thoroughly before installing the new gasket. Ensure the gasket is centered and that the bolt holes align perfectly. Tighten the bolts gradually and evenly.
- Exhaust Sealant: For added security, apply a thin bead of high-temperature exhaust sealant around the joint before connecting the pipes or tightening flange bolts. This helps fill any microscopic imperfections in the mating surfaces.
Tightening Everything Down
Once all the components are in place and aligned, begin tightening all the bolts and clamps. Work your way from the front of the exhaust system towards the rear. Use your torque wrench to tighten bolts to the manufacturer’s specifications for your specific exhaust system.
This ensures everything is secure and won’t vibrate loose.
Proper tightening prevents leaks and ensures the exhaust system is rigidly mounted, minimizing stress on its components and the vehicle’s chassis. Over-tightening can strip threads or crack flanges, so always refer to the torque specifications provided by the exhaust manufacturer. This step is critical for the longevity and performance of your new exhaust.
- Crisscross Pattern for Flanges: When tightening bolts on flanged connections, always use a crisscross or star pattern. This helps to distribute the clamping force evenly, preventing warping of the flanges and ensuring a consistent seal.
- Torque Wrench Usage: Refer to the instructions for your performance exhaust system for specific torque values. If unavailable, a general guideline for exhaust bolts is between 20-30 foot-pounds, but always verify. Over-tightening is a common mistake.
- Re-check After Driving: After you’ve completed the installation and driven the vehicle for a short period (e.g., a few miles), it’s a good practice to re-check all the bolts and clamps. Exhaust systems can settle, and vibrations can sometimes loosen fasteners.
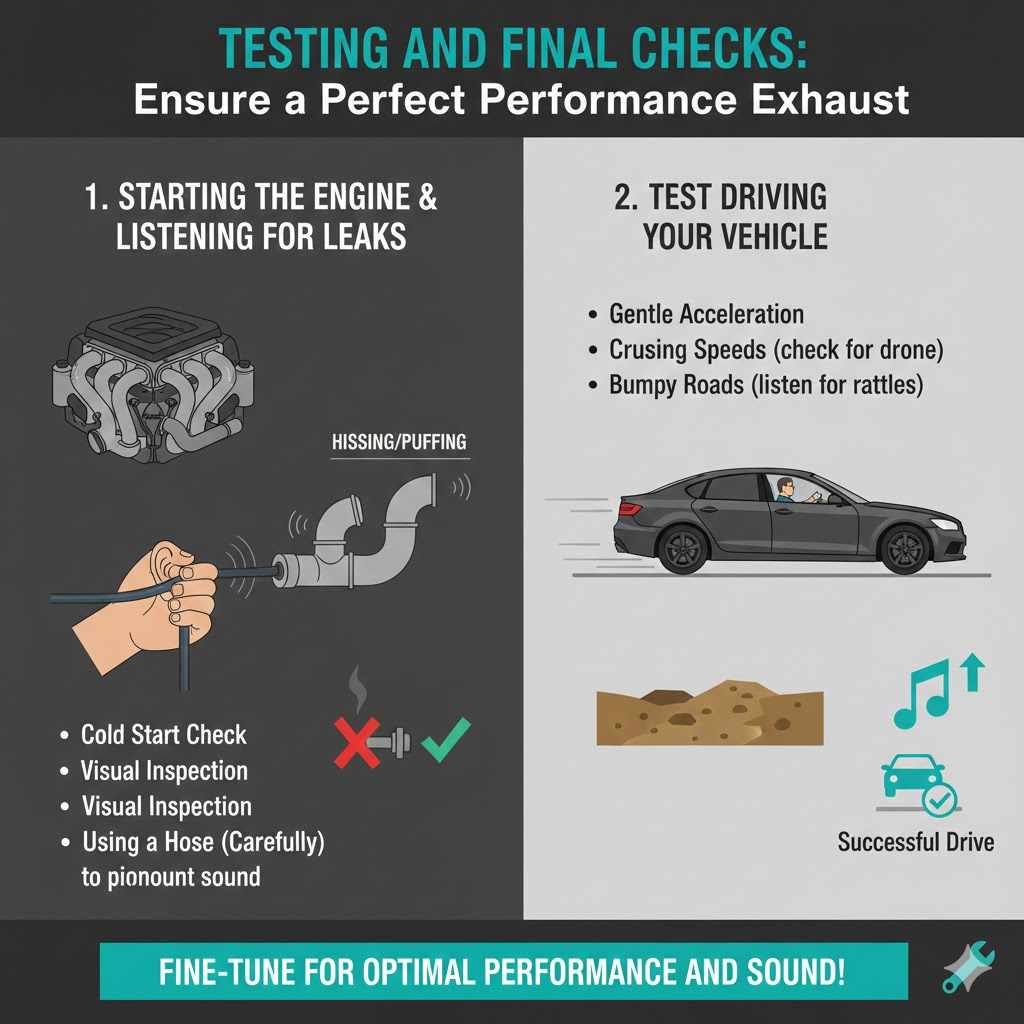
Testing And Final Checks
After the installation is complete, you’ll want to test your work. This involves starting the car and listening for any unusual noises or leaks. We’ll also cover what to look for during a test drive and any minor adjustments you might need to make.
This final stage ensures your new exhaust is performing as it should.
A proper test ensures that the installation was successful and that the performance exhaust system is functioning optimally. This includes listening for any exhaust leaks, unusual vibrations, or rattles. It’s also your chance to hear the new sound of your vehicle.
A few simple checks can save you from potential future problems.
Starting The Engine And Listening For Leaks
Start your car’s engine and listen carefully. You should hear a deeper, more aggressive sound than before. More importantly, listen for any hissing or puffing sounds, especially around the connection points.
These are indicators of exhaust leaks. If you find a leak, shut off the engine and re-tighten the problematic connection.
Exhaust leaks can occur at any point where two pipes join or where the exhaust connects to the engine manifold. Even a small leak can be noisy and reduce the efficiency of your exhaust system. Sometimes, a leak might only be apparent when the exhaust system heats up and expands.
- Cold Start Check: Listen for leaks immediately after starting the engine when it’s cold. This is often when leaks are most noticeable as the metal hasn’t expanded yet.
- Visual Inspection: While the engine is running, you can sometimes see small wisps of exhaust gas escaping from a leaky joint. Use caution and avoid touching hot exhaust components.
- Using a Hose (Carefully): For very small, hard-to-find leaks, some people use a piece of hose held to their ear to pinpoint the sound. Move the open end of the hose around connection points to isolate the source of the noise.
Test Driving Your Vehicle
Take your vehicle for a short test drive, paying attention to how it sounds and feels. Accelerate moderately and listen for any new noises. Check for any vibrations that seem out of the ordinary.
A performance exhaust should enhance the driving experience, not detract from it.
During the test drive, be aware of how the engine performs. You might notice a slight increase in responsiveness. Listen for any rattling or scraping sounds, which could indicate the exhaust is hanging too low or is too close to the chassis.
This is also a good time to confirm the exhaust note is pleasing and not overly loud or droney at cruising speeds.
- Gentle Acceleration: Start with gentle acceleration to get a feel for the new exhaust sound and power delivery. Avoid hard acceleration initially until you are confident everything is secure.
- Cruising Speeds: Drive at various speeds, including highway speeds, to listen for any drone or excessive noise. Some performance exhausts can be louder inside the cabin at certain RPMs.
- Bumpy Roads: Briefly driving over slightly uneven surfaces can sometimes reveal rattles or loose components that weren’t apparent on smooth roads.
Frequently Asked Questions
Question: Do I need a special exhaust system for my car model
Answer: Yes, it’s best to get a performance exhaust system specifically designed for your car’s make, model, and year. These are built to fit your vehicle’s chassis and mounting points, making installation much easier and ensuring optimal performance.
Question: How long does it typically take to install a performance exhaust system
Answer: For someone with basic mechanical skills and the right tools, installing a performance exhaust system usually takes between 2 to 4 hours. If you encounter heavily rusted bolts or need to modify components, it could take longer.
Question: Will a performance exhaust system void my car’s warranty
Answer: It depends on your car’s warranty and the specifics of the exhaust system. Some manufacturers may claim it voids the warranty on the exhaust components or related engine parts, while others may not. Check your warranty documentation or ask your dealer.
Question: Can I install a performance exhaust system myself
Answer: Yes, if you have some mechanical experience, the right tools, and follow instructions carefully, you can install a performance exhaust system yourself. Safety is paramount, so ensure your vehicle is properly supported.
Question: What is a catalytic converter and do I need to replace it
Answer: A catalytic converter is an emissions control device. Most performance exhaust systems are designed to work with your car’s existing catalytic converter. Replacing it requires careful consideration of local emissions laws.
Summary
You’ve learned how to install a performance exhaust system. We covered gathering tools, safely removing the old system, fitting the new parts, and making sure everything is tight and sealed. Testing and final checks ensure your car sounds great and runs well.
This project gives your car a noticeable upgrade.