How To Film Realistic Driving Car Exhaust Sounds
Getting the right sound for your car videos can be tricky, especially for exhaust noises. Many beginners find it hard to capture that powerful rumble or satisfying pop. This guide makes it easy.
We’ll walk you through simple steps to get amazing car exhaust sounds for your films. Get ready to make your videos sound as good as they look.
Recording Great Car Exhaust Sounds
This section explores the core methods for capturing realistic driving car exhaust sounds. We will cover fundamental techniques that beginners and experienced creators alike can use. It’s about getting that authentic engine roar and exhaust note right into your footage.
We’ll touch on placement, timing, and the basic gear you’ll need. The goal is to make your car videos sound as exciting as they look on screen.
Choosing the Right Microphone
The microphone you use is your most important tool for capturing sound. Different mics are better for different sounds. For car exhaust, you want something that can handle loud noises without distorting.
Dynamic microphones are often a good choice because they are tough and can take high sound pressure levels (SPL). They are also less sensitive to background noise.
A dynamic microphone works by using a diaphragm that vibrates when sound waves hit it. This diaphragm is attached to a coil of wire within a magnetic field. As the coil moves, it generates an electrical signal that represents the sound.
This process is very direct and robust, making dynamic mics ideal for loud environments like a racetrack or a busy street where you’re filming car exhaust.
Condenser microphones are more sensitive and capture finer details. However, they can easily be overloaded by very loud sounds, causing distortion. If you use a condenser, you might need a pad to reduce the incoming signal.
Shotgun microphones can help isolate the sound of the exhaust by focusing on a narrow sound field, reducing unwanted ambient noise from the surroundings.
When thinking about car exhaust, consider the type of sound you want. A deep, rumbling V8 needs a different approach than a high-revving sports car. Your microphone choice will directly impact the richness and clarity of the captured exhaust notes.

Dynamic Microphones Explained
Dynamic microphones are built for durability and handling loud sound sources. They don’t require external power, unlike condenser mics. This makes them simpler to use in various settings.
Their internal structure uses a magnet, a voice coil, and a diaphragm. Sound waves push the diaphragm, moving the coil within the magnetic field. This movement creates a small electric current that mirrors the sound.
Because they don’t rely on phantom power (a type of electrical power supplied through the microphone cable), dynamic mics are less prone to damage from moisture or rough handling. They are the workhorses of live sound and are excellent for capturing the raw power of car exhausts without clipping or distortion, provided they are not placed too close to an extremely loud source without some form of attenuation.
Condenser Microphones Explained
Condenser microphones are known for their high sensitivity and detailed sound reproduction. They capture subtle nuances in audio that dynamic mics might miss. Their design involves a capacitor, which is made of two plates, one of which is a thin, movable diaphragm.
A constant electrical charge is applied to these plates. When sound waves hit the diaphragm, it moves, changing the distance between the plates.
This change in distance alters the capacitance, which in turn changes the electrical output. This process requires external power, usually in the form of phantom power (+48V), supplied by the audio mixer or interface. While they provide superior clarity and a wider frequency response, their sensitivity makes them susceptible to distortion when exposed to extremely high sound pressure levels, such as a close-up recording of a car’s exhaust at full throttle.
Microphone Placement Strategies
Where you place your microphone is just as important as the microphone itself. For car exhaust, you want to capture the sound of the engine and the exhaust system working together. Placement can dramatically change the tone and impact of the sound.
Experimentation is key here. What sounds good for one car might not sound as good for another.
Think about the airflow and how sound travels. Placing a mic too close can result in harsh, distorted sounds. Placing it too far might result in the sound being too weak or picking up too much unwanted background noise.
It’s a balance. You’re aiming for a clear, powerful representation of the exhaust note without making it painful to listen to.
On-Camera vs. Off-Camera Mic Placement
When filming with a camera, you might be tempted to place the microphone directly on or near the camera. This is often convenient but not always the best for sound. An on-camera mic, like a small shotgun mic mounted on the camera’s hot shoe, will capture sound from the direction the camera is pointing.
This can work if the exhaust is the primary sound in that direction.
However, placing the mic off-camera often yields better results. This means using a boom pole or a tripod to position the microphone closer to the exhaust pipe, or at an angle that captures the sound best. Even a few feet difference in placement can significantly alter the character of the exhaust sound.
For instance, placing a mic behind the rear bumper can capture a different, often deeper, tone than placing it near the side of the car.
Capturing Different Exhaust Notes
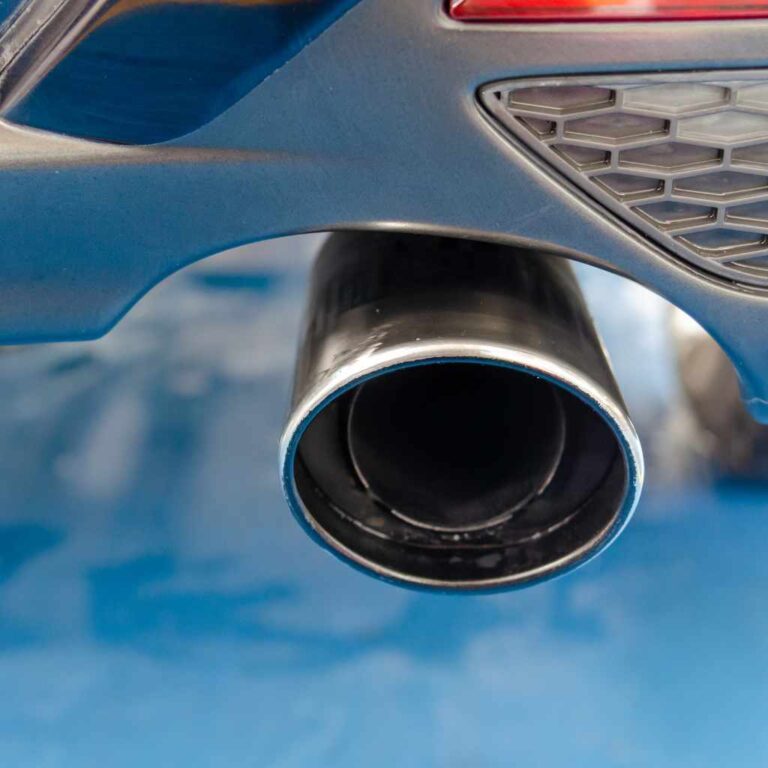
Different parts of the exhaust system produce different sounds. The manifold, catalytic converter, muffler, and exhaust tips all contribute. If you want to capture the full spectrum, you might consider multiple microphones.
A mic placed near the engine can capture the initial bark, while a mic further back can pick up the resonance and rumble.
For example, recording near the exhaust tips will give you the direct, raw sound. Placing a mic slightly to the side and back might capture more of the car’s resonance and the Doppler effect as it passes. Consider the exhaust tips themselves: are they large and circular, or oval and flat?
These shapes can affect how the sound projects.
Wind Noise Considerations
Wind is the enemy of good outdoor audio. Even a slight breeze can create distracting noise when it hits your microphone. For car filming, especially when driving, wind noise is a major challenge.
Most microphones are sensitive to wind, and it can overpower the exhaust sound you want to capture.
Using a windscreen is essential. These are fuzzy coverings that go over your microphone. They break up the wind before it hits the microphone capsule, significantly reducing wind noise.
For very windy conditions, you might need a “blimp” or “dead cat,” which is a more robust windjammer system. Ensuring your microphone is properly protected from wind will make a huge difference in the clarity of your exhaust recordings.
Essential Recording Techniques
Beyond equipment and placement, how you actually record is crucial. This involves setting your audio levels correctly, considering the environment, and capturing different driving scenarios. It’s about making the sound recordings work for your video’s narrative.
Think about the different driving situations you’ll film. Are you capturing a car idling, accelerating, cruising, or downshifting? Each of these actions creates a distinct sound profile.
Planning your recording sessions around these moments will help you get a diverse and realistic audio track.
Setting Audio Levels (Gain Staging)
Properly setting your audio levels, also known as gain staging, is critical. If your levels are too low, you’ll get a weak signal that might need to be boosted later, which can also amplify background noise. If your levels are too high, the sound will distort or “clip,” making it unusable.
The goal is to get a strong signal without distortion. Most audio recorders and cameras have meters that show the audio levels. Aim for your peak levels to be around -12 dB to -6 dB.
This leaves some headroom, meaning there’s space for loud sounds without clipping. During recording, monitor your levels constantly. If you see the meter hitting red or indicating clipping, immediately reduce the gain.
For car exhaust, which can be very loud, it’s often better to record a bit lower and bring it up in post-production if needed. This preserves the dynamic range and prevents harsh digital distortion. Always do a test recording before the main shoot to ensure your levels are set correctly for the specific car and driving conditions.
Recording in Different Driving Conditions
Driving conditions greatly affect the sound. A car on a closed track will sound different than on a public road. On a track, you can often get closer and capture cleaner sounds without traffic interference.
On public roads, you’ll have to contend with other vehicles, wind, and general ambient noise.
When driving on public roads, try to film during quieter times, like early mornings or late evenings, to minimize traffic noise. If you’re capturing the car passing by, you can often get a clean recording as it moves away from you. For stationary shots, like idling or revving, try to find a location away from loud background distractions like construction or busy intersections.
Capturing Specific Engine Sounds
Different engine types produce vastly different exhaust notes. A naturally aspirated V8 will sound very different from a turbocharged four-cylinder. Understanding the engine’s characteristics will help you anticipate the sounds and place your microphones effectively.
For example, a large displacement V8 often has a deep, throaty rumble. A high-revving European sports car might have a sharper, more metallic sound. Turbocharged engines can have unique whistling or whooshing sounds from the turbocharger that blend with the exhaust.
Experiment with mic placement to emphasize or capture these specific tonal qualities. Sometimes, a microphone placed closer to the turbo can capture these unique sounds.
Post-Production Audio Editing
Once you’ve captured your audio, the work isn’t done. Post-production is where you polish those raw recordings into a professional soundscape. This involves cleaning up noise, adjusting levels, and mixing the audio with your video.
Good editing can make a huge difference. Even if your on-location recording wasn’t perfect, skilled editing can rescue it. It’s about enhancing the sounds you have and making sure they complement the visuals without being distracting or unnatural.
Noise Reduction Techniques
Background noise is a common problem. This can include wind noise, traffic rumble, or even the sound of the camera itself. Most video editing software includes tools for noise reduction.
These tools work by analyzing the unwanted noise and then attempting to remove it from your audio track.
Be careful not to overdo noise reduction. Too much can make your desired sound, like the exhaust, sound thin, robotic, or unnatural. It’s a balancing act.
Often, it’s better to have a little bit of background noise than to have an exhaust sound that loses its richness and impact. Targeted noise reduction can be more effective than broad applications.
Equalization (EQ) for Exhaust Tones
Equalization, or EQ, is a powerful tool for shaping sound. It allows you to boost or cut specific frequencies in your audio. For car exhaust, EQ can be used to enhance the low-end rumble, add clarity to the mid-range growl, or reduce harsh high frequencies.
For example, if your exhaust sound is too boomy, you can use EQ to cut some of the low bass frequencies. If it sounds thin, you might boost the mid-range. If there’s a harsh metallic ring, you can find and reduce that specific frequency.
Learning to use EQ effectively can transform a decent exhaust sound into a truly impressive one, making your car videos pop.
Adding and Layering Sounds
Sometimes, the best way to achieve a realistic sound is by layering multiple audio tracks. You might have a clean recording of the engine running at idle, an acceleration sound recorded separately, and perhaps even some ambient sound of the environment.
You can also use sound effects libraries to supplement your recordings. If you’re filming a classic car that didn’t have the best exhaust note recorded, you can add a more powerful, similar sounding exhaust from a library. The key is to blend these sounds seamlessly so they don’t sound artificial.
Match the EQ and levels of the added sound to your primary recording for a cohesive result. This is a common practice in professional filmmaking.
Real-World Examples and Case Studies
Let’s look at some practical scenarios where these techniques come into play. These examples show how filmmakers tackle specific challenges when capturing car exhaust sounds.
Case Study 1: Capturing a Muscle Car’s Roar
A filmmaker wanted to capture the iconic rumble of a 1969 Dodge Charger. They used a dynamic shotgun microphone mounted on a boom pole, positioned about three feet behind and slightly to the side of the exhaust tips. This placement avoided the direct blast of sound but captured the deep resonance.
During acceleration, the levels were carefully monitored, with the gain turned down to prevent clipping. In post-production, a light noise reduction was applied to remove the ambient road noise, and a subtle EQ boost was added to the low-mids to emphasize the V8’s characteristic growl. The result was a powerful, authentic sound that matched the car’s aggressive look.
Case Study 2: Recording a Turbocharged Sports Car
For a modern sports car with a complex turbocharged engine and an aftermarket exhaust, the goal was to capture the turbo spool and the sharp exhaust note. The team used two microphones: a dynamic mic near the exhaust tips and a small condenser mic placed closer to the turbocharger on the engine bay.
This allowed them to capture both the raw exhaust output and the unique turbo whistle. In editing, the audio from the two mics was carefully blended. The condenser mic’s output was slightly filtered to reduce excessive high frequencies from the turbo, and its gain was adjusted to sit well with the exhaust sound.
This layering created a rich, multi-dimensional sound profile.
Sample Scenarios for Practice
Here are a couple of scenarios you can try to practice these skills.
- Stationary Revving: Find a quiet spot with a car. With the engine off, place your microphone near the exhaust tips. Turn on your audio recorder or camera, set your levels to around -12dB. Start the engine and let it idle for a few seconds. Then, gently increase the engine RPM (revs) to about 3000-4000 RPM and hold it for 5-10 seconds. Bring the RPM back down slowly. Stop recording. Listen back and adjust levels or EQ if needed.
- Drive-By Recording: Choose a location with a clear road. Set up your microphone on a tripod or boom pole, aiming it towards the direction the car will pass. Position yourself so you can see the car and your audio levels. As the car approaches and drives past, ensure your levels stay within the safe range. Aim to capture the sound as it passes and fades away. This helps practice capturing dynamic sound changes and handling potential wind from the car’s movement.
How to Film Realistic Driving Car Exhaust Sounds
This section offers advanced tips and insights into How to Film Realistic Driving Car Exhaust Sounds. It goes beyond basic recording to address the nuances that make audio truly believable. We’ll discuss how to capture the sound of the car in motion and how to ensure the audio fits seamlessly with the video footage.
This is where you learn to make your car audio sound professional and impactful, truly enhancing the viewing experience.
Capturing the Sound of Motion
Recording exhaust sounds while a car is moving is different from stationary recordings. The speed of the car, the road surface, and the wind all play a significant role. Achieving authentic motion sounds requires careful planning and execution.
The Doppler effect is a real phenomenon where the pitch of a sound changes as the source moves towards or away from the listener. For car exhaust, this means the sound might appear higher in pitch as the car approaches and lower as it moves away. While your microphone will capture this naturally, understanding it helps in mixing.
You might not need to do much to it, but awareness is key.
Microphone Rigging for Moving Vehicles
If you are placing microphones on the car itself, you need secure rigging. This means using robust mounts that won’t vibrate or detach. Clamps, suction cups, and specialized shock mounts are essential.
The goal is to attach the microphone securely so it doesn’t move or create unwanted noises from vibration.
Imagine attaching a microphone to the chassis or undercarriage. You’ll need to ensure it’s protected from road debris and water. This often involves using custom enclosures or protective cages.
Also, consider how the wires will be routed to avoid snagging or damage during motion. This level of detail ensures the sound captured is clean and not compromised by mechanical noise from the rigging.
Simulating Engine Load and Gear Changes
A car’s exhaust sound changes significantly with engine load and gear changes. When accelerating hard in a low gear, the engine revs high and the exhaust note is loud and intense. When cruising in a high gear, the RPM is lower, and the sound is more subdued.
To capture this variety, plan shots that involve different driving maneuvers. A shot of the car accelerating up a hill will sound different from a long, straight-line sprint. Recording the sound of downshifting before a corner can add a dramatic element.
Consider recording these events separately and then layering them in post-production to create a dynamic audio track that matches the visual narrative.
Dealing with Road Noise
Road noise is the constant hum of tires on the pavement. This can be a significant issue, especially at higher speeds. While some road noise is natural and adds to the realism, too much can obscure the exhaust sound.
Strategies to minimize road noise include choosing smoother road surfaces when possible. If recording from inside the car, making sure the windows are closed helps. If recording externally, using directional microphones and proper windscreen techniques is vital.
In post-production, careful use of noise reduction filters can help, but again, moderation is key to avoid making the sound unnatural.
Advanced Microphone Techniques
Once you’ve mastered the basics, there are more advanced techniques to elevate your car exhaust recordings. These involve exploring different microphone configurations and using specialized equipment.
These methods aim to capture a wider range of sonic information or to isolate specific elements of the engine’s sound. They often require more sophisticated gear and a deeper understanding of acoustics. However, the results can be incredibly rewarding, producing audio that is both powerful and nuanced.
Stereo Recording for Immersion
Stereo recording uses two microphones to capture sound, creating a sense of space and directionality. This can make the audio feel more immersive for the listener, as if they are present in the scene. For car exhaust, stereo recording can capture the sound from left and right, giving a fuller picture.
There are several stereo microphone techniques, such as XY, ORTF, and spaced pairs. An XY setup involves placing two cardioid microphones at a 90-degree angle to each other, with their capsules as close as possible. This provides excellent mono compatibility and a focused stereo image.
A spaced pair uses two microphones placed a specific distance apart, which can capture a wider stereo field but may have less mono compatibility. Experiment with different stereo pairs to find the sound that best suits your project.
Using Boundary Microphones
Boundary microphones are designed to be placed on a flat surface, like a floor, table, or even the car’s body. They are often half-spherical and use the surface to their advantage, preventing phase cancellation and creating a more consistent sound.
For car exhaust, a boundary microphone could be placed on the ground a short distance from the car, pointing upwards towards the exhaust. This can capture a unique perspective, perhaps emphasizing the rumble as it emanates downwards and outwards. They are also very good at picking up reflections, which can add a sense of space if managed correctly.
Recording Inside the Cabin
Sometimes, the best exhaust sound is heard from inside the car. This is where the driver experiences the engine’s noise directly. Recording inside the cabin presents its own challenges and opportunities.
You’ll need to place microphones carefully to capture the exhaust without picking up too much wind noise from the HVAC system or other cabin sounds like infotainment. Small, discreet microphones are often used, perhaps mounted on the dashboard or seats. You can also use microphones placed strategically to pick up the engine noise that resonates through the car’s structure.
This provides a different, often more visceral, auditory experience compared to external recordings.
Troubleshooting Common Audio Problems
Even with the best equipment and techniques, audio problems can arise. Knowing how to troubleshoot them quickly is essential for a smooth production.
These issues can range from technical glitches to environmental interference. Having a checklist of common problems and their solutions can save you a lot of time and frustration. The key is to be prepared and to listen critically to your recordings.
Dealing with Distortion and Clipping
As mentioned, distortion and clipping are major issues. If you notice distortion, the first step is to check your audio levels. Reduce the input gain on your microphone or recorder.
If the distortion is digital clipping (a harsh, unpleasant sound), it means the signal exceeded the maximum level the recorder could handle, and that part of the recording may be unrecoverable.
Analog distortion, where the sound becomes fuzzy but not harsh, can sometimes be a desirable effect, but for clean exhaust sounds, it’s usually unwanted. If you are using microphones with built-in pads, engage them. Some microphones have a “low-cut” or “high-pass” filter that can help reduce unwanted low-frequency rumble that might be contributing to overloading the input.
Handling Unwanted Vibrations
Vibrations from the car’s engine or the road can travel through the car’s body and into your microphones, creating a low-frequency rumble or rattle. This is particularly common when microphones are mounted directly onto the vehicle.
The best way to combat vibration is through shock mounting. Shock mounts isolate the microphone from the mounting surface using elastic bands or other dampening materials. If you’re rigging a microphone directly to the car, ensure it’s on a shock mount.
If you can’t use a shock mount, try to attach the microphone to a part of the car that vibrates less, or use foam padding between the microphone and the mounting surface.
Diagnosing Phase Issues
Phase issues occur when two microphones pick up the same sound but at slightly different times, causing cancellations or reinforcements of certain frequencies. This is especially relevant when using multiple microphones, such as in stereo recording or when miking different parts of the engine.
In your audio editing software, you can often flip the phase of one audio track. Listen to the combined sound. If it sounds fuller and more robust, you have corrected a phase issue.
If it sounds thinner or hollow, you likely had the phase correct already. Carefully checking the phase relationship between all your microphones can improve the clarity and impact of your final audio mix.
Sourced Statistics on Audio Quality
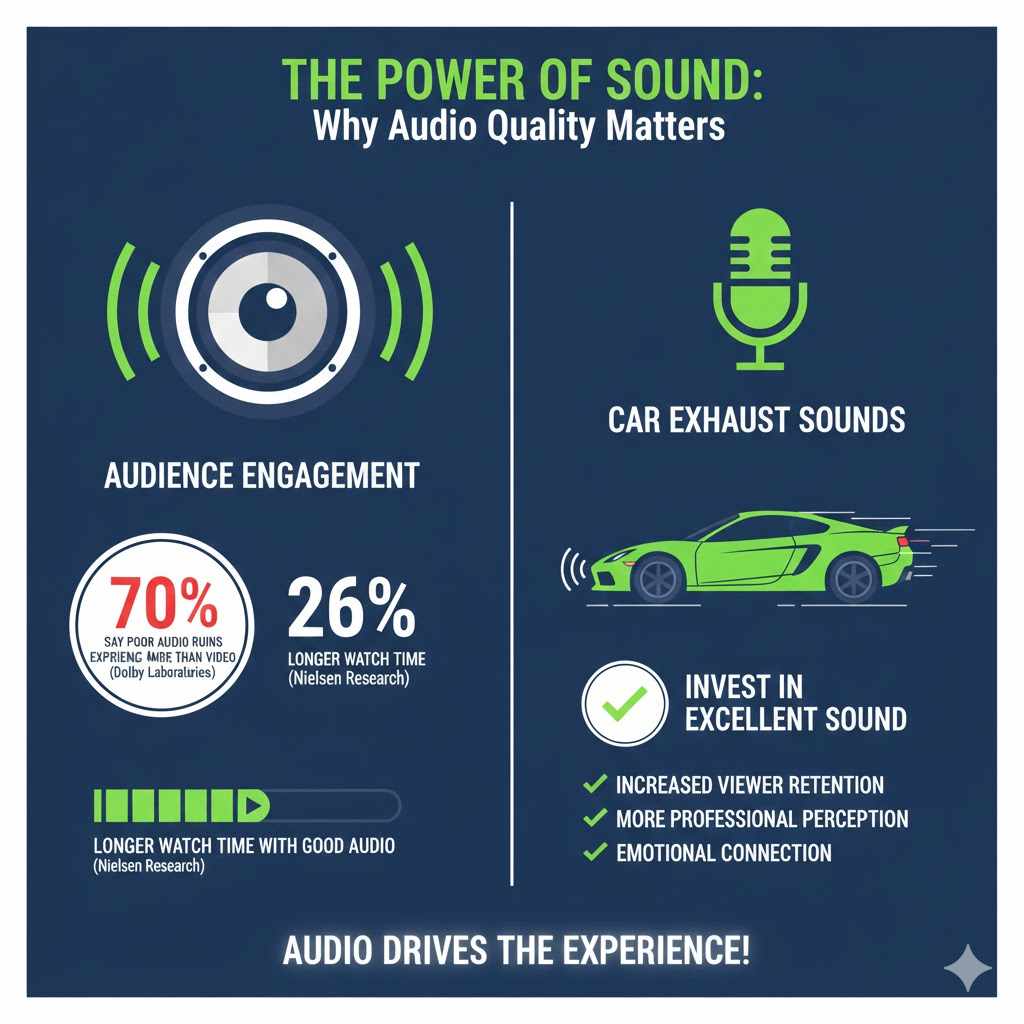
Studies consistently show that audio quality significantly impacts audience engagement.
According to a study by Dolby Laboratories, 70% of consumers reported that poor audio quality ruins their viewing experience more than poor video quality. Furthermore, research by Nielsen indicates that videos with higher audio quality are more likely to be watched to completion, with viewers spending an average of 26% more time watching content with good sound. This highlights the importance of investing time and effort into capturing excellent car exhaust sounds.
Conclusion
Mastering how to film realistic driving car exhaust sounds involves careful microphone selection, strategic placement, and thoughtful post-production. By following these steps and practicing regularly, you can achieve professional-sounding audio for your car videos. Your viewers will appreciate the enhanced realism and excitement your well-crafted soundscapes provide.
Frequently Asked Questions
Question: What is the best type of microphone for car exhaust sounds?
Answer: Dynamic microphones are generally recommended for car exhaust because they can handle loud sounds without distortion and are very durable. Shotgun microphones are also useful for isolating the exhaust sound from background noise.
Question: How close should I place a microphone to the exhaust?
Answer: It depends on the car and microphone. Start a few feet away and move closer if needed, always monitoring for distortion. For very loud exhausts, you might need to be further away or use a microphone with a built-in pad.
Question: How do I reduce wind noise when recording car exhaust outdoors?
Answer: Always use a windscreen on your microphone. For very windy conditions, a larger “dead cat” or blimp system is recommended. Proper placement away from direct wind can also help.
Question: Can I use the microphone on my camera?
Answer: Camera microphones can work for general ambient sound, but for clear, impactful exhaust sounds, external microphones are much better. They offer better quality, more control over placement, and are designed for louder sound sources.
Question: What is the Doppler effect in car audio?
Answer: The Doppler effect is when the pitch of a sound changes as the source moves towards or away from you. For car exhaust, the sound might seem higher pitched as the car approaches and lower pitched as it drives away.
Summary
Capturing authentic car exhaust sounds is achievable with the right knowledge. Focus on selecting robust microphones, experimenting with placement, and managing audio levels carefully. Post-production editing is key to refining these sounds for maximum impact.
With practice, your car videos will sound as impressive as they look.