Exhaust Clamps and Connectors Guide for Leak-Free Joints
Choose exhaust clamps and connectors by joint condition first: in most repairs, a band clamp suits a straight, round slip-fit or lap joint; a U-bolt may be acceptable for a low-cost crush-fit repair; V-bands are a better choice when frequent removal and repeatable alignment matter; and flanges or welding are usually better when the pipe is damaged, misaligned, or exposed to high movement. Use the wrong method and you get leaks, pipe distortion, comebacks, and joints that will not reseal a second time. The matrix below gives the quick decision, and the rest of the guide shows how I measure, fit, and tighten joints in the shop so they stay sealed.
How exhaust clamps and connectors do different jobs


What an exhaust clamp actually secures
An exhaust clamp compresses pipe walls so a joint stays sealed and supported. In practice, that usually means securing a slip joint or a lap joint. The clamp does not change pipe size. It does not repair severe damage. It only works if the mating surfaces are round enough, thick enough, and clean enough to compress.
An exhaust system has pipe sections, often a front pipe, mid-pipe, tailpipe, and short connector stubs at the muffler or resonator. Those pipes carry combustion gases away from the engine or stove. On vehicles, the clamp’s whole job is to hold those sections together without a leak, buzz, or rattle.
Clamp sizing is based on pipe outside diameter, not inside diameter. That matches both common exhaust hardware catalog practice and what I see in the shop, because old clamps are often distorted and listed sizes can be nominal while the actual assembled joint at the clamp location measures differently. Walker installation guidance and general tubing practice both treat clamp fit as a function of the outside dimension where the clamp sits, not the shape of the old hardware.
What an exhaust connector changes or joins
An exhaust connector joins or adapts the pipe itself. In a slip-fit exhaust system, that can be a sleeve connector for end-to-end repair, a reducer for stepping down size, or an expander for stepping up size or recreating a slip fit on damaged pipe.
A sleeve connector is usually a separate tube section that bridges two pipe ends. A reducer decreases diameter. An expander increases diameter. All three are connection parts. None of them replace the need to think about alignment, insertion depth, or wall condition.
Aftermarket exhausts may use steel, aluminized steel, stainless steel, titanium, or carbon fiber. Stainless steel exhaust parts are common on performance and direct-fit systems, and the connector or clamp material should suit the metals being joined if you want a joint that still comes apart later.
Clamp versus connector: when you need one, both, or neither
A clamp alone works when one pipe already slips over or into the other and both sealing surfaces are sound. A connector plus clamp works when pipe ends need help meeting, matching size, or bridging a cut section. Neither is enough when the pipe is split, deeply pitted, crushed, or badly misaligned.
That sounds obvious, but it is where a lot of bad repairs start. I regularly see jobs where someone tries to save a split or ovalized pipe with a larger clamp and more torque. It may quiet down for a short drive, then come back with soot tracks, ticking at cold start, and a pipe end that is now more distorted than before.
How do I choose the right exhaust connection method?
Choose the method by joint type and pipe condition before thinking about clamp size. Slip joints usually want a band clamp, butt joints often need a sleeve connector, mismatched diameters need a reducer or expander, and damaged or high-movement sections often need welding, flanges, or replacement instead of any clamp.
Start with joint type: slip, lap, butt, reducer, or expander
A slip joint means one pipe slides into another. It needs enough overlap to seal and support the connection. I see this style on many replacement kits because it goes together on the car without welding.
A lap joint uses overlapping layers, often where one expanded end fits over a straight section. The clamp must compress both layers evenly. Measure where the clamp will sit, at the overlap, because the combined wall stack and any expansion change the outside diameter.
A butt joint is end-to-end. That is where an exhaust sleeve connector makes sense. The sleeve bridges both ends, and clamps or welds hold it. If the diameters are off, a plain sleeve will fight alignment and leak.
Reducers and expanders are for diameter transitions. The size change affects both sealing and hanger alignment, so the right adapter matters more than brute clamp force.
Check pipe condition before you pick hardware
Round, straight, solid pipe gives a clamp a chance. Ovalized pipe, rust pitting, thin wall, and split ends do not. Most clamp failures start there.
Ovalized pipe is common after old U-bolt clamps, impacts, or rough removal. A wide band clamp on an oval tube often leaves two leak paths. Thin-wall repair pipe can wrinkle before it seals. Rust pitting creates channels that no extra torque will fill. Mixed wall thickness can pull one side tight and leave the other side loose.
If the overlap is crushed or belled unevenly, cut back to sound material or use a different connection style. Do not expect hardware to fix bad geometry.
Factor in serviceability: temporary repair, long-term street use, or frequent teardown
Serviceability changes the choice. A U-bolt crush clamp may hold a budget repair, but it often makes later disassembly ugly. A wide stainless band clamp is better when the system may need to come apart again. V-bands or flanges are the better answer where repeated removal is expected.
Mixed stainless and aluminized systems need extra thought. Stainless hardware resists corrosion better on a stainless steel exhaust. On aluminized pipe, stainless clamps can outlast the tube itself, which helps durability but can leave the pipe as the weak point. Anti-seize on threads helps later service, especially where galling is possible.
When clamping is the wrong fix and cutting or welding makes more sense
Some failures are beyond clamp-on repair. Split pipe ends, severe pitting through the sealing area, badly crushed overlap sections, poor angular alignment, and unsupported joints near high movement are common examples.
A clamp is also the wrong fix when the pipe has been expanded too many times and lost wall support. If the tube can be squeezed by hand pressure around the joint area, sealing is doubtful. Cut back to stronger pipe, replace the section, add a flange, or weld it.
Connection-selection matrix
Best choice by condition, mismatch, and service need
| Joint or pipe condition | Diameter mismatch | Future serviceability need | Best hardware choice | Failure-mode note |
|---|---|---|---|---|
| Round slip joint, clean pipe, good overlap | None | May need later removal | Wide band exhaust clamp sized to measured OD at clamp location | Wrong size or short overlap can still leak at the insertion edge |
| Round lap joint with two solid layers | None | Normal street service | Lap-joint band clamp | Poor clamp position can pinch one edge and leave the other edge open |
| Budget repair on thick mild-steel pipe | None | Low priority on future removal | U-bolt exhaust clamp | Crushes pipe, distorts sealing area, often makes later disassembly harder |
| End-to-end cut repair, straight pipe ends | None | Prefer no welding | Exhaust sleeve connector plus clamps | Diameter match must be right or the sleeve will not seal evenly |
| One pipe smaller than the other | Step down needed | Street repair | Reducer connector plus clamps or welds | Stacking shims or overtightening a plain clamp usually leaks and misaligns |
| One pipe larger than the other, or a damaged slip end needs resizing | Step up needed | Street repair | Expander connector or properly re-expanded pipe end | Too much expansion thins the wall and weakens the seal area |
| Stainless system with frequent teardown | None or controlled | High | V-band or stainless flange connection | Band or U-bolt clamps may seize, mark pipe, or lose repeatable alignment |
| Ovalized pipe, rust pitting, thin wall, or split end | Any | Any | Cut back, replace section, weld, or add flange | Clamp-only repair usually leaks, loosens, or tears the weakened pipe further |
Quick picks for common scenarios
- Replacement kit slip joint with clean expanded end: band clamp.
- End-to-end patch after cutting out a bad section: sleeve connector and clamps.
- 2 different pipe sizes meeting at a repair: reducer or expander first, clamp second.
- Old crushed joint that must come apart again later: cut and rebuild rather than clamp over damage.
- Thin-wall stainless tube: avoid U-bolt clamps unless pipe distortion is acceptable.
How do you measure exhaust pipe diameter correctly?
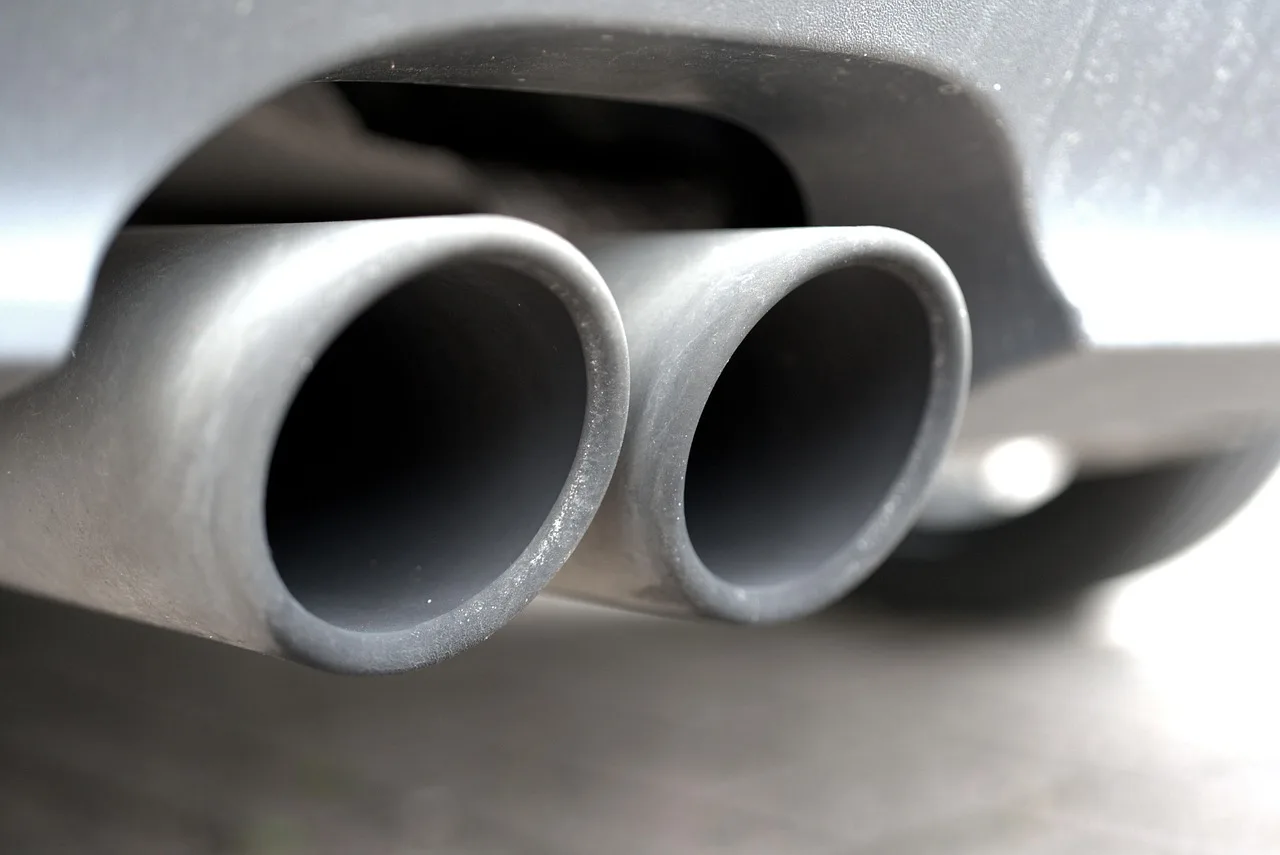
Measure the pipe outside diameter at or near the spot where the clamp or connector will sit. Use calipers if there is room, or wrap a flexible tape measure or string around the pipe, mark the circumference, then divide by pi. Measure the largest reading at the clamp location.
Measure outside diameter at the exact clamp location
Do not measure the old clamp. Measure the pipe itself. That is the only dimension that matters for fit. If the pipe end is expanded, rust-scaled, or slightly oval, the reading can change over a short distance.
On a slip joint, measure where the clamp band will actually press. On a lap joint, measure over the overlap, not beside it. On a butt repair using a sleeve, measure each pipe end separately and then the sleeve or adapter you plan to use.
Use calipers, flexible tape measure, or string and divide circumference by pi
Calipers are best when access is good and the pipe is round. Installed systems often do not give that kind of access. A flexible tape measure or string works well enough if used carefully.
- Clean loose rust and scale from the measurement area.
- Wrap the tape or string at the intended clamp location.
- Mark the circumference without pulling the string into dents.
- Lay it flat and divide that circumference by pi.
- Check more than one point if the pipe looks ovalized.
Common retail clamp ranges often run from 2.5 inch to 5 inch and beyond, but those buying ranges are only useful after the actual OD is confirmed on the assembled joint.
Why nominal pipe size and actual OD can differ
Nominal exhaust sizes and actual outside diameter are not always the same thing. Replacement pipe, expanded ends, repair sleeves, and thin-wall tubing can all stray from the number stamped on a listing.
This catches buyers on direct-fit repairs. One side may be a nominal 3-inch section, but the expanded slip end may measure larger where the clamp sits. Size the clamp to that actual outside diameter, because clamp fit is based on the assembled outside dimension at the seal point.
Where to measure on slip joints and lap joints
For a slip joint, measure after test-fitting the pipes to the intended insertion depth. For a lap joint, measure over both layers at the overlap. If the overlap is uneven or crooked, fix that first. Measuring a bad overlap only helps order a clamp for a bad joint.
Practical exhaust clamp sizing chart by outside diameter
Use this quick chart as a buying and test-fit guide. Measure the assembled joint where the clamp will sit, then choose the clamp style made for that OD and joint type. In real repairs, overlap length matters almost as much as diameter; if the overlap is too short, the right-size clamp can still leak.
| Common nominal pipe size | What to measure for clamp sizing | Typical real-world example | Overlap note |
|---|---|---|---|
| 1.75 in | OD at clamp location on the assembled joint | Small car rear section or tailpipe repair | Aim for enough slip engagement that the clamp loads fully over both layers, not at the pipe edge |
| 2.00 in | OD on the slip or lap area, not the loose pipe end | Compact or midsize muffler connection | If only about 1 inch of overlap is available, a sleeve or cut-back repair is usually better |
| 2.25 in | OD over the overlap if one pipe is expanded | Common OE and aftermarket intermediate pipe size | I try to avoid sealing on a crooked expanded end; straighten it before measuring |
| 2.50 in | Actual OD where the band sits after test-fit | Common cat-back and light truck repair size | Good overlap matters because 2.5-inch joints love to leak at the insertion edge when fitment is shallow |
| 3.00 in | OD at the finished clamp position, often larger on expanded ends | Performance axle-back or truck exhaust connection | If the expanded end measures over nominal, buy to the measured assembled OD, not the advertised pipe size |
| 3.50 in and 4.00 in | OD with the system hanging neutrally on its mounts | Large truck, diesel, or performance applications | Large-diameter joints show misalignment fast; support the weight before final tightening or the clamp will chase a leak instead of sealing it |
Which clamp style fits your joint and pipe condition?
Band clamps fit straight, round joints that need even compression and possible later disassembly. U-bolt clamps fit low-cost repairs where crushing the pipe is acceptable. Stainless systems usually want corrosion-resistant band hardware. Ovalized, pitted, or thin-wall pipe changes the answer because clamp force stops sealing once the pipe deforms first.
Band clamps for even compression and later disassembly
Band clamps spread load over a wider area. That helps on slip joints and lap joints, especially on stainless steel exhaust parts or thinner aftermarket tubing. They also leave the pipe in better shape for future service.
For straight slip fits, a wide band clamp is usually the cleanest no-weld choice. For lap joints, a lap-style band clamp that matches the step in the joint tends to compress more evenly than a plain band trying to bridge two thicknesses.
U-bolt clamps for budget repairs and where pipe distortion is acceptable
U-bolt clamps are cheap and common. They work on heavy-gauge repair jobs where permanent pipe distortion is acceptable. They are less forgiving on thin wall, stainless, and any joint that may need to come apart later.
The downside is simple: they crush. That crushed shape can help a rough repair hold, but it can also make a future sleeve or replacement section much harder to fit. On an ovalized joint, they often make the shape worse instead of sealing it.
Choosing for stainless steel exhaust versus aluminized pipe
Stainless steel exhaust parts benefit from stainless or similarly corrosion-resistant hardware. Aluminized systems can use aluminized or plated clamps, but mixed-material repairs deserve a little planning.
If a stainless rear section is being joined to an older aluminized mid-pipe, expect the aluminized side to age out first. Use hardware that can come off later without destroying the newer part. Thread treatment helps. So does choosing a band clamp over a crush clamp when serviceability matters.
Why ovality, rust pitting, and thin wall change the answer
Ovality reduces contact area. Rust pitting creates leak channels. Thin wall buckles before it loads evenly. Those are geometry problems, not torque problems.
If the pipe is only slightly out of round, reforming the end may save it. If pits are deep enough to catch a pick across the seal area, clamp pressure alone is usually wishful thinking. If the wall is paper-thin from corrosion, a connector will often tear it during tightening.
When to use sleeve connectors, reducers, and expanders
Sleeve connectors for end-to-end repair sections
An exhaust sleeve connector joins two pipe ends in line. It is the usual answer for a butt repair after cutting out a bad section. Diameter match matters, because the sleeve must support both ends and still let the clamps load the joint evenly.
A sleeve repair is often cleaner than trying to force one damaged pipe into another. It also works where welding is not desired. If the pipe ends are jagged, thin, or far out of line, cut them square and support the system before clamping.
Reducers for stepping down pipe size without a leak path
A reducer decreases diameter. Use it when the downstream or upstream pipe is smaller and there is no proper slip fit. A good reducer keeps the transition centered so the joint seals and the exhaust hangs without side load.
Trying to collapse a larger pipe with clamp force until it matches a smaller pipe usually leaves wrinkles and gaps. That is a classic comeback repair.
Expanders for stepping up size or restoring a usable slip fit
An expander increases diameter. It can adapt a smaller pipe to a larger one, or restore a slight slip fit on a plain cut end. Expansion is useful, but it has limits because stretching a thin wall weakens the sealing area.
If the expanded end goes uneven or splits, stop there. That pipe is now a cut-back or replace item, not a clamp harder item.
Alignment and wall-thickness issues that affect sealing
Different wall thicknesses change how the joint reacts under clamp load. One side may collapse while the other barely moves. That is common when a thin repair tube meets an older OE-style section.
Mock the system up on the hangers before tightening anything. A connector that looks fine on the bench can pull sideways once the muffler and tailpipe weight are hanging on it. That side load opens leaks.
Why exhaust clamps leak and how to stop it
Wrong size, wrong position, or not enough overlap
Size errors are one of the first checks to make. A clamp sized too large cannot load the joint. A clamp sized too small may bottom out or distort the pipe before it seals.
Position matters too. On a slip joint, the clamp should load the overlapped section, not hang half on unsupported single wall. On a lap joint, it should straddle the overlap correctly so both layers compress.
Deformed pipe, rust scale, and pitting at the seal area
Leaks often trace back to surface condition. Rust scale flakes away after the first heat cycle and leaves a path. Pits stay open no matter how tight the clamp goes. Ovality leaves high spots and low spots.
Clean the surface. Deburr cut edges. Reform slight damage before final assembly. If the seal area is deeply pitted or thinned, cut back or replace that section.
Over-tightening, under-tightening, and uneven compression
Too little torque leaves the joint loose. Too much can warp the pipe, strip hardware, or crush one side of the connection. There is no single universal torque number worth printing here because hardware type and maker spec matter.
The right practice is to tighten to the hardware specification, then recheck after heat cycles. Alignment first. Clamp torque second. Leak check third. That order keeps you from chasing leaks caused by a stressed, crooked joint.
How to diagnose a clamp leak after installation
Look for soot marks first. They usually show the leak path. Check insertion depth next, then clamp position, then pipe shape. If the joint needed sealant to stop leaking, that is often a sign the metal fit was poor in the first place.
On a fresh install, a small leak may also come from a nearby flange or gasket, so isolate the source before replacing hardware that is not at fault.
One real-world example from my shop: a 2.5-inch slip joint on a rust-belt SUV kept leaking after two retightens. The clamp was technically the right size, but the old pipe had two deep grooves from a previous U-bolt. A band clamp could not bridge those channels. We cut back 2 inches to clean metal, added a sleeve repair, supported the rear section correctly, and the leak was gone. Another common one is a thin aftermarket stainless tail section hung under tension; the clamp gets blamed, but the real problem is the system is twisted on the hangers and trying to spring the joint open.
Can you connect exhaust pipes without welding?
Yes, many exhaust pipes can be connected without welding if the joint is round, supported, and matched to the right clamp or connector. Slip-fit systems, sleeve repairs, and direct-fit kits are common examples. No-weld repairs stop making sense when pipe damage, heat, or movement exceed what a clamped joint can tolerate.
Where clamp-on and sleeve repairs work well
They work well on replacement sections with proper slip joints, on straight cut repairs using a sleeve connector, and on systems designed around direct-fit assembly. That is realistic when the receiving pipes and hangers are still in good shape.
Limits of no-weld fixes on high-heat, high-movement sections
A pipe section between engine and silencer may use flexible metal industrial ducting. Areas near that movement, and near engine shake or unsupported weight, are harder on clamp-only repairs. High movement plus poor support loosens joints and frets the pipe walls.
If the repair sits near a flex section, a hanger is missing, or the pipes meet under tension, welding or a flange may be the better long-term fix.
Best practices for clamp-first installs that last
Use the right connector first, then the right clamp. Support the system so the joint sits neutral on the hangers. Avoid stacking random reducers, split sleeves, and oversized clamps in one repair area. I rarely see that kind of patchwork stay sealed for long.
How to install exhaust clamps and connectors so they seal
Dry-fit and align the system before tightening anything
Start with all hangers engaged and all parts loosely assembled. Check tip position, tunnel clearance, axle clearance, and body clearance. A joint tightened while the system is twisted will often leak once the rest of the exhaust is forced into place.
Set insertion depth or overlap, then place the clamp correctly
On a slip joint, mark the desired insertion depth before separating the parts. Reassemble to that mark. On a lap joint, make sure the overlap is even all the way around. Then place the clamp where it can compress the full sealing area.
Do not center a clamp over a gap or damaged edge and hope the band will bridge it. It will not.
Tighten to hardware spec and recheck after heat cycles
Tighten the fasteners evenly. Watch the joint as the clamp loads. If the pipe starts to buckle, stop and rethink the connection method. After a few heat cycles, recheck torque to the hardware specification because thermal cycling can relax a fresh assembly.
Final leak check, clearance check, and re-torque routine
Once the system is hot, inspect for soot, ticking, and fresh condensation trails at joints. Check that no part is touching the body or suspension. If the connection moved during heating, loosen it, realign it, and retighten rather than adding more torque to a stressed joint.
Frequently asked questions
What is an exhaust clamp and connector used for?
An exhaust clamp secures an existing joint by compressing the pipe walls together, usually on a slip joint or lap joint. An exhaust connector changes or bridges the pipes themselves, such as with a sleeve, reducer, or expander, and is often paired with clamps when welding is not desired.
How do I choose the right exhaust clamp size?
Choose clamp size from the pipe outside diameter at the exact clamp location, not from inside diameter, old hardware, or vehicle guesswork. Measure the assembled joint if one pipe slips over another. Common clamp buying ranges run from 2.5 inch to 5 inch, but measurement decides the actual choice.
What is the difference between a clamp and a sleeve connector?
A clamp applies compression to hold a joint that already exists. A sleeve connector is a separate piece of tubing that joins two pipe ends, usually on a butt repair. Many repairs use both: the sleeve creates the bridge, and the clamps load each side to seal it.
Why does my exhaust clamp keep leaking?
Repeat leaks usually come from the wrong connection method, not loose bolts alone. Common causes are wrong clamp size, short overlap, clamp position off the sealing area, ovalized pipe, rust pitting, mixed wall thickness, or overtightening that deforms the tube before it seals.
Will an exhaust clamp work on rusty pipes?
Sometimes, but only if the rust is light and the pipe wall is still solid at the seal area. Heavy scale, deep pitting, split ends, or thin wall usually mean the clamp is the wrong fix. In those cases, cutting back, sleeving, welding, or replacing the section is the better repair.
Can you reuse gaskets with exhaust clamps?
Reuse depends on the joint style. Many clamp-only slip joints and lap joints do not use a gasket as the sealing element at all. Where a flange or sealing ring is present, damaged or heat-crushed gaskets should not be reused. If the gasket face is compromised, replace it.
Is a band clamp better than a U-bolt clamp?
Usually yes for sealing quality and future service, because a band clamp loads more evenly and distorts the pipe less. A U-bolt clamp is still useful on low-cost repairs where crushing the pipe is acceptable, but it is usually the worse choice for stainless tubing, thin wall, and joints you may need to disassemble later.
How much overlap do exhaust pipes need for a clamp to seal?
There is no single universal minimum that fits every pipe and clamp style, but the overlap must be long enough for the clamp to compress fully over supported material rather than at the edge of one pipe. In practice, if the joint only barely slips together, or the clamp lands partly on unsupported single wall, I treat that as a fitment problem first and not a torque problem.
Can I use exhaust paste or sealant with a clamp?
Sometimes as a minor helper on otherwise good-fitting joints, but it should not be the main fix for bad geometry, rust channels, or short overlap. If sealant is doing all the work, the metal fit is wrong and the repair is more likely to fail after heat cycles.
When should I weld or replace the section instead of clamping it?
Weld, flange, or replace the section when the pipe is split, badly ovalized, deeply pitted through the seal area, too thin to support clamp load, or located where movement and weight keep stressing the joint open. That is especially true near flex sections, missing hangers, and repeated comeback leaks.
Author
Daniel Harper, exhaust repair technician and editor — I have spent years fitting aftermarket exhausts, repairing rusted OE systems, and fixing leak comebacks caused by wrong-size clamps, poor overlap, and distorted pipe ends. This guide is based on that hands-on shop work first, then checked against manufacturer installation instructions and emissions-related guidance so the advice stays practical and defensible.
Sources
- U.S. Environmental Protection Agency, tampering and emissions-control guidance for exhaust-related vehicle components.
- Walker Exhaust, installation instructions and fitment guidance for exhaust clamps, pipes, and direct-fit components.
- DynoMax, technical installation guidance for band clamps, U-bolt clamps, and exhaust system alignment.
- Borchla, V-band and clamp installation guidance for serviceable performance exhaust connections.
- Engineering Toolbox, circumference-to-diameter calculation reference used when measuring round tubing by wrap measurement.