Does Autozone Replace Oxygen Sensors? An Essential Answer
While AutoZone does not replace oxygen sensors, they are an essential partner for the job. They sell the correct sensor for your car and offer a free Loan-A-Tool program so you can borrow the special socket needed for the replacement. They also provide free check engine light scans to confirm the issue.
Has that pesky check engine light popped up on your dashboard? It can be a frustrating sight. Often, the cause is a small but important part called an oxygen sensor. You might wonder if you can just drive to your local AutoZone and have them fix it. It’s a common question many car owners have.
The short answer is no, but don’t worry! This doesn’t mean you’re stuck. AutoZone provides all the tools and parts you need to do the job yourself. Replacing an oxygen sensor is one of the most rewarding and straightforward DIY repairs you can do. This guide will walk you through everything, step-by-step, making it easy and stress-free. Let’s get started!
What AutoZone Can Do to Help You
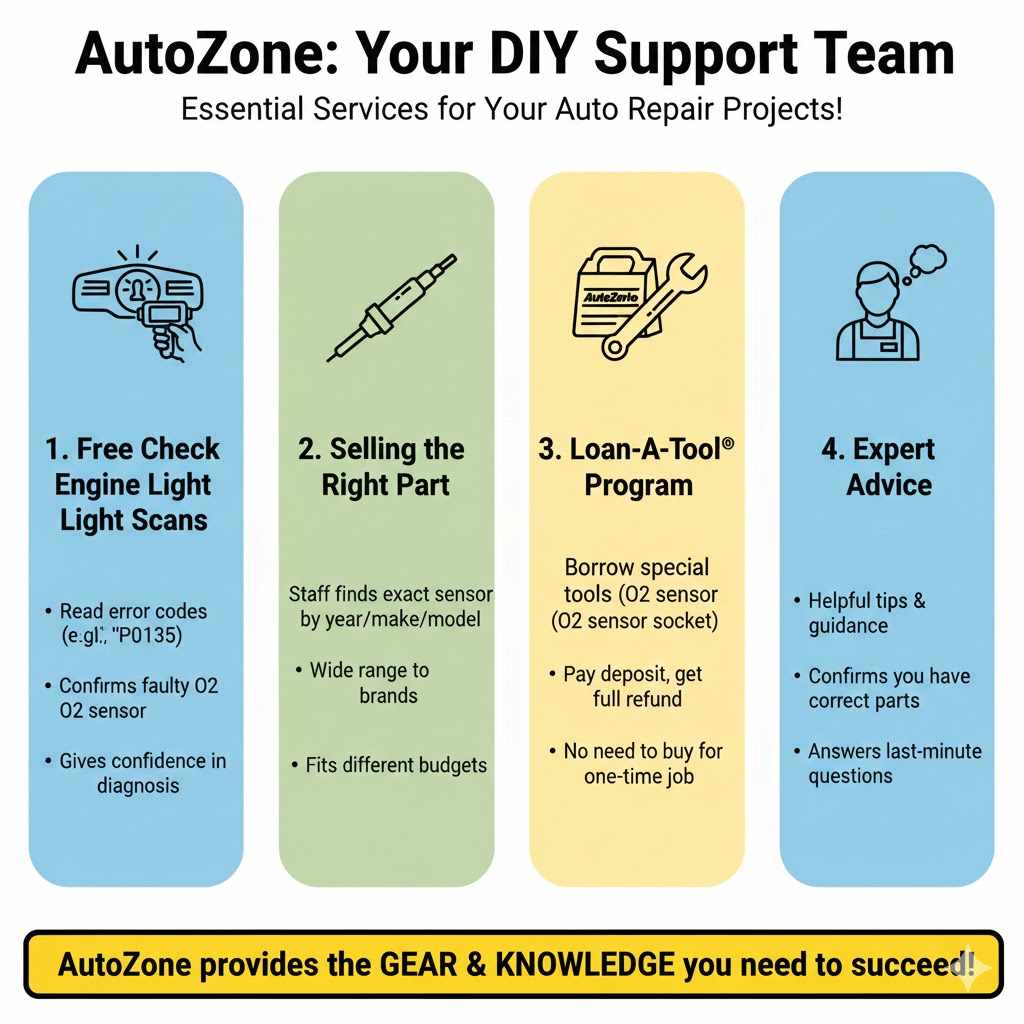
While AutoZone employees can’t get under your car and perform the repair, they offer a suite of services that make them an invaluable resource for any DIY auto project. Think of them as your support team, providing the gear and knowledge you need to succeed.
Here’s exactly how AutoZone can assist you with your oxygen sensor replacement:
- Free Check Engine Light Scans: Before you buy any parts, you need to know what’s wrong. An AutoZone team member can plug a diagnostic scanner into your car’s OBD-II port (usually under the steering wheel) for free. This tool reads the error codes stored in your car’s computer. A code like “P0135” might point directly to a faulty oxygen sensor, giving you confidence in your diagnosis.
- Selling the Right Part: Cars can have multiple oxygen sensors, and they aren’t all the same. AutoZone’s staff can use your vehicle’s information (year, make, model, and engine size) to find the exact sensor you need. They carry a wide range of brands to fit different budgets.
- Loan-A-Tool® Program: This is perhaps the most helpful service for this specific job. Replacing an oxygen sensor requires a special tool called an oxygen sensor socket. It has a slit down the side to fit over the sensor’s wire. Instead of buying this tool for a one-time job, you can borrow it from AutoZone. You simply pay a deposit, which is fully refunded when you return the tool.
- Expert Advice: The employees at AutoZone are often car enthusiasts or experienced mechanics. They can offer helpful tips, confirm you have the right parts, and answer last-minute questions before you start the repair.
Why You Should Replace Your Own Oxygen Sensor
The thought of working on your own car can be intimidating, especially if you’re new to it. However, replacing an oxygen sensor is a perfect entry-level project. It doesn’t require complex mechanical skills, and the feeling of accomplishment you get from fixing your own car is fantastic. Plus, there are some very practical benefits.
The Benefits of a DIY Replacement
- Save Significant Money: This is the biggest motivator for most people. A repair shop will charge you for the part and for labor. Labor costs can easily add $100 to $200 to the final bill. By doing it yourself, you only pay for the part, cutting your total cost by more than half.
- Build Confidence and Skills: Every successful DIY repair builds your confidence. You’ll learn more about how your car works and feel more empowered to handle future maintenance tasks. What starts with an oxygen sensor might lead to changing your own oil or replacing brake pads.
- It’s Faster Than You Think: Once you have the tools and parts, the actual replacement process often takes less than an hour. You don’t have to schedule an appointment, drop your car off, and wait for a mechanic. You can do it on your own time.
- Ensure Quality Work: When you do the job yourself, you know exactly what part was used and that it was installed correctly. You can take your time, clean the threads, and make sure everything is perfect.
Understanding the Oxygen Sensor: What It Is and Why It Fails
So, what exactly is this little part causing all the trouble? An oxygen sensor, or O2 sensor, is a key component of your vehicle’s emissions control system. It’s about the size of a spark plug and is screwed into your exhaust pipe.
Its job is to measure the amount of unburned oxygen in the exhaust gas. It sends this information to the engine’s computer (ECU), which then adjusts the air-fuel mixture. A proper air-fuel mixture is crucial for engine performance, fuel economy, and keeping emissions low, as required by regulations from the Environmental Protection Agency (EPA).
Common Signs of a Failing Oxygen Sensor
Over time, oxygen sensors can get contaminated by oil, coolant, or carbon buildup. When they start to fail, they send inaccurate information to the ECU, leading to several noticeable problems.
| Symptom | Why It Happens |
|---|---|
| Check Engine Light On | This is the most common sign. The car’s computer detects a problem with the sensor’s signal and triggers the warning light. |
| Poor Fuel Economy | An incorrect signal can cause the engine to use more fuel than necessary. You might notice you’re filling up your gas tank more often. |
| Rough Idling or Misfires | The imbalanced air-fuel mixture can cause the engine to run poorly, especially when stopped or at low speeds. |
| Failed Emissions Test | An O2 sensor is vital for controlling emissions. If it’s not working, your car will likely fail a state-mandated smog test. |
| Sluggish Performance | Your car might feel slow or hesitant when you accelerate because the engine isn’t getting the right fuel mixture to perform optimally. |
Tools and Parts You’ll Need for the Job
Before you start, it’s essential to gather everything you need. Having the right tools makes the job smoother, safer, and much less frustrating. You can get almost everything on this list from AutoZone.
Essential Shopping List:
- New Oxygen Sensor: The most important part! Make sure it’s the correct one for your car’s year, make, and model.
- Oxygen Sensor Socket: This is the specialized tool you can borrow from AutoZone’s Loan-A-Tool® program.
- Ratchet and Extension: You’ll need these to turn the O2 sensor socket.
- Penetrating Oil (like PB Blaster or WD-40): Exhaust parts get very hot and rusty, making them difficult to remove. This spray helps loosen things up.
- Safety Glasses: Always protect your eyes when working under a car. Rust and debris can fall.
- Mechanic’s Gloves: Protect your hands from grime and hot parts.
- Anti-Seize Compound: Many new sensors come with this pre-applied to the threads, but it’s good to have on hand. It prevents the new sensor from getting stuck in the future.
- A Jack and Jack Stands: You may need to safely lift your vehicle to get enough room to work underneath. Never work under a car supported only by a jack.
How to Replace an Oxygen Sensor: A Step-by-Step Guide
Ready to get started? Follow these steps carefully, and you’ll have that new sensor installed in no time. Remember to work slowly and prioritize safety.
Safety First and Foremost
Your safety is the top priority. Before you do anything else, make sure your car is parked on a flat, level surface and that the engine is completely cool. The exhaust system gets extremely hot and can cause severe burns. Put on your safety glasses and gloves.
Locate the Faulty Sensor
Your car has at least two oxygen sensors, and some V6 or V8 engines have four. The diagnostic code you got from the AutoZone scan should tell you which one to replace (e.g., “Bank 1, Sensor 1”). “Bank 1″ refers to the side of the engine with cylinder #1. Sensor 1” is the upstream sensor (before the catalytic converter), and “Sensor 2” is the downstream sensor (after the catalytic converter). If you’re unsure, consult a repair manual for your specific vehicle.
Disconnect the Battery
As a safety precaution, it’s always a good idea to disconnect the negative terminal of your car battery. This prevents any accidental electrical shorts while you’re working.
Unplug the Electrical Connector
Follow the wire from the oxygen sensor until you find its electrical connector. There’s usually a small plastic tab you’ll need to press to release it. Be gentle—these clips can become brittle over time. Don’t pull on the wires themselves.
Apply Penetrating Oil
This step is crucial. Spray a generous amount of penetrating oil where the base of the oxygen sensor screws into the exhaust pipe. Let it sit for at least 15-20 minutes (or even longer) to soak in and break down the rust. This will make removing the old sensor much, much easier.
Remove the Old Sensor
Slide the oxygen sensor socket over the sensor, making sure the wire fits through the slot. Attach your ratchet (with an extension, if needed) to the socket. Turn the ratchet counter-clockwise to loosen the sensor. It might take a good amount of force to break it free. Once it’s loose, you should be able to unscrew it the rest of the way by hand.
Prepare the New Sensor
Compare the new sensor to the old one to make sure they match. Most new sensors come with anti-seize compound already applied to the threads. If yours doesn’t, apply a small amount to the threads, being very careful not to get any on the sensor tip itself.
Install the New Sensor
Carefully thread the new sensor into the exhaust pipe by hand. This prevents cross-threading, which can damage the pipe. Once it’s hand-tight, use your ratchet and socket to snug it down. Don’t over-tighten it; follow the torque specifications in your repair manual if you have a torque wrench. A good rule of thumb is about a quarter-turn past hand-tight.
Reconnect Everything
Plug the electrical connector back in. You should hear a “click” to confirm it’s secure. Then, reconnect the negative terminal on your car battery.
Clear the Code and Test Drive
Start the car. The check engine light may turn off on its own after a few driving cycles. If you want to clear it immediately, you can use an OBD-II scanner. Take your car for a short test drive to make sure everything feels normal.
Common Mistakes to Avoid
While this is a beginner-friendly job, a few common mistakes can cause headaches. Keep these in mind to ensure your repair goes smoothly.
- Working on a Hot Engine: This is a serious safety risk. Always let the exhaust system cool down completely for at least a few hours.
- Stripping the Threads: If a sensor is very rusty and stuck, using too much force can damage the threads on the exhaust pipe. Be patient and use plenty of penetrating oil. If it won’t budge, it might be time to call a professional.
- Forgetting Anti-Seize: Without anti-seize, the new sensor can become permanently stuck, making future replacements nearly impossible.
- Over-Tightening the Sensor: This can damage the new sensor or the exhaust pipe threads. Snug is good enough.
- Getting Contaminants on the Sensor Tip: Grease, oil, or even anti-seize on the sensor tip can ruin it and cause it to fail prematurely. Handle it with care.
DIY vs. Hiring a Professional: Making the Right Choice
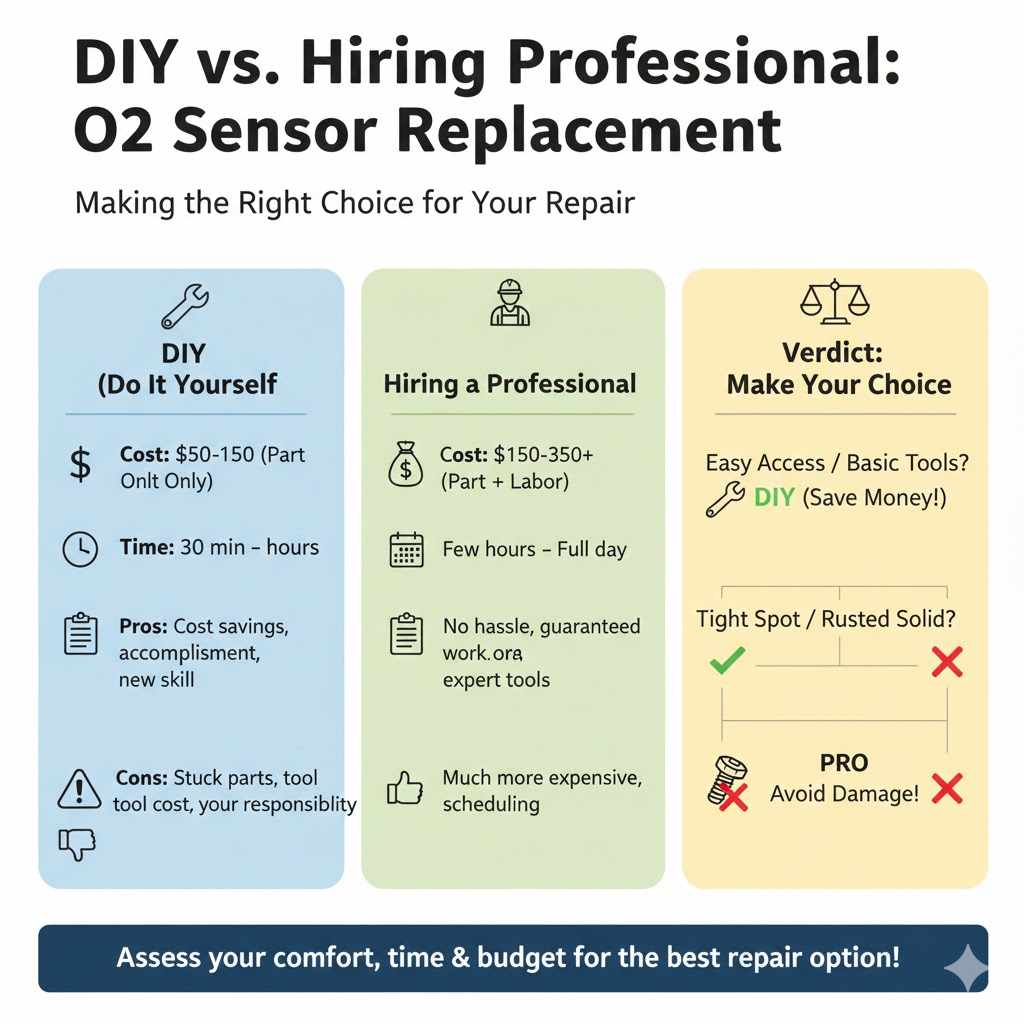
Deciding whether to tackle this job yourself or take it to a mechanic depends on your comfort level, time, and budget. Here’s a quick comparison to help you decide.
| Factor | DIY (Do It Yourself) | Hiring a Professional |
|---|---|---|
| Cost | $50 – $150 (cost of the part only) | $150 – $350+ (part cost + labor) |
| Time | 30 minutes to 2 hours, depending on experience and rust. | Could be a few hours to a full day, depending on the shop’s schedule. |
| Pros | Huge cost savings. Sense of accomplishment. Learn a new skill. | No hassle. Guaranteed work. They handle stuck or complicated parts. |
| Cons | Requires buying or borrowing tools. Risk of running into a stuck part. You’re responsible for the work. | Much more expensive. You have to work around their schedule. |
Ultimately, if your sensor is easily accessible and you have the basic tools, a DIY replacement is a fantastic way to save money. However, if the sensor is in a very tight spot or is completely seized with rust, a professional mechanic has the heavy-duty tools and experience to get it done without causing further damage.
Frequently Asked Questions (FAQ)
1. How much does it cost to replace an oxygen sensor?
If you do it yourself, you’ll only pay for the part, which typically costs between $50 and $150. If you take it to a mechanic, the total cost will likely be between $150 and $350, as this includes about one hour of labor charges plus the markup on the part.
2. Can I drive my car with a bad oxygen sensor?
Yes, you can usually drive your car, but it’s not recommended for a long period. A faulty sensor will cause poor fuel economy, increased emissions, and can potentially lead to more serious damage to your catalytic converter over time, which is a very expensive repair.
3. How many oxygen sensors does my car have?
Most modern cars with 4-cylinder engines have two oxygen sensors. Cars with V6 or V8 engines have four sensors—one upstream and one downstream for each bank of cylinders. Your owner’s manual or a quick online search can confirm the number for your specific vehicle.
4. What is the difference between an upstream and a downstream O2 sensor?
The upstream sensor (Sensor 1) is located before the catalytic converter and is the primary sensor for measuring the air-fuel ratio. The downstream sensor (Sensor 2) is located after the catalytic converter and its main job is to monitor the converter’s efficiency. The upstream sensor is the one that most commonly fails.
5. Will replacing the oxygen sensor definitely turn off my check engine light?
If the diagnostic code points directly to a faulty oxygen sensor, then yes, replacing it should resolve the issue and turn off the light. However, sometimes a bad O2 sensor is a symptom of another problem, like a vacuum leak or an issue with the fuel system. That’s why getting the code scanned first is so important.
6. How long does it take to replace an oxygen sensor?
For a beginner, plan for about one to two hours. This gives you plenty of time to work carefully, let the penetrating oil soak in, and double-check your work. An experienced mechanic can often do the job in under 30 minutes.
Conclusion: You’ve Got This!
So, does AutoZone replace oxygen sensors? No, they don’t perform the labor. But as we’ve seen, they are your best friend for the project. From diagnosing the problem with a free scan to providing the exact part and loaning you the special tools for free, they empower you to take control of your car’s health.
Replacing an oxygen sensor is a simple, cost-effective, and highly rewarding task that is well within the reach of a beginner. By following this guide, you can silence that check engine light, restore your car’s fuel efficiency, and gain invaluable confidence in your own abilities. Don’t be afraid to get your hands a little dirty—your car and your wallet will thank you for it.