Do Both Oxygen Sensors: Essential Guide
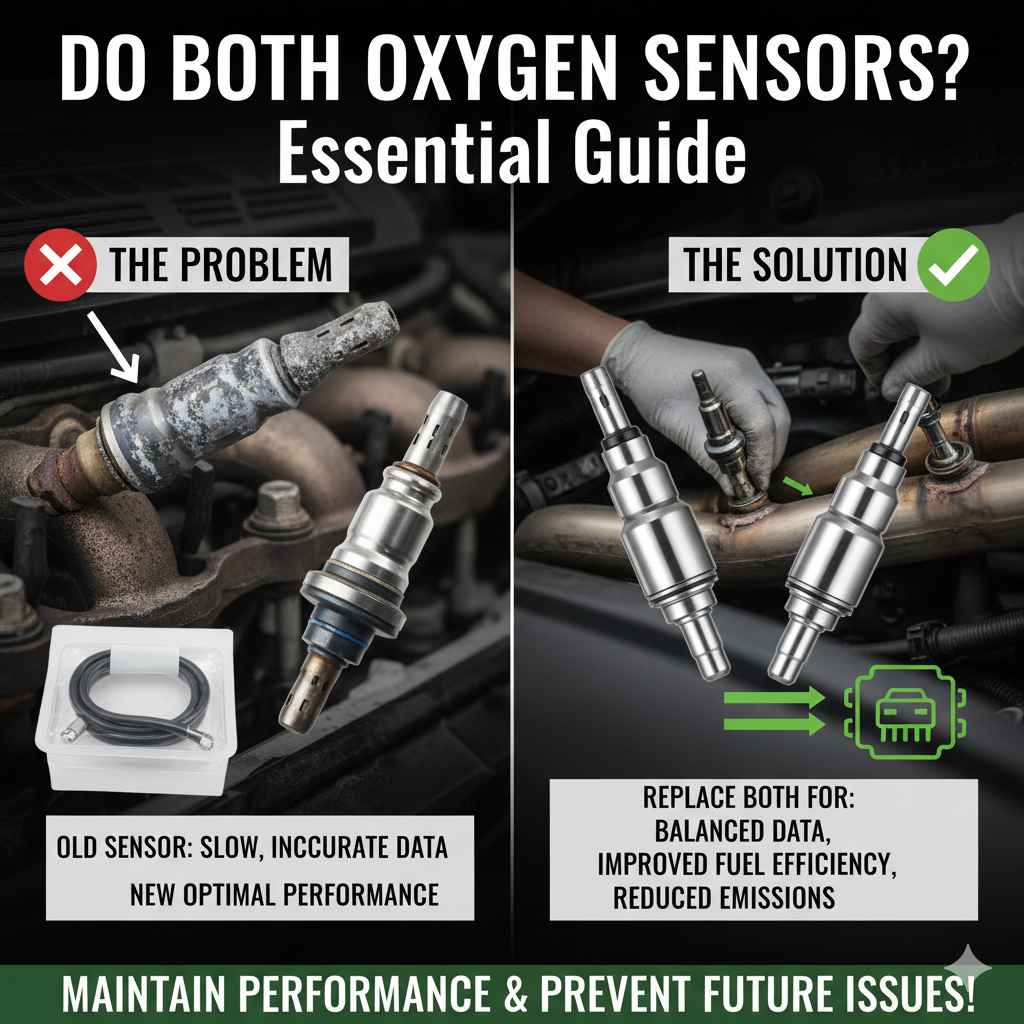
Yes, you absolutely should replace both oxygen sensors if one is failing. Replacing both at the same time is the most cost-effective and time-saving approach, preventing future issues and ensuring your car runs efficiently. It’s a smart preventive maintenance step that guarantees optimal performance.
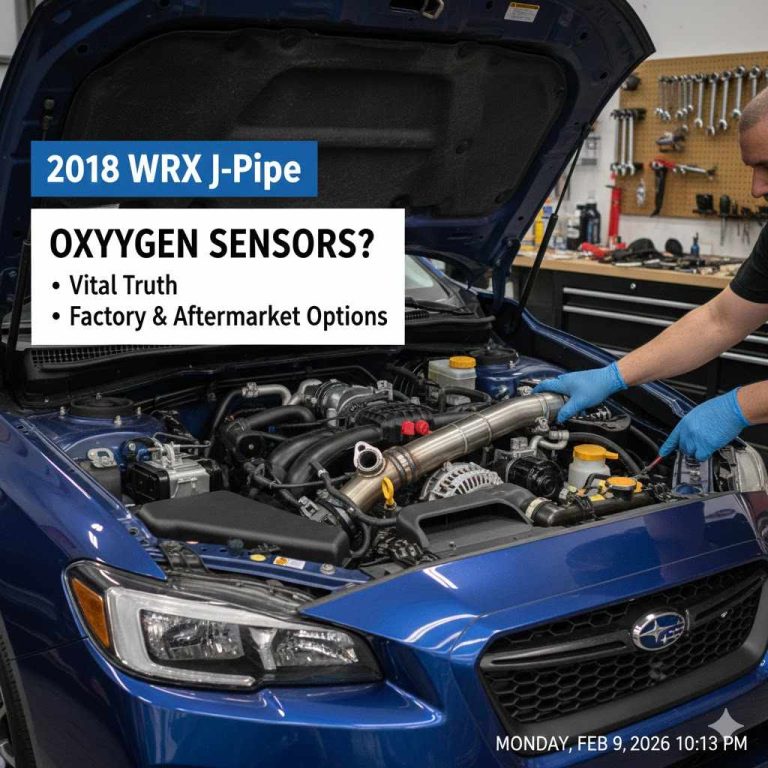
So, you’ve heard that little voice in your head, or maybe a warning light on your dashboard, suggesting your oxygen sensors might be acting up. It’s a common car concern, and frankly, it can be a bit confusing. What exactly is an oxygen sensor, and why would you need to replace them? If one goes bad, do you really need to deal with both?
As your friendly guide to all things exhaust, I’m here to clear the air and make this simple. I’ll walk you through exactly what these sensors do, why they matter for your car’s health and your wallet, and the best way to handle them—which often means replacing both. Stick around, and you’ll be confidently understanding and tackling this common car task in no time!
Understanding Your Car’s Oxygen Sensors
Think of oxygen sensors, often called O2 sensors, as tiny detectives for your car’s engine. They live in your exhaust system, right before and after the catalytic converter. Their main job? To measure the amount of unburned oxygen in your exhaust gases. This little piece of information is crucial for your car’s computer (the Engine Control Unit, or ECU) to figure out the optimal air-fuel mixture.
Why is this mixture so important? A perfect air-fuel ratio means your engine burns fuel cleanly and efficiently. Too much fuel means wasted gas and more pollution. Too little fuel means the engine can overheat and damage itself. Your O2 sensors provide the real-time data the ECU needs to make tiny adjustments to this mix, ensuring your car runs smoothly, saves you money on gas, and keeps those emissions in check. For more on how emission control systems work, you can check out resources from the Environmental Protection Agency (EPA).

The Two Sides of the Story: Bank 1 vs. Bank 2, Sensor 1 vs. Sensor 2
Most modern cars have at least two oxygen sensors, and often more, especially if they have V-shaped engines (like V6 or V8). To understand why you might replace them in pairs, let’s break down the common naming conventions:
- Bank 1 and Bank 2: On V-shaped engines, each “bank” refers to a side of the engine. Bank 1 is typically the side that contains cylinder #1. Bank 2 is the opposite side. If your car has an inline engine (like a 4-cylinder), you’ll typically only have Bank 1.
- Sensor 1 and Sensor 2: Within each bank, you’ll usually find at least two sensors.
- Sensor 1 (Upstream): This is the sensor located before the catalytic converter. It’s the primary sensor that tells the ECU about the air-fuel mixture going into the converter. It’s the most active and crucial for engine performance adjustments.
- Sensor 2 (Downstream): This sensor is located after the catalytic converter. Its main job is to monitor the catalytic converter’s efficiency, ensuring it’s doing its job of cleaning exhaust gases effectively.
So, a common setup for a V6 engine might be Bank 1, Sensor 1; Bank 1, Sensor 2; Bank 2, Sensor 1; and Bank 2, Sensor 2. When one sensor triggers a fault, it’s often Sensor 1 in one of the banks that’s the culprit, directly impacting how your engine runs.
Why You Should Replace Both Oxygen Sensors (Even if Only One is Bad)
This is the core of our discussion, and it’s a common question that can save you time and money in the long run. If your car’s computer flags an issue with one oxygen sensor, the advice is almost always to replace both sensors on that same bank, or even all of them. Here’s why it’s the smart move:
1. Age and Wear are Equalizers
Oxygen sensors are not designed to last the lifetime of a car. They are exposed to extreme heat, vibrations, and corrosive exhaust gases. Over time, the internal components of the sensor degrade. If one sensor has failed or is failing, it’s highly probable that its counterpart on the same bank, subjected to the same working conditions and age, is not far behind. Replacing both upfront is like getting ahead of a future problem.
2. Improved Performance and Efficiency
When O2 sensors go bad, they can send inaccurate readings to your engine’s computer. This results in an incorrect air-fuel mixture, leading to poor gas mileage, sluggish acceleration, and rough idling. Replacing both sensors ensures that both sides of the engine (if applicable) are getting accurate, consistent data, allowing the ECU to optimize fuel delivery and combustion for maximum efficiency and power. This is crucial for maintaining the performance your car was designed for.
3. Preventing Future Breakdowns and Costs
Imagine replacing just one sensor, only to have the other one fail a few months later. You’ll be paying for parts and labor again. By replacing both at once, you’re essentially getting two repairs done for the price of one labor event. This proactive approach minimizes the chances of unexpected breakdowns and additional repair bills down the line.
4. Cost-Effectiveness in the Long Run
While buying two sensors might seem more expensive initially, consider the cost of labor. Most of the work involved in replacing an O2 sensor is the same whether you’re doing one or two. The parts are often the most significant variable. Spreading the labor cost over two sensors at once is almost always more cost-effective than paying for labor twice. Furthermore, failing O2 sensors can sometimes lead to damage to your catalytic converter, which is a much more expensive repair. Getting the O2 sensors sorted can protect this vital component.
5. Simplifying Diagnosis
When a check engine light comes on and points to an O2 sensor, it might specify which one. However, other underlying issues could be affecting sensor readings. By replacing both, you ensure that you’re not chasing a ghost problem caused by an aged sensor, allowing you to more accurately diagnose any other potential issues if they arise.
Signs Your Oxygen Sensors Need Replacing
Your car is pretty good at telling you when something’s wrong, you just need to know what to listen for. Recognizing these signs can help you address a failing O2 sensor before it causes bigger problems:
- Check Engine Light: This is the most common indicator. The light may illuminate with specific O2 sensor codes (e.g., P0130-P0167 range in OBD-II systems). Reading these codes requires an OBD-II scanner.
- Reduced Fuel Economy: If you notice your gas mileage dropping significantly without any other changes, it could be your O2 sensors are not telling the ECU to lean out the fuel mixture properly.
- Rough Idling or Hesitation: An engine that idles unevenly, misfires, or hesitates during acceleration can be a sign of an incorrect air-fuel mixture caused by faulty O2 sensors.
- Failed Emissions Test: Because O2 sensors are critical for managing emissions, a failing sensor will likely cause your car to fail an emissions inspection.
- Smell of Rotten Eggs: This smell often indicates that the catalytic converter is not functioning correctly, which can be a direct result of bad O2 sensor readings causing the converter to overheat or get fouled.
- Black Smoke from the Exhaust: This signifies the engine is burning excessively rich (too much fuel). Your O2 sensors might be reporting incorrect oxygen levels, leading the ECU to inject too much fuel.
Essential Tools for the Job
Replacing an oxygen sensor is a task that many DIYers can handle. You don’t need a full mechanic’s arsenal, but having the right tools will make the job much easier and safer.
Basic Toolkit:
- Socket Set/Wrench Set: You’ll need sockets and wrenches that fit the nuts and bolts on your exhaust system and potentially the sensor itself.
- Oxygen Sensor Socket (O2 Socket): This is specialized tool with a slot cut into the side to allow it to fit over the sensor’s wire. It makes removing and installing the sensor much easier. They come in different sizes, so ensure you have the correct one for your vehicle. You can find these at any auto parts store.
- Penetrating Oil (like PB Blaster or WD-40): Exhaust components can be severely rusted. Spraying the old sensor and surrounding area with penetrating oil several hours or even a day before you plan to work on it can make removal much easier. Rust penetrating sprays are designed for this purpose.
- Torque Wrench: Crucial for installing new sensors to the correct tightness. Overtightening can damage the sensor, and undertightening can lead to exhaust leaks.
- Safety Glasses: Always protect your eyes from falling debris and rust.
- Gloves: Protect your hands from grease, grime, and potentially hot exhaust parts.
- Jack and Jack Stands: You’ll likely need to lift your car to access the sensors. NEVER work under a car supported only by a jack. Use sturdy jack stands. Ensure you understand proper jacking points for your vehicle.
- OBD-II Scanner: To read the diagnostic trouble codes (DTCs) that indicate which sensor is faulty and to clear the codes after replacement.
- Anti-Seize Compound: A small amount applied to the threads of the new sensor can make it easier to remove in the future (but check if the new sensor comes with it pre-applied or if the manufacturer recommends it).
Step-by-Step Guide: Replacing Your Oxygen Sensors
While the exact process can vary slightly depending on your car’s make and model, the general steps for replacing oxygen sensors are quite similar.
Preparation is Key
- Identify the Faulty Sensor: Use your OBD-II scanner to read the diagnostic codes. The code will usually specify which bank and sensor (e.g., Bank 1, Sensor 1) is reporting an issue.
- Locate the Sensor(s): With the codes in hand, locate the oxygen sensor(s) on your exhaust system. Sensor 1 (upstream) is usually closer to the engine, and Sensor 2 (downstream) is further back, near the catalytic converter. Remember, if one Sensor 1 is bad, you’ll want to replace the other Sensor 1 on the opposite bank as well.
- Gather Your Tools and Parts: Have all your tools, new oxygen sensors (ensure they are the correct part number for your vehicle!), anti-seize compound (if needed), and penetrating oil ready.
- Apply Penetrating Oil: Generously spray the old O2 sensor and its fitting with penetrating oil. Let it soak for at least 15-30 minutes, or even overnight if possible, to help break down rust and corrosion.
- Safety First: Ensure the exhaust system has had ample time to cool down completely before you start working on it. Hot exhaust components can cause severe burns.
The Removal and Installation Process
- Lift and Secure the Vehicle (If Necessary): If you need more clearance to access the sensors, use a jack to lift the vehicle and secure it properly with jack stands on a level surface.
- Disconnect the Electrical Connector: Carefully unplug the electrical connector from the old oxygen sensor. There’s usually a small tab you need to press. Avoid pulling on the wires themselves.
- Remove the Old Sensor:
- Use your specialized O2 sensor socket and a ratchet or breaker bar to loosen and remove the old sensor.
- Turn the socket counter-clockwise. If it’s very tight, you might need to apply steady, firm pressure. Sometimes, a little gentle tapping on the socket wrench might help.
- Once loose, unscrew the sensor by hand.
- Prepare the New Sensor:
- Inspect the new sensor. Many come with anti-seize compound pre-applied to the threads. If yours does not, apply a small amount of high-temperature anti-seize compound to the threads of the new sensor. Be careful NOT to get any on the sensor tip or windings, as this can damage the sensor.
- Ensure the new sensor is the correct type (e.g., narrow band or wide band).
- Install the New Sensor:
- Carefully thread the new sensor into the exhaust pipe by hand to avoid cross-threading.
- Once hand-tight, use your O2 sensor socket and ratchet to tighten it.
- Crucially, use a torque wrench to tighten the sensor to the manufacturer’s specified torque. This is vital to prevent leaks and damage. Refer to your vehicle’s service manual for the exact torque specification. A common spec is shown below, but always verify.
- Reconnect the Electrical Connector: Plug the electrical connector of the new sensor back in securely until it clicks.
- Repeat for Other Sensors: If you are replacing both sensors on a bank, or all four on a V-engine, repeat steps 2-8 for the other sensor(s).
- Lower the Vehicle: Carefully lower the vehicle if it was raised.
- Clear the Fault Codes: Use your OBD-II scanner to clear the diagnostic trouble codes from the car’s computer.
- Start the Engine and Test Drive: Start your car and let it idle for a few minutes. Then, take it for a test drive. The check engine light should stay off. If it doesn’t, or if the car runs poorly, recheck your work or consult a professional. It might take a few drive cycles for the car’s computer to be fully satisfied that the new sensors are working correctly and to turn off the light permanently.
Torque Specifications Example
Torque specifications are critical for O2 sensor installation. While these are general examples, always consult your vehicle’s specific service manual for the correct values.
| Component | Typical Torque Specification |
|---|---|
| Oxygen Sensor Threads | 15-30 lb-ft (20-40 Nm) |
| Oxygen Sensor Housing (if applicable for specific types) | Refer to service manual; generally snug plus a quarter turn or as specified. |
Note that some sensors have built-in gaskets or crush washers and others thread directly into the exhaust manifold or pipe. The torque value is to ensure a seal without deforming the sensor or stripping the threads.
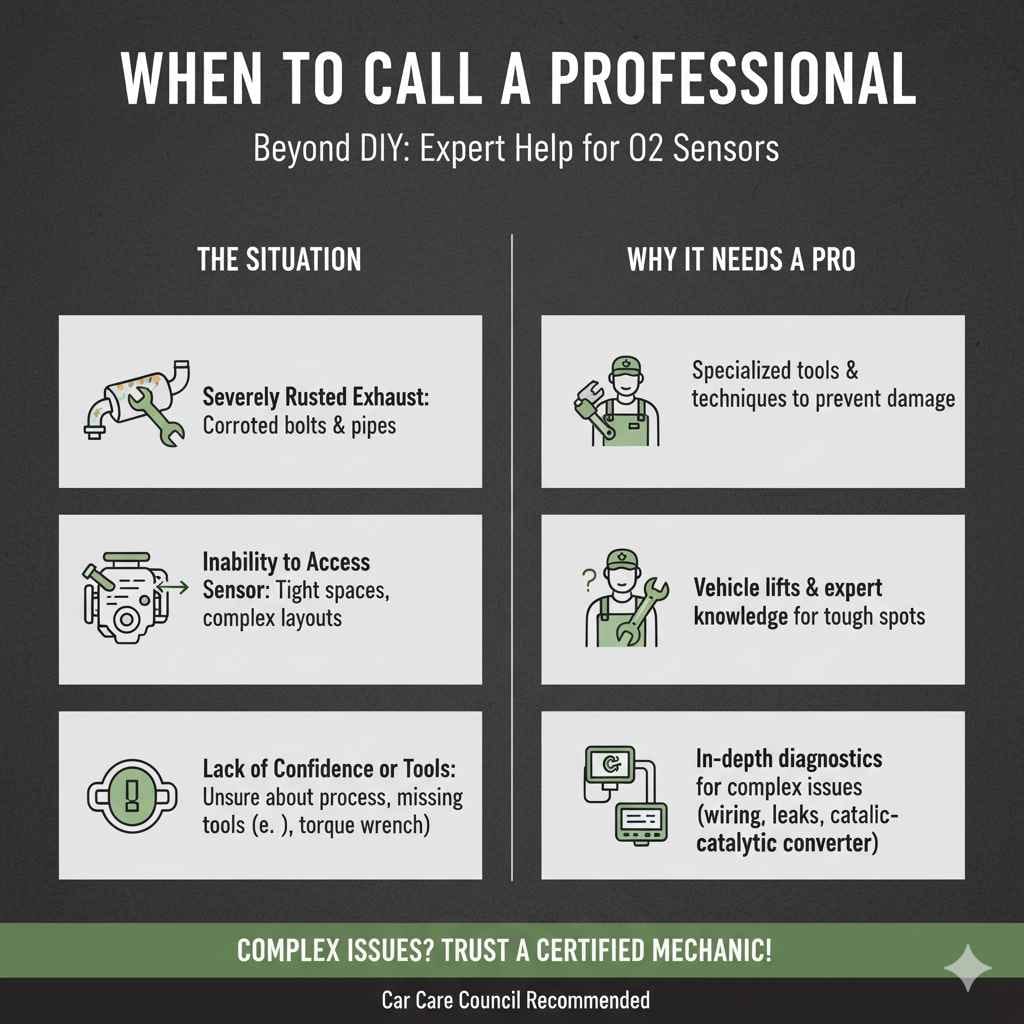
When to Call a Professional
While replacing oxygen sensors is a manageable DIY task for many, there are situations where it’s best to hand the job over to a certified mechanic:
- Severely Rusted Exhaust: If your exhaust system is so corroded that you fear damaging it trying to remove the old sensor, a professional has better tools and techniques to handle it.
- Inability to Access Sensor: Some vehicles have exhaust components or engine layouts that make O2 sensor access extremely difficult or impossible without specialized lifts or tools.
- Lack of Confidence or Tools: If you feel uncomfortable with any part of the process, or if you don’t have the necessary tools (especially a torque wrench), it’s safer and often more reliable to let a pro do it.
- Persistent Problems: If you replace the sensors and the check engine light persists or the car still runs poorly, there might be a more complex issue at play, like wiring problems, exhaust leaks, or even issues with the catalytic converter itself. A mechanic can perform more in-depth diagnostics.
For a deeper dive into exhaust system maintenance and common issues, resources like those from the Car Care Council offer valuable insights for car owners.
Frequently Asked Questions (FAQ)
Q1: How long do oxygen sensors typically last?
Oxygen sensors are wear-and-tear items. While they can last for many years and miles, their lifespan is typically between 60,000 and 100,000 miles, depending on the quality of the sensor, driving conditions, and your vehicle’s maintenance history. Some may fail sooner, while others might last longer.
Q2: Can I drive with a bad oxygen sensor?
Yes, you can usually drive with a bad oxygen sensor, but it’s not recommended for extended periods. Your car will likely experience reduced fuel efficiency, poorer performance, and increased emissions. Crucially, a faulty sensor can lead to a damaged catalytic converter, which is a very expensive component to replace.
Q3: What’s the difference between an “upstream” and “downstream” O2 sensor?
The “upstream” sensor (Sensor 1) is located before the catalytic converter and provides critical data for the engine’s air-fuel mixture control. The “downstream” sensor (Sensor 2) is located after the catalytic converter and monitors its efficiency. They have different functions and wear patterns.