Are Oxygen Sensors Hard to Replace: Essential Guide
Replacing an oxygen sensor is often a manageable DIY task for beginners, but can be tricky due to rust, tight spaces, and the need for specific tools. With careful preparation and the right guidance, you can typically replace them successfully, saving time and money.
Seeing that dreaded check engine light can be unnerving. For many car owners, the culprit is often a faulty oxygen sensor (or O2 sensor). These small but mighty parts play a crucial role in your car’s performance and its emissions. When they fail, your car can feel sluggish, guzzle more gas, and pollute the environment more than it should. You might be wondering, “Are oxygen sensors hard to replace?” The good news is, it’s often a repair you can tackle yourself, even if you’re new to car maintenance. This guide will walk you through everything you need to know, making the process clear, safe, and achievable.
Understanding Your Oxygen Sensor
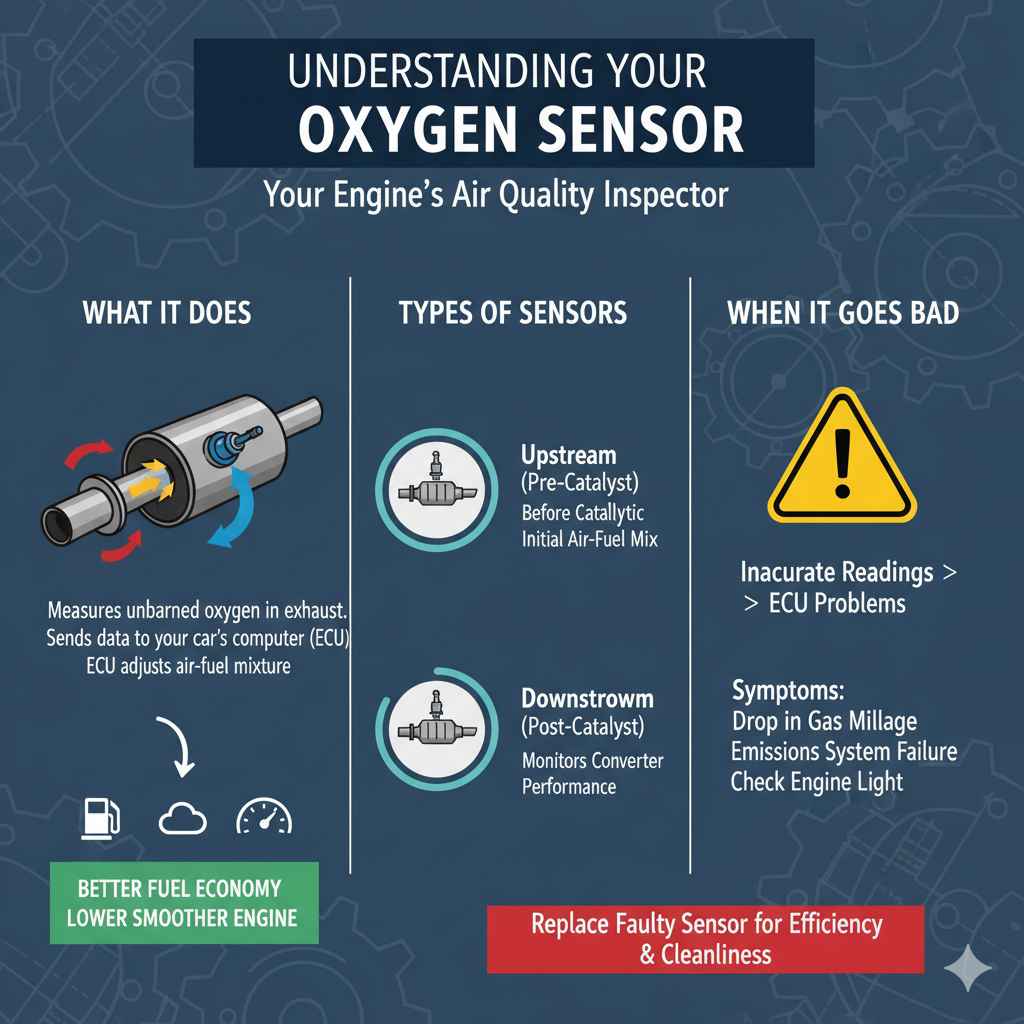
Before we dive into replacement, let’s quickly understand what an oxygen sensor does. Think of it as your engine’s tiny air quality inspector. It sits in your exhaust system, measuring the amount of unburned oxygen in the exhaust gases. This information is sent to your car’s computer (ECU), which then adjusts the air-fuel mixture for optimal combustion. A healthy air-fuel ratio means better fuel economy, lower emissions, and a smoother-running engine.
There are typically two types of oxygen sensors:
- Upstream (or “pre-catalyst”) sensor: Located before the catalytic converter. This sensor provides vital data for the initial air-fuel mixture adjustments.
- Downstream (or “post-catalyst”) sensor: Located after the catalytic converter. This sensor monitors the catalytic converter’s performance.
When an O2 sensor starts to go bad, it can send inaccurate readings to your ECU. This can lead to a range of problems, from a drop in gas mileage to a complete failure of your emissions system. Replacing a faulty sensor is essential to keep your car running efficiently and cleanly.
Are Oxygen Sensors Hard to Replace? The Real Answer
The truth is, replacing an oxygen sensor can range from surprisingly simple to quite challenging. It largely depends on a few key factors:
- Your vehicle’s make and model: Some cars have easily accessible sensors, while others tuck them away in hard-to-reach spots.
- The amount of rust and corrosion: Exhaust components are exposed to the elements and can become heavily rusted, making removal difficult.
- Your tool collection: Specialized tools are often required for a smooth replacement.
- Your comfort level with car repair: While straightforward, it does involve working under your car and with exhaust components.
For many DIYers, especially those with a bit of experience, replacing an oxygen sensor is a very doable job. The main hurdles are usually rust and access. But don’t let that discourage you! With the right preparation and techniques, you can overcome these challenges.
When Should You Consider Replacing Your Oxygen Sensor?
Several signs indicate your oxygen sensor might be failing. Paying attention to these can save you from bigger problems down the road:
- The Check Engine Light is on: This is the most common indicator. Your car’s computer has detected an issue with the sensor’s readings.
- For example, a P0130 code often points to a problem with the 02 sensor circuit. For more details on diagnostic trouble codes (DTCs), you can refer to resources from the National Highway Traffic Safety Administration (NHTSA).
- Poor Fuel Economy: If you notice your gas mileage dropping significantly, a faulty O2 sensor could be causing your car to burn too much fuel.
- Rough Idling or Engine Misfires: An incorrect air-fuel mixture can lead to an engine that doesn’t run smoothly, especially at idle.
- Failed Emissions Test: If your car can’t pass its smog or emissions test, a bad O2 sensor is a very likely culprit.
- A Smell of Sulfur or Rotten Eggs: While this can also indicate a catalytic converter problem, a failing O2 sensor can contribute to this issue.
Tools and Safety Gear You’ll Need
Having the right tools makes the job much easier and safer. Here’s a list of what you’ll typically need:
Essential Tools:
- New Oxygen Sensor: Make sure it’s the correct part for your vehicle’s year, make, model, and the specific location (upstream/downstream).
- Oxygen Sensor Socket Wrench: This special socket has a slit to fit over the sensor’s wire, allowing you to turn it. These come in various sizes, so check what fits your sensor.
- Ratchet Wrench: To attach to the sensor socket.
- Breaker Bar (optional but recommended): For extra leverage to loosen stubborn sensors.
- Penetrating Oil (like WD-40 or PB Blaster): Crucial for loosening rusted sensors.
- Anti-Seize Compound: A small amount to apply to the threads of the new sensor for easier removal in the future.
- Wire Brush: To clean the area around the sensor bungs.
- Gloves: Protect your hands from dirt, grease, and hot exhaust parts.
- Safety Glasses: Essential to protect your eyes from debris.
- Car Jack and Jack Stands: For safely lifting and supporting your vehicle. Never work under a car supported only by a jack.
- Wheel Chocks: To prevent the vehicle from rolling.
- Torque Wrench (optional, for precise installation): To tighten the new sensor to the manufacturer’s specification.
Why a Specialized Socket?
A standard socket won’t work because the oxygen sensor has a wire harness that needs to pass through the socket. An O2 sensor socket has a gap on the side to accommodate this wire. You can find good quality O2 sensor socket sets from reputable tool brands like GearWrench or Lisle. A quick search on sites that sell automotive tools will show you many options.
Step-by-Step Guide to Replacing an Oxygen Sensor
Safety first! Always ensure your vehicle is on a level surface, the parking brake is engaged, and wheel chocks are in place before you start.
Step 1: Locate the Oxygen Sensor(s)
Your vehicle might have two or even four oxygen sensors. If your check engine light is on, it’s best to use an OBD-II scanner (you can often borrow one from an auto parts store) to pinpoint which sensor is reporting the fault. Upstream sensors are usually closer to the engine, before the catalytic converter, while downstream sensors are after it.
Step 2: Inspect and Prepare the Area
Once you’ve located the sensor, take a look at the area around it. Clean any dirt, grease, or debris from around the sensor and its mounting point (the “bung”) using a wire brush. This will help your socket get a better grip and prevent dirt from falling into the exhaust.
Step 3: Apply Penetrating Oil
This is a critical step, especially if your car is older or lives in a humid climate. Generously spray penetrating oil onto the threads of the oxygen sensor where it screws into the exhaust pipe. Let it soak in for at least 15-30 minutes, or even longer if possible. For very stubborn sensors, you might need to apply it multiple times and let it soak overnight.
Step 4: Disconnect the Electrical Connector
Locate the electrical connector for the oxygen sensor. It will likely be clipped or plugged into a bracket nearby. Carefully disconnect it. There’s usually a tab you need to press or a lock you need to release. Avoid pulling on the wires themselves; always grasp the connector housing.
Step 5: Loosen and Remove the Old Sensor
- Attach the oxygen sensor socket to your ratchet wrench.
- Slide the socket over the oxygen sensor, making sure the wire is routed through the slit in the socket.
- Apply steady, firm pressure to loosen the sensor. Most sensors thread into the exhaust pipes clockwise to tighten, meaning you’ll turn counter-clockwise to loosen.
- If it feels extremely tight, don’t force it too hard initially with the socket. Sometimes, a little more penetrating oil and time can help. If you have a breaker bar, use it for extra leverage.
- Once loose, unscrew the sensor by hand or with the ratchet. Be aware that it might be hot if the car was recently run.
Tip for Stubborn Sensors: If the sensor still won’t budge after soaking and applying pressure, some mechanics recommend carefully applying a small amount of heat with a propane torch to the exhaust bung around the sensor, not directly on the sensor itself. This can help expand the metal and break the rust bond. However, this should only be done by experienced individuals who understand the risks of working with fuel systems and hot exhaust components. If you’re not comfortable with this, it’s best to take it to a professional.
Step 6: Prepare the New Oxygen Sensor
Inspect your new oxygen sensor. Many come with a protective cap on the sensing element and pre-applied anti-seize on the threads. If it doesn’t have anti-seize, apply a small amount of high-temperature anti-seize compound to the threads. Be careful not to get any on the sensing element itself, as this can damage it.
Step 7: Install the New Oxygen Sensor
- Thread the new sensor into the bung by hand as far as it will go. You want to make sure it’s not cross-threaded.
- Once hand-tight, use your oxygen sensor socket and ratchet to tighten it.
- If you have a torque wrench, tighten the sensor to the manufacturer’s specifications. A common torque spec for many O2 sensors is around 30-35 lb-ft, but always check your vehicle’s service manual for the exact specification. If you don’t have a torque wrench, tighten it firmly, but avoid over-tightening, which can strip the threads.
Step 8: Reconnect the Electrical Connector
Plug the new sensor’s electrical connector back into its mating connector. Ensure it clicks securely into place.
Step 9: Clean Up and Test
Put away your tools and double-check that everything is secure. Lower your vehicle safely. Start the engine. The check engine light should turn off after a few miles of driving, or you may need to clear the code with an OBD-II scanner. If the light stays on, there might be another issue or the new sensor might be faulty.
DIY vs. Professional Replacement: A Comparison
Deciding whether to tackle this job yourself or take it to a mechanic often comes down to your comfort level, available tools, and the specific challenges presented by your vehicle. Here’s a breakdown:
| Factor | DIY (Do It Yourself) | Professional Mechanic |
|---|---|---|
| Cost Savings | High – you only pay for the part and basic tools. | Lower – includes labor costs. |
| Time Investment | Can take a few hours, depending on difficulty and experience. | Usually completed within an hour or two. |
| Difficulty for Beginners | Moderate. Can be challenging if sensors are corroded or hard to access. | Easy – they have the expertise and tools. |
| Specialized Tools | Requires an O2 sensor socket and potentially other items like a breaker bar and torque wrench. | Mechanics have all necessary specialized tools. |
| Risk of Damage | Higher if not careful (stripping threads, damaging wiring, injury). | Lower – experienced professionals minimize risks. |
| Job Satisfaction | High – sense of accomplishment and saved money. | N/A |
If your sensors are easily accessible and not heavily rusted, DIY is a great option. If you anticipate a tough job (e.g., heavily rusted exhaust, sensors in very tight spots), consider the cost of potential mistakes and the value of your time before committing to DIY.
Common Mistakes to Avoid
Even experienced DIYers can make mistakes. Here are a few to watch out for:
- Using the wrong O2 sensor: Ensure it’s the correct sensor for your vehicle’s specific location (upstream/downstream) and system type (e.g., heated vs. non-heated).
- Not using a specialized O2 sensor socket: A regular socket can damage the sensor or wire, and make removal much harder.
- Over-tightening or under-tightening the new sensor: This can lead to leaks or stripped threads. Using a torque wrench is ideal.
- Getting anti-seize on the sensor element: This will contaminate the sensor and cause it to fail prematurely.
- Forgetting to reconnect the electrical connector: A simple oversight that will keep your check engine light on.
- Not letting penetrating oil soak long enough: Patience can prevent a lot of frustration and potential damage.
- Working under an improperly supported vehicle: Safety is paramount. Always use jack stands.
When to Call a Professional
While many O2 sensor replacements are DIY-friendly, there are times when calling a professional is the smarter choice:
- Extremely Rusted Exhaust Components: If the pipe or bung is crumbling with rust, a mechanic may have the tools and experience to repair or replace the section of pipe.
- Sensors in Very Inaccessible Locations: Some vehicles require dropping the exhaust or removing other components to reach the sensor, making it a more complex job.
- Lack of Proper Tools or Confidence: If you don’t have the necessary specialized tools or feel uncomfortable with any part of the process, it’s best to leave it to the pros.
- Persistent Check Engine Light: Even after replacing the sensor, if the check engine light remains on, there might be a more complex electrical issue or a problem with another component, requiring professional diagnosis.

FAQ: Your Oxygen Sensor Questions Answered
What does an oxygen sensor do for my car?
An oxygen sensor measures the amount of unburned oxygen in your car’s exhaust. This information helps your car’s computer adjust the air-fuel mixture for optimal engine performance, fuel efficiency, and reduced emissions.
How do I know if my oxygen sensor needs replacing?
Common signs include the check engine light illuminating, a noticeable drop in fuel economy, rough engine idling, engine misfires, or failing an emissions test. Using an OBD-II scanner can help confirm a faulty O2 sensor.
Can I drive my car with a bad oxygen sensor?
While your car might still run, driving with a bad oxygen sensor is not recommended. It can lead to poor fuel economy, increased emissions, and potentially damage other components like the catalytic converter over time.
How long does an oxygen sensor typically last?
Oxygen sensors are designed to last for a significant number of miles, often between 60,000 and 100,000 miles. However, their lifespan can be affected by driving conditions, fuel quality, and engine health.
Is it okay to use a universal oxygen sensor?
While universal sensors exist, it’s generally best to use an exact fit sensor for your vehicle. Universal sensors may require splicing wires, and if they aren’t perfectly compatible, they can cause further issues. Always try to get the OEM-equivalent part.
How important is the anti-seize compound?
The anti-seize compound on the new sensor’s threads is very important. It prevents the sensor from seizing into the exhaust bung due to heat and rust, making future replacements much easier. However, be careful not to apply it to the sensing element itself.
My new sensor is showing the same O2 sensor code. What did I do wrong?
This could happen for a few reasons: The new sensor might be faulty (rare, but possible), the electrical connector might not be fully seated, or the original problem wasn’t the O2 sensor itself but a related issue (e.g., vacuum leak, faulty MAF sensor, exhaust leak).