What Exhaust Tip Should I Get? Essential Guide
Choosing the right exhaust tip is simple: decide on material (stainless steel is best), size (make sure it fits your bumper cut-out), sound preference (tips mainly affect looks or minor tone changes), and finish (chrome for classic shine, black for modern stealth). This guide walks you through matching a tip to your car’s style and needs easily.
Upgrading your car’s exhaust might sound complicated, but starting with just the tip is a fantastic first step. Many drivers feel frustrated when they look under their car and see a rusty, small pipe hiding away. You want your ride to look sharp, but figuring out what exhaust tip to get feels like guesswork. Do you need big ones? Small ones? What color is best?
Don’t worry! I’m Monowar Shohag, and I’ve helped countless drivers like you make easy and effective upgrades. We are going to break down the process into simple steps. We will cover size, material, style, and installation so you can pick the perfect exhaust tip with total confidence. By the end of this guide, you’ll know exactly what you need to make your car look and sound a little better.
Understanding What an Exhaust Tip Actually Does
Before we dive into choosing, let’s clear up a common misconception. Many people think changing the exhaust tip drastically alters the sound of their car. While it plays a small role, the main sound production comes from the muffler and the piping itself. An exhaust tip primarily serves two main purposes:
- Aesthetics (Looks): It’s the final visual statement of your vehicle’s rear end. It cleans up the look dramatically.
- Exit Point Protection: A quality tip can protect the end of your existing exhaust pipe from rust and heat damage.
If you are looking for a huge jump in volume or performance, you’ll need to look at a full cat-back system. But for a simple, affordable upgrade that catches the eye, the tip is the way to go.
Step 1: Determining the Right Size for a Perfect Fit
Sizing is the most critical, non-negotiable step. An exhaust tip that is too large won’t fit over your existing pipe, and one too small will look silly and might wobble loose. You need to measure two primary dimensions:
Measuring the Inlet Diameter (Connection Size)
The inlet diameter is the hole on the back of the tip where it slides over your existing exhaust pipe. This must match your existing pipe size perfectly for a secure, snug fit.
How to Measure Your Existing Exhaust Pipe:
- Safety First: Ensure the car is completely cool. Never touch a hot exhaust system.
- Access the Pipe: You may need to crouch down or even use a small ramp or jack stands (safely supported!) if the pipe is hard to reach.
- Measure the Outside Diameter (OD): Use a reliable tape measure or, better yet, a set of digital calipers for accuracy. Measure across the outside of the existing pipe.
- Note the Size: Exhaust pipes are usually measured in inches or millimeters (e.g., 2.25 inches or 2.5 inches).
Pro Tip from Monowar: Always round down slightly when comparing sizes if you are between measurements, or look for “clamp-on” style tips, which offer a bit more forgiveness. If you are buying a slip-on tip, aim for the exact match found on your existing pipe.
Measuring the Outlet Diameter (Tip Size)
This is the visible part—how wide the opening is once installed. This measurement affects the look and can slightly impact the tone.
- Subtle Look: Choose a tip diameter that is about 0.5 to 1 inch larger than your inlet pipe. (e.g., If your pipe is 2.25″, an outlet of 2.75″ looks subtle).
- Bold Look: Choose a tip diameter that is 1.5 to 2 inches larger than your inlet pipe. (e.g., If your pipe is 2.25″, an outlet of 3.5″ or 4″ looks much more aggressive).
You must also consider how much of the tip will stick out past the bumper. Measure the bumper cut-out if your vehicle has one, ensuring the tip won’t scrape the bumper when hot or vibrate against it.
Step 2: Choosing Your Material – Durability Matters
Exhaust tips live in a harsh environment—repeated extreme heat, road salt, moisture, and grime. The material you choose determines how long they will look good and how resistant they are to rust.
Here is a breakdown of the most common materials used for quality tips:
| Material | Pros | Cons | Best For |
|---|---|---|---|
| 304 Stainless Steel | Excellent rust resistance, very durable, high heat tolerance. | Slightly more expensive upfront. | Long-term durability and daily drivers in all seasons. (Highly Recommended) |
| 409 Stainless Steel | Good corrosion resistance, more affordable than 304. | May eventually show surface rust in harsh climates. | Budget-conscious buyers in dry climates. |
| Mild Steel (Painted/Coated) | Very cheap upfront cost. | Prone to rust quickly once the coating chips, requires frequent re-painting. | Temporary fits or show cars that rarely see road use. |
| Titanium/Carbon Fiber | Extremely lightweight, exotic look. | Very expensive, carbon fiber can degrade under extreme, direct heat. | High-end performance builds or specialized aesthetic builds. |
For the everyday driver looking for the best balance of looks, reliability, and value, 304 Stainless Steel is the gold standard. It holds polish well and resists the corrosion caused by road salt better than other options. For learning more about stainless steel grades and corrosion resistance, resources like those from material science experts can offer deeper insight into why 304 outperforms 409 in tough conditions.
Step 3: Style and Shape — Matching Your Car’s Vibe
Now for the fun part: aesthetics! The shape of the tip plays a huge role in the character you want to give your vehicle. Do you want a classic, muscle car look, or modern, sleek lines?
Common Exhaust Tip Shapes
- Rolled Edge (Double Wall): These tips have an inner wall and an outer rolled lip. They look thicker, much more substantial, and they resist heat discoloration better because the heat is spread across two layers of metal. This is a very popular, high-quality look.
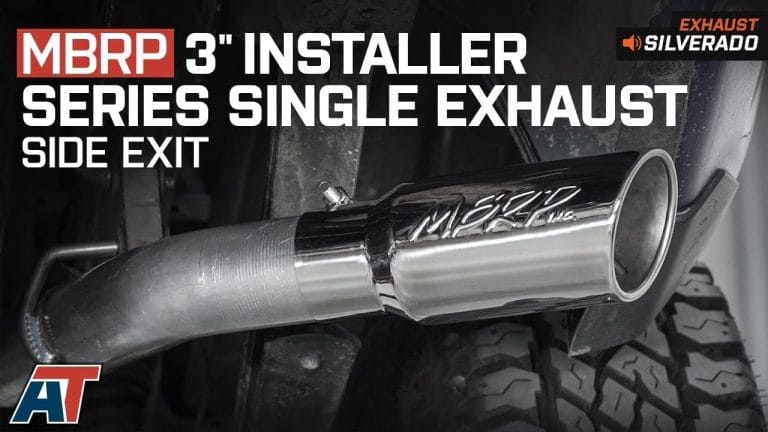
- Straight Cut (Single Wall): These are simpler, featuring a straight-cut opening. They tend to look cleaner and more utilitarian, often used on sportier or off-road setups.
- Turned Out (Angled): The tip is angled slightly downward or outward. This is traditional on many trucks and older muscle cars, helping direct exhaust fumes away from a trailer or the rear bumper.
Common Finishes (Color)
The finish dictates the shine and color of the tip. This choice works hand-in-hand with your car’s paint color.
- Polished Chrome: The classic, mirror-like shine. Perfect for vintage cars, luxury vehicles, or anyone wanting a bright, eye-catching accent. Requires regular polishing to stay perfect.
- Satin/Brushed Finish: A duller, matte look that hides small scratches and fingerprints much better than chrome. Excellent for a slightly more understated or modern performance look.
- Black Powder Coat: Very popular right now. A durable, baked-on coating that offers a stealthy, blackout appearance. Ideal for modern trucks or vehicles with dark paint jobs.
- Burnt Titanium (Heat Treated): These tips naturally (or artificially) obtain a rainbow hue—blue, purple, and gold—from extreme heat cycling. This is common on high-performance imports and Japanese Domestic Market (JDM) styles.
If you have a black or dark gray car, a black powder-coated tip creates a seamless, aggressive look. If you have a brightly colored car (like red or blue), a polished stainless steel tip will really pop against the paint.
Step 4: Installation Type – Weld-On vs. Clamp-On
How the tip attaches to your existing pipe is crucial. This choice often depends on your mechanical comfort level and whether your existing system is damaged.
Clamp-On Style Tips (Beginner Friendly)
This is usually the easiest way for a beginner to upgrade. These slip over the existing pipe and are secured using one or two heavy-duty metal clamps (sometimes integrated). They are removable, meaning you aren’t permanently altering your factory exhaust.
- Pros: Easy installation (often just a screwdriver or wrench needed), reversible, no welding required.
- Cons: Can sometimes wiggle loose over time, especially with aggressive driving, and the clamp itself might be visible.
Weld-On Style Tips (Permanent Upgrade)
These tips are designed to be permanently fused to the existing tailpipe by a professional welder. They offer the most secure, clean, and long-lasting attachment, as there are no visible clamps.
- Pros: Extremely secure fit, superior sealing, cleanest aesthetic possible.
- Cons: Requires access to a welder, more expensive due to labor costs, and difficult or impossible to remove without cutting.
If you are unsure about bending metal or dealing with heat, always opt for a quality clamp-on tip. If you are serious about a permanent, clean upgrade and plan to keep the car for years, find a reputable local shop to weld them on safely.
Quick Fitment Check: Single vs. Dual Exit
Before you buy, you must know what your car came with from the factory:
- Single Exit: Most standard economy cars and some trucks have one pipe exiting on one side (driver or passenger). You need one tip to cover that single pipe.
- Dual Exit (Split): Some vehicles have one pipe coming from the muffler that immediately splits into two tips exiting on both sides.
- True Dual: High-performance cars often have two completely separate exhaust paths, one on each side, each with its own tip.
If you have a single exit but want the look of a dual exit, this requires significant modification (installing a “split” pipe setup after the muffler), which moves beyond a simple “exhaust tip” upgrade and into full exhaust modification territory.
Essential Tools You Might Need for Installation
Even for a simple clamp-on install, having the right tools makes the job faster and safer. Always start by researching the required torque settings if you are tightening clamps, as over-tightening can crush your exhaust pipe.
- Safety Glasses and Gloves: Essential protection.
- Tape Measure or Calipers: For accurate sizing.
- Wire Brush or Sandpaper: To clean the old pipe end before sliding the new tip on.
- Penetrating Oil (like WD-40): Helpful if the old tip or pipe end is rusted stuck.
- Screwdriver or Ratchet/Socket Set: To tighten the clamp bolts (ensure you have the correct size head).
- Exhaust Hanger Removal Pliers (Optional but helpful): These specialized pliers make removing the rubber isolators holding the exhaust pipes much easier than wrestling them by hand.
Remember to follow safety guidelines related to working under vehicles. If you ever feel unsafe lifting or supporting your car, take it to a professional service center noted by organizations like the National Highway Traffic Safety Administration (NHTSA) regarding vehicle safety checks.
Common Pitfalls to Avoid When Buying Tips
As your guide, I want to help you avoid common beginner mistakes that lead to wasted money or a frustrating installation experience.
Mistake 1: Forgetting to Account for the Existing Pipe’s Coating
If your existing pipe is covered in thick rust or scale, its apparent diameter will be larger than the actual metal pipe underneath. Always try to scrape off loose debris to measure the bare metal diameter for an accurate inlet size.
Mistake 2: Buying Tips That Are Too Long
A tip that sits 6 inches past your bumper looks awkward and is highly susceptible to being hit by curbs, road debris, or scraping when exiting steep driveways or speed bumps. Generally, 2 to 4 inches of protrusion is plenty.
Mistake 3: Confusing Muffler Inlet Size with Pipe Outlet Size
A common error is measuring the large muffler body instead of the narrow pipe coming out of it. The tip must slip over the tailpipe, not the muffler body. Always measure the pipe end.
Mistake 4: Choosing Chrome in a High-Salt Environment
If you live where snow removal crews use heavy road salt, shiny chrome will quickly begin to pit and discolor unless you wash the underside of your car religiously. In these areas, choose brushed stainless steel or a high-quality black coating.
A Comparison of Budget vs. Premium Tip Investment
Exhaust tips range widely in price. Understanding what you pay for helps justify the investment. Below is an overview of what to expect based on quality:
| Tier | Typical Price Range (Per Tip) | Key Feature | Expected Lifespan |
|---|---|---|---|
| Budget / Generic | $15 – $35 | Mild steel, painted or thin chrome plating, often straight cut. | 1–3 years before significant fading/rust. |
| Mid-Range / Good Quality | $40 – $80 | 409 Stainless Steel, rolled edge, good clamp mechanism. | 3–6 years, may show minor tarnishing. |
| Premium / Top Tier | $85 – $150+ | 304 Stainless Steel, double-wall construction, polished mirror finish. | 10+ years with minimal care. |
While the budget options look great in the parking lot, they often fail the long-term durability test due to thin materials that cannot handle constant thermal cycling. Think of the tip like the frame of your car’s sunglasses—it needs to be sturdy enough to handle the elements it faces daily.

Final Check-Up: Getting the Best Sound Upgrade
I mentioned earlier that the tip itself doesn’t change the sound much, but the shape does have a minor effect, especially on the “exit tone.”
- A Larger Outlet Diameter: A very large tip opening (like a 5-inch tip) can sometimes slightly lower the pitch or make the sound a bit “deeper” because it allows the sound waves to expand more quickly.
- A Smaller/Stock-Sized Outlet: Retains the sound profile created by your muffler, offering the least change.
- Resonators and Muffler Type are Key: If you want a noticeable change in volume or a deeper tone, you need an aftermarket muffler or resonator delete—not just a tip. A tip purchase should be focused on looks first, sound second.
Keep the focus on matching the visual style you want with reliable materials (like 304 Stainless Steel) and the correct inlet size for a hassle-free bolt-on experience.
Frequently Asked Questions (FAQ) for Exhaust Tips
Q1: Will putting on a new exhaust tip make my car louder?
A: Not significantly. The muffler controls almost all the sound volume. A new tip might slightly change the very end resonance, but it won’t change your car from quiet to loud. For loud sounds, you need a new muffler or muffler delete.
Q2: How far should my exhaust tip stick out past the bumper?
A: Ideally, the tip should extend just past the bumper edge, usually between 1 and 3 inches. You want it visible but not so far out that it becomes a target for bumps or scrapes when reversing.
Q3: Is it okay if my new tip is slightly smaller than my old pipe?
A: No. The new tip’s inlet must fit over or be the exact same size as the existing pipe. If it is too small, you cannot get it on. If you have a genuine size mismatch, you will need an exhaust reducer sleeve or need a shop to weld it.