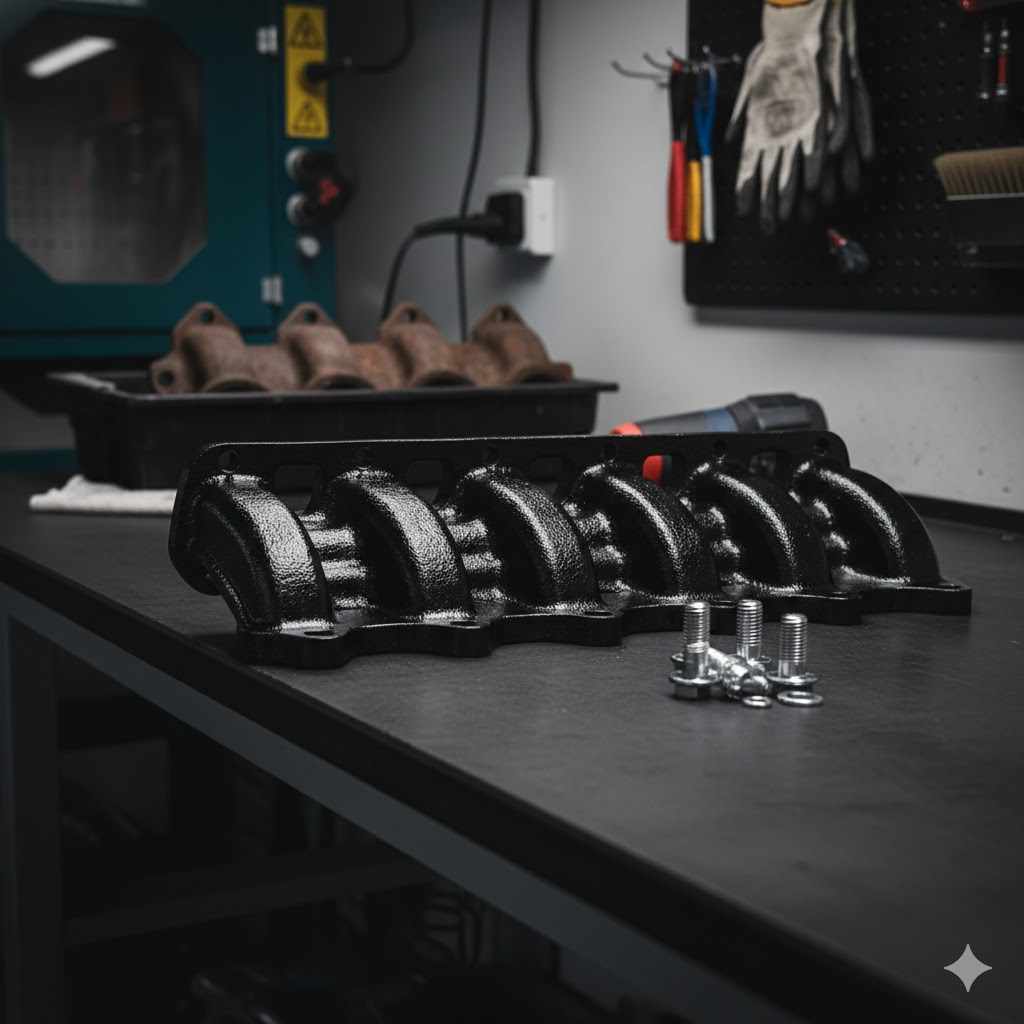
How to Restore Exhaust Manifolds Like New
Restoring old exhaust manifolds can seem like a tough job, especially for those just starting out. You might look at rusted, gunk-covered parts and wonder if they can ever look good again. It’s a common challenge because manifolds endure a lot of heat and dirt.
But don’t worry, it’s totally doable! We’ll guide you through this step-by-step so you can see just How to Restore Exhaust Manifolds Like New.
Cleaning Your Exhaust Manifolds
This section covers the initial and perhaps most important step: getting your exhaust manifolds clean. Removing all the built-up grime, rust, and old gasket material is key to a successful restoration. A clean surface allows for better inspection and ensures any subsequent treatments will adhere properly.
We’ll go over different methods to tackle even the toughest buildup, making sure you’re set up for the next stages of restoration.
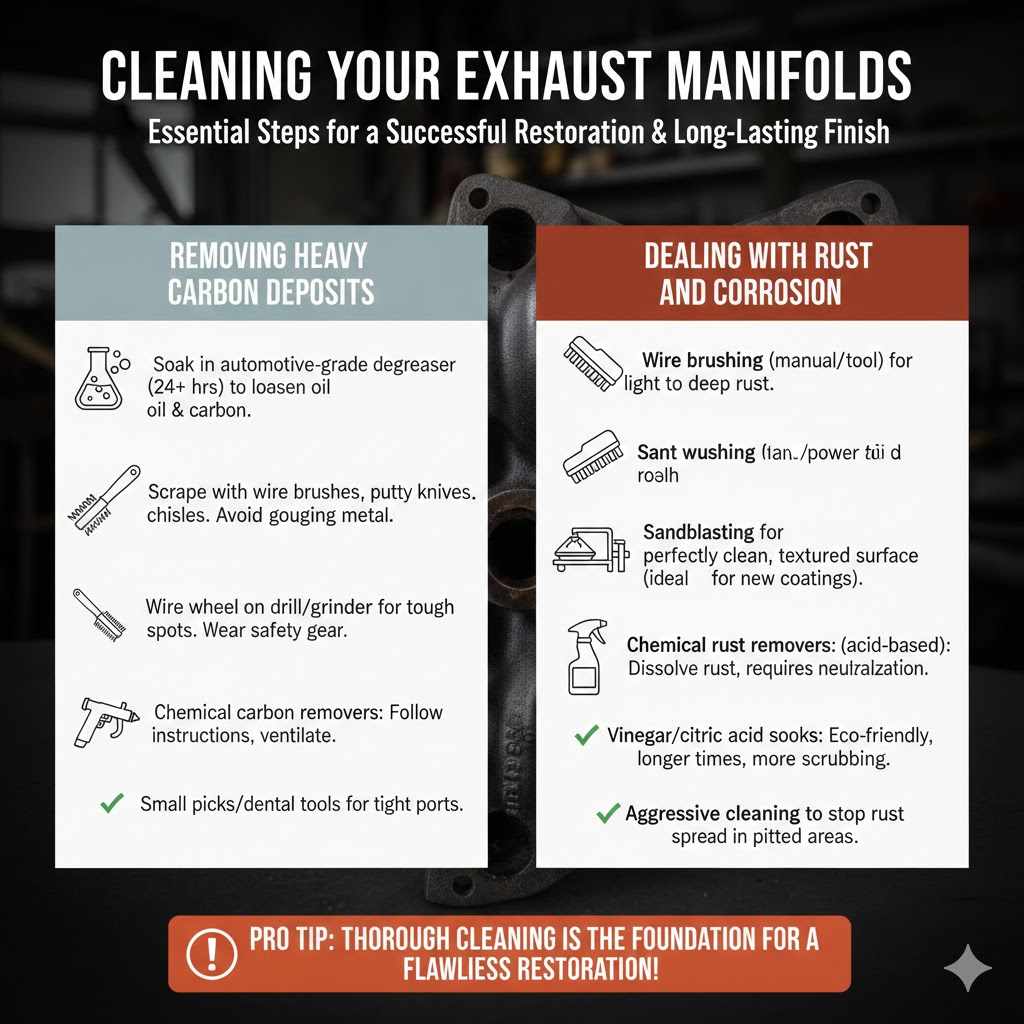
Removing Heavy Carbon Deposits
Carbon deposits are a major enemy of exhaust manifolds. They build up over time from combustion gases and can become very hard. If left on, they prevent proper sealing and can even trap moisture, leading to more rust.
Getting rid of them is essential for a good finish.
- Soaking in a degreaser is a great first step. Use a strong, automotive-grade degreaser. Let the manifold soak for at least 24 hours. This helps loosen the carbon and oil.
- Scraping with tools is often necessary. Use wire brushes, putty knives, and even small chisels. Be careful not to gouge the metal, especially if the manifold is cast iron. Small, controlled movements work best here.
- Wire wheel attachments on drills or grinders are very effective. Use coarse grit wire wheels for tough spots. Always wear safety glasses and gloves when using power tools. The dust can be harmful.
- Chemical carbon removers can also work wonders. Follow the product instructions carefully. Some require ventilation, and others might need a rinse afterwards.
One common issue is that carbon can get into tiny cracks or ports. Make sure to poke around all the openings. A small pick or even a dental tool can help get into those tight spots.
If the manifold is especially bad, you might need to repeat some of these steps.
Dealing with Rust and Corrosion
Rust is another common problem that makes manifolds look old and weak. It can eat away at the metal if not addressed. Removing it properly sets the stage for a lasting finish.
- Wire brushing by hand is a good start for light rust. For deeper rust, a wire wheel on a drill is much more efficient. Go over the entire surface until you see clean metal.
- Sandblasting is a highly effective method for rust removal. It uses abrasive media to blast away rust and old paint. This leaves a perfectly clean and slightly textured surface, ideal for new coatings. Many auto shops offer sandblasting services.
- Chemical rust removers are also an option. These are often acid-based solutions that dissolve rust. You’ll need to follow the manufacturer’s safety instructions and usually neutralize the acid afterwards.
- Vinegar or citric acid soaks can be used for less severe rust. These are more eco-friendly but may require longer soaking times and more scrubbing.
A good example of rust damage is when it starts to pit the metal. Deep pits can weaken the manifold. While you can’t fill them perfectly, aggressive cleaning will at least stop the rust from spreading.
For very heavily rusted manifolds, replacement might be the only option, but often restoration is possible.
Repairing Damaged Manifolds
Sometimes, cleaning isn’t enough. Exhaust manifolds can develop cracks or warpage from constant heating and cooling. This section focuses on how to fix these issues to get your manifold back in working order and looking great.
Addressing damage is vital for performance and safety.
Fixing Cracks in Cast Iron Manifolds
Cracks are a serious problem. They can lead to exhaust leaks, performance loss, and dangerous fumes entering the cabin. Fixing them requires skill and the right materials.
- Welding is the most common repair for cast iron cracks. Special cast iron welding rods and techniques are needed because cast iron is brittle and prone to cracking further if heated or cooled improperly. Preheating the manifold and slow, controlled cooling are critical.
- Epoxy repair kits are available for smaller cracks. These are typically high-temperature metal epoxies. They are easier to use than welding but may not be as durable for high-stress areas.
- Brazing is another option, especially for thinner sections or hairline cracks. It uses a filler metal with a lower melting point than the base metal. This can sometimes be less stressful on cast iron than welding.
- Clamping kits can also be used as a temporary or semi-permanent fix. These kits often involve drilling and tapping holes on either side of the crack and using strong bolts to pull the metal together.
For example, a hairline crack near a port can be welded shut. A larger crack that spans across the manifold might be more difficult and could benefit from a combination of welding and clamping. It’s important to assess the crack’s location and severity before choosing a repair method.
Addressing Warpage and Leaks
Warpage occurs when the manifold bends out of shape, usually from uneven heating. This prevents a good seal with the cylinder head, causing exhaust leaks.
- Surface grinding is the most effective way to flatten a warped manifold. This process removes a thin layer of metal from the mounting surface, creating a perfectly flat plane. This is often done by machine shops.
- Checking for warpage can be done with a straight edge. Lay a good quality metal straight edge across the manifold’s mounting surface. If you can see light between the straight edge and the manifold, it’s warped.
- Some minor warpage might be corrected with thicker gaskets. However, this is not a long-term solution and can lead to other problems.
- If a manifold is severely warped, it might be beyond repair. In such cases, a new or known good used manifold is a better choice.
A common scenario is a manifold that looks straight but leaks because the mounting surface isn’t perfectly flat. Using a new gasket and torquing the bolts correctly is important, but if the manifold itself is warped, these steps won’t fix the leak.
Surface Preparation for Coating
Once your manifolds are clean and repaired, the surface needs to be perfectly prepped before any coating is applied. This ensures the coating adheres well and lasts a long time, protecting your investment and giving a great finish.
Importance of a Clean Surface
Any remaining oil, grease, or residue will prevent coatings from sticking properly. This can lead to peeling, flaking, or premature failure of the coating. A spotless surface is absolutely essential.
- Final wipe down with a solvent cleaner is critical. Use a good quality degreaser or brake cleaner. Wipe down the entire manifold until no residue comes off on the rag.
- Avoid touching the surface with bare hands after cleaning. Skin oils can transfer and compromise adhesion. Wear clean gloves.
- Inspect the manifold closely for any missed spots. Look for any dull patches or areas that look different. If you find any, repeat the cleaning steps.
- Ensure the manifold is completely dry before proceeding. Moisture can also affect coating adhesion.
Think of it like painting a wall. If the wall isn’t clean and primed, the paint won’t stick well. Exhaust manifolds are under much harsher conditions, so the prep has to be even more thorough.
Choosing and Applying Coatings
There are several types of coatings you can use to protect and beautify your restored manifolds. Each has its pros and cons.
- High-temperature ceramic coatings are very popular. These coatings can withstand extreme heat and offer excellent corrosion protection. They come in various colors, often looking like polished aluminum or black. Application can be done professionally or sometimes with aerosol cans for DIY.
- Exhaust wrap is another option. This is a fiberglass or similar material that is wrapped around the manifold. It helps insulate and reduce heat, but it doesn’t protect the metal itself from corrosion and can trap moisture if not applied correctly.
- High-temperature paints are available, but they might not be as durable as ceramic coatings for very high-heat applications. They can offer a good aesthetic for milder conditions.
- A heat-cured high-temperature paint or ceramic coating provides the best durability. This usually requires sending the manifold to a specialized shop. The curing process hardens the coating, making it extremely tough.
A common scenario for choosing a coating is based on performance needs and desired look. For race cars or high-performance engines, ceramic coatings are often the choice for their heat management and durability. For classic restorations where appearance is key, a polished ceramic look can be very appealing.
Applying ceramic coatings yourself with an aerosol can is possible, but it requires following the instructions precisely. Multiple thin coats are better than one thick coat. You’ll also need to properly cure the coating, often by running the engine at temperature.
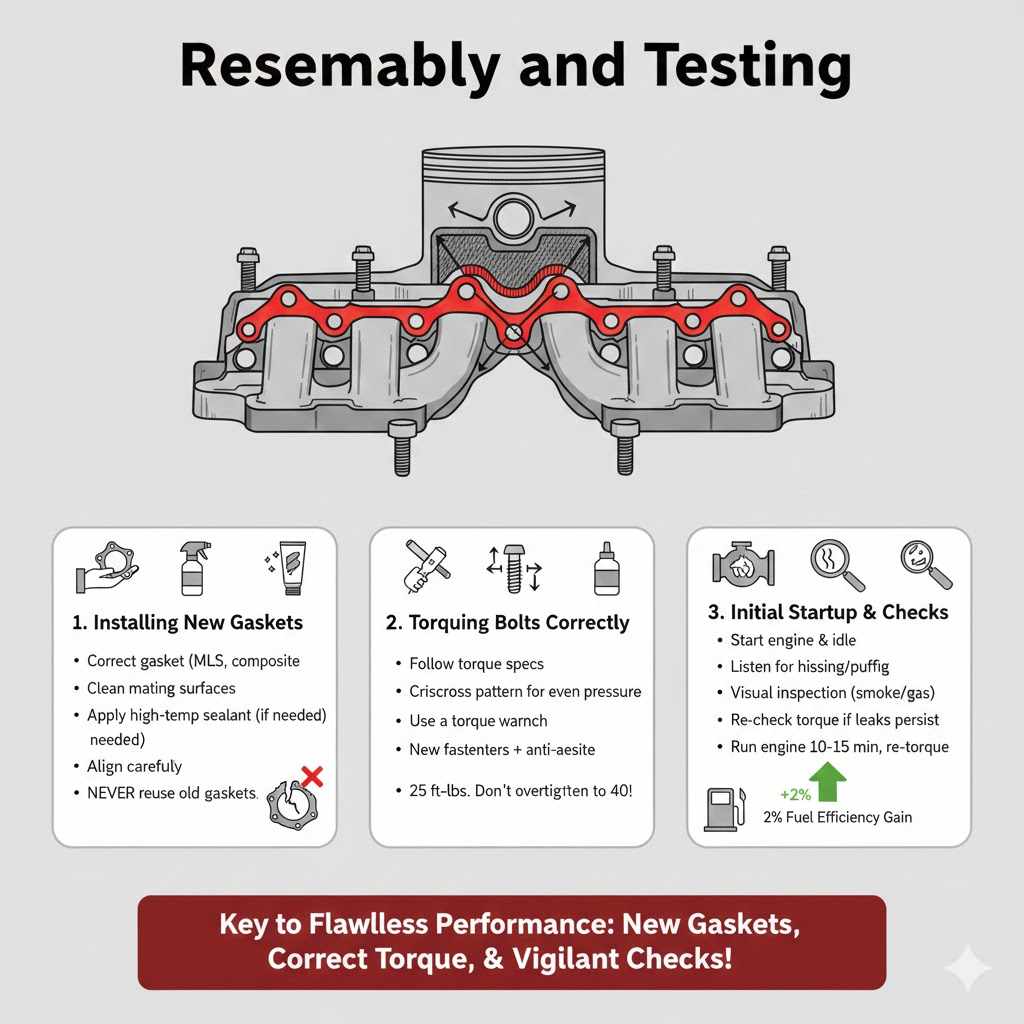
Reassembly and Testing
After restoration, putting everything back together correctly is crucial. This ensures your hard work pays off and the manifold functions as intended. Proper reassembly prevents new leaks and problems.
Installing New Gaskets
Using new, high-quality gaskets is essential. Old or damaged gaskets will lead to leaks, no matter how well you restored the manifold.
- Ensure you have the correct gasket for your specific manifold and engine. There are many types, including multi-layer steel (MLS) or composite gaskets.
- Clean the mating surfaces on both the manifold and the cylinder head thoroughly. Any debris can prevent a good seal.
- Apply a thin, even layer of high-temperature sealant or anti-seize to the gasket surface if recommended by the manufacturer. Some gaskets are designed to be installed dry.
- Place the gasket carefully, ensuring it’s centered and aligned correctly with the bolt holes.
A common mistake is reusing an old gasket. Even if it looks okay, it has likely compressed and lost its sealing ability. Always use a new one.
Torquing Bolts Correctly
Proper torque is vital for creating a seal without damaging the manifold or bolts.
- Follow the manufacturer’s torque specifications for your engine. These are usually listed in the vehicle’s service manual.
- Tighten bolts in a specific sequence, often in a crisscross pattern, to ensure even pressure. This prevents warpage during installation.
- Use a torque wrench for accuracy. Do not guess or overtighten.
- Consider using new fasteners or re-using quality original ones with anti-seize compound for easier future removal.
Example: If the spec is 25 foot-pounds, and you overtighten to 40, you risk cracking the manifold or stripping the threads. A torque wrench ensures you get it just right.
Initial Startup and Leak Checks
After everything is bolted down, it’s time to start the engine and check for any issues.
- Start the engine and let it idle. Listen carefully for any unusual exhaust sounds or hissing.
- Visually inspect the manifold and gasket area for any signs of smoke or escaping exhaust gas. A small mirror can help you see tight spots.
- If you notice any leaks, shut off the engine immediately. Re-check the torque on the bolts, starting with the center and working outwards, following the correct sequence.
- If leaks persist, the gasket might be faulty, the surface may not be perfectly flat, or there could be a crack you missed.
A common scenario is a slight exhaust leak that only appears when the engine heats up. Running the engine for 10-15 minutes and then re-checking torque can often seal these minor issues.
Performance statistic: Properly sealed exhaust manifolds can improve fuel efficiency by up to 2%. This is because the engine control unit relies on accurate exhaust gas readings to adjust fuel injection. Leaks can skew these readings.
One real-life case study involved a classic car owner who restored their exhaust manifolds. After cleaning and applying a high-temperature ceramic coating, they reinstalled them with new gaskets and torqued them correctly. The result was a quiet exhaust, improved engine performance, and a significant aesthetic upgrade, making the engine bay look much more appealing.
Frequently Asked Questions
Question: How long does it take to restore an exhaust manifold
Answer: The time can vary greatly depending on the condition of the manifold and the methods used. A simple cleaning and recoating might take a few hours, while extensive repairs like welding cracks or professional sandblasting could take a day or more, plus drying or curing times.
Question: Can I use regular paint on exhaust manifolds
Answer: No, regular paint will burn off very quickly due to the high temperatures involved. You need specialized high-temperature paint or ceramic coatings designed to withstand extreme heat.
Question: What is the best way to remove stubborn carbon buildup
Answer: For stubborn carbon, a combination of soaking in a strong degreaser, mechanical scraping with tools like wire brushes and putty knives, and using a wire wheel attachment on a power tool is usually most effective.
Question: Are repaired exhaust manifolds safe
Answer: Yes, if cracks and other damage are repaired properly using appropriate welding or epoxy techniques and the manifold is then coated, it can be safe and reliable. However, severely damaged manifolds might be better replaced.
Question: Do I need special tools to restore exhaust manifolds
Answer: While some basic tools like wire brushes and scrapers are helpful, more advanced restoration may require specialized tools like a torque wrench, a wire wheel on a drill, or access to sandblasting or welding equipment.
Wrap Up
Restoring your exhaust manifolds like new is an achievable project. By cleaning them thoroughly, repairing any damage, and preparing the surface properly before applying a suitable coating, you can significantly improve their appearance and function. Following the reassembly and testing steps ensures a lasting, successful outcome for your vehicle.


