Do Exhaust Tips Go Inside Existing Pipes or Outside? Explained
Figuring out where your exhaust tip goes can be tricky. You might be wondering, Do Exhaust Tips Go Inside Existing Pipes or Outside? It’s a question many car owners have when customizing their vehicles. Don’t worry, it’s simpler than you think! We’ll explore the basics and show you the proper way to install exhaust tips. We’ll break it down step-by-step so you can get it right the first time. Let’s get started!
Choosing the Right Exhaust Tip
Before you even think about installation, picking the right exhaust tip is important. Several factors influence your choice, including the size of your existing exhaust pipe, the style you want, and the material the tip is made from. Exhaust tips come in many shapes, such as round, oval, square, or even custom designs. The material affects both looks and durability. Stainless steel is a popular option due to its resistance to rust and its shiny appearance. Chrome tips are also favored for their visual appeal.
Carbon fiber offers a modern, high-performance look. Making an informed selection ensures your tip not only looks good but also lasts. Consider your car’s make and model. Proper fitment is key. A tip that doesn’t fit right can look awkward or even cause issues.
Measuring Your Exhaust Pipe
Accurate measurements are the first step. Measure the outer diameter (OD) of your existing exhaust pipe. This is where the exhaust tip will connect. Use a tape measure or a digital caliper. If using a tape measure, wrap it around the pipe and note the circumference. Then, divide the circumference by pi (approximately 3.14159) to get the diameter. Digital calipers provide a precise reading of the OD. Knowing this measurement helps you choose an exhaust tip that fits snugly. Too small, and it won’t fit.
Too large, and you’ll need adapters or modifications. Also measure the distance from where the exhaust pipe comes out to where you want the tip to end. This is how you’ll judge the overall length needed for the tip. Don’t forget to account for any bends in the exhaust pipe. Be thorough; a perfect fit makes all the difference.
- Tools: Gather your tools. You’ll need a tape measure or digital caliper, a wrench or socket set, and possibly a cutting tool if you need to adjust your existing exhaust pipe. Gloves can protect your hands.
- Inspection: Examine the existing exhaust system. Check for any rust, damage, or wear. Address any issues before installing the new tip. A damaged exhaust system can affect performance and safety.
- Safety: Work in a well-ventilated area. Wear safety glasses to protect your eyes from debris. Let the exhaust system cool down if the car has been running. Never work under a car supported only by a jack. Use jack stands for safety.
Material Matters: Exhaust Tip Options
The material of your exhaust tip affects its looks, longevity, and even sound. Stainless steel is a popular choice for its durability and resistance to rust and corrosion. It often has a bright, polished finish that maintains its appearance over time. Chrome tips provide a classic look with a shiny, reflective surface. They are usually made of steel that is then plated with chromium. While they look great, chrome can be prone to scratching and may require more upkeep to keep looking good. Carbon fiber offers a modern, sporty look.
It is lightweight and heat-resistant but can be more expensive. Titanium tips are also available, offering a unique appearance and high heat resistance. The best material depends on your priorities: appearance, budget, and where you drive. Choosing the right material ensures the exhaust tip will look great and last a long time.
Here’s a comparison table showing the pros and cons:
| Material | Pros | Cons |
|---|---|---|
| Stainless Steel | Durable, rust-resistant, shiny look. | Can be more expensive than some other options. |
| Chrome | Shiny, classic appearance. | Prone to scratches, may require more cleaning. |
| Carbon Fiber | Lightweight, modern look, heat-resistant. | More expensive than other options, can be damaged easily. |
| Titanium | Durable, high heat resistance, unique look. | Can be costly. |

Do Exhaust Tips Go Inside or Outside? The Installation Process
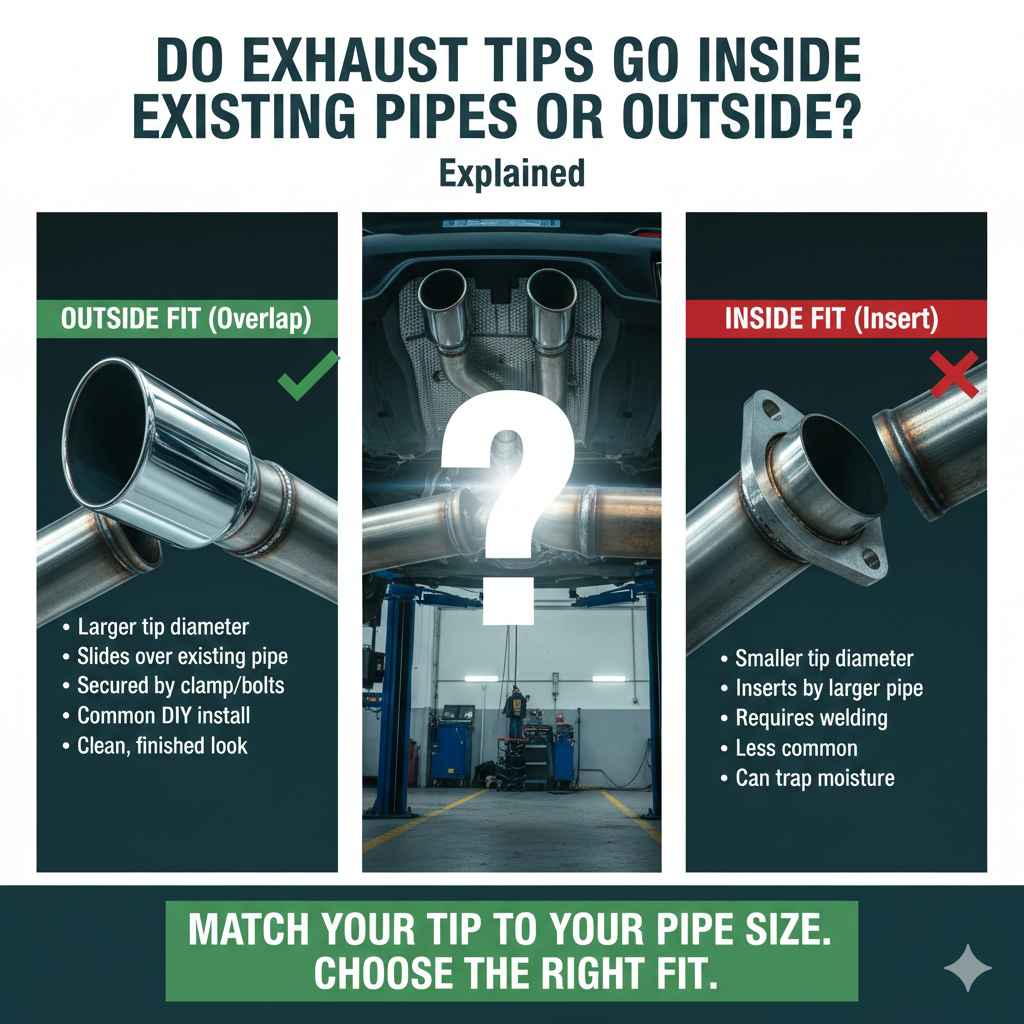
The main question is, Do Exhaust Tips Go Inside Existing Pipes or Outside? In nearly all cases, the exhaust tip fits outside the existing exhaust pipe. The tip slides over the end of the existing pipe, providing a visual finish and sometimes modifying the sound. Some tips use clamps, while others may require welding. The method depends on the exhaust tip and the existing pipe’s design. Welding provides a permanent, secure connection, ideal for performance and longevity.
Clamps are easier to install and remove, which is good if you like changing things up. It’s important to ensure a secure fit, regardless of the method you choose. A loose tip can rattle, fall off, or lead to exhaust leaks. Let’s dive into the specifics of how to install your exhaust tip.
Sliding the Tip Over the Pipe
The most common approach involves sliding the tip over the end of the existing exhaust pipe. This is typically done using a clamp to secure the tip. Start by sliding the clamp onto the exhaust pipe. Position the exhaust tip over the end of the pipe, ensuring it’s aligned as desired. Push the tip firmly over the exhaust pipe until it’s flush. The tip should sit evenly, so it looks clean and matches your vehicle’s style. Next, position the clamp over the connection point. Tighten the clamp using a wrench or socket set.
Make sure it’s tight enough to hold the tip securely but not so tight that it damages the pipe. Check the fit. Give the tip a gentle tug to make sure it doesn’t move. If everything checks out, your installation is successful. This method is simple and suitable for many types of exhaust tips and existing pipe designs.
- Alignment: Ensure the tip is straight and aligned with the bumper. Check the tip’s angle. It should match the design of your car’s exhaust system. If it’s crooked, loosen the clamp and adjust the tip until it looks perfect.
- Clamping: Use a clamp that fits the diameter of your exhaust pipe. Make sure the clamp is properly positioned over the joint. Tighten the clamp evenly to avoid any gaps or leaks. Avoid overtightening.
- Checking: Once the tip is clamped, give it a firm tug to check the stability. Inspect the connection point for any movement or play. If the tip feels secure and doesn’t move, the clamp is doing its job.
Welding Exhaust Tips: A Detailed Guide
Welding provides a more permanent and robust connection for your exhaust tip. This process requires some skill and specialized tools, so it’s often best left to a professional. The welder will prepare the existing exhaust pipe and the exhaust tip to ensure a strong weld. This often involves cleaning the surfaces and removing any rust or debris. The welder will then position the tip. The tip needs to be precisely aligned. The welder will apply heat to both the exhaust pipe and the exhaust tip using the welding equipment.
Filler metal is added to create the weld. The filler metal bonds the two pieces together. Once the weld is complete, the area needs to be inspected for any leaks or weak points. The weld needs to look seamless and be fully attached. It’s a good idea to repaint the welded area to protect it from corrosion. This method ensures your exhaust tip is securely attached and has a long lifespan. A well-done weld also maintains the integrity of the exhaust system.
- Preparation: Clean the existing exhaust pipe and the inside of the exhaust tip thoroughly. Remove any rust, dirt, or debris. This helps the welding process create a stronger bond. A clean surface ensures a better weld.
- Positioning: Place the exhaust tip over the exhaust pipe and ensure it’s perfectly aligned. The tip should be straight and at the desired angle. Tack weld the tip in a few spots to hold it in place.
- Welding: Using a MIG or TIG welder, create a continuous weld around the perimeter. The weld must penetrate both the pipe and the tip. Go slow and ensure complete fusion. Inspect the weld for any gaps.
- Finishing: After welding, allow the area to cool completely. Inspect the weld for any cracks or weaknesses. Grind down any excess weld material to smooth out the area. Then, apply a high-temperature paint to prevent rust and corrosion.
Tools Needed for Installation
Whether you’re clamping or welding, having the right tools makes the job easier. For clamping, you’ll need a clamp that matches your exhaust pipe’s diameter. You’ll also need a wrench or socket set. A lubricant, such as penetrating oil, can help with rust removal or with sliding the tip. For welding, you’ll need a welding machine (MIG or TIG) and safety gear, including a welding helmet, gloves, and protective clothing. Additional tools might include a wire brush for cleaning the exhaust pipe, a grinder for smoothing the weld, and high-temperature paint to protect the welded area. Consider having jack stands available for safety. Having everything you need before you start will help you complete the process smoothly. Prepare by gathering everything.
Advanced Installation Techniques
For more complex installations or custom setups, further techniques may be needed. You might need to cut or modify the existing exhaust pipe to achieve the perfect fit. This requires a pipe cutter or saw and the skill to make precise cuts. Some exhaust tips are designed to be flush with the bumper, requiring careful measurements and cutting. Custom exhaust systems sometimes involve bending exhaust pipes to route the exhaust in a new direction. Welding skills are important in these cases.
If you’re altering the exhaust system, always make sure the changes don’t cause any performance issues or reduce ground clearance. This is where advanced skills are needed. It’s often best to consult with a professional if you’re undertaking complex modifications. Professionals have the tools, skills, and experience to ensure your exhaust tip installation is flawless and safe.
Dealing With Rust and Corrosion
Rust and corrosion can make installation harder and potentially weaken your exhaust system. Before installing your exhaust tip, inspect your existing exhaust pipe for rust. If you find rust, you can remove it using a wire brush or a rust-removal product. A wire brush can remove surface rust, while rust-removal products can help remove deeper corrosion. Clean the exhaust pipe to ensure a good connection. After cleaning, you might apply a rust-preventative coating to help stop future rust from forming. A layer of protective coating can help add a layer of protection from road salt and moisture. Regular maintenance and inspection of your exhaust system help to identify problems early, extending the life of your exhaust system.
- Surface Rust: Use a wire brush or sandpaper to remove surface rust. Light rust is usually easy to remove. Scrub the rusty areas until the metal is clean.
- Penetrating Oil: Apply penetrating oil to loosen rusty connections, making it easier to remove old exhaust tips or clamps. This will help with the process.
- Rust Converter: Apply a rust converter to convert the remaining rust into a protective layer. Rust converters chemically change rust, preventing it from spreading.
Custom Exhaust Tip Positioning and Aesthetics
The positioning of your exhaust tip plays a major part in how it looks. You can adjust the tip’s angle and how far it sticks out. Consider how the tip matches the rest of your vehicle’s design. Some people prefer a flush look, where the tip sits even with the bumper. Others prefer a more aggressive stance, where the tip extends beyond the bumper. The tip should also be centered and aligned. This looks cleaner and more professional. Think about the style. You can also experiment with different tip sizes and shapes to find the best look. Also think about symmetry. If you have dual exhaust, make sure both tips are in the same position. The right positioning and aesthetics make a big difference.
Consider these aspects when positioning:
- Flush Look: The exhaust tip is level with the bumper, providing a clean appearance. Measure carefully to achieve this look.
- Protruding Look: The exhaust tip extends beyond the bumper, which can add a sporty aesthetic. Ensure the tip doesn’t stick out too far to avoid damage.
- Angle: Adjust the angle of the tip to match the lines of the car. Use angles that fit the design.
Sound Considerations: How Exhaust Tips Affect Noise
Exhaust tips alone will rarely drastically change the sound of your exhaust. However, they can impact sound. The shape of the tip can subtly alter the exhaust note, and the material of the tip might reflect sound differently. Some exhaust tips have internal designs that influence sound waves. An exhaust tip is unlikely to make a significant difference in sound. If you are looking to change your exhaust sound, it’s best to consider a full exhaust system or a performance muffler. These components are designed to create a noticeable effect on the sound of your vehicle.
The size of the tip also matters. A larger-diameter tip could, in some cases, slightly deepen the exhaust tone. Understanding these factors helps you choose an exhaust tip that matches your preferences. It is important to know that the impact of a tip on sound is minimal.

Frequently Asked Questions
Question: Can I install an exhaust tip myself?
Answer: Yes, you can typically install an exhaust tip yourself if you have basic tools and follow the instructions. Clamping the tip is relatively easy. Welding requires more skill and specialized equipment.
Question: What’s the difference between clamping and welding?
Answer: Clamping involves using a clamp to secure the tip to the exhaust pipe. Welding involves using heat to fuse the tip to the exhaust pipe, creating a permanent connection.
Question: Will an exhaust tip make my car louder?
Answer: Usually, exhaust tips will not make a noticeable change to your car’s volume. However, some tips with specific designs might slightly alter the tone of the exhaust.
Question: What material is best for an exhaust tip?
Answer: Stainless steel is often a great choice because of its durability and resistance to rust. Chrome and carbon fiber are other options, each offering a unique look.
Question: How do I measure my exhaust pipe?
Answer: Use a tape measure or calipers to measure the outer diameter of your existing exhaust pipe. This measurement is crucial for choosing the right-sized exhaust tip.
Final Thoughts
Deciding Do Exhaust Tips Go Inside Existing Pipes or Outside? is a crucial first step. As we’ve explored, the correct answer is, for the most part, outside. This is because exhaust tips are usually designed to slide over the end of your existing exhaust pipe, improving appearance. We’ve talked about choosing the right exhaust tip, from measuring your exhaust pipe to selecting the right material and the installation process. The choice between clamping and welding, and the need for tools like wrenches, clamps, and possibly a welder, has also been discussed. Remember to ensure that your exhaust tip is securely attached, aligned properly, and that you have all the necessary tools before you start. Consider that rust and corrosion can be an issue. Follow these steps and safety guidelines. With a little care and attention, you can easily install an exhaust tip. Enjoy the upgrade and the new look of your vehicle!