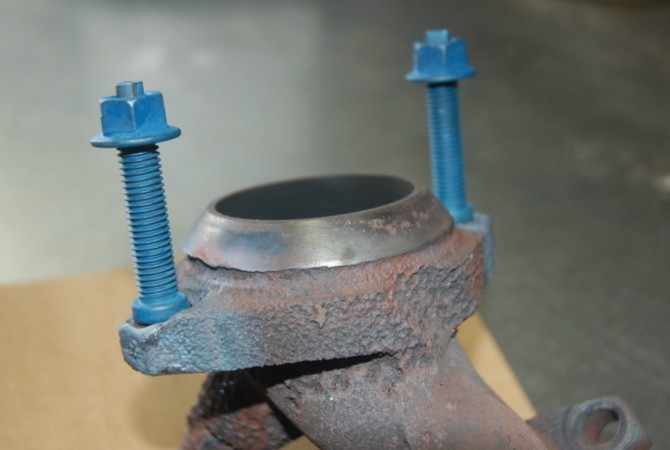
How to Make an Exhaust Hanger That Fits
Set the exhaust hanger at ride height, then verify about 10–15 mm of clearance through full suspension travel and drivetrain movement before welding or bolting it in (OEM fitment practice; verify against the vehicle’s service specifications). Skip the mock-up, and the exhaust can bang, bind, crack, or tear a hanger when the axle moves. This guide shows how to position the hanger, check clearance through travel, and build the final mount so it fits where it should.
What an exhaust hanger has to do

- Direct OEM fitment for Ford exhaust systems
- Ensures compatibility with vehicle’s original design
- Supports exhaust weight and drivetrain movement
An exhaust hanger supports exhaust weight, lets the drivetrain move, and keeps the pipe off the frame, axle, body, and suspension. Hangers and rubber isolators control exhaust movement so the system can shift with heat and load without being pulled tight or left loose enough to rattle (movement-control principle used in OEM exhaust mounting).
Load support and movement
A truck exhaust system takes more abuse than most owners realize. Road salt, trailer duty, trail impacts, heat cycles, and vibration can damage a hanger, and a bad hanger can lead to a cracked pipe, damaged muffler, or melted nearby component. A clean exhaust installation should look controlled, not pulled tight.
That balance matters because the engine and exhaust move relative to the chassis. If the hanger is too stiff, too short, or bent to the wrong angle, it can preload the system and force the pipe to act like a spring (thermal expansion and powertrain movement are expected; confirm final placement at operating temperature and load conditions).
Clearance points that matter
The exhaust must not contact the frame, axle, body, or suspension. Check the gap at the pipe, hanger rod, rubber isolator, and bracket. Lifted trucks and aftermarket bumpers often change the hanger path, so the pipe can swing closer to a crossmember or shock during articulation.
Check the hanger path at the pipe, the rubber isolator, and the bracket. A part can clear statically and still hit under droop, compression, or engine torque (clearance should be verified through suspension travel and drivetrain movement, not just at rest).
When a hanger is too tight
Worn hangers may first show up as an irritating rattle. Look for cracked rubber, stretched mounting holes, and broken metal rods. If the hanger stops movement instead of controlling it, it is too tight, even if the pipe sits where you want at rest.
Suppose a tailpipe sits about 12 mm from the leaf spring at ride height. If axle travel or exhaust rotation eats half that gap, the system can touch on the first hard bump. The fix is usually more stand-off, a different bend, or a different isolator position, not more force on the hanger (check the tightest point through compression and droop before final fastening).
Which hanger parts do you need?
Start with the parts that match the job: the rod, the rubber isolator, and the bracket style. Reuse OEM rubber when the shape still fits and the rubber is sound, choose a universal isolator when the spacing changes but the basic layout remains usable, and build a fully custom mount when the pipe path or chassis points no longer line up.
Rod, rubber isolator, and bracket
What an exhaust hanger is in practice is simple: a metal rod attached to the exhaust and a rubber isolator or bushing that separates the rod from the chassis mount. The rod needs the correct diameter and bend shape, and it should align with the existing exhaust bracket without preloading the exhaust.
Rubber isolators absorb vibration, but they must match the hanger rod size and spacing. If the hole size or center spacing is off, the hanger can sit cocked and wear fast. For fitment, choose a rod diameter that passes freely through the isolator without forcing the rubber open or leaving enough slack for chatter (sizing should match the bracket and isolator as a pair).
Clamp-on vs weld-on hardware
A clamp-on exhaust hanger is useful when welding is not desired or when the section needs to stay serviceable. It must match the pipe diameter and depend on a secure bite without crushing the pipe, so it is best on sound tubing with enough wall thickness for the clamp to hold. Clamp-on mounts are the better choice when the pipe is likely to be removed again.
A weld-on exhaust hanger fits custom fabrication better. It needs clean metal, careful placement for clearance, and load distribution that does not pull the exhaust tight. For serviceable joints, an exhaust band clamp can be a better choice than a narrow clamp because band clamps distribute clamping force around a wider section of pipe and reduce pipe distortion.
When to reuse OEM parts
Reuse the OEM rubber when the old hanger still sits in the right location, the holes are not stretched, and the rubber has no cracks or tears. Replace it when the rubber is cracked, stretched, or torn, or when the hanger has started to rattle under load.
Material choice matters too. Mild steel is common for general fabrication, stainless is the better fit where corrosion resistance matters, and galvanized rod can make sense in salted-road use when the local climate shortens part life. Match the material to the vehicle’s exposure, not just the price tag (corrosion resistance and heat exposure should guide the choice).
Exhaust hanger fitment worksheet
Use this worksheet before final welding or clamping. It keeps the hanger sized to the vehicle instead of guessed from a catalog listing.
| Measurement | Record | Why it matters |
|---|---|---|
| Pipe OD | _____ mm | Sets clamp size and hanger placement on the tube |
| Rod diameter | _____ mm | Must match the bracket and isolator hole size |
| Rubber isolator style | OEM / universal / custom | Determines hole spacing, stiffness, and serviceability |
| Stand-off length | _____ mm | Controls distance from pipe to chassis and nearby parts |
| Mount angle | _____ degrees | Keeps the rod aligned without twist or preload |
| Minimum clearance points | Frame ___ / axle ___ / body ___ / suspension ___ mm | Confirms the exhaust stays off all moving and fixed parts |
| Failure mode: rattle at idle | Likely cause: loose rod, twisted isolator, or pipe touching a nearby part; fix: re-center the hanger and restore clearance | Idle vibration reveals small fitment errors before road use |
| Failure mode: hits axle on compression | Likely cause: stand-off too short or clearance checked only at rest; fix: add gap, change the bend, or move the mount | Compression is where many “looks fine” installs fail |
| Failure mode: torn isolator | Likely cause: preload, misalignment, or a rod entering the rubber at an angle; fix: relieve the load and straighten the hanger path | Rubber tears when it is used as a correction device |
| Failure mode: pipe preloaded | Likely cause: hanger set before ride height was confirmed; fix: reset the mock-up and rework the rod length and angle | Preload shortens life and can crack the exhaust |
| Failure mode: clamp slips | Likely cause: wrong clamp match or poor pipe bite; fix: choose the correct clamp style and make sure the pipe surface is sound | Slip usually points to fitment, not just torque |
- Pipe OD: Measure the outside diameter of the tube where the hanger will clamp or weld. If the pipe is oval, distorted, or dented, measure the actual clamp area, not a nominal size from the tubing label.
- Rod diameter: Measure the existing rod or the isolator hole you plan to use. The rod should pass through without forcing the rubber open or leaving enough slack for chatter.
- Rubber isolator spacing: Record the center-to-center spacing of the mount holes or slots. A mismatch here is a common reason a hanger fits on the bench but sits twisted on the vehicle.
- Stand-off length: Measure from the pipe centerline or hanger tab to the chassis-side mount point. This sets how far the exhaust sits from the frame, axle, body, and suspension.
- Mount angle: Note the angle the rod needs to enter the isolator without side load. A hanger that is angled into the rubber too hard will wear the isolator and can rattle under load.
- Minimum clearance points: Record the tightest gap at ride height, full droop, and full compression. Include the muffler shell, tailpipe, shock body, axle tube, fuel tank shield, and any heat-sensitive nearby part.
Go/no-go checklist
- Go: The hanger supports the exhaust without pulling it upward, sideways, or rearward.
- Go: The rubber isolator sits straight and does not stretch to reach the mount.
- Go: The pipe clears the frame, axle, body, and suspension at ride height.
- Go: The same clearances remain through droop and compression.
- No-go: The exhaust contacts a part at any point in travel.
- No-go: The hanger must be bent harder just to hold the pipe in place.
- No-go: The isolator tears, binds, or twists during movement.
- No-go: A quarter inch of guesswork is left in the fit. A quarter inch of guesswork can make installation unnecessarily difficult.
How do you mock up a hanger at ride height?
Mock the hanger with the vehicle sitting at ride height so the exhaust is positioned where it will live most of the time. That lets you set stand-off, angle, and rod shape before heat or hardware locks the system into the wrong spot.
Support the vehicle safely
Put the suspension at normal ride height, or simulate ride height with the axle or suspension loaded so the chassis sits where it will on the road. Do not mock the hanger with the axle hanging free unless the final fit is meant for that position.
Locate the fixed points
Mark the exhaust tab, chassis mount, and nearest clearance risks. Include frame rails, brake lines, shock bodies, sway bars, and the body mount area if the pipe runs nearby.
Hold the hanger in place
Use a temporary clamp, tack, or wire support to position the rod and isolator. Keep the rod aligned with the bracket rather than forcing the rubber to take up a bad angle.
Check the natural hang
Let the exhaust sit on the temporary support without extra pressure. The pipe should hang in a controlled way, not be lifted or dragged into alignment by the hanger.
Mark the final location
Mark the rod bend, cut length, and bracket position only after the pipe clears the chassis and moving parts. That keeps the final hanger from inheriting a bad mock-up.
Picture a custom tailpipe that passes near the axle on one side and a heat shield on the other. If the rod is fixed before the axle is loaded, the hanger may end up about 8 mm too short once the suspension settles. Mock up at ride height first, then trim.
How do you bend and trim the rod so it fits?
Bend and trim the rod so it lines up with the exhaust bracket without side load or preload. The best hanger shape follows the exhaust path, leaves room for movement, and lands the isolator in a neutral position at ride height.
Rod alignment to the exhaust bracket
Start with the bracket line, not the pipe alone. The rod should enter the rubber or bushing straight enough that the mount can move in its intended arc without twisting. A rod that points sideways into the isolator will wear the rubber and can create a rattle.
If the original bracket is gone, set the replacement mount so the rod lands square with the chassis-side hole. That reduces bind and makes later service easier.
Stand-off length and mount angle
Stand-off length sets the gap between the exhaust and the body-side mount. Mount angle sets how the rod meets the isolator. Both need to be right at the same time, because changing one can change the other enough to alter the clearance at the frame or axle.
A common first-timer mistake is making the rod longer to solve a clearance problem that is really an angle problem. That can move the pipe into another tight spot and leave the hanger under constant bend.
Avoiding preload on the exhaust
The hanger should support the system, not pull it into position. If the exhaust shifts when the clamp or tack is loosened, the hanger is carrying preload and should be reworked before final assembly.
- Trim in small increments. Cut a little, refit, and recheck the stand-off each time. Small changes are easier to correct than a hanger that ends up about 15 mm short.
- Match the bend to movement. Shape the rod so the exhaust can swing through its normal arc without the rubber being asked to twist hard. This is especially important near the axle and rear suspension links.
- Confirm the relaxed position. With the rod in place, loosen the temporary support and confirm the exhaust stays controlled without being drawn tight. A clean fit should sit neutral at rest and still move when the chassis moves.
How do you check clearance through suspension travel?
Check clearance at full droop, full compression, and under drivetrain movement. A hanger that fits statically but binds in motion is still the wrong hanger, because suspension travel and heat expansion can erase the gap you saw in the garage.
Full droop checks
At full droop, the axle and exhaust may separate or swing in ways that change the rod angle. Confirm the hanger does not pull the pipe into the frame or pinch the rubber against a bracket edge.
Compression and axle movement
At compression, the axle can move closer to the tailpipe, muffler, or hanger tab. Make sure the pipe still clears the suspension and body when the axle is high in the travel arc, especially on lifted trucks and modified suspensions (suspension clearance should be checked where axle path is tightest).
Heat expansion and drivetrain shift
The exhaust grows with heat and moves with torque changes. That is why a fit that looks fine cold can touch after warmup or during throttle input. Leave enough margin so the system can move without making contact (thermal growth and engine movement are normal; build in room accordingly).
Clearance should cover the pipe, the hanger rod, and the rubber. If any one of those parts hits the chassis, the mount is too close even if the tube itself clears.
Frequently asked questions
What is an exhaust hanger?
An exhaust hanger is the support that carries exhaust weight while letting the system move with the drivetrain and suspension. It usually uses a metal rod plus a rubber isolator or bushing. The goal is controlled movement, not a rigid mount that transmits every bump and twist into the pipe.
How do I make an exhaust hanger that fits without rattling?
Make it fit by setting the hanger at ride height, keeping the rod straight in the isolator, and leaving at least 10–15 mm of clearance through travel and drivetrain movement. Rattle usually comes from a loose or twisted isolator, a rod that is too small, or a hanger that only fits when stationary.
What size rod and rubber isolator do I need for a custom exhaust hanger?
Use the rod size that matches the bracket and the isolator hole spacing, not just the pipe diameter. The pipe size helps choose clamp or tab fit, but the rod must match the rubber and the mount geometry. Measure both parts together so the hanger does not bind or sit crooked.
How much clearance should an exhaust hanger allow for suspension movement?
Allow enough gap for full droop, full compression, engine torque, and heat expansion. A practical target is at least 10–15 mm at the closest point before final welding or bolting, then recheck after the suspension moves. Lifted trucks and modified suspensions often need more because their axle path changes.
How to make bike hanger
If you mean a bike hanger, that is a different job from an exhaust hanger. For a bicycle rack or wall hook, the shape, load, and materials are different, so use a bike-specific guide and hardware rating. If you meant an exhaust hanger for a bike with an engine, the same ride-height mock-up and clearance checks still apply.