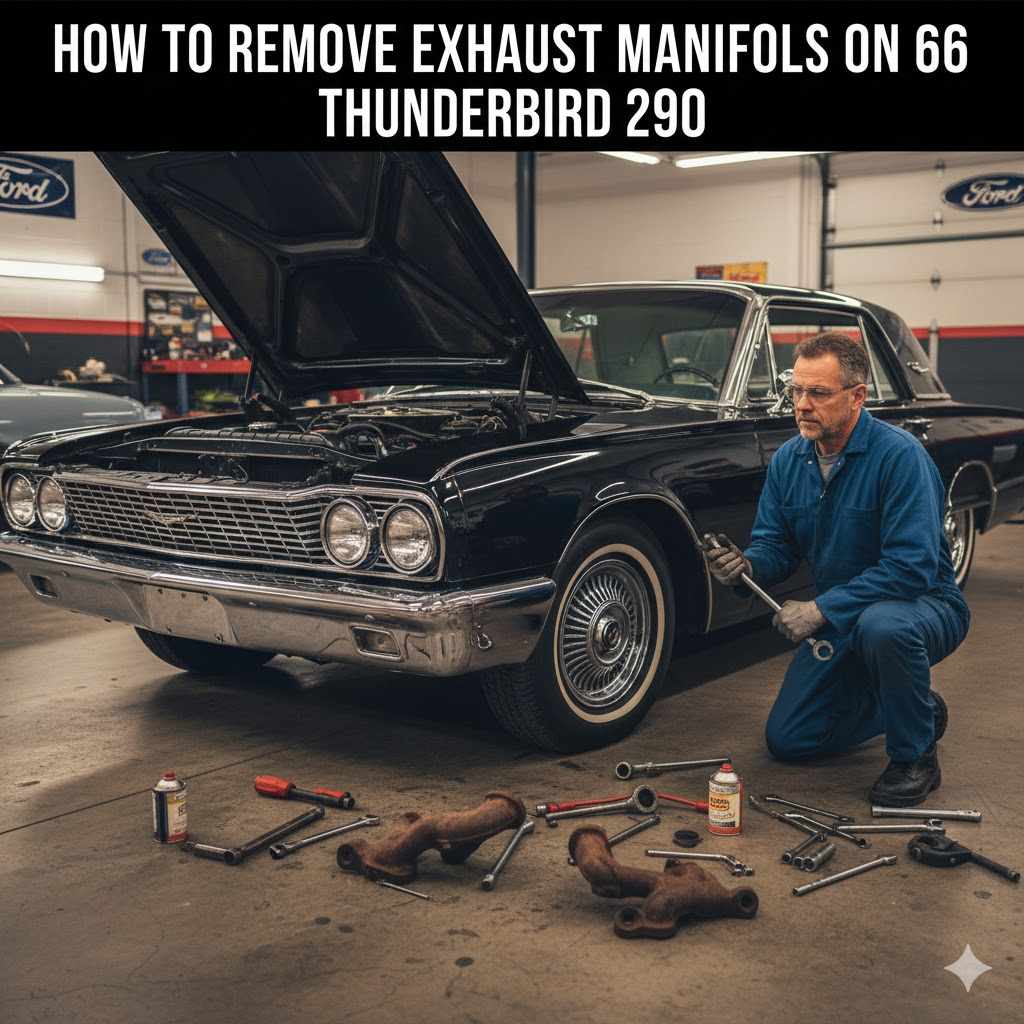
How to Remove Exhaust Manifolds on 66 Thunderbird 290
Getting your hands dirty on a classic car can be really rewarding. Sometimes, though, a job like How to Remove Exhaust Manifolds on 66 Thunderbird 290 can seem a bit tricky, especially if you’re new to working on engines. Old bolts can get stuck, and there might be a few tight spots.
But don’t worry, it’s totally doable! We’re going to walk through this step by step, making it as simple as possible so you can get that job done right and keep your Thunderbird running smoothly.
Getting Ready How to Remove Exhaust Manifolds on 66 Thunderbird 290
This part is all about making sure you have everything you need and that the car is safe to work on. When you’re planning on How to Remove Exhaust Manifolds on 66 Thunderbird 290, preparation is key. It prevents headaches later.
Think of it as laying the groundwork for a smooth engine repair. A little extra time here means less frustration when you’re under the car or wrestling with stubborn parts.
Safety First When Removing Exhaust Manifolds
Before you even think about touching a wrench, safety must be your top priority. Cars can be heavy and dangerous if not handled properly. Always make sure the vehicle is on a level surface.
The emergency brake should be on, and you should use wheel chocks on the wheels that stay on the ground. Never rely solely on a jack.
- Jack Stands Are Essential
- Always use sturdy jack stands to support the vehicle. Jacks are for lifting, but jack stands are for holding. Position them under strong points of the frame or chassis.
- Give the car a gentle push to make sure it’s stable before you get underneath. This prevents any unexpected movement while you’re working.
- Disconnect the Battery
- To avoid any electrical shorts or accidental starting, always disconnect the negative battery cable first. This stops power from flowing to the electrical system. It’s a simple step that can prevent a lot of potential problems, especially when you’re working around engine components.
- Wear Protective Gear
- Your eyes and hands need protection. Safety glasses are a must to shield your eyes from falling debris or fluid splashes. Gloves will protect your hands from grease, grime, and sharp edges.
Good work boots are also a smart choice for foot protection.
Gathering Your Tools and Supplies
Having the right tools makes all the difference. Trying to force a job with the wrong tools can damage parts or even injure you. For this specific job, having a good set of sockets, wrenches, and some specialized tools will be very helpful.
Think about what might be stuck and how you can deal with it.
- Basic Tool Set
- You’ll need a good set of metric and SAE sockets and wrenches. A ratchet with various extensions will be invaluable for reaching bolts in tight spaces. A breaker bar can provide extra leverage for stubborn fasteners.
- Don’t forget a torque wrench for reassembly if you want to be precise.
- Penetrating Oil
- Rust and age can make exhaust manifold bolts incredibly hard to remove. A good quality penetrating oil is your best friend here. Spray it on the bolts generously and let it soak for a while.
- You might need to reapply it. This helps to break down rust and corrosion.
- Exhaust Gaskets
- When you remove the manifolds, you’ll need to replace the gaskets. Always buy new ones for a proper seal. Having them on hand before you start means you won’t have to stop and run to the store mid-job.
- Make sure they are the correct ones for your 1966 Thunderbird 290 engine.
- Heat Source (Optional but Recommended)
- Sometimes, a little heat can help loosen stubborn bolts. A propane torch or a heat gun can be used carefully. Apply heat to the manifold where it bolts to the cylinder head.
Be very cautious not to overheat or damage surrounding components. This is an advanced technique.

Step-by-Step Guide How to Remove Exhaust Manifolds on 66 Thunderbird 290
Now that you’re prepped and have your tools, it’s time to get to work. This section details the actual process of removing the exhaust manifolds from your classic Ford. Following these steps carefully will ensure a smooth operation, whether you’re a seasoned mechanic or doing this for the first time.
We’ll cover everything from initial disconnection to freeing the manifold.
Disconnecting Exhaust System Components
The first physical steps involve disconnecting the exhaust system from the manifolds. This usually means separating the exhaust pipes from the manifolds. There might be a flange or a clamp holding them together.
This needs to be done before you can even think about removing the manifolds themselves.
- Locate Exhaust Pipe Connections
- Find where the exhaust pipes connect to the bottom of the exhaust manifolds. On many older vehicles, this is a flanged connection secured with bolts and nuts. Sometimes, it’s a slip fit with a clamp.
- Remove Fasteners
- Use your wrenches to remove the nuts and bolts holding the exhaust pipe to the manifold flange. If these are rusted solid, apply penetrating oil generously. You might need to use a wire brush to clean off rust and dirt first.
- If the bolts break, you’ll have a different problem to solve later.
- Separate Pipes from Manifolds
- Once the fasteners are off, you may need to gently persuade the exhaust pipes to separate from the manifolds. A pry bar or a rubber mallet can be used carefully. Wiggle the pipes to help break any rust seals.
Be careful not to damage the pipes or the manifold flanges.
Removing the Exhaust Manifold Bolts
This is often the most challenging part of How to Remove Exhaust Manifolds on 66 Thunderbird 290. The bolts can be seized due to heat and time. Patience and the right approach are crucial here.
Breaking a bolt off in the cylinder head can turn a manageable job into a major repair.
- Apply Penetrating Oil and Wait
- Spray penetrating oil on every bolt and nut holding the exhaust manifold to the cylinder head. Let it sit for at least 30 minutes, or even overnight if possible. The longer it soaks, the better the chance it has of working its way into the threads and loosening the rust.
- Loosen Bolts Gradually
- Start with the bolts closest to the center of the engine and work your way outwards. Use your socket and ratchet to try and turn each bolt counterclockwise. Apply steady, firm pressure.
- If a bolt feels like it’s going to snap, stop and try again later, perhaps after more penetrating oil or heat.
- Dealing with Broken Bolts
- If a bolt does break, don’t panic. You have options. The best case is that enough of the bolt shaft is sticking out to grip with locking pliers or a bolt extractor.
If it breaks flush or below the surface, you’ll need to drill it out and use a screw extractor. This is a more advanced repair. Sometimes, you might need to have the head repaired by a professional.
Taking Off the Exhaust Manifold
With all the bolts loosened or removed, the manifold should be ready to come off. There might be a few more tricks to get it free from the cylinder head. Sometimes, they stick due to gasket material or carbon buildup.
Remember, the driver’s side and passenger’s side manifolds might have slightly different access points and challenges.
- Gently Pry the Manifold Free
- Once all fasteners are out, try to wiggle the manifold by hand. If it doesn’t move, carefully use a pry bar or a wide, flat-head screwdriver between the manifold and the cylinder head. Work your way around the manifold, applying gentle pressure to pry it away from the head.
- Be careful not to gouge the aluminum or cast iron head surface.
- Clear Old Gasket Material
- As you remove the manifold, old gasket material will likely be stuck to both the manifold and the cylinder head. You’ll need to scrape this off carefully. A gasket scraper or a razor blade can be used.
- Make sure the mating surfaces are perfectly clean and smooth before installing the new gasket and manifold.
- Inspect the Manifold and Cylinder Head
- While the manifold is off, take the opportunity to inspect both the manifold and the cylinder head for any cracks or damage. This is also a good time to check the condition of the cylinder head’s exhaust ports for carbon buildup. Clean any debris or build-up from the ports.
Common Issues and Tips for 66 Thunderbird 290 Exhaust Manifolds
Every classic car has its quirks, and the 1966 Thunderbird 290 is no exception. Understanding some common problems you might encounter during the manifold removal process can save you time and frustration. We’ll cover specific challenges and offer practical solutions to make your task easier.
Dealing with Rusted and Seized Fasteners
This is probably the most frequent battle when working on older cars. The combination of heat cycles, moisture, and time can weld exhaust manifold bolts and nuts into place. Having a strategy for these seized fasteners is crucial.
- The Power of Heat
- Applying heat with a propane torch or a heat gun to the bolt or nut can expand the metal, helping to break the rust bond. Heat the area around the bolt, not the bolt itself. After heating, let it cool slightly, then try to turn it.
- You might need to repeat this process. Be extremely cautious not to ignite any fuel lines or wiring.
- Impact Tools
- An impact wrench, even a small electric one, can be very effective. The rapid hammering action can help shock loose rusted fasteners that a steady pull from a regular wrench won’t budge. Use the correct size socket to avoid rounding off the bolt head.
- Nut Splitters
- If the nuts are completely seized and you can’t get them to turn or break them off cleanly, a nut splitter is a handy tool. It’s a device that cracks the nut open without damaging the bolt threads, allowing you to remove it. You can then replace the nut and possibly the bolt.
Access and Space Constraints
The 1966 Thunderbird engine bay, while spacious for its era, can still present challenges when trying to reach exhaust manifold bolts. The engine’s placement, surrounding components, and the chassis itself can make access difficult.
- Long Extensions and Universal Joints
- Using long socket extensions allows you to reach bolts from a more comfortable angle. A universal joint (swivel socket adapter) is essential for reaching bolts that are at odd angles or obstructed by other parts of the engine or chassis. These tools help you apply torque effectively even in tight spots.
- Removing Other Components Temporarily
- In some cases, it might be easier to remove a component that is blocking access. This could be a heat shield, a part of the power steering system, or even a motor mount if absolutely necessary. Always weigh the time and effort of removing and reinstalling these parts against the difficulty of working around them.
- Patience and Repositioning
- Sometimes, you just need to get creative. Try different positions under the car or on the side. Reaching bolts from above or below might be necessary.
Don’t be afraid to try a different tool or a slightly different approach if your first attempt isn’t working.
Protecting Cylinder Head Mating Surfaces
The surface of the cylinder head where the exhaust manifold bolts is critical for a good seal. Damaging this surface can lead to exhaust leaks even with new gaskets.
- Gentle Scraping Techniques
- When removing old gasket material, use a gasket scraper or a razor blade held at a very low angle. You want to lift the old material, not gouge into the metal of the head. Work slowly and deliberately.
- Many mechanics prefer plastic scrapers as they are less likely to damage softer aluminum heads.
- Cleaning Thoroughly
- After scraping, use a clean rag with a bit of solvent like brake cleaner or carburetor cleaner to wipe the surface clean. Ensure there is no rust, old gasket residue, or debris left. A clean surface is vital for the new gasket to seal properly and prevent exhaust leaks.
Reassembly and Final Checks
Putting everything back together is just as important as taking it apart. A proper reassembly ensures that your exhaust system is sealed, quiet, and free of leaks. Following torque specifications and using new parts will give you the best results.
Installing New Exhaust Gaskets
New gaskets are a must for a proper seal. Old gaskets, even if they look okay, have compressed over time and will not seal effectively.
- Proper Gasket Placement
- Ensure you have the correct gaskets for your application. They are often shaped to fit specific manifolds and cylinder heads. Many gaskets have a specific side that faces outwards or inwards.
- Check the gasket packaging or an assembly manual for guidance.
- Aligning the Manifold
- Carefully place the new gasket onto the cylinder head, or onto the manifold if that is how it is designed. Then, carefully position the exhaust manifold over the gasket and line up the bolt holes. This can sometimes be tricky, so take your time to ensure it’s seated correctly without pinching or tearing the gasket.
Tightening Manifold Bolts
Proper tightening of the exhaust manifold bolts is essential for a good seal and to prevent future leaks or warped manifolds. Over-tightening can also cause damage.
- Torque Specifications Are Key
- If you have access to a service manual for your 1966 Thunderbird 290, find the recommended torque specifications for the exhaust manifold bolts. These are usually given in foot-pounds (ft-lbs) or Newton-meters (Nm).
- Tightening Sequence
- Just like cylinder head bolts, exhaust manifold bolts should be tightened in a specific sequence to ensure even pressure. This usually starts from the center bolts and works outwards in a crisscross pattern. This even pressure prevents warping the manifold and ensures a uniform seal against the cylinder head.
- Multiple Passes
- It’s best to tighten the bolts in stages. First, snug them all up according to the sequence. Then, go around again and tighten them to about half the final torque value.
- Finally, go around a third time and tighten them to the full torque specification. This allows the gasket to seat evenly.
Connecting Exhaust Pipes and Final Checks
Once the manifolds are securely bolted down, you can reattach the exhaust system components.
- Align and Secure Exhaust Pipes
- Line up the exhaust pipes with the flanges on the new manifolds. Use new hardware (bolts, nuts, and possibly new clamps) to secure them. Again, use a bit of anti-seize compound on the threads to make future removal easier.
- Ensure the exhaust system is properly supported and not hanging loosely.
- Check for Leaks
- After everything is reassembled, start the engine. Listen carefully for any hissing or puffing sounds, which indicate exhaust leaks. You can also visually inspect the connections.
- If you find leaks, you may need to re-tighten the bolts or check the gasket seating. Sometimes, small leaks will seal themselves as the engine heats up, but it’s best to fix them.
- Test Drive and Monitor
- Take your Thunderbird for a short test drive. Listen to the engine and exhaust note. If you had exhaust leaks, they should be gone.
Keep an ear out for any unusual noises over the next few drives. It’s a good idea to re-check the manifold bolts after the engine has cooled down and then heated up a few times, as they can sometimes settle.

Frequently Asked Questions
Question: How long does it typically take to remove exhaust manifolds on a 1966 Thunderbird 290
Answer: For someone experienced, it might take a few hours. For a beginner tackling How to Remove Exhaust Manifolds on 66 Thunderbird 290, it could take a full day or even a weekend, especially if you encounter stubborn bolts or have to deal with broken fasteners.
Question: What are the most common tools needed for this job
Answer: You’ll need a good set of sockets and wrenches, extensions, a breaker bar, penetrating oil, safety glasses, gloves, and jack stands. A torque wrench is recommended for reassembly.
Question: Can I reuse the old exhaust manifold gaskets
Answer: No, it is highly recommended to always use new exhaust manifold gaskets. Old gaskets have compressed and will not create a proper seal, leading to exhaust leaks.
Question: What if a bolt breaks off in the cylinder head
Answer: If a bolt breaks flush or below the surface, you’ll need to drill it out and use a screw extractor. This is a more advanced step, and if you’re not comfortable, it’s best to seek professional help to avoid damaging the cylinder head.
Question: How do I know if I have an exhaust leak after installation
Answer: You will likely hear a hissing or puffing sound coming from the engine bay, especially when the engine is running. You might also smell exhaust fumes. Visually inspecting the manifold and pipe connections can also reveal leaks.
Wrap Up
Successfully completing How to Remove Exhaust Manifolds on 66 Thunderbird 290 involves preparation, patience, and the right tools. By following these steps, you can tackle this job. Ensure all fasteners are properly tightened with new gaskets.
Enjoy your smoothly running classic Thunderbird.


