How to Prep Exhaust Manifolds for Coating or Paint
Getting exhaust manifolds ready for a new coating or paint job can seem tricky, especially if you’re new to car maintenance. There are a few steps that make a big difference in how well the new finish sticks. Don’t worry, it’s not as hard as it looks.
We’ll walk through exactly what you need to do, step-by-step, to get your manifolds looking great and protected. This guide will show you How to Prep Exhaust Manifolds for Coating or Paint easily.
Preparing Exhaust Manifolds for Durability
Getting your exhaust manifolds ready for a new coating or paint is a really important step for a long-lasting finish. This process ensures that the new material sticks well and won’t peel or flake off later. It’s all about creating a clean and slightly rough surface for the coating to grip onto.
Proper preparation means your work will look better and last much longer, saving you time and effort down the road. We will explore why this step is key and the best ways to do it right.
Why Surface Preparation Matters
Surface preparation is like building a strong foundation for your house. Without it, the house can crumble. The same applies to coatings and paints on metal surfaces.
Exhaust manifolds are exposed to extreme heat, vibrations, and corrosive elements. If the surface isn’t clean and properly treated, any coating applied will have a weak bond. This can lead to premature failure of the coating, rust formation, and a generally poor appearance.
A good prep job ensures the coating adheres tightly, resisting these harsh conditions and extending the life of the manifold.
Think about painting a greasy pan. The paint would never stick, right? Exhaust manifolds are often covered in oil, carbon deposits, rust, and old paint.
All of these are contaminants that prevent new coatings from bonding. Removing them is the first and most critical part of the process. A clean surface is the only surface that can accept a new, durable finish effectively.
This focus on cleanliness prevents future problems like chipping and blistering.
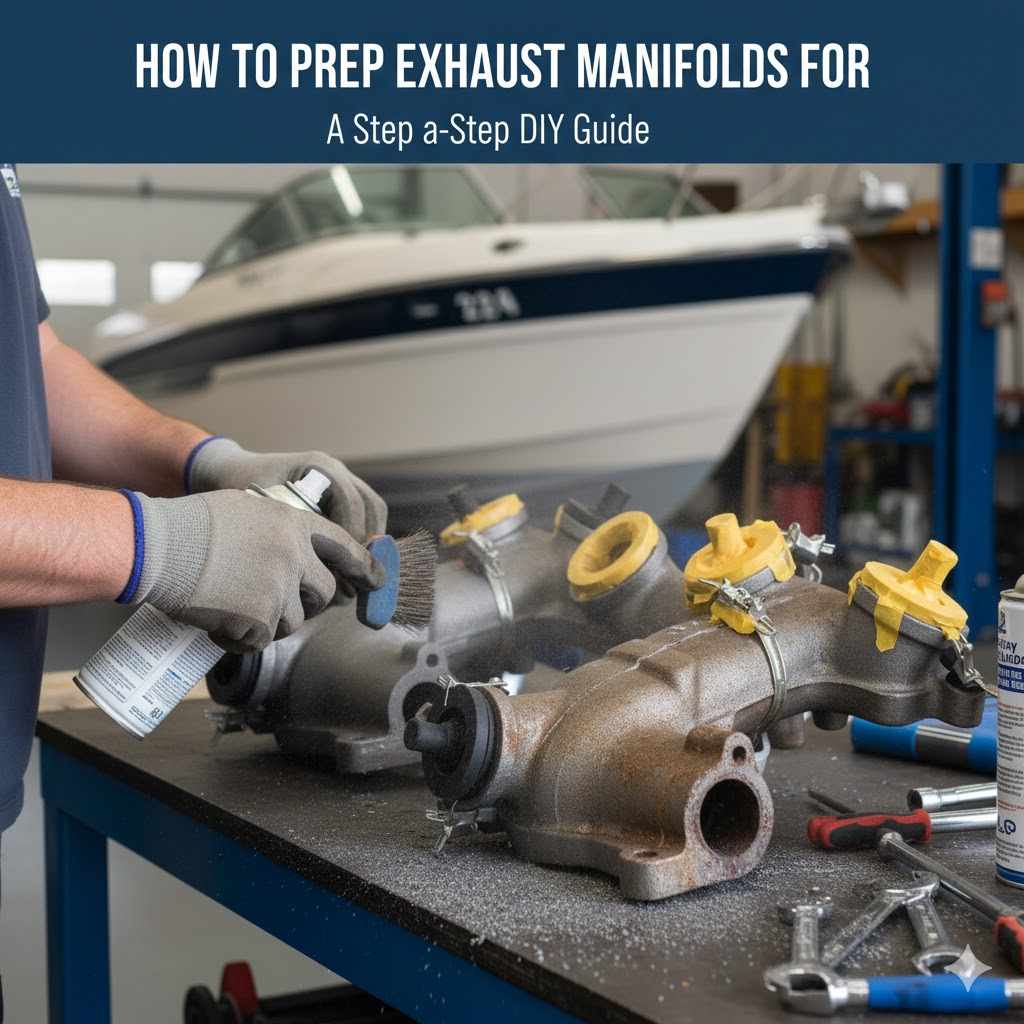
Tools and Materials for Prep Work
To get your exhaust manifolds ready, you’ll need a few helpful tools and supplies. Having the right items makes the job much smoother and more effective. You want to be sure you have everything before you start to avoid interruptions.
The goal is a clean, smooth surface for the best coating adhesion.
- Wire Brushes: These are essential for removing loose rust, carbon, and old paint. You can get them in different stiffness levels. A stiff metal brush is great for heavy-duty cleaning.
- Sandpaper or Abrasive Pads: Grits from 80 to 220 are usually good. Sandpaper helps to smooth the surface and create a slight profile for paint to grip. Sanding also removes stubborn residues that brushes can’t touch.
- Chemical Cleaners/Degreasers: These remove oil, grease, and grime. Brake cleaner or a good automotive degreaser works well. You’ll need this to make sure no oily residues are left behind.
- Scrapers: A putty knife or a specialized scraper can help chip away thick carbon buildup or old gasket material. Use these carefully to avoid scratching the metal too deeply.
- Safety Gear: Always wear safety glasses, gloves, and a respirator mask. Metal dust, chemicals, and debris can be harmful to your eyes, skin, and lungs. Protection is key.
Having these items on hand means you can tackle various types of contamination and surface conditions. A clean workspace and prepared tools contribute greatly to a successful outcome. It ensures you can effectively remove all unwanted materials.

Step-by-Step Guide to Exhaust Manifold Prep
Now let’s get into the actual process. This guide will take you through each stage of preparing your exhaust manifolds. Following these steps will help you achieve a professional-looking and durable finish.
It’s a straightforward process if you take your time and be thorough.
Step 1 Thorough Cleaning
The very first thing you need to do is get the manifolds as clean as possible. This involves removing all visible dirt, grease, oil, and loose debris. Imagine you’re washing a car; you start with a good wash to remove surface dirt before any polishing or waxing.
Exhaust manifolds are often coated in road grime and other automotive fluids.
Use a strong degreaser and a stiff wire brush. Spray the degreaser generously over the entire manifold. Let it sit for a few minutes to break down the grease and oil.
Then, scrub aggressively with the wire brush. Make sure to get into all the nooks and crannies. You might need to repeat this process a couple of times, especially if the manifolds are very dirty.
Rinse thoroughly with water and let them dry completely before moving to the next step. Any remaining grease will cause the new coating to fail.
Dealing with Stubborn Grime
Sometimes, simple scrubbing isn’t enough. For really thick layers of baked-on oil or carbon, you might need a bit more power. A plastic or metal scraper can be used to gently chip away at these deposits.
Be careful not to gouge the metal. If the grime is extremely tough, consider using a stronger chemical cleaner or even a pressure washer, but ensure the manifolds are completely dry afterward. Heat can also help loosen some deposits; warming the manifold slightly can make cleaning easier.
Step 2 Rust and Old Paint Removal
Once the manifolds are clean and dry from the initial degreasing, you’ll tackle any rust or old paint. These need to be removed for the new coating to adhere properly. Rust, in particular, is a major enemy of new paint jobs.
It will continue to spread underneath the new coating if not fully eliminated.
Start with your wire brushes again. Use a more aggressive wire brush, or even a wire wheel attachment on a drill or grinder, for rust. Work in one direction to create a consistent finish.
For areas with heavy rust, you might need to spend a good amount of time. Don’t be afraid to be thorough. You want to get down to bare metal wherever possible.
Old paint that is peeling or flaking also needs to be removed. Use your scraper to lift off loose sections. Sandpaper or abrasive pads are excellent for removing thinner layers of paint and smoothing out rough spots.
Aim to create a uniform surface across the entire manifold.
Choosing the Right Abrasives
The type of abrasive you use depends on the condition of the manifold. For heavy rust, start with a coarser grit sandpaper, like 80 or 120. This will quickly remove the bulk of the rust.
Once the rust is gone, switch to a finer grit, such as 220, to smooth the metal surface. This finer grit creates a better profile for paint adhesion. If the manifold is relatively free of rust but has some old paint or minor imperfections, starting with 120 or 220 grit sandpaper might be sufficient.
Remember to wear your safety glasses and a mask during this process. Metal dust and paint particles can fly everywhere. After sanding, wipe down the entire manifold with a clean cloth to remove all dust.
You want to ensure there’s no dust left behind. This dust can get embedded in the new coating.
Step 3 Surface Abrasion for Adhesion
This step is crucial for creating a surface that paint or coating can grab onto. It’s not just about removing imperfections; it’s about creating a slight “tooth” on the metal. This is often called creating a profile.
After removing rust and old paint, you’ll want to go over the entire surface with sandpaper or abrasive pads again. A grit of around 180-220 is typically ideal for this. The goal is to lightly scuff up the bare metal.
This process removes any microscopic burrs or remaining smooth patches. It ensures that the entire surface has a uniform, slightly rough texture.
Think of it like preparing a wall for wallpaper. You don’t want a glossy, slick surface; you want something with a bit of grip for the adhesive to work. For exhaust manifolds, this grip is essential for the high-temperature coating to bond properly.
Use an orbital sander for larger areas if available, or good old-fashioned elbow grease with sandpaper. Pay attention to corners and edges.
Creating the Perfect Profile
The “profile” refers to the microscopic peaks and valleys created on the metal surface. A good profile means the coating can chemically bond and mechanically lock into these tiny imperfections. Too smooth, and the coating might peel.
Too rough, and you might have issues with the coating not filling in properly. A medium-grit abrasive like 220 provides a balanced profile.
After sanding, thoroughly wipe down the manifold with a clean, lint-free cloth. You want to remove every speck of dust. For the best results, you can use compressed air to blow out any dust from hidden areas.
This ensures a truly clean and prepared surface for the next stage.
Step 4 Final Cleaning and Inspection
Before you apply any coating, one last cleaning and a careful inspection are necessary. This is your final check to catch anything you might have missed. It’s the last chance to ensure a perfect surface.
Use a high-quality degreaser or a wax and grease remover. Apply it to a clean lint-free cloth and wipe down the entire manifold. This will remove any fingerprints, residual dust, or oils from handling.
Make sure to work in a well-ventilated area. Some degreasers have strong fumes. Allow the manifold to air dry completely.
Do not touch the surface with bare hands after this step.
Visually inspect the entire manifold under good light. Look for any remaining rust spots, grease, or dull areas. If you find any, go back and address them.
This might mean a quick spot sanding or another wipe-down with degreaser. A final wipe with a tack cloth can also pick up any lingering fine dust particles before painting. This thoroughness is what separates a good finish from a great one.
Handling and Protection
Once the manifold is prepped, handle it with care. Wear clean gloves to avoid transferring oils from your skin. If you need to move it, use a clean cloth or a dedicated hook.
The goal is to keep the prepared surface pristine until the coating is applied. Any contamination at this stage can compromise the entire preparation effort. Store the manifold in a clean, dry place away from dust and moisture.
Choosing the Right Coating for Exhaust Manifolds
Selecting the correct coating is just as important as the preparation steps. Exhaust manifolds operate under extreme conditions, so your chosen coating needs to withstand high temperatures, corrosion, and vibration. Not all paints are up to the task.
High-Temperature Paint Options
For exhaust manifolds, you generally need specialized high-temperature paints. These are formulated to withstand temperatures that can range from 1200°F to 2000°F (650°C to 1090°C) or even higher, depending on the product. Standard automotive paints will burn off quickly under these conditions.
Common types include ceramic-based paints, silicone-based paints, and specialized exhaust coatings. These coatings often offer excellent durability and resistance to thermal cycling. They can also provide a protective barrier against rust and corrosion, which is vital for longevity.
When choosing, always check the manufacturer’s specifications for temperature resistance and intended use.
Many of these products come in aerosol cans, making application relatively straightforward. Some come as a two-part system for maximum durability. Always read and follow the manufacturer’s instructions for application and curing procedures.
Ceramic Coatings
Ceramic coatings are a popular choice for exhaust components. They are known for their exceptional heat resistance and durability. These coatings create a very hard, smooth surface that can help reduce heat transfer and improve exhaust flow efficiency.
They are also highly resistant to corrosion and chemical attack.
Ceramic coatings are often applied professionally, but DIY-friendly kits are available. They typically require a high-temperature curing process, often involving running the engine for a specific period to bake the coating onto the metal. This curing step is critical for achieving the coating’s full potential and durability.
The cost of professional ceramic coating can be higher, but it often offers the longest-lasting and most robust solution. DIY options are more budget-friendly but might require more careful application and curing.
Application Techniques
The method of applying your chosen coating is critical. Whether you’re using an aerosol can or a brush-on product, proper technique ensures even coverage and maximum protection. Avoid applying the coating too thickly, as this can lead to runs, drips, and uneven curing.
For aerosol cans, hold the can about 8-12 inches from the surface and use steady, sweeping motions. Overlap each pass by about 50% to avoid missed spots or thin areas. Apply multiple thin coats rather than one thick coat.
This allows each layer to flash off properly before the next is applied, promoting better adhesion and a smoother finish.
For brush-on applications, use a high-quality brush designed for paints and coatings. Apply thin, even strokes. Work in sections to ensure you don’t leave marks.
Always follow the manufacturer’s recommended drying times between coats.
Curing the Coating
Most high-temperature exhaust coatings require a specific curing process to achieve their full hardness and heat resistance. This often involves heat. The exact procedure will vary depending on the product you use, so always consult the manufacturer’s instructions.
For aerosol paints, this often involves running the engine for a set period. Typically, you’ll start the engine and let it idle for 10-20 minutes to allow the coating to cure. You might notice some smoke or fumes during this initial heat cycle, which is normal as the solvents evaporate.
Ensure good ventilation during this process. After the initial idle, you might need to drive the vehicle under normal conditions for a set duration to fully cure the coating.
Some ceramic coatings might require oven curing or a specific heat cycle in a kiln, especially for professional applications. Failure to cure the coating properly can lead to premature failure, peeling, or discoloration. This is a common reason for coatings not performing as expected.
Common Mistakes to Avoid
Even with the best intentions, it’s easy to make mistakes during the preparation process. Being aware of these common pitfalls can save you a lot of frustration and ensure your project is successful.
Incomplete Cleaning
One of the biggest mistakes is not cleaning the manifold thoroughly enough. Leaving even small amounts of grease, oil, or grime can severely compromise the adhesion of your new coating. It might look clean on the surface, but microscopic contaminants can prevent a strong bond.
Always degrease, scrub, and rinse multiple times if necessary. Ensure the surface is completely free of any oily residue before proceeding.
A common scenario is rushing the degreasing step. People might wipe it down once and assume it’s clean. However, exhaust manifolds are often saturated with oils and carbon that are hard to remove.
Using a quality degreaser and allowing it to work for the recommended time is essential. A final wipe with a wax and grease remover ensures no fingerprints are left behind.
Skipping Sanding or Abrasion
Another frequent error is failing to properly abrade the surface after cleaning. Bare metal might look smooth, but it doesn’t offer enough “tooth” for coatings to grip. Sanding creates microscopic valleys and peaks that allow the coating to mechanically lock onto the surface.
Skipping this step often results in coatings that peel or flake prematurely.
A good rule of thumb is to sand until the surface has a uniform matte appearance, indicating that all smooth, shiny spots have been scuffed. This doesn’t mean making the surface rough; it means creating a consistent, lightly textured finish. For areas with old paint, ensure all loose or peeling sections are removed and the remaining paint is well-scuffed.
Not Reading Product Instructions
Every coating product is different. They have specific application temperatures, drying times, and curing procedures. Failing to read and follow the manufacturer’s instructions is a recipe for disaster.
For example, applying a high-temperature coating when the ambient temperature is too low or too high can affect its performance.
Similarly, improper curing is a major cause of coating failure. Some coatings need a specific heat cycle to harden correctly. If you don’t follow the curing steps precisely, the coating might not reach its full potential, leading to early breakdown.
Always take the time to read the label or technical data sheet for the product you are using.
Handling Contamination Post-Prep
Once you’ve done all the hard work of prepping the manifold, it’s crucial to prevent re-contamination. Touching the surface with bare hands introduces oils that can interfere with coating adhesion. Avoid handling the manifold unnecessarily after the final cleaning.
Use clean gloves and handle it by areas that will be less visible or that will be covered by the coating anyway, if possible.
Also, be mindful of your work environment. If you are painting in a dusty garage, dust can settle on the freshly prepped surface before the coating is applied. Try to paint in the cleanest area possible and minimize air movement that can stir up dust.
Covering the manifold loosely with a clean plastic sheet can help protect it from dust settling while it waits for coating application.
Real-World Examples
To further illustrate the importance of proper preparation, let’s look at a couple of scenarios.
Scenario 1: The Weekend Warrior’s Fix
John, a DIY enthusiast, decided to repaint his old pickup truck’s exhaust manifolds. He quickly brushed off some loose rust, gave them a once-over with a rag, and sprayed them with a standard engine enamel he had lying around. Within a few weeks of driving, he noticed the paint starting to bubble and peel, especially near the hottest parts of the manifold.
The issue was twofold: the engine enamel wasn’t rated for the extreme heat of exhaust manifolds, and more importantly, the surface wasn’t properly cleaned or abraded. Oil and rust residue remained, preventing the paint from adhering. The bubbling and peeling were a direct result of insufficient preparation and the wrong coating.
Had John followed the steps outlined above, he would have used a high-temperature specific coating and spent time cleaning, removing rust thoroughly, and sanding the surface to create a proper profile. This would have ensured a much more durable and longer-lasting finish.
Scenario 2: The Professional Restoration
Sarah was restoring a classic car and wanted the exhaust manifolds to look as good as new. She took the manifolds to a specialist who performed a multi-stage preparation process. First, they were chemically cleaned to remove all oils and grease.
Then, they were sandblasted to remove all traces of rust and old coating, ensuring they were down to bare, clean metal.
After sandblasting, the surface was meticulously inspected. Any remaining imperfections were smoothed. Finally, a specialized high-temperature ceramic coating was applied in multiple thin layers and then professionally cured in a high-temperature oven.
The result was a stunning, highly durable finish that looked factory-fresh and was built to withstand the engine’s heat for many years.
This example highlights the difference when professional methods and materials are employed. The investment in proper preparation and coating leads to exceptional results and longevity, far surpassing a quick DIY attempt.

Frequently Asked Questions
Question: How long does it take to prep exhaust manifolds?
Answer: The time needed varies greatly depending on the condition of the manifolds. For lightly rusted ones, it might take 2-3 hours. For heavily corroded or carbon-caked manifolds, it could take 6-10 hours or even longer, spread over a couple of days to allow for cleaning and drying.
Question: Can I use regular spray paint on exhaust manifolds?
Answer: No, regular spray paint is not suitable for exhaust manifolds. They get extremely hot, and standard paint will burn off, discolor, or peel quickly. You must use specialized high-temperature exhaust paint designed for these conditions.
Question: Do I need to remove the exhaust manifolds from the car for prep?
Answer: Yes, it is highly recommended to remove the exhaust manifolds from the vehicle for proper cleaning and preparation. Accessing all areas thoroughly is much easier when they are off the vehicle, ensuring a complete and effective job.
Question: What grit sandpaper is best for exhaust manifold prep?
Answer: For initial rust and paint removal, a coarser grit like 80-120 might be used. For smoothing the surface and creating a profile for paint adhesion, a medium grit like 180-220 is generally recommended. The final finish should be smooth but not glossy.
Question: Will heat curing damage the manifold material?
Answer: No, the heat curing process for exhaust coatings is designed to be safe for the manifold material, typically cast iron or steel. The temperatures and durations are within the material’s tolerance, and they are intended to bond the coating to the metal effectively without causing damage.
Final Thoughts
Preparing exhaust manifolds for coating or paint is vital for a lasting finish. Thorough cleaning, rust removal, and surface abrasion create the necessary bond. Using the right high-temperature coating and following application instructions ensure durability.
This careful prep work protects your investment and keeps your engine looking its best.