Do You Need Exhaust Tips? Essential Guide
Do you need exhaust tips? For most drivers, exhaust tips are not strictly necessary for vehicle operation, but they offer significant benefits in appearance, sound customization, and mild protection against rust. You only “need” them if you want to upgrade the look or fine-tune the exhaust note of your daily driver.
Picking out the right parts for your car can feel overwhelming, especially when you start looking at the exhaust system. You see shiny chrome tips on cool cars and wonder: Are these just for looks, or do I actually require them? It is a common question, and the answer is simpler than you might think. Exhaust tips are primarily cosmetic, but they can also subtly change how your car sounds and help protect the original pipe end.
If your current exhaust pipe is rusty, boring, or just too small, installing a new tip is a fun, easy upgrade. You do not need to be an expert mechanic to do this. This guide will walk you through exactly what exhaust tips do, why people use them, and how you can choose the best ones for your ride. We will keep things simple and boost your confidence right away!
Let’s get straight to the heart of the matter. Do you need them? No. Your car will run perfectly fine without any tip attached to the end of the muffler pipe. However, the real question is what you want your car to look and sound like. Exhaust tips serve several key purposes that move them from a pure accessory to a valuable upgrade.
The Core Functions of an Exhaust Tip
While they look like simple decorations, exhaust tips actually interact with the gases leaving your engine. Think of them as the finishing piece of your vehicle’s powerful voice.
1. Aesthetics and Customization (The Main Reason)
The factory exhaust pipe on many everyday vehicles is often plain steel, sometimes tucked away or simply cut straight, which doesn’t match the stylish look of the rest of the car. An exhaust tip covers that boring, oxidized end, bringing a fantastic visual upgrade. You can choose from materials like polished stainless steel, high-temp black coating, or even carbon fiber.
2. Protecting the Original Pipe
This is a practical benefit many people overlook. The very end of your exhaust pipe is the first place to see moisture, road salt, and dirt. If the factory pipe starts rusting or degrading, an exhaust tip clamps over it, shielding the vulnerable metal from further damage. This can keep your existing system looking newer for longer.
3. Tuning the Exhaust Sound (Mildly)
While a full muffler or resonator replacement creates the biggest sound change, the shape and diameter of the tip play a small role. Generally:
- Wider tips can sometimes give a slightly deeper, throatier tone.
- Tips with rolled edges or specific baffling (though rare in simple bolt-on tips) can slightly alter the resonance.
For major volume increases or deep rumbling sounds, you need to look past just the tip and investigate axle-back or cat-back systems. But for minor refinement, the tip helps.

When an Exhaust Tip Becomes Essential (For Looks and Safety)
While necessary for operation, a tip becomes important or “essential” when restoring function or achieving a desired look. Here are the primary scenarios where installing a new tip makes sense:
- Factory Pipe Damage: If your original pipe is rusted through, extremely dented, or broken right at the end, a bolt-on or weld-on tip is a cost-effective repair to seal that opening and make it look good again.
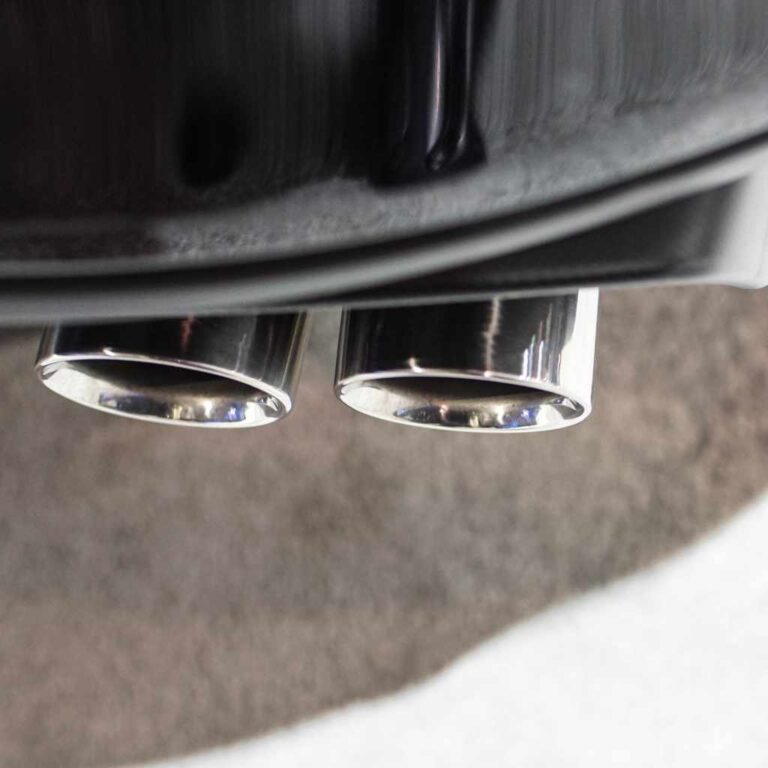
- Desire for a Specific Style: If you want a twin-tip setup or need those large, round tips common on performance cars, a tip upgrade is the simplest way to achieve that look without replacing the entire system.
- Protecting a New System: If you just paid for a brand-new aftermarket exhaust, covering the end with a high-quality stainless steel tip protects your investment from environmental corrosion.
Types of Exhaust Tips and How They Attach
Understanding how tips connect to your existing exhaust pipe is crucial for a successful, frustration-free installation. They generally fall into three main attachment categories. Always measure the diameter of your existing pipe before you buy anything!
1. Slip-On (Clamp-On) Tips
These are the easiest to install and the most popular for beginners. They slide directly over the existing tailpipe and are secured using a small bolt (usually an Allen key or hex bolt) that tightens down, clamping the tip onto the pipe.
- Pros: Very easy DIY, requires no welding, easily removable.
- Cons: Less permanent, sometimes can rotate or loosen over time if not clamped very securely.
2. Weld-On Tips
These tips are designed to be permanently fused to your existing tailpipe using a welder. This creates the most secure fit with a factory-like appearance.
- Pros: Highly durable, no movement or vibration, best aesthetic integration.
- Cons: Requires welding equipment and skill, permanent modification.
3. Bolt-On Tips (Hanger Style)
Less common for simple tips, these often use a mounting flange or bracket that bolts onto a specific attachment point near the end of the exhaust pipe, offering a secure connection without welding.
- Pros: Sturdy connection, often used for dual-tip setups.
- Cons: Requires precise hole alignment on the existing pipe and specific hardware.
| Installation Type | Skill Level Required | Permanence | Best For |
|---|---|---|---|
| Slip-On (Clamp) | Beginner | Low (Removable) | Quick cosmetic upgrades |
| Weld-On | Intermediate/Expert | High (Permanent) | Maximum security and factory look |
| Bolt-On | Intermediate | Medium | Dual-exhaust reconfiguration |
A Beginner’s Guide to Sizing and Choosing Your Tip
The biggest mistake beginners make is buying a tip that simply doesn’t fit the existing pipe end. Getting the size right is not about aesthetics; it’s about making sure the tip slides on and clamps securely.
Step 1: Measure Your Existing Pipe Diameter
You need two crucial measurements. Use a reliable tape measure or digital caliper. If you don’t have one, you can use a piece of string, mark where it overlaps on the pipe, and then measure the string with a standard ruler.
- Inlet Diameter (The crucial one): Measure the outside diameter (OD) of the exhaust pipe where the tip will slide onto. This measurement determines the size of the tip’s opening. Common sizes range from 1.5 inches up to 3 inches.
- Outlet Diameter (The look): This is the size of the opening you want to see sticking out the back. This is based purely on style preference.
Tip Tip: If you are buying a clamp-on tip, the inlet diameter of the purchase must match your existing pipe OD precisely, or be slightly larger if it uses a compression sleeve.
Step 2: Select Your Material and Finish
Material choice affects durability, appearance, and how much cleaning it will require.
- Stainless Steel (Best Overall): Highly resistant to rust and heat. Polished stainless remains shiny, while brushed stainless offers a more subdued look. This is the standard, reliable choice.
- Titanium/Chrome Plated: Chrome offers a brilliant mirror finish, but cheaper plating can sometimes flake off over long periods of exposure to extreme heat.
- Carbon Fiber: Light, modern, and very stylish, often paired with stainless steel tips for durability while offering a unique look.
Step 3: Consider Tip Style and Shape
This purely comes down to matching your car’s overall look. Performance vehicles often use large, aggressive tips, while luxury cars might prefer smaller, highly polished, or subtly angled tips.
- Round: The most common, versatile shape.
- Oval/Rectangle: Often used on trucks or vehicles aiming for a wider, more aggressive rear view.
- Angled/Chop Cut: Where the opening is cut at an angle (usually 15 to 30 degrees), often used to tuck the tip neatly under the bumper line.
For safety and long-term satisfaction, always check reputable sources for material quality. For instance, when dealing with high heat emissions, understanding the material safety standards for automotive exhaust components, often discussed by bodies like the Society of Automotive Engineers (SAE), can guide your choice toward materials rated for sustained high temperatures.
Installation: How to Install an Exhaust Tip (The Easy Way)
Installing a bolt-on or clamp-on tip should take less than 30 minutes and requires very basic tools. This process removes the frustration and makes you feel like a pro! Remember safety first—only work on a cool exhaust system.
Tools You Will Likely Need
Before starting, gather these essentials:
- New Exhaust Tip
- Wire Brush or sandpaper (to clean the old pipe)
- Penetrating Oil (if the old pipe is rusty)
- Safety Glasses and Gloves
- Wrench or socket set (to fit the clamp bolt)
- Jack and Jack Stands (only if you need more access underneath)
Step-by-Step Installation Guide (The Slip-On Method)
This process assumes you are installing a standard slip-on tip onto a factory pipe.
- Ensure the Vehicle is OFF and Cool: Never work on a hot exhaust system. The gases and metal retain heat for a very long time, leading to severe burns. Wait at least an hour after driving.
- Inspect and Clean the Old Pipe End: Use your wire brush or coarse sandpaper to scrub the last 4–5 inches of your existing tailpipe. You must remove all rust, soot, and grime. A clean surface ensures the new tip slides on smoothly and clamps tightly. If it is very rusty, spray it with penetrating oil and let it sit for 10 minutes.
- Test Fit the New Tip: Slide the new tip over the cleaned pipe. It should fit snugly. Note exactly how far it slides on. You want to leave about 1/2 inch to 1 inch of the old pipe showing if you plan to keep the clamp visible, or push it all the way on for the cleanest look.
- Position the Tip: Adjust the tip so it lines up perfectly straight with the bumper opening. Ensure it doesn’t hit any other part of the chassis or suspension.
- Tighten the Clamp Bolt: Locate the small bolt on the clamp band attached to the new tip. Use your wrench or socket to tighten this bolt firmly. Do not overtighten, especially if the original pipe is thin, as you could crush it. Tighten until the tip is completely secure and cannot rotate by hand.
- Clean Up: Wipe down the new tip with a lint-free cloth to remove fingerprints for that brilliant shine.
If you have significant clearance issues or need to cut your old pipe off a little shorter before installing a tip, you might need an angle grinder or a hacksaw. However, for simple slip-ons, this extra cutting is usually not required. Always check local regulations on exhaust modification; while tips are generally safe, some areas have strict limits on how far components can extend past the bumper.
Maintenance: Keeping Your New Exhaust Tips Shiny
Exhaust tips get dirty fast—they are literally the exit point for 1,000-degree exhaust gases mixed with road grime. Regular, gentle cleaning is key to maintaining that custom look.
Monthly Cleaning Routine
For standard stainless steel or chrome tips, a monthly wipe-down is usually enough to prevent heavy buildup.
- Use warm water and mild dish soap.
- Wash the tip lightly with a soft cloth or sponge to remove loose dirt.
- Dry immediately with a clean towel to prevent water spots.
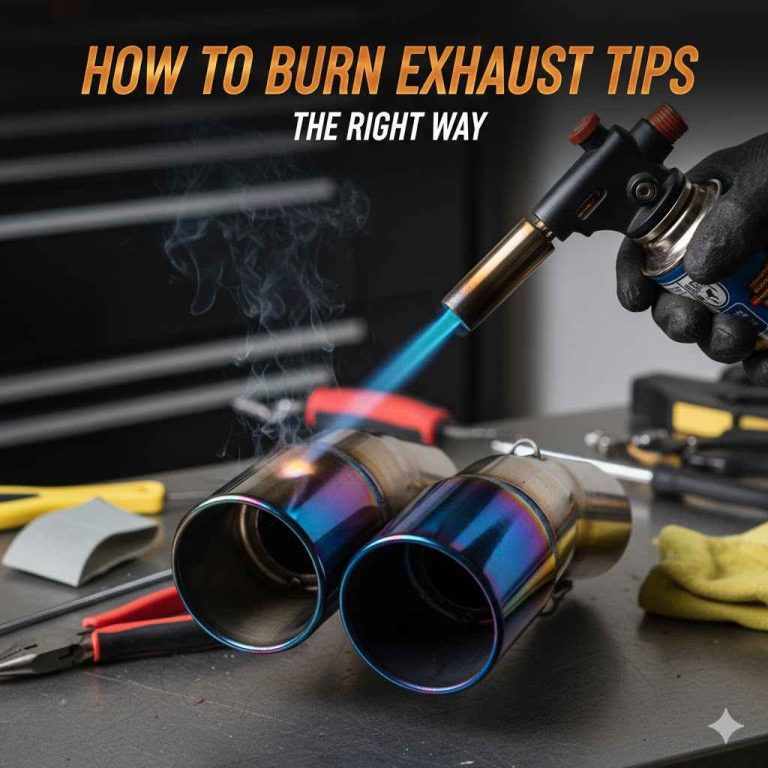
Dealing with Heat Stains and Blueing
High heat can cause stainless steel tips to develop a bluish or golden tint. This is called heat tint and is normal, especially after hard driving. It is not rust.
To address heat tint:
- Purchase a specialized metal polish designed for stainless steel or exhaust systems (e.g., those containing fine abrasives).
- Apply the polish sparingly to a clean cloth.
- Rub the stained area with moderate pressure. Always rub with the grain of the metal finish (if it has visible lines) or in circular motions for perfectly smooth finishes.
- Wipe clean. This might take a few passes for heavy stains.
Caution: Avoid using harsh chemical cleaners, steel wool, or abrasive pads on chrome or coated finishes, as these can scratch or strip the protective layer.
Exhaust Tips vs. Full Exhaust Systems: What’s the Difference?
Many beginners confuse a simple exhaust tip upgrade with installing a full performance exhaust system. Understanding the roles helps you decide if tips alone meet your needs.
The Exhaust System Components
A vehicle’s exhaust system generally includes several parts, each serving a specific engineering purpose:
| Component | Primary Job | Impact of Modification |
|---|---|---|
| Exhaust Manifold/Headers | Collects gases from the engine cylinders. | Major performance change (Expert level). |
| Catalytic Converter | Converts harmful emissions into safer byproducts. | Legality risk; moderate performance change. |
| Muffler | Reduces noise/sound pressure. | Primary source of volume change (louder or quieter). |
| Resonator | Tunes out specific, irritating sound frequencies (drone). | Mild sound tuning. |
| Tailpipe/Exhaust Tip | Final exit point; cosmetic finish. | Cosmetic look and minor sound refinement. |
In summary: If you are happy with the volume, responsiveness, and power delivery of your car, an exhaust tip is a perfect, low-cost customization. If you want a noticeable power boost, a sportier sound across the RPM range, or major volume increase, you need to look at replacing the muffler or installing a cat-back system.
When a Tip Alone Isn’t Enough
You should consider upgrading further than just the tip if:
- You want a significantly deeper, louder sound.
- You are chasing maximum horsepower (which requires better exhaust flow down the line).
- Your existing muffler is failing or rusting internally.
- You want to switch from a single exhaust outlet to a dual-outlet setup (often requiring a new axle-back muffler assembly).
Are Cheap Exhaust Tips Worth Buying? Safety Concerns
It is tempting to see an ultra-cheap tip online, but when dealing with car parts that handle intense heat and vibration, quality matters. Cheap tips often come with safety and durability risks.
Risks Associated with Low-Quality Tips
- Rapid Discoloration (Blueing/Rust): Thinly chromed or low-grade stainless steel (like 409 instead of 304) will often turn ugly blue or show rust spots very quickly, ruining the look you paid for.
- Loose Clamps: Poorly manufactured clamp hardware often strips easily or loosens under vibration, causing the tip to fall off while driving—a safety hazard for you and other drivers.
- Shoddy Welding: If you buy a welded tip, poor welds can crack under thermal stress.
It’s wise to invest in a mid-range tip made from 304-grade stainless steel. This grade handles heat expansion and corrosion much better than cheaper alternatives. Your investment will pay off in longevity and a consistently clean look.
FAQ: Common Questions About Exhaust Tips
1. Will installing an exhaust tip affect my car’s warranty?
Generally, no. Because an exhaust tip is considered an accessory that mounts externally and does not alter any emissions control components (like the catalytic converter or O2 sensors), it typically does not void your powertrain warranty. However, always check with your dealer if you are concerned about a specific engine warranty.
2. Do I need a special tool to remove an old, stuck exhaust tip?
If the old tip is rusted onto the pipe, you might need help. First, spray the junction point generously with penetrating oil (like WD-40 Specialist Penetrant) and let it soak for several hours or overnight.