Do Mufflers Have Stops For Exhaust Pipes? Essential Secrets
Yes, mufflers often have integrated stops, spacers, or shoulder features designed to correctly position the exhaust pipe during assembly. These stops are crucial for ensuring a tight, leak-free fit and preventing pipes from sliding too far into the muffler chamber, which directly affects sound routing and performance.
Welcome! If you’ve ever looked closely at an exhaust system, you might wonder how everything lines up so perfectly under your car. Dealing with exhaust pipes and mufflers can seem tricky, especially when replacing parts. You might be asking yourself: “Do mufflers have built-in stops for the pipes?” It is a common question, and the answer will save you time and frustration during installation. You do not need to be a master mechanic to understand this! We are going to break down exactly what these features are, why they matter, and how they keep your exhaust running smoothly and quietly. Get ready to gain some real confidence in understanding your vehicle’s undercarriage.
Decoding Muffler Stops: What They Are and Why They Matter
When we talk about exhaust systems, we are dealing with heat, vibration, and precise alignment. If an exhaust pipe slides too far into a muffler, it can block the internal paths designed to cancel out sound—making your car sound weird or loud. If the pipe doesn’t go in far enough, you risk leaks and a loose connection. This is where the concept of a “stop” comes into play.
A muffler stop isn’t always a separate bolt or washer. More often, it’s a clever design feature built directly into the muffler inlet or outlet port. Understanding this feature is key to a successful repair or upgrade.
The Anatomy of the Connection Point
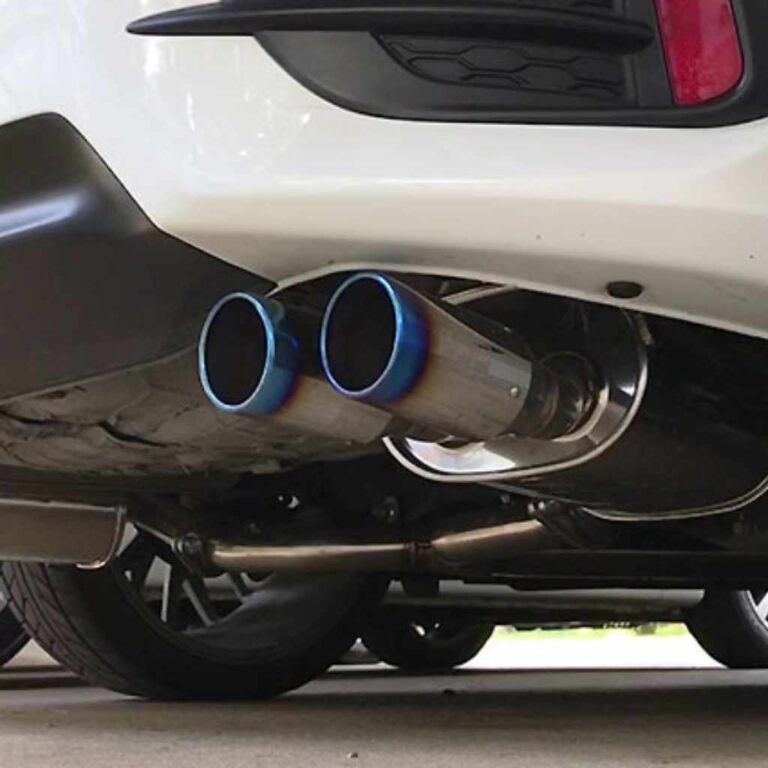
To understand the stop, we first need a quick refresher on the muffler itself. A muffler is not just a big metal box; it’s a complex series of chambers, baffles, and perforated tubes. The sound waves bounce around inside these chambers to cancel each other out, resulting in a quieter ride.
The points where the exhaust pipes enter (inlet) and exit (outlet) must be perfectly aligned with these internal components. The design ensures the gas flows correctly through the sound-deadening path.
Types of Exhaust Pipe Stops or Positioning Aids
When examining an aftermarket or OEM (Original Equipment Manufacturer) muffler, you might find several ways the manufacturer ensures the pipe seats correctly. These methods act as the “stop” you are looking for:
- Internal Shoulder/Lip: This is the most common “stop.” Inside the muffler inlet, the metal tubing narrows down, creating a distinct shoulder or lip. The inserted exhaust pipe should butt right up against this shoulder, preventing it from going too deep into the muffler’s chambers.
- Weld Seam Alignment: Sometimes, especially in universal mufflers, the lack of a perfect shoulder means alignment relies on pre-drilled holes or specific weld points that dictate how far the pipe should be inserted before welding or clamping.
- Spacers or Slip-Fit Design: Some systems are designed for a slip-fit connection. Here, the pipe slides into the muffler sleeve, and the stop might be determined by the length of the receiving tube, ensuring that a certain amount of pipe overlap is achieved for a solid weld or clamp seal.
- External Clamps/Brackets: While not technically inside the muffler, many professional installations use external stops—like specific support brackets or clamps mounted to the vehicle frame—that physically limit how far the pipe can travel toward the muffler body.

Why Proper Pipe Insertion is Non-Negotiable
Why go into such detail about a few inches of pipe travel? Because improper insertion affects three critical areas of your vehicle’s operation:
- Acoustics (Sound): If the pipe pushes past the internal stop and blocks a baffle or an exit hole, you change the acoustic path. This often results in louder, raspier, or droning noises that the muffler was designed to eliminate.
- Heat Dissipation and Backflow: Exhaust gases need to flow smoothly outward. If the pipe blocks the path, hot gases can back up, potentially damaging seals or sensors located upstream (closer to the engine).
- Longevity and Sealing: If the pipe doesn’t go in far enough, the connection will be weak. Vibration will cause leaks at the joint, leading to premature rusting and failure—and annoying exhaust leaks. A good stop ensures maximum surface area contact for clamping or welding.
For more insight into how exhaust gas dynamics affect engine performance, you can review principles discussed by engineering resources, such as those detailing fluid dynamics in confined spaces, which applies directly to muffler chamber design [Engineering Toolbox reference].
How to Check for a Muffler Stop Before Installation
Before you start cutting or welding, it’s smart to inspect your new or replacement muffler—especially if it’s a universal fit kit. OEM mufflers are usually straightforward, but universal mufflers require more attention.
Step-by-Step Inspection Guide
Follow these steps carefully to locate the designated stop inside the muffler:
- Gather Your Tools: You’ll need a bright flashlight and possibly a long, thin, non-marring rod (like a wooden dowel or plastic trim stick—do NOT use a metal screwdriver, as you might scratch internal components).
- Locate the Inlet Port: Identify the side of the muffler where the pipe from the catalytic converter or resonator will enter.
- Shine the Light Inside: Place the flashlight directly into the inlet port, shining inward toward the muffler body.
- Look for the Shoulder: Slowly look down the tube. You are searching for a distinct change in diameter—a narrower section or a physical lip where the inner tubing stops and opens into the main baffling area. This lip is your stop.
- Measure the Insertion Depth: If you can safely reach the lip with your non-marring rod, measure the distance from the very edge of the muffler inlet opening to that stop point. This measurement tells you exactly how far your exhaust pipe should insert before installation.
- Compare to the Old Muffler (If Possible): If you removed the old muffler, measure the depth of the pipe stub still attached to it. This measurement should ideally match the insertion depth dictated by the new muffler’s stop.
If your new muffler is a universal type without clear internal stops, professional advice is to mock-fit the pipes and use the alignment of the clamping area or an external measure based on the original factory specifications to ensure correct depth alignment.
Table: OEM vs. Universal Muffler Stop Design
The way stops are integrated often depends on whether the part is made for a specific vehicle (OEM) or designed to fit many different cars (Universal). This table highlights the general differences a beginner might encounter when shopping for parts:
| Feature | OEM Muffler (Direct Fit) | Universal Muffler (Generic Fit) |
|---|---|---|
| Stop Mechanism | Precise internal shoulder, perfectly matching pipe O.D. (Outer Diameter). | Often requires external measurement or pipe overlap setting; stop may be less defined internally. |
| Pipe Insertion Depth | Fixed and exact; installation is “set and forget.” | Requires user measurement to ensure proper flow diversion. |
| Installation Complexity | Low. Pipes slide in until they hit the built-in stop. | Medium to High. Requires careful measuring and marking before welding/clamping. |
| Risk of Misalignment | Very Low. | Higher if installation steps are not followed precisely. |
The Role of Welding and Clamping in Sealing the Joint
Once the pipe has met the internal stop, the next step is securing the connection to prevent leaks and rattling. The muffler stop ensures the pipe is positioned correctly, but the seal is what keeps the exhaust gases contained.
Clamping Techniques for No-Weld Connections
If you are using slip-fit connections and clamps (common for budget or temporary fixes), note this:
- The pipe must insert to the stop.
- The clamp must be positioned directly over the joint where the pipe meets the muffler sleeve, not just randomly placed along the pipe. A properly placed clamp spreads the pressure evenly around the seam.
- Sometimes, exhaust sealant paste is used around the joint before clamping for an extra barrier against leaks, especially if the fit isn’t perfectly snug even after hitting the internal stop.
Welding for the Best Connection
For permanent, high-performance setups, welding is the way to go. When welding:
A good technician will insert the pipe until it contacts the internal stop, tack-weld it temporarily, then check alignment from the entire undercarriage perspective before running a continuous bead.
Remember, the quality of modern welding equipment available for home use is improving rapidly. Understanding basic metallurgy and proper surface preparation from reliable sources, like those provided by welding supply associations, can significantly boost your home welding success [American Welding Society Guidelines].
Troubleshooting: What If There Isn’t an Obvious Stop?
Sometimes, especially with high-flow or resonator-delete pipes, the component you purchase is simply a straight tube designed to replace the muffler. In these cases, the component itself has no internal stop because it is designed only to change the flow route, not manage baffling intricacies.
If you are installing a performance upgrade and noticing that the replacement pipe seems too loose or too tight, consider these scenarios:
Scenario 1: The Pipe is Too Short (It won’t reach the next hanger or connection point)
This means your “insertion point” needs to be determined by the remaining components in the system. The pipe must leave enough exposed length to securely connect up to the next component (like a resonator or tailpipe) while still achieving a proper seal at the upstream connection.
Scenario 2: The Pipe Slides Too Far In (A “Deep Fit”)
If the pipe slides too far into a component that should have a stop, the part is likely the wrong specification for your vehicle—even if the outer diameter (O.D.) matches. This is common with universal parts not perfectly engineered for your specific chassis layout. The solution here is often custom fabrication: weld a small ring or collar onto the pipe itself. This collar acts as the external stop, preventing the pipe from entering too far.
Safety First: Exhaust System Work Precautions
Working under a car, especially near the exhaust system, requires careful adherence to safety rules. Exhaust components get extremely hot, even hours after driving.
Essential Safety Checklist:
- Cool Down: Ensure the car has been turned off for several hours. Use a thermal gun or carefully check metal surfaces with the back of your hand (from a safe distance) to confirm they are cool to the touch.
- Secure Lifting: If you need access underneath, use sturdy jack stands rated for your vehicle’s weight. Never rely only on a hydraulic jack. Consult your vehicle’s manual for proper jacking points.
- Ventilation: If you plan to weld or use strong adhesives/sealants, work outdoors or in a very well-ventilated area. Exhaust fumes and welding byproducts are hazardous.
- Protective Gear: Always wear safety glasses, heavy-duty gloves (especially when handling cuts of old, sharp exhaust pipe), and appropriate work clothing.
Impact on Sound Dynamics: The Muffler’s Secret Job
The internal stop isn’t just about fit; it’s fundamentally about acoustics. Mufflers work based on specific path lengths. Imagine the exhaust gas is like sound waves traveling through narrow hallways.
The length of the pipe inserted into the muffler determines how much sound wave is canceled out versus how much is allowed through. If the pipe goes past the stop:
- The path length changes.
- The sound waves that were supposed to interact destructively (canceling each other out) no longer do so correctly.
- You get undesirable noises, like low-frequency booming or a high-pitched whistle, at certain RPMs.
This subtle engineering detail is why buying a direct-fit muffler is usually easier than modifying a universal one—the direct-fit part has utilized factory engineering data to ensure that its built-in stop aligns perfectly with the original design specifications.

Frequently Asked Questions (FAQ) About Muffler Pipes and Stops
Q1: If I cut the pipe to remove the old muffler, how deep do I need to insert the new pipe?
A: You must insert the new pipe until it makes contact with the internal shoulder or stop inside the new muffler inlet. If there is no factory stop, aim for a minimum insertion depth equal to the diameter of the pipe, plus enough extra length to allow for a secure, full clamp or weld circumference.
Q2: Can I weld the pipe to the outside of the muffler sleeve instead of inserting it deeply?
A: While technically possible, welding only on the exterior is generally discouraged for primary exhaust pipes. Inserting the pipe slightly (to the stop) and then welding creates a much stronger seal, prevents internal turbulence, and resists heat fatigue better than an external-only weld.
Q3: Does hitting the ‘stop’ mean the connection is automatically leak-proof?
A: No. Hitting the stop ensures correct internal alignment. You still need to seal the joint externally, either by tightening the clamp hardware properly or by running a continuous, high-quality weld around the circumference of the connection point.
Q4: What happens if I don’t use a stop and let the pipe slide too far in?
A: The pipe can block the internal baffles or chambers designed to cancel noise. This usually results in your car sounding much louder than stock, possibly creating an unpleasant drone sound, and potentially affecting exhaust gas flow efficiency.
Q5: Are the stops inside the muffler generally the same size for all cars?
A: No. Since the internal noise cancellation design (the baffle layout) is unique for every vehicle model’s sound goal, the location of the internal stop will vary significantly between a sports sedan and a heavy-duty truck muffler.
Q6: How do I know if my muffler is vibrating because the pipe isn’t seated correctly?
A: If the pipe connection is loose (not reaching the stop or clamp area securely), you will often hear a distinct rattling or ticking sound from that specific joint, especially noticeable when the car is idling or accelerating lightly. Vibration is usually accompanied by an audible exhaust leak sound or a change in the expected exhaust tone.
Maintaining Alignment: Tips for Longevity
Getting that initial fit right by observing the muffler stop is only half the battle. Over time, exhaust hangers break, clamps loosen due to constant heating and cooling cycles, and road debris can knock your system askew. Maintaining the alignment achieved by that initial stop is crucial for long-term quiet operation.
Regular Inspection Points
Make a habit of checking these areas during oil changes or tire rotations:
- Hanger Condition: Look for cracked, stretched, or missing rubber hangers. Replace any cracked rubber isolators immediately, as they are cheap and essential for absorbing vibration.
- Clamp Tightness: Visually inspect all connection points, especially the one leading into the new muffler. If you see black soot leaking out, the seal has failed and retightening or re-welding is required.
- Clearance: Ensure no part of the pipe or muffler is currently touching the chassis, fuel lines, or brake lines. The exhaust system needs space to move freely with the engine’s natural rocking motion.
Properly maintained clearance and secure connections ensure that the engineered pathways inside your muffler—dictated by that precise insertion depth or ‘stop’—remain effective for thousands of miles.
Conclusion: Confidence in Your Connection
You now understand the essential secret about muffler connections: the “stop” is a critical, often internal, design feature that dictates exactly how far the exhaust pipe must enter the muffler chamber. Whether it’s a clearly defined shoulder or a measurement dictated by universal fit guides, respecting this insertion depth is key to managing your vehicle’s sound profile and ensuring a leak-free, enduring exhaust system.
Remember, working on your car is about following clear steps. By taking the time to look inside the connection point, comparing measurements, and securing the joint properly, you are ensuring that your exhaust functions exactly as the engineers intended. You have the knowledge now to accurately install or inspect your muffler connection with expert precision. Happy wrenching!