Does AutoZone Test Oxygen Sensors? The Proven, Essential Guide
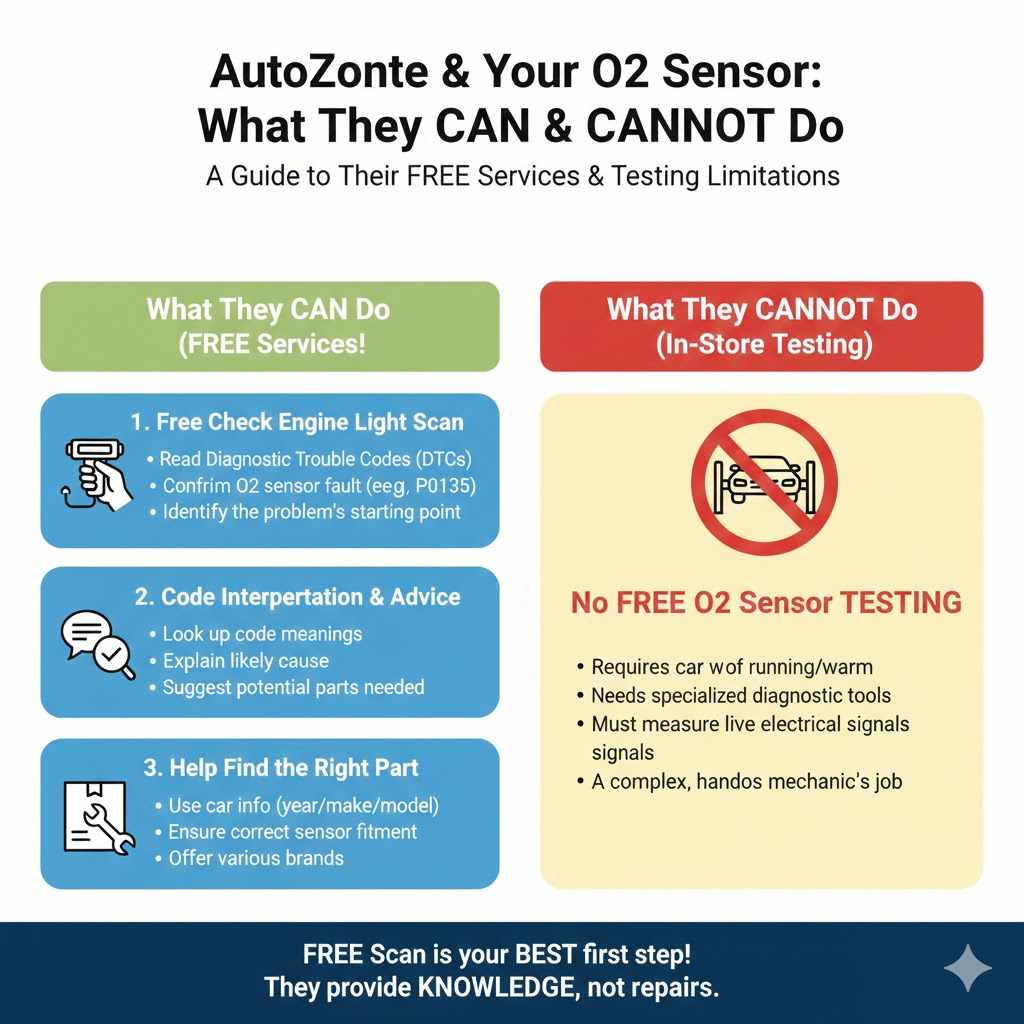
No, AutoZone does not test oxygen sensors directly. However, they offer a free check engine light scanning service that reads the trouble codes from your car’s computer. This service is a crucial first step in diagnosing a bad oxygen sensor and helps you identify the problem for free.
Is your check engine light glowing on the dashboard? It can be a frustrating sight. Many times, a faulty oxygen sensor is the culprit. You might wonder if you can just pop over to your local AutoZone for a quick test. It’s a great question that many car owners ask.
While the answer isn’t a simple “yes,” don’t worry. AutoZone provides powerful tools and services that can point you in the right direction. This guide will walk you through exactly what AutoZone can do to help. We will also show you how you can test the sensor yourself at home. You can solve this problem, and I’m here to help you every step of the way.
The Straight Answer: What AutoZone Can Do For Your Oxygen Sensor
Let’s clear this up right away. AutoZone employees cannot take your oxygen sensor out of your car, hook it up to a machine, and tell you if it’s good or bad. The testing process for an oxygen sensor is complex. It needs to be tested while the car is running and at the right temperature to get an accurate reading. This is something that can’t be done on a bench inside a store.
But that doesn’t mean they can’t help you. In fact, AutoZone is one of the best first stops you can make when you suspect an O2 sensor issue. Here’s what they can do for you, completely free of charge:
- Free Check Engine Light Scan: This is their most valuable service for this problem. An AutoZone employee will come out to your car with a handheld OBD-II (On-Board Diagnostics) scanner. They plug it into a port under your dashboard and read the diagnostic trouble codes (DTCs) that your car’s computer has stored.
- Code Interpretation: The scanner will provide a code, such as “P0135.” The employee can look up this code for you and explain what it means. For example, P0135 points to a malfunction in the O2 sensor’s heater circuit. This gives you a huge clue about what’s wrong.
- Provide Repair Advice: Based on the code, they can offer advice on the most likely cause and the parts you might need to fix it.
- Help You Find the Right Part: If the code points to a bad oxygen sensor, they can use your car’s make, model, and year to find the exact replacement sensor you need from their inventory.
Why an In-Store Test Isn’t Practical
To truly test an oxygen sensor, a mechanic uses a tool like a digital multimeter or a high-end scan tool that shows live data. They measure the voltage the sensor produces as the engine runs. A healthy sensor will show a rapidly fluctuating voltage. A bad one will be stuck at one voltage or respond very slowly.
This process requires:
- The sensor to be installed in the exhaust.
- The engine to be running and fully warmed up.
- Specialized diagnostic tools to read the electrical signals.
As you can see, it’s a hands-on job that goes beyond the scope of a retail auto parts store. But the free code reading they provide is the perfect starting point for any DIY repair.
Your Step-by-Step Guide to Testing an Oxygen Sensor at Home
Feeling empowered by the information from AutoZone’s scan? Great! You can often confirm the sensor is bad with a simple test at home. It sounds technical, but if you follow these steps carefully, you can do it. This will give you the confidence to know you’re replacing the right part.
Safety First!
Before you start, safety is your top priority. Your exhaust system gets extremely hot.
- Always work on a cool engine. Let the car sit for at least a few hours before starting.
- Wear safety glasses to protect your eyes from dirt and debris.
- Wear mechanic’s gloves to keep your hands clean and safe.
- Work in a well-ventilated area, like an open garage or driveway.
Tools You Will Need
You’ll need a few basic tools for this job. You might already have some of them. If not, they are a great investment for any car owner.
- Digital Multimeter: This is the most important tool for the test. It measures voltage. You don’t need an expensive one; a basic model will work perfectly.
- Oxygen Sensor Socket: This is a special socket with a slit down the side to accommodate the sensor’s wire. You can often borrow one from AutoZone’s Loan-A-Tool program.
- Wrenches: You may need a standard wrench set to access the sensor.
- Jack and Jack Stands: You may need to safely lift the car to reach the sensor. Never work under a car supported only by a jack.
- Your Vehicle’s Repair Manual: This will show you the exact location of your sensors and the wiring color codes.
The Testing Process: A Simple Walkthrough
Step 1: Locate the Correct Oxygen Sensor
Most modern cars have at least two oxygen sensors, and some have four. They are labeled “Upstream” (before the catalytic converter) and “Downstream” (after the catalytic converter). The trouble code you got from AutoZone should help you identify which one is causing the problem. For example, “Bank 1, Sensor 1” refers to the upstream sensor on the same side of the engine as cylinder #1.
| Sensor Location | Common Name | Primary Function |
|---|---|---|
| Before Catalytic Converter | Upstream / Sensor 1 | Measures exhaust gas to adjust the air-fuel mixture. |
| After Catalytic Converter | Downstream / Sensor 2 | Monitors the efficiency of the catalytic converter. |
Step 2: Warm Up the Engine
An oxygen sensor needs to be hot (around 600°F or 315°C) to work correctly. Start your car and let it run for about 10-15 minutes to reach normal operating temperature. Then, turn the car off completely and remove the key.
Step 3: Access and Unplug the Sensor
Find the sensor you need to test. It looks like a spark plug screwed into your exhaust pipe. Follow its wire up to the electrical connector. Carefully unplug the connector. There might be a small plastic tab you need to press to release it. Do not pull on the wires themselves.
Step 4: Set Up Your Multimeter
Turn your digital multimeter on and set it to the DC Volts setting. A 2V or 20V setting is usually best. Now you need to connect the multimeter’s probes to the correct pins on the sensor’s connector (the side coming from the sensor, not the car’s wiring harness).
- Connect the red (positive) probe to the sensor’s signal wire.
- Connect the black (negative) probe to the sensor’s ground wire.
This is where your repair manual is essential, as wire colors vary between manufacturers. Often, the signal wire is black, and the ground wire is gray, but always check your manual to be sure.
Step 5: Start the Engine and Read the Voltage
With the multimeter connected, have a friend start the engine. Watch the multimeter display carefully. Here’s what you’re looking for:
- A Good Sensor: The voltage reading should fluctuate rapidly and consistently between approximately 0.1 volts (100mV) and 0.9 volts (900mV). It should swing back and forth about once per second. This shows the sensor is actively reading the changing oxygen levels.
- A Bad Sensor: The voltage reading is stuck. It might be stuck at a low voltage (e.g., 0.1V), a high voltage (e.g., 0.9V), or in the middle (e.g., 0.45V). If the reading is not moving or is moving very slowly, the sensor has likely failed.
Interpreting Your Test Results
Your multimeter reading tells a clear story. Use this table to understand what you’re seeing.
| Multimeter Reading | What It Means | Next Step |
|---|---|---|
| Rapidly fluctuating between 0.1V and 0.9V | The sensor is working correctly. | The problem may be elsewhere (e.g., vacuum leak, fuel issue). |
| Stuck at a low voltage (under 0.2V) | The sensor is reading a “lean” condition, or it has failed. | Likely a bad sensor. Time to replace it. |
| Stuck at a high voltage (over 0.8V) | The sensor is reading a “rich” condition, or it has failed. | Likely a bad sensor. Time to replace it. |
| No voltage or very slow response | The sensor is dead or dying. | Definitely time for a replacement. |
Common Symptoms of a Failing Oxygen Sensor
Your car often gives you clues that something is wrong before the check engine light even comes on. If you experience any of these symptoms, a bad O2 sensor could be the cause.
- Check Engine Light On: This is the most obvious sign. The code pulled by AutoZone will give you the specifics.
- Worse Gas Mileage: A bad sensor can send incorrect data to the car’s computer, causing it to use more fuel than necessary. You might notice you’re visiting the gas station more often.
- Rough Idle: Your car might shake or sputter when you’re stopped at a light. This happens because the engine isn’t getting the right air-to-fuel ratio.
- Poor Engine Performance: Does your car feel sluggish or slow to accelerate? A failing O2 sensor can rob your engine of power.
- Failed Emissions Test: Oxygen sensors play a key role in controlling your car’s emissions. A bad sensor is a common reason for failing a state emissions inspection, as noted by the Environmental Protection Agency (EPA).
- Strange Smells: Sometimes, a rich-running engine caused by a bad sensor can lead to a smell of rotten eggs or sulfur coming from the exhaust.
If the symptoms and the trouble code both point to the oxygen sensor, you can be very confident that replacing it will solve the problem.