Do EPR Resonators Go Bad? Essential Fixes
Yes, EPR (Exhaust Pipe Resonance) resonators, often called Helmholtz or absorption resonators, absolutely go bad over time due to heat, vibration, and rust. If you hear strange drone noises or notice performance changes, fixing or replacing a failing resonator is straightforward with the right tools and guidance. Don’t worry; we’ll walk you through diagnosing and fixing these common exhaust components safely.**
Welcome! If you’ve noticed a new, annoying drone sound coming from under your car, especially at cruising speeds, you might be dealing with a failing exhaust resonator. These parts look simple, but they play a big role in keeping your ride quiet and smooth. It’s frustrating when something breaks, but knowing the signs and having a clear fix makes all the difference. You don’t need to be a professional mechanic to tackle this. I’m Monowar Shohag, and I’ll guide you step-by-step to check your resonator and make reliable, beginner-friendly fixes. Let’s dive into what these parts do and how to keep your exhaust sounding just right.
Understanding the Exhaust Resonator: What It Is and Why You Have One
Before we talk about them failing, let’s quickly cover what an exhaust resonator actually is. Think of your muffler as the main sound blocker, handling the loud bangs. The resonator is its helpful sidekick, usually placed before or after the muffler. Its main job is specialized: it targets specific, irritating sound frequencies—often a low-frequency drone that drives you crazy on the highway.
Resonators achieve this using clever design principles, often relying on chambers or internal tubes that reflect sound waves back onto themselves, canceling out that annoying tone. They are crucial for modern, quiet driving experiences. If your car is older or high-performance, it likely has one.
The Two Main Types of Resonators
While they all serve the same purpose, resonators are generally built in two ways. Understanding the type helps you diagnose the failure:
- Chambered (Helmholtz) Resonators: These use specific-sized empty chambers or side branches welded into the exhaust pipe. They are tuned perfectly to cancel one specific frequency. If these rust through, they stop working, often making the drone problem worse than before.
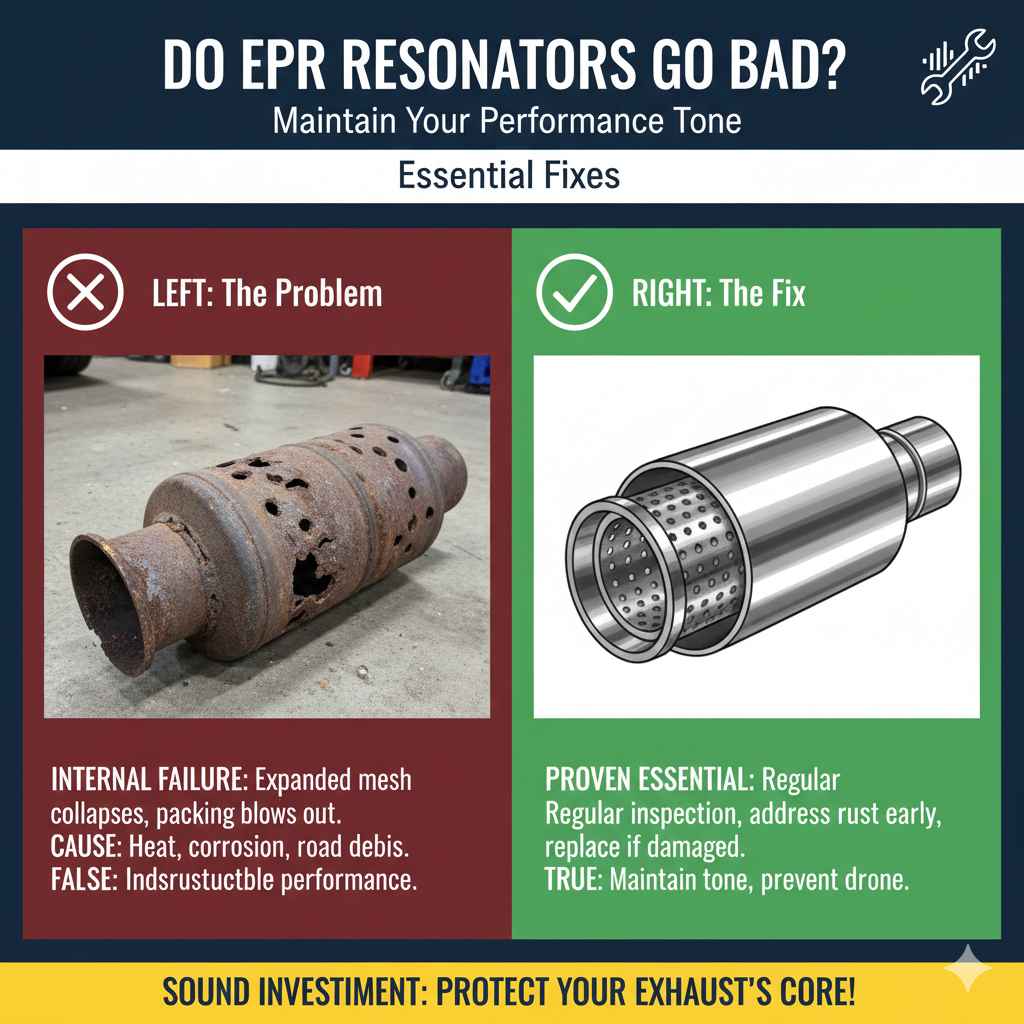
- Absorption (Straight-Through) Resonators: These look similar to small mufflers. They use sound-absorbing material (like fiberglass packing) wrapped around a perforated core, letting exhaust gas pass through but trapping sound waves. If the outer shell rusts or the packing blows out, performance drops slightly, and the sound changes.
Do EPR Resonators Go Bad? The Honest Answer
The short answer is a resounding yes, EPR resonators definitely go bad. They are subject to the exact same harsh environment as the rest of your exhaust system.
Because they are constantly exposed to extreme heat cycles, moisture (especially in winter environments where salt is used on roads), and constant vibration, the metal—usually aluminized or stainless steel—will eventually break down. Think about the forces acting on that pipe:
- Intense heat from engine combustion.
- Water condensation forming inside the pipe.
- Physical impact from road debris.
- The constant flexing caused by the engine moving.
When a resonator fails, it usually means one of two things has happened: either the outer shell has rusted through, creating a hole, or the internal components (if absorption type) have failed or blown out.
Common Symptoms of a Failing Resonator
If you suspect your resonator is the culprit, look out for these clear warning signs. These issues usually appear gradually:
- New or Louder Drone Noise: This is the most common sign. You’ll hear a distinct, low-frequency humming or buzzing sound, often loudest between 1,800 and 2,500 RPM (highway cruising speed).
- Rattling or Clunking Sounds: If the internal baffling or packing has come loose (common in absorption types), you might hear a rattling sound when starting the car or idling.
- Exhaust Leaks (Visual Check): After the initial rust hole forms, you might see black soot staining the pipe near the resonator body, indicating a leak.
- Slight Performance Drop: While the impact is usually minor compared to a clogged catalytic converter, a major hole in the resonator can slightly disrupt the carefully calculated backpressure needed for optimal engine tuning, leading to a slight loss of responsiveness.
Essential Diagnosis: How to Check Your Resonator
Don’t rush to replace parts! A simple visual and auditory check will tell you 90% of what you need to know. Always prioritize safety when working under a car. Never work under a car supported only by a jack.
Tools You Might Need for Inspection
| Tool | Purpose |
|---|---|
| Safety Glasses and Gloves | Protect your eyes and hands from rust and sharp edges. |
| Flashlight or Work Light | Crucial for peering under the vehicle. |
| Rags/Shop Towels | To check for soot stains. |
| Torque Wrench (For later reassembly) | Ensures clamps are tightened correctly (if necessary). |
Step-by-Step Inspection Guide
Follow these steps carefully to pinpoint the problem area:
- Safety First: Park and Cool Down: Park your vehicle on a flat, level surface. Engage the parking brake and let the exhaust system cool completely—even a slightly warm pipe can cause serious burns.
- Locate the Resonator: Have a friend start the car briefly while you listen from a safe distance. The resonator is usually located in the mid-pipe section, often right behind the catalytic converter but before the main muffler.
- Visual Inspection (The Soot Test): Get under the car (using sturdy jack stands or a lift). Shine your light directly on the resonator body and the welds connecting it to the main pipe. Look for any flaky rust, white or orange corrosion, or dark, sooty stains coming from a specific spot. Soot always indicates an active exhaust leak.
- The Tap Test: Gently tap the body of the resonator with a rubber mallet or the handle of a screwdriver. If it sounds solid, that’s good. If you hear a dull thud or the tapping sound changes dramatically, it might mean the outer shell is thin or has separated from an internal baffle.
- The Sound Test (The “Wiggle Test”): With the engine off, gently wiggle the pipe around the resonator connections. Excessive movement or squeaking sounds might indicate loose mounts or broken welds.
If you find a hole or significant rust, the resonator is definitely bad and needs attention. For more in-depth checks involving internal exhaust flow dynamics, reputable sources like the SAE International (Society of Automotive Engineers) offer deeper technical insights into acoustic tuning, though our focus here is on practical home repair.
Essential Fixes: Repairing vs. Replacing a Bad Resonator
Once you confirm the resonator is bad, you face a choice: repair the hole or replace the entire unit. Your choice depends heavily on the extent of the damage and your comfort level with welding.
Option 1: Temporary Patching and Minor Repair (For Small Holes)
If the rust hole is very small—think pin-sized—and you need a quick fix to silence the drone until you can get a proper replacement, you can try patching it. Note: These are rarely permanent solutions.
Required Materials for Patching
- High-Temperature Exhaust Repair Putty or Epoxy (rated for 1500°F+).
- Exhaust System Repair Tape (fiberglass mesh tape).
- Wire brush or sandpaper.
- Brake cleaner or degreaser.
Patching Procedure
- Cool and Clean: Ensure the exhaust is totally cold. Use the wire brush to vigorously clean the area around the hole. Remove all rust, dirt, and grease.
- Degrease: Wipe the area down thoroughly with brake cleaner. The patch material will not stick to oil or grime.
- Apply Putty (If Applicable): Force the exhaust repair putty into the pinhole. Shape it smoothly over the area.
- Wrap with Tape: Immediately wrap the area tightly with the fiberglass repair tape, overlapping significantly past the damaged zone.
- Cure: Follow the putty/tape instructions exactly for curing time. Usually, the first heat cycle (running the engine briefly) helps it harden.
Option 2: Welding the Hole (Intermediate Skill Level)
If you have access to a welder (MIG is easiest for thin exhaust pipe), you can weld a small patch plate over the rusted area. This is much stronger than putty but requires removing the rusted metal first.
Warning: Welding exhaust components requires knowledge of metal prep and handling high heat. If the pipe is severely rusted, welding may just burn a bigger hole in the thin metal.
Option 3: Full Resonator Replacement (The Best Long-Term Fix)
For holes larger than a quarter, or if the internal baffles are rattling, replacement is the only way to restore factory quiet performance. This involves cutting out the old unit and installing a new one.
Tools Needed for Replacement
- Jack and Sturdy Jack Stands (or lift).
- Safety Gear (Goggles, gloves).
- Pry Bar or large wrench to leverage pipes apart.
- Exhaust Pipe Cutter or Reciprocating Saw (Sawzall) with a metal blade.
- New Resonator (OEM or aftermarket equivalent).
- New Clamps or V-Band Couplers (depending on your car’s setup).
- Oxygen Sensor Removal Tool (if applicable, as sensors are often near the resonator).
Step-by-Step Replacement Guide
This process assumes your resonator is connected by slip joints and clamps, which is common for mid-pipe components.
- Support the Vehicle Safely: Jack up the car and secure it properly on high-quality jack stands. Ensure you have plenty of room to work underneath.
- Locate and Remove Sensors (If Needed): If there is an oxygen sensor mounted in or directly before/after the resonator, carefully unplug its electrical connector and use the specialized tool to unscrew the sensor from the pipe. Set the sensor aside safely—do not drop it or get it dirty.
- Unbolt/Unclamp Connections: Identify the clamps or bolts holding the resonator to the upstream pipe (leading from the engine/catalytic converter) and the downstream pipe (leading to the muffler). Loosen and remove these fasteners.
- Cut Out the Old Unit: Using your pipe cutter or reciprocating saw, carefully cut the exhaust pipe on both sides of the resonator body. Try to cut as close to the resonator as possible, leaving as much of the original connecting pipe intact for the new part to slide onto. Wear hearing protection, as cutting metal can be loud.
- Remove the Old Part: Once cut free, wiggle and pull the old resonator out from under the car. It might be stuck; use the pry bar gently between the old pipe and the new pipe section to create a gap.
- Install the New Resonator: Slide the new resonator into place. If using a slip-fit replacement, slide the upstream pipe slightly into the new resonator inlet, and the downstream pipe slightly into the new resonator outlet. Ensure it lines up perfectly.
- Secure the Connections: Install new clamps or couplings where you cut the pipe. Position the clamps slightly behind the joint seam.
- Tighten Everything Down: Start by tightening the clamps loosely. Then, check the alignment of the entire exhaust run. Once satisfied, use your torque wrench to tighten all clamps to the manufacturer’s recommended specification (or snug, if specs aren’t available—avoid crushing the pipes). Check O2 sensor threads if you removed one.
- Test Run: Reconnect any O2 sensors. Start the car slowly. Listen carefully for leaks. If you hear sputtering or loud exhaust noise, shut it down immediately and check your clamps. If it sounds quiet and smooth, let it run for 5-10 minutes to check for leaks under heat expansion.
Choosing the Right Replacement Resonator
When buying a replacement, you have choices that affect noise level, durability, and cost. This is a crucial decision point for any DIYer.
Resonator Material Comparison
| Material Type | Durability | Cost | Best For |
|---|---|---|---|
| Aluminized Steel | Fair (Prone to rust in salty climates) | Low | Budget repairs; dry climates. |
| T-409 Stainless Steel | Good (Resists surface rust well) | Medium | Most everyday drivers looking for longevity. |
| T-304 Stainless Steel | Excellent (Highly corrosion resistant) | High | Long-term ownership; harsh, salty environments. |
OEM vs. Aftermarket Resonators
OEM (Original Equipment Manufacturer): These are designed specifically by your car maker to meet precise noise and performance standards. They are guaranteed to fit and sound correct. The downside is usually higher cost and sometimes harder sourcing.
Aftermarket: These offer more variety. Some are direct-fit replacements designed to match OEM sound. Others, often called “performance” or “straight-through” resonators, might be slightly smaller or use a different packing material. They might reduce drone but could potentially increase overall volume slightly compared to stock. Always read user reviews for the specific sound profile.
Preventative Maintenance: Making Your New Resonator Last Longer
The best fix is avoiding the problem in the first place! Since heat and moisture cause failure, minimizing their effect is key to maximizing the life of your new resonator. While you can’t stop engine heat, you can manage moisture and physical wear.
Best Practices for Exhaust Longevity
- Undercoating/Rust Protection: After installation, consider spraying the new resonator and surrounding pipes with a quality chassis or exhaust undercoating spray. This adds a barrier against moisture and road salt.
- Avoid Deep Puddles: While unavoidable sometimes, consistently driving through deep standing water can rapidly accelerate internal condensation and rust formation.
- Check Rubber Hangers: Ensure the rubber exhaust hangers are in good condition. Worn hangers allow the pipe to bang against the frame or suspension components, increasing vibration and putting stress on welds and joints—the exact places resonators fail first.
- Periodic Inspection: Make it a habit to look under the car during oil changes. A quick 5-minute visual check can catch a pinhole leak before it turns into a loud, multi-foot section of rotten pipe.
Troubleshooting Common Resonator Fix Issues
Even the simplest fixes can have hiccups. Here are common problems beginners face when dealing with resonators and how to solve them.
Problem 1: The New Part Doesn’t Fit Right
The Issue: The replacement resonator sits too high, too low, or the pipes don’t line up perfectly after you cut the old one out.
The Fix: This almost always means your cuts on the original pipes were too far inward, or you didn’t leave enough of the old pipe sticking out for the new resonator’s slip-fit socket to slide over. You may need a short section of replacement exhaust pipe (a “sleeve” or “coupler”) and another set of clamps to bridge the gap. If the fit is only slightly off, gentle prying and levering while the clamps are loose can sometimes shift the alignment enough. Remember to check the routing for clearance against the driveshaft or heat shields.
Problem 2: The Drone is Still There (or Worse)
The Issue: You replaced the resonator, but the annoying drone remains, or a new, louder noise has appeared.
The Fix: If the drone persists, the original issue might not have been the resonator itself, but the muffler, or perhaps the car has a specific tuning issue that only appears at certain RPMs (like a broken catalytic converter baffle). If the noise is much louder and hissing, you have an active leak that wasn’t sealed properly (see Step 8 of replacement). Re-inspect all your clamps immediately. If the noise is a new rattle, check that you didn’t knock loose any internal packing from an adjacent muffler section.
Problem 3: O2 Sensor Reads Wrong After Replacement
The Issue: Your Check Engine Light (CEL) comes on after replacing the resonator, often with a code related to Bank 1 or Bank 2 Sensor readings.
The Fix: This happens if you damaged or failed to properly reconnect the oxygen sensor, or if the leak you created is now upstream of the sensor, confusing its readings. Double-check the electrical connection is secure. If you had to move the sensor into the new resonator body, ensure it is screwed in tightly (but do not overtighten the ceramic threads). If the leak is upstream, the fix is resealing that connection.
Frequently Asked Questions (FAQ) About Exhaust Resonators
Q1: Can I just remove the resonator entirely and drive without it?
A: Yes, you can legally remove a resonator in most places, as it is not a regulated emissions control device like the catalytic converter. However, removing it will make your exhaust noticeably louder and will almost certainly bring back the specific drone frequency it was designed to eliminate. It might also cause minor performance dips if your engine tuning relies on that specific backpressure.
Q2: How long should an exhaust resonator last?
A: This varies widely based on material and climate. An aluminized steel resonator in a snowy, salted environment might only last 5 to 8 years. A T-304 stainless steel resonator on a car driven mostly in dry weather could easily last 15 years or more.
Q3: Is a failed resonator dangerous to drive on?
A: A small hole is generally not dangerous from a performance or emissions standpoint. However, if the hole is large or the pipe breaks completely, you risk damaging the exhaust hangers due to excess movement, which could eventually cause the entire system to sag or fall. Furthermore, excessive noise pollution is often illegal.
Q4: How much does it cost to have a shop replace a resonator?
A: Costs fluctuate, but generally, replacing a bolt-on resonator (no cutting) is cheaper than one requiring cutting and welding. Expect labor charges to range from $150 to $350, plus the cost of the part itself. Always get a quote detailing whether they use bolt-on couplers or will be welding.
Q5: What is the difference between a resonator and a muffler?
A: The muffler is the primary sound dampener, focusing on reducing the loudest exhaust pulses. The resonator is secondary; it specifically targets and cancels out high-frequency, resonant drone noises, often working at highway cruising speeds when the muffler’s job is less stressed.
Q6: Do I need to replace the O2 sensor if I replace the resonator?
A: Not unless the sensor was damaged during removal or if the sensor was already near the end of its life. However, if you cut the pipe very close to the sensor bung, you might need a new bung welded in or use an extension kit if the new resonator pushes the sensor further away from the optimal measurement location.
Conclusion: Quiet Roads Ahead
We’ve covered the facts: yes, EPR resonators wear out because they fight harsh elements every day. Recognizing the tell-tale drone sound is the first step toward a smooth ride again. Whether you choose a quick putty patch for a temporary fix or commit to a full stainless steel replacement, the process is manageable when broken down into simple steps. Remember the safety rules—never compromise on sturdy support when you are under the vehicle. With a little patience and the right tools, you can confidently diagnose and fix that annoying exhaust noise, keeping your car reliable, quieter, and restoring that peaceful driving experience you deserve.


