How to Bend Your Own Exhaust for Jeep CJ
Getting Ready to Bend Your Exhaust
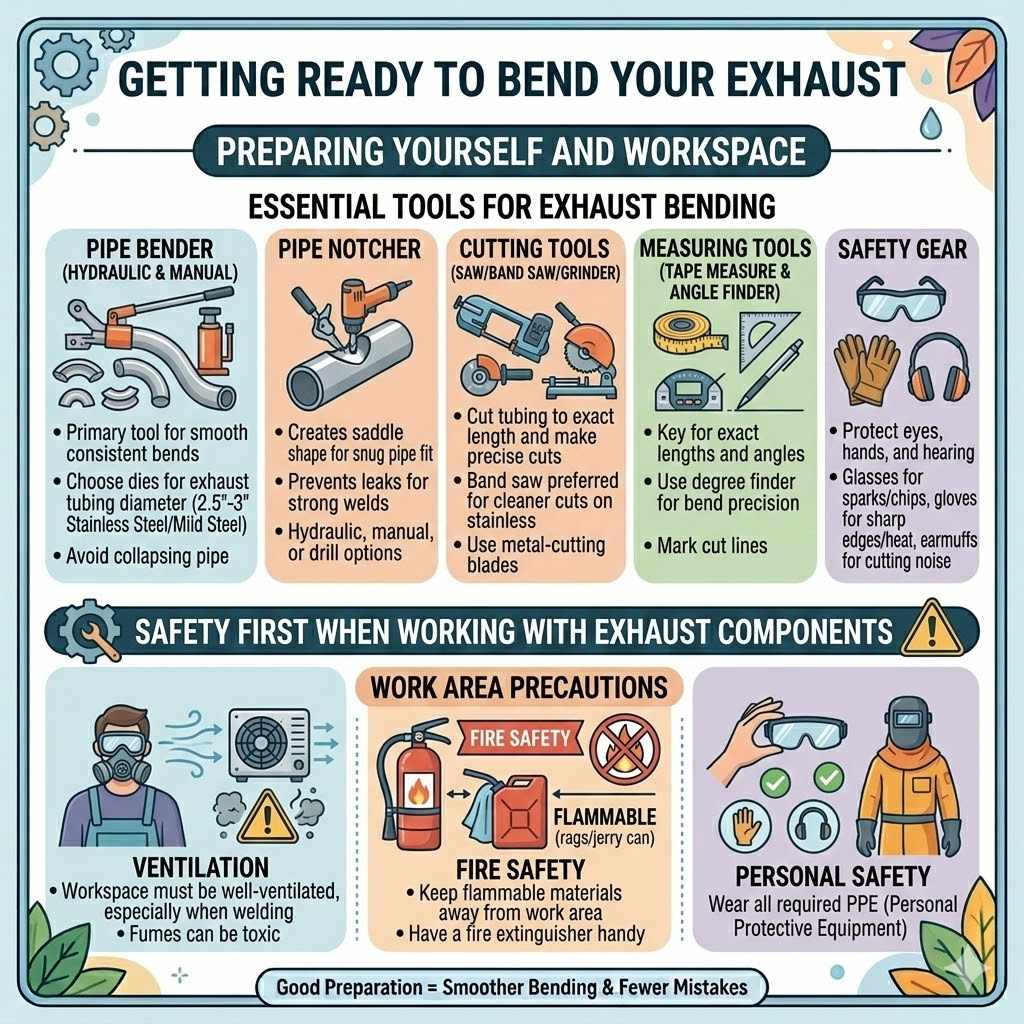
This section is all about preparing yourself and your workspace for bending exhaust pipes. It covers the essential tools you’ll need and the safety precautions you should take. Having the right setup makes the whole process go much smoother and helps ensure you get good results.

Truck Exhaust Kits
Truck Exhaust Kits - 84-01 Jeep Cherokee…
- Single 2.5" O.D. Mandrel Bent Aluminized Tail Pipe
- Includes a Jones Stainless Muffler
- Can be installed with basic hand tools
As an Amazon Associate I earn from qualifying purchases.
We’ll look at why each tool is important and how to stay safe while working with metal and potentially hot materials.
Essential Tools for Exhaust Bending
To bend your own exhaust pipes, you need some specific tools. A pipe bender is the most important. There are different types, like hydraulic and manual.
Hydraulic benders use fluid pressure to bend, making them easier to use for thicker pipes. Manual benders require more physical effort. You also need a pipe notcher to make clean joints where pipes connect.
A saw or cutoff wheel is necessary to cut your pipes to the correct length. Measuring tape is vital for getting exact lengths and angles.
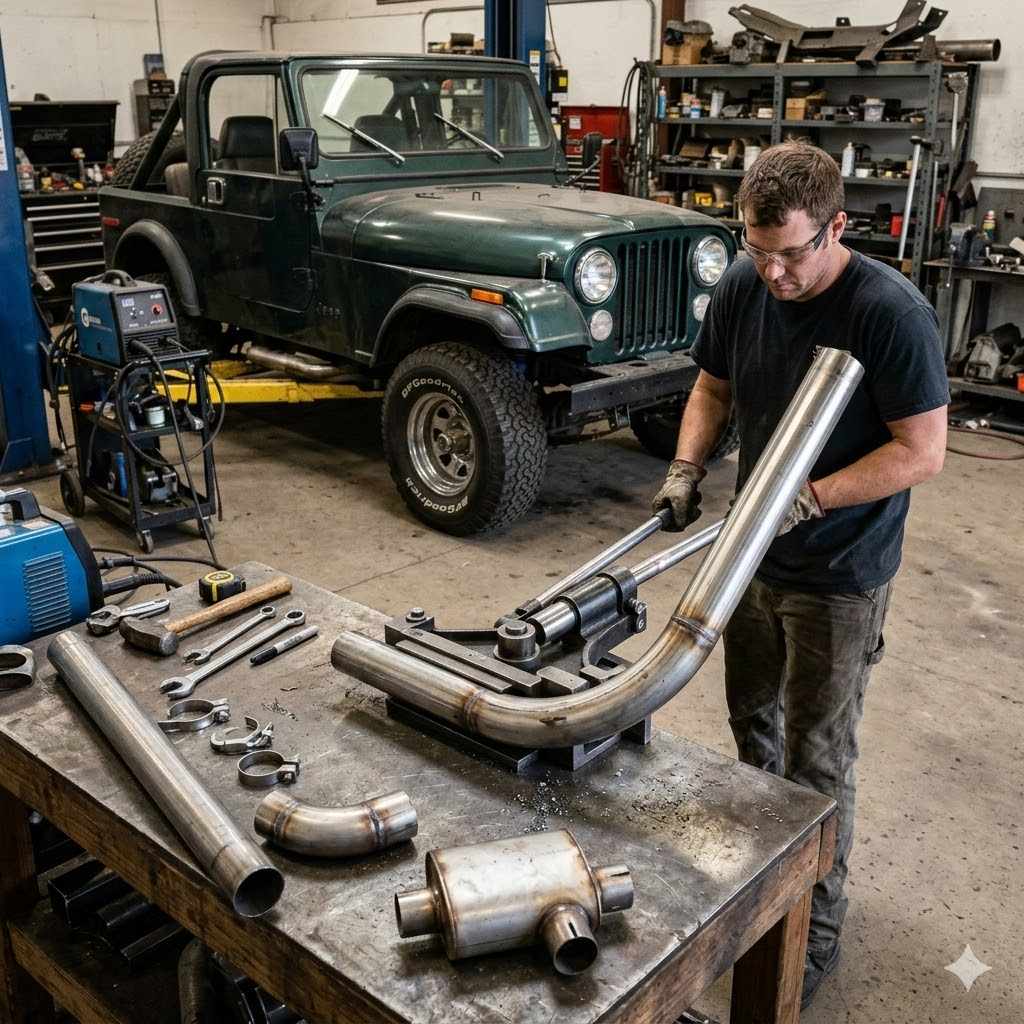
- Pipe Bender: This is your primary tool. Choose one that matches the diameter and material thickness of your exhaust tubing. A good quality bender will create smooth, consistent bends without collapsing the pipe. Some common types include rotary draw benders, which are very precise, and hickey-style benders, which are simpler for basic bends. For an LS swap in a Jeep CJ, you’ll likely be working with 2.5-inch or 3-inch stainless steel or mild steel tubing, so ensure your bender can handle these.
- Pipe Notcher: This tool is used to create a perfect saddle shape on the end of one pipe so it fits snugly against another pipe before welding. This creates a strong and leak-free joint. Without proper notching, you’d have gaps that are hard to weld and could lead to exhaust leaks. There are hydraulic, manual, and even drill-press-mounted notchers available.
- Cutting Tools: You’ll need a way to cut your exhaust tubing to length and make precise cuts. A metal-cutting chop saw, a band saw, or even an angle grinder with a cut-off wheel can work. For cleaner cuts, especially on stainless steel, a band saw is often preferred. Ensure you have the correct metal-cutting blades for your chosen tool.
- Measuring Tools: Accurate measurements are key to a successful exhaust system. A good quality tape measure is essential. You might also want a degree finder or protractor to measure bend angles and a scribe for marking cut lines and bend points.
- Safety Gear: This is non-negotiable. Always wear safety glasses to protect your eyes from flying debris. Work gloves are important to protect your hands from sharp edges and heat. Hearing protection is also recommended when using cutting tools. If you’re welding, you’ll need a welding helmet and appropriate fire-resistant clothing.
Safety First When Working with Exhaust Components
Working with metal and tools can be dangerous if you don’t take precautions. Always wear safety glasses to protect your eyes from sparks and metal shards. Wear sturdy gloves to prevent cuts and burns from sharp edges.
If you are cutting or grinding, wear earplugs or earmuffs. Make sure your workspace is well-ventilated, especially if you are welding, as fumes can be harmful. Keep flammable materials away from your work area.
- Eye Protection: Always wear safety glasses. Metal can chip, and sparks can fly. A full face shield offers even more protection when grinding or cutting.
- Hand Protection: Work gloves are a must. Exhaust tubing can have sharp edges from cutting, and hot metal can cause serious burns.
- Hearing Protection: Grinding and cutting metal can be loud. Use earplugs or earmuffs to prevent hearing damage.
- Ventilation: Ensure your workspace is well-ventilated, especially when welding. Fumes from welding and cutting can be toxic.
- Fire Safety: Keep flammable materials like rags or gasoline far away from your work area. Have a fire extinguisher handy, just in case.
Understanding Exhaust Pipe Bending
This part explains the basics of how exhaust pipes are bent. We’ll talk about why bending is better than using a lot of separate pieces and joints. You’ll learn about the different types of bends and why they matter for exhaust flow.
This knowledge helps you make smarter decisions when you’re shaping your pipes for your Jeep CJ LS swap.
The Art of the Smooth Bend
When you build a custom exhaust, smooth bends are really important. Instead of using lots of straight pipes and elbows, bending a single pipe creates a cleaner path for exhaust gases. This helps the engine breathe better.
It also reduces the chances of exhaust leaks because there are fewer connections to seal. A smooth bend means the pipe’s inside diameter stays mostly the same throughout the curve.
- Improved Exhaust Flow: Smooth, gradual bends allow exhaust gases to exit the engine more efficiently. This reduces backpressure, which can improve engine performance and fuel economy. Think of it like water flowing through a pipe; a pipe with many sharp turns and obstacles slows the water down, while a pipe with smooth curves lets it flow freely.
- Reduced Turbulence: Sharp elbows create turbulence in the exhaust stream. This turbulence can disrupt the smooth flow of gases, creating pressure waves that work against the engine’s natural exhaust cycle. Gentle bends minimize this turbulence, leading to a more consistent and predictable exhaust flow.
- Fewer Leak Points: Every joint in an exhaust system is a potential leak point. By bending pipes to follow the contours of the vehicle, you can significantly reduce the number of flanges, clamps, and welds needed. This means fewer places for exhaust gases to escape, leading to a quieter and more efficient system.
- Aesthetics and Fitment: Bending pipes allows you to create a custom fit for your specific vehicle. You can route the exhaust cleanly around suspension components, the chassis, and other obstacles, ensuring proper ground clearance and a professional look. This is especially critical for LS swaps in tight engine bays like a Jeep CJ.
Types of Bends and Their Applications
Exhaust bending involves creating curves in a pipe. The most common types are mandrel bends and compression bends. Mandrel bending uses a flexible rod inside the pipe to keep it from collapsing during the bend.
This results in a smooth, consistent radius. Compression bending, on the other hand, bends the pipe without internal support, which can lead to a flattened or crimped section. For performance exhaust systems, especially for an LS swap, mandrel bends are highly preferred.
- Mandrel Bends: These are created using a mandrel bender. A mandrel, which is essentially a flexible rod or a series of segments, is inserted into the pipe before bending. This mandrel supports the inner wall of the pipe, preventing it from collapsing, kinking, or deforming during the bending process. The result is a smooth, consistent bend with an unchanged inner diameter. This is crucial for maintaining exhaust flow efficiency and preventing performance loss. Mandrel bends are the standard for high-performance exhaust systems.
- Compression Bends: These bends are made without any internal support. The pipe is simply clamped and bent around a die. While simpler and cheaper to produce, compression bends often result in the pipe flattening or collapsing on the outer radius of the bend, and the inner radius can become tighter. This restriction can significantly impede exhaust gas flow, reduce performance, and increase noise. For an LS swap, where you want optimal engine breathing, compression bends should generally be avoided.
- Radius of Bend: The radius refers to the distance from the center of the pipe to the center of the bend. A tighter radius means a sharper turn, while a larger radius means a gentler curve. The radius of a bend affects how smoothly exhaust gases flow. Larger radii are generally better for flow, but tighter radii may be necessary to fit the exhaust around chassis components. The choice of radius depends on both performance needs and packaging constraints for your Jeep CJ.
- Angle of Bend: This is simply how much you bend the pipe. Bends are often measured in degrees, such as 45-degree, 90-degree, or 180-degree bends. You’ll use a combination of different angles to route the exhaust from the engine manifolds all the way to the tailpipe, ensuring clearance and proper fitment within the Jeep CJ’s undercarriage.
How to Bend Your Own Exhaust for Jeep CJ LS Swap Step-by-Step
This section is the heart of the guide. We will walk you through the actual process of bending exhaust pipes. This includes measuring, marking, setting up your bender, making the bend, and checking your work.
Following these steps carefully will help you create custom exhaust pipes that fit your Jeep CJ LS swap perfectly.
Measuring and Marking Your Pipes
Before you bend anything, you must measure accurately. Lay out your proposed exhaust route on your Jeep CJ. Use a flexible measuring tape or even a piece of string to trace the path the exhaust pipe will take from the exhaust manifold to where you want it to exit.
Mark your cut points and bend points carefully on the tubing.
- Lay Out the Path: With your LS engine and exhaust manifolds in place on your Jeep CJ, visually plan the route of your exhaust system. Consider ground clearance, suspension travel, and any body modifications. Use chalk or tape to mark the general path on the vehicle’s frame and floor pan.
- Measure the Overall Length: Use a flexible measuring tape or a string to follow the exact path you’ve planned for each section of the exhaust pipe. Transfer these measurements to your tubing. It’s often easier to measure the centerline of the pipe.
- Mark Bend Locations: Once you have the total length for a segment, you need to determine where each bend will occur. You can do this by trial and error, or by using a bend chart or software if you have access to it. For simple bends, you can mark the starting point of the bend on the pipe. The bender’s degree markings will guide the amount of bend.
- Account for Material for Bends: Remember that a bend takes up extra length. The amount of extra length depends on the radius of the bend and the angle. You need to add this extra length to your measurement before cutting. For example, a 90-degree bend with a 4-inch radius will require more tubing length than a straight pipe of the same linear distance.
- Double-Check Your Marks: Measure twice, cut once. Before making any cuts or bends, review all your measurements and marks. Ensure they account for the exact routing and clearance needed for your specific Jeep CJ LS swap setup.
Setting Up Your Pipe Bender
Your pipe bender needs to be set up correctly for each bend. This involves securing the pipe and setting the desired bend angle. Follow the manufacturer’s instructions for your specific bender.
For a hydraulic bender, this might involve attaching hoses and cylinders. For a manual bender, it means securing it to a workbench or stand.
- Secure the Bender: If your bender is portable, ensure it’s on a stable, level surface. Bolt it to a sturdy workbench or a dedicated stand. If it’s a larger, stationary unit, confirm it’s properly anchored. A moving bender is dangerous and will produce inaccurate bends.
- Select the Correct Die: Pipe benders use dies that match the diameter and wall thickness of the tubing you are bending. Using the wrong die can lead to poor bends or damage to the tubing. Ensure the die for your specific exhaust tubing size (e.g., 2.5-inch or 3-inch mild steel or stainless steel) is correctly installed on the bender.
- Mark Your Bend Start Point: On the tubing, mark the exact point where the bend should begin. This mark usually corresponds to the starting point of the bend radius on the bender’s die. Some benders have rulers or indicators to help with this precise positioning.
- Set the Bend Angle Indicator: Most pipe benders have a degree indicator or protractor. Set this to the desired bend angle for your specific pipe segment. For example, if you need a 90-degree bend, set the indicator to 90. Remember that due to spring-back, you might need to over-bend slightly.
- Lubricate if Necessary: Some bending processes benefit from lubrication, especially when bending certain materials or at extreme angles. Check your bender’s manual for recommendations on lubricants that can be applied to the die or the pipe to ensure a smooth bending action and prevent galling.
Making the Bend
Now it’s time to actually bend the pipe. Slowly and steadily apply pressure to the bender handle. Watch the pipe closely as it bends.
Stop when you reach your desired angle. If you are using a hydraulic bender, control the pressure to avoid over-bending. If you are using a manual bender, apply smooth, consistent force.
- Apply Steady Pressure: Operate the bender handle smoothly and consistently. Avoid jerky movements. For hydraulic benders, control the flow of hydraulic fluid to manage the bending speed. For manual benders, use your body weight and leverage to apply even force.
- Monitor the Bend: Watch the degree indicator and the pipe itself as it bends. Many bend diagrams will specify a bend angle. It’s common practice to over-bend slightly to compensate for spring-back, where the pipe tends to return to a straighter position after the bending force is removed.
- Account for Spring-Back: Steel and stainless steel tubing will “spring back” to some extent after the pressure is released. You’ll need to learn how much spring-back your material and bender produce. A good rule of thumb is to over-bend by a few degrees (e.g., 2-5 degrees for mild steel, potentially more for stainless steel). This often requires a test bend first.
- Check for Collapsing: Keep an eye on the bend. If the pipe starts to flatten or collapse, you might be bending too quickly, the bender isn’t set up correctly, or you may need a mandrel bender if you are not already using one. A collapsed bend severely restricts exhaust flow.
- Stop at the Target Angle: Once you reach your desired angle (including the adjustment for spring-back), stop applying pressure. Carefully release the tension on the bender.
Checking and Fitting Your Bent Pipes
After bending, place the bent pipe back onto your Jeep CJ to check the fit. Ensure it clears all components and has adequate ground clearance. You may need to make minor adjustments.
If the bend is not right, you might be able to carefully bend it a little more, or you may need to start over with a new piece of tubing.
- Dry Fit on the Vehicle: Carefully position your newly bent pipe onto your Jeep CJ. See how it lines up with the exhaust manifolds, other exhaust sections, suspension components, and the chassis. This is your chance to see if the routing is correct and if there are any clearance issues.
- Verify Ground Clearance: Pay close attention to how low the exhaust pipe hangs. You need enough clearance for normal driving, especially off-road. Measure the lowest point of the exhaust pipe and compare it to your Jeep’s frame rails or suspension components.
- Check for Interference: Look for any contact points between the exhaust pipe and the vehicle’s body, frame, or driveline. Ensure there’s enough room for suspension travel without the exhaust hitting anything. This is especially important with a V8 engine like an LS in a compact Jeep CJ.
- Minor Adjustments: If a bend is slightly off, you might be able to make small adjustments by carefully re-bending the section, often with slight heat applied to the bend area (though be cautious with heat, as it can affect the metal’s properties). However, significant errors usually mean starting over.
- Mark for Final Cuts: Once you are satisfied with the fit, mark any final cut points on the pipe. These might be where it connects to another pipe or where you want the tailpipe to exit.
Advanced Tips and Considerations for Your Jeep CJ LS Swap Exhaust
This part goes into more detail for those looking to really optimize their exhaust. We’ll cover material choices, welding, and how to route the exhaust for best performance and sound. These tips will help you achieve a professional-level exhaust system for your Jeep CJ LS swap.
Choosing the Right Exhaust Tubing Material
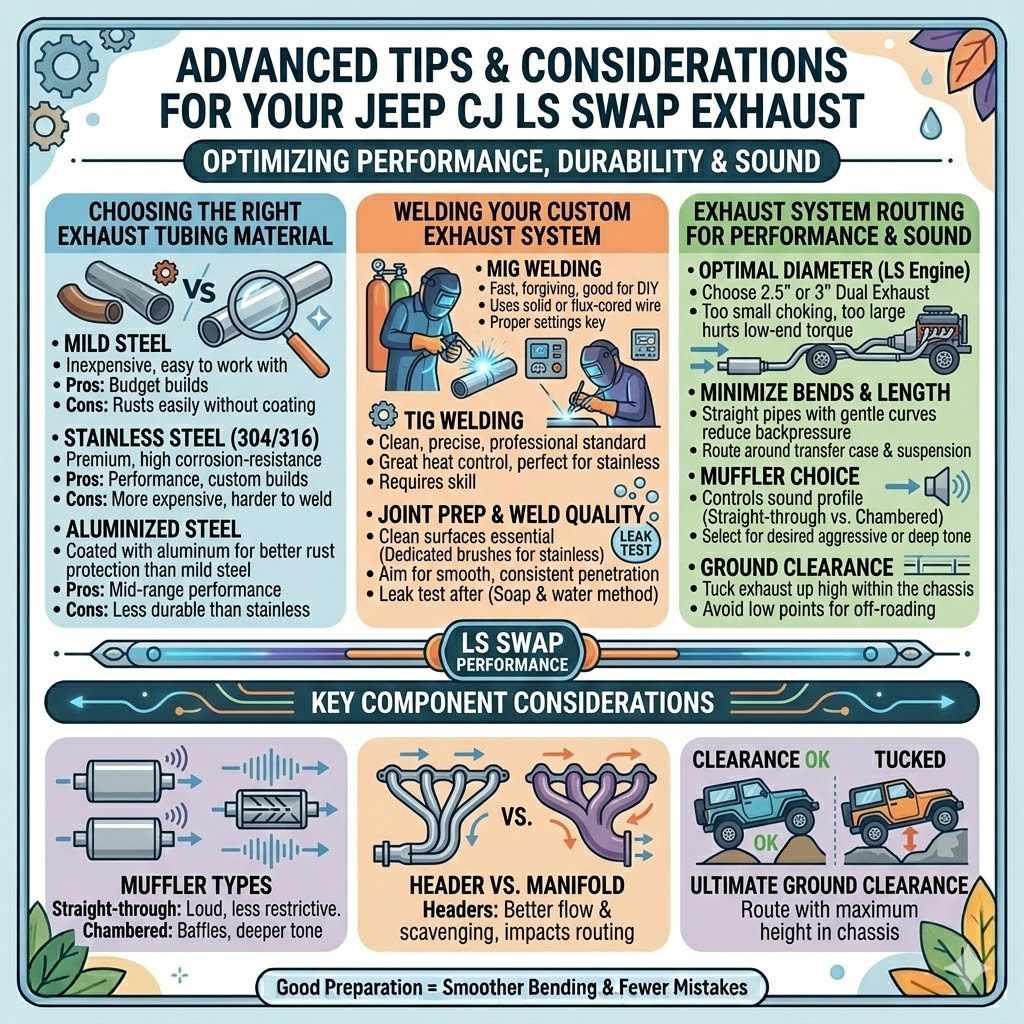
The material of your exhaust tubing significantly impacts its durability, appearance, and cost. Common choices include mild steel, stainless steel, and aluminized steel. Mild steel is the most affordable but will rust over time if not coated or treated.
Stainless steel is more expensive but offers excellent corrosion resistance and a premium look, making it ideal for long-term durability. Aluminized steel offers a balance between cost and corrosion resistance.
| Material | Pros | Cons | Typical Use |
|---|---|---|---|
| Mild Steel | Inexpensive, easy to work with | Rusts easily without coating | Budget builds, temporary exhaust |
| Stainless Steel | Highly corrosion-resistant, durable, premium look | More expensive, can be harder to weld | Performance builds, custom exhausts, long-term durability |
| Aluminized Steel | Good corrosion resistance, more affordable than stainless | Less durable than stainless, coating can wear off | Mid-range performance, general replacement |
- Mild Steel: This is the most common and budget-friendly option. It’s relatively easy to bend and weld. However, it is prone to rust and corrosion, especially in harsh environments like off-road conditions. Without proper coatings (like ceramic coating or high-temperature paint), it will eventually rust through. For a Jeep CJ that sees a lot of mud and water, this could mean a shorter lifespan for the exhaust system.
- 304 Stainless Steel: This is a premium material known for its exceptional corrosion resistance and longevity. It maintains a polished look for a long time and is very strong. While more expensive upfront, its durability often makes it a cost-effective choice in the long run, especially if you plan to keep your Jeep CJ for many years or frequently drive in salty conditions. It can be a bit trickier to weld than mild steel but is very achievable.
- 316 Stainless Steel: This is an even more corrosion-resistant grade of stainless steel than 304, offering superior protection against chemicals and salt. It’s typically overkill for most exhaust systems unless you’re in an extremely corrosive environment, making it significantly more expensive.
- Aluminized Steel: This is mild steel coated with aluminum. It offers better corrosion resistance than plain mild steel and is less expensive than stainless steel. It’s a good middle-ground option if budget is a concern but you still want better-than-basic rust protection. The aluminum coating can wear off over time, especially in abrasive conditions.
Welding Your Custom Exhaust System
Once your pipes are bent and fitted, you’ll need to weld them together. MIG welding is a popular choice for exhaust systems because it’s relatively easy to learn and offers good penetration. TIG welding provides a cleaner, stronger weld but requires more skill.
Regardless of the method, ensure you have clean surfaces and proper joint preparation for strong, leak-free welds.
- MIG Welding: This is often the go-to for DIY exhaust fabrication. It’s forgiving, fast, and can produce strong welds. You’ll need a MIG welder, the appropriate wire (e.g., .030 or .035 inch flux-cored or solid wire for steel), and shielding gas (if using solid wire). Proper settings are crucial for good penetration without burning through the tubing.
- TIG Welding: This method produces very clean, precise, and strong welds, often considered the professional standard for stainless steel exhaust. It requires a TIG welder, filler rods, and shielding gas (usually argon). TIG welding allows for excellent control over heat and bead appearance, but it has a steeper learning curve than MIG welding.
- Joint Preparation: Before welding, ensure your pipe ends are clean and properly prepped. If you’ve used a notcher, the fit should be perfect. Clean away any grease, oil, or mill scale from the welding area. For stainless steel, grinding with dedicated stainless steel brushes or discs is essential to avoid contamination.
- Weld Quality: Aim for a weld that is smooth, consistent, and has good penetration. You want the weld to fuse the two pieces of metal together thoroughly. Avoid weld porosity (tiny holes) and excessive spatter, as these can weaken the weld and cause leaks. Consider having a more experienced welder check your work or perform critical welds if you are new to welding.
- Leak Testing: After welding, it’s a good idea to perform a leak test. You can do this by covering the end of the exhaust and applying a small amount of air pressure, or by running the engine briefly and listening for any escaping gases. Sometimes, soap and water applied to the welds can reveal tiny leaks as bubbles.
Exhaust System Routing for Performance and Sound
How you route your exhaust pipes affects not only how they fit but also your Jeep CJ’s performance and the sound it makes. Keeping the pipes as straight as possible, with smooth bends, is best for exhaust flow. The diameter of the pipes and the type of muffler you choose will also heavily influence the sound.
For an LS swap, consider a 2.5-inch or 3-inch diameter system.
- Minimize Bends and Length: Generally, shorter exhaust systems with fewer bends provide the best performance by reducing backpressure and allowing exhaust gases to escape quickly. However, practicality often dictates the routing. For a Jeep CJ, you’ll need to route around the transfer case, suspension, and body. Try to make bends as gentle as possible.
- Pipe Diameter: For an LS engine, you’ll typically want a 2.5-inch or 3-inch diameter exhaust system. A system that is too small will choke the engine, while a system that is too large may hurt low-end torque. The optimal diameter depends on the specific LS engine’s cubic inches, camshaft, and intended use. For most Jeep CJ LS swaps, 2.5-inch or 3-inch dual exhaust is a good starting point.
- Muffler Choice: The muffler is the primary component that controls exhaust sound. Straight-through mufflers offer the least restriction and a louder, more aggressive sound. Chambered mufflers use internal baffles to reduce sound and can create a deeper tone. Choose a muffler that matches the sound profile you desire for your LS-powered Jeep CJ.
- Header vs. Manifold: The choice between exhaust manifolds and headers can impact performance. Headers typically offer better flow and scavenging (pulling exhaust gases out more efficiently) than stock manifolds. The design of the headers will also influence the routing of the initial exhaust pipes.
- Ground Clearance: As mentioned before, maintaining adequate ground clearance is paramount for a Jeep CJ, especially if you plan to go off-roading. Carefully plan the routing to tuck the exhaust system up as high as possible within the chassis, avoiding the lowest points of the vehicle.
Frequently Asked Questions
Question: What is the most important tool for bending exhaust pipes
Answer: The most important tool is a pipe bender, as it is specifically designed to create smooth, consistent bends in tubing without collapsing it.
Question: Can I use compression bends instead of mandrel bends
Answer: While compression bends are possible, they often lead to flattened pipes and restricted flow, which is not ideal for performance. Mandrel bends are highly recommended for better results.
Question: How do I measure for exhaust bends
Answer: Measure the desired path of your exhaust system, accounting for the extra length needed for each bend based on its radius and angle. Mark the start of the bend on your tubing.
Question: What type of steel is best for Jeep CJ LS swap exhaust
Answer: 304 stainless steel offers excellent corrosion resistance and durability for off-road use, though mild steel is a more budget-friendly option.
Question: How do I avoid collapsing the pipe when bending
Answer: Use a high-quality pipe bender, ensure the correct die is used, apply steady pressure, and consider using a mandrel bender which supports the inside of the pipe.
Wrap Up
You’ve learned how to bend your own exhaust for your Jeep CJ LS swap. This guide covers the tools, techniques, and materials needed. Remember to prioritize safety and accuracy.
With practice, you can create a custom exhaust that fits your Jeep perfectly and helps your LS engine perform its best. Get out there and start bending!
Related pick: Check today's price on Amazon