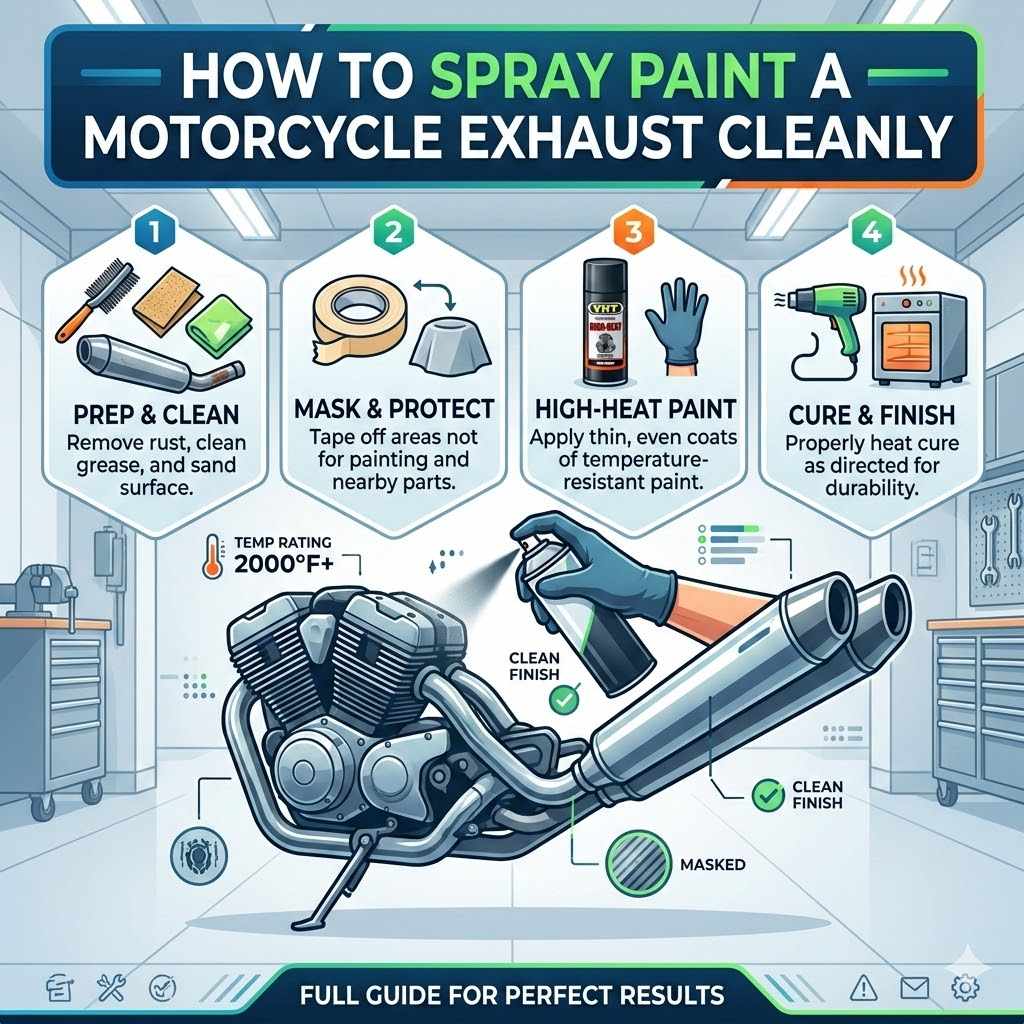
How To Spray Paint A Motorcycle Exhaust Cleanly
Painting your motorcycle exhaust can make it look new again. It seems simple, but getting a smooth, lasting finish can be tricky for folks new to it. You want it to look great and not peel off.
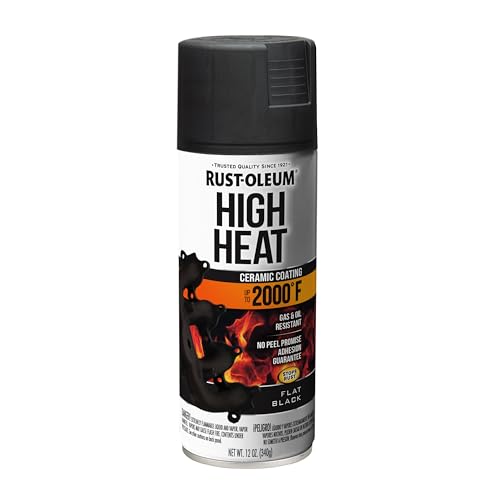
Rust-Oleum
Rust-Oleum Automotive High Heat Spray Paint, Flat…
- Ideal for use on automotive parts and surfaces subject to intermittent high heat up to 2000°F
- Tough enamel features Stops Rust formula to prevent corrosion and rust with ultimate protection
- Dries to touch in 30 minutes, covers up to 10 sq. ft. per can
As an Amazon Associate I earn from qualifying purchases.
Don’t worry! This guide breaks down How to Spray Paint a Motorcycle Exhaust Cleanly into easy steps. We’ll help you get a professional-looking job right at home.
Preparing Your Motorcycle Exhaust For Paint
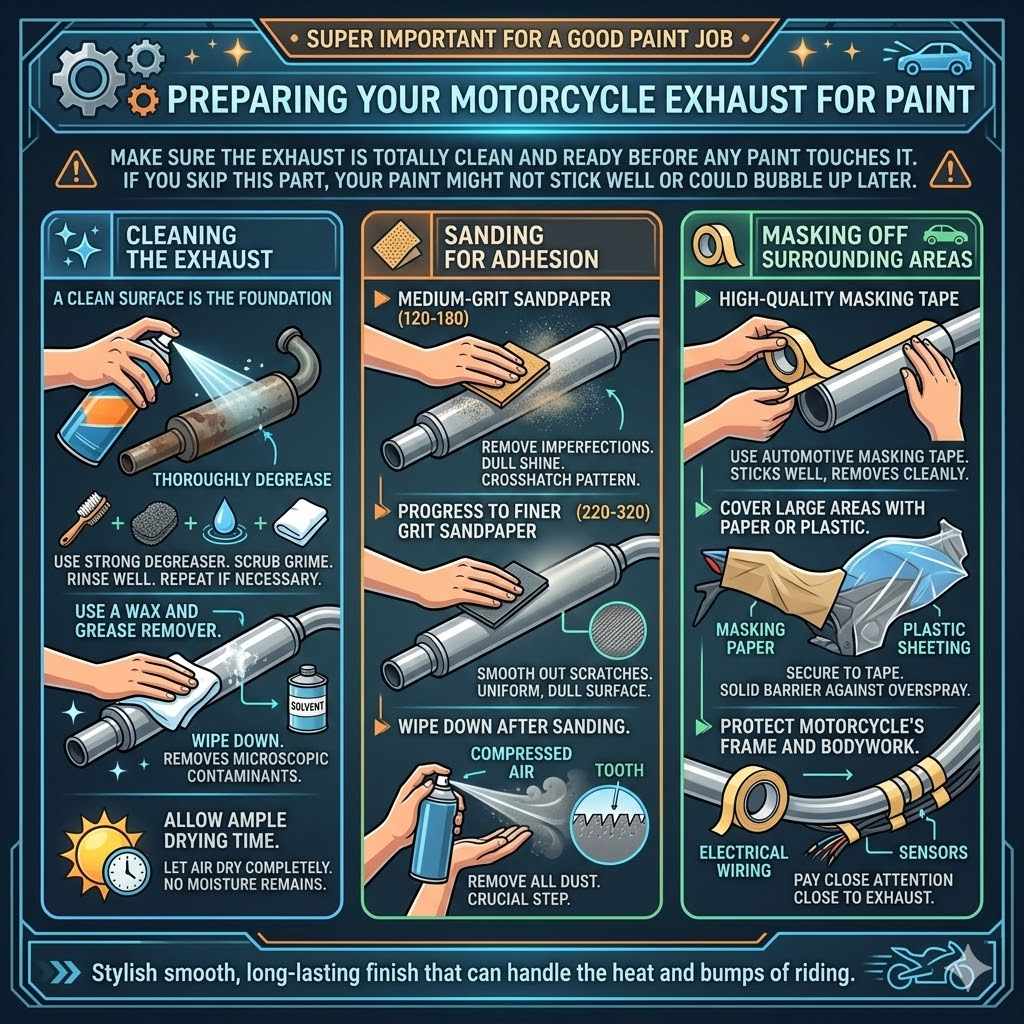
This first step is super important for a good paint job. You need to make sure the exhaust is totally clean and ready before any paint touches it. If you skip this part, your paint might not stick well or could bubble up later.
We’ll cover cleaning, sanding, and masking to get a smooth surface.
Cleaning The Exhaust
A clean surface is the foundation for any lasting paint job. Grease, oil, road grime, and old wax can prevent paint from adhering properly. This means the paint might flake off or look patchy.
You want to remove all contaminants.
- Thoroughly degrease the exhaust pipe. Use a strong degreaser specifically designed for automotive parts. Apply it generously and let it sit for a few minutes to break down tough grime. Then, scrub the pipe with a stiff brush or steel wool. Rinse it well with water and wipe it down with a clean rag. Repeat this process if necessary until all visible dirt and grease are gone.
- Use a wax and grease remover. After degreasing and rinsing, wipe down the entire exhaust with a wax and grease remover. This is a specialized solvent that evaporates completely, leaving no residue. It’s essential for removing any microscopic contaminants that might be left behind. Use a clean, lint-free cloth for this step.
- Allow ample drying time. Let the exhaust air dry completely. You can speed this up slightly with compressed air, but ensure no moisture remains in any nooks or crannies. Any trapped moisture can cause issues when heat is applied later.
Sanding For Adhesion
Sanding creates a surface that the new paint can grab onto. It roughens the existing surface just enough. This is often called creating “tooth.” Without this tooth, the new paint would just slide off smooth metal.
- Start with medium-grit sandpaper. Use sandpaper with a grit of around 120 to 180. This will remove any remaining surface imperfections and start to dull the shine of the original finish. Sand the entire area you plan to paint. Ensure you sand in multiple directions to create a crosshatch pattern.
- Progress to finer grit sandpaper. After using the medium grit, switch to a finer grit, like 220 or 320. This will smooth out the scratches left by the coarser grit. The goal is a uniform, dull surface, not a perfectly smooth one. You should not see any shiny spots.
- Wipe down after sanding. After sanding, use a clean, dry cloth to remove all dust. You can also use compressed air to blow away any dust particles. It’s crucial to get all the dust off the surface before proceeding to the next step.
Masking Off Surrounding Areas
You don’t want spray paint to get on parts of your motorcycle that you don’t intend to paint. This includes the fairings, engine components, wheels, or tires. Careful masking protects these areas.
- Use high-quality masking tape. Automotive masking tape is best because it’s designed to stick well and remove cleanly without leaving residue. Apply the tape firmly, ensuring all edges are sealed. Overlap the tape to create a solid barrier against overspray.
- Cover large areas with paper or plastic. For larger areas that need protection, use masking paper or plastic sheeting. Secure the paper or plastic to the tape. Make sure there are no gaps where paint mist can get through. Extend the coverage well beyond the area you are painting.
- Protect the motorcycle’s frame and bodywork. Pay close attention to areas close to the exhaust. Use extra layers of tape and paper around sensitive components like electrical wiring or sensors. If you have a delicate paint job on your bike’s frame or body, consider using a spray mask designed for automotive painting to prevent any accidental overspray.
Choosing The Right High-Temperature Spray Paint
Not all spray paints can handle the heat from a motorcycle exhaust. You need a special type of paint. This paint is made to withstand extreme temperatures without fading, blistering, or peeling.
Using the wrong paint will lead to a very disappointing and short-lived finish.
Understanding High-Temperature Paints
Motorcycle exhausts get incredibly hot, especially during riding. Regular spray paints are formulated for typical room temperatures or mild outdoor conditions. They will break down quickly when exposed to the high heat generated by an exhaust system.
High-temperature paints use special binders and pigments that can withstand these extreme conditions. These paints often contain ceramic or silicone resins that form a very durable and heat-resistant film. They are designed to resist thermal shock, which is the stress caused by rapid changes in temperature.
This prevents cracking and peeling.
Types of High-Temperature Spray Paints
There are generally two main types of high-temperature spray paints you’ll encounter for exhausts. One is a ceramic-based paint, and the other is often silicone-based. Both offer excellent heat resistance, but their properties can vary slightly.
- Ceramic-based paints offer superior durability and heat resistance. They are formulated to withstand very high temperatures, often exceeding 1200 degrees Fahrenheit (about 650 degrees Celsius). These paints dry to a very hard finish and are excellent at resisting abrasion and chipping. They are ideal for the hottest parts of the exhaust system, like the header pipes closest to the engine.
- Silicone-based paints are also heat resistant, typically up to around 600-800 degrees Fahrenheit (about 315-425 degrees Celsius). They can be a good option for less extreme areas of the exhaust, like mufflers or tailpipes. Silicone paints often offer a bit more flexibility, which can be beneficial if the exhaust system experiences a lot of vibration.
- Consider matte, satin, or gloss finishes. High-temperature paints come in various finishes. Matte finishes hide imperfections well and can give a stealthy look. Satin finishes offer a slight sheen, while gloss finishes provide a very shiny, new appearance. Choose a finish that matches your aesthetic preferences and the original look of your exhaust, if desired.
Color Options
While black is the most common color for exhaust paints due to its heat resistance and common aesthetic, you can find other options. Some manufacturers offer colors like silver, graphite, or even titanium finishes. These are also formulated for high heat.
- Black is the most popular choice. It’s classic, hides dirt and soot well, and many high-temperature paints offer excellent matte, satin, or gloss black finishes. This is often the easiest color to find and the most forgiving for DIY application.
- Silver and metallic finishes mimic the look of polished or stainless steel. If you want to restore the look of chrome or brushed metal, a high-temperature silver or metallic paint can be a good choice. Ensure the specific product is rated for exhaust temperatures.
- Rare specialty colors. While less common, some brands might offer other colors. These are typically more expensive and may have slightly lower temperature ratings compared to standard black or silver. Always check the product specifications carefully.
The Spray Painting Process
Now that your exhaust is prepped and you have the right paint, it’s time to start painting. This process requires patience and steady hands. Applying thin, even coats is key to a smooth, professional look.
Applying Primer (Optional But Recommended)
While some high-temperature exhaust paints can be applied directly to a prepared metal surface, using a high-temperature primer can improve adhesion and durability. A primer acts as a bonding layer between the metal and the topcoat.
- Select a high-temperature primer. Just like the paint, the primer must be able to withstand extreme heat. Look for primers specifically designed for exhaust systems or high-temperature applications. These primers are often formulated with ceramic or metallic compounds.
- Apply thin, even coats. Shake the primer can well and apply it in light, consistent passes. Hold the can about 8-10 inches away from the surface. Avoid applying too much primer at once, as this can lead to runs or drips.
- Allow proper drying time between coats and before top-coating. Check the product instructions for specific drying times. Most primers need at least 30 minutes to an hour to dry to the touch before applying the next coat or the base paint. Ensure the primer is fully cured according to the manufacturer’s recommendations before applying the topcoat.
Applying The Paint Coats
This is where the transformation happens. Remember, multiple thin coats are far better than one thick coat. A thick coat will drip and run, ruining your finish.
- Shake the spray can thoroughly. Before you start spraying, shake the can vigorously for at least two minutes. This ensures the pigments and propellants are well mixed. You should hear a rattling sound from the mixing ball inside.
- Apply light, even coats. Hold the can about 8-10 inches away from the exhaust. Spray in smooth, overlapping strokes. Move the can in a steady motion from side to side or up and down. Do not linger in one spot.
- Allow flash-off time between coats. After each coat, let the paint “flash off” for 5-10 minutes. This allows the solvents to evaporate slightly, which helps the next coat adhere properly. It also prevents the paint from becoming too wet and running.
- Apply several thin coats. For a durable and smooth finish, you’ll likely need 3-5 thin coats. The exhaust should be completely covered but not dripping with paint. The color will build up gradually with each layer.
Drying and Curing
The paint needs time to dry and then cure properly. Drying means it’s no longer wet to the touch. Curing is a chemical process that makes the paint hard and durable.
This often happens with heat.
- Allow the paint to dry to the touch. Let the exhaust air dry for at least 24 hours after the final coat. During this time, avoid touching the painted surface. Keep it in a well-ventilated area away from dust and moisture.
- The heat curing process. Most high-temperature exhaust paints require a heat cure to achieve their maximum durability. This is usually done by starting the motorcycle’s engine and letting it idle for a specific period. The heat from the exhaust fumes will bake the paint, hardening it.
- Follow manufacturer instructions for curing. Each paint product will have slightly different curing requirements. Some might suggest idling the bike for 15-20 minutes at first, then letting it cool completely, followed by another longer run. Others might recommend a gradual increase in engine run time over a few days. Always refer to the paint can’s instructions for the correct curing procedure. This is critical for the paint’s longevity.
Troubleshooting Common Issues
Even with careful work, sometimes things don’t go perfectly. Knowing how to fix common problems can save your paint job. From drips to uneven coverage, we’ll help you solve them.
Drips and Runs
These happen when too much paint is applied in one spot or the can is held too close. They create unsightly lines on the surface.
- Fixing wet drips and runs. If you catch a drip while the paint is still wet, you can try to gently smooth it out with a soft brush or a clean cloth. However, this can sometimes smear the paint. Often, it’s better to let it dry and then carefully sand it down.
- Sanding down dried drips. Once the paint is fully dry, use fine-grit sandpaper (400-600 grit) to carefully sand down the run until it’s level with the surrounding paint. Be careful not to sand through the paint. After sanding, clean the area and reapply thin coats of paint to that spot, feathering the edges.
- Preventing future drips. Always use thin, even coats. Ensure proper “flash-off” time between coats. Hold the spray can at the recommended distance and keep it moving. Avoid painting in humid conditions or when the temperature is too low.
Uneven Coverage or Thin Spots
This can happen if the paint wasn’t shaken enough, or if the spray pattern was inconsistent. You might see lighter areas where the original metal or primer is showing through.
- Apply more thin coats. The easiest way to fix thin spots is to apply more thin coats of paint. Ensure you maintain the correct spraying distance and overlap pattern. Build up the color gradually until it’s uniform.
- Check spray can performance. If you notice an inconsistent spray pattern (e.g., sputtering), the nozzle might be clogged. Try clearing it with a fine pin or replacing the nozzle if possible. If the can is not producing enough pressure, it might be nearing empty.
- Inspect for missed areas. After the paint has dried, look at the exhaust under good lighting from different angles. You might see areas that were missed or not coated evenly. Touch up these areas with additional thin coats.
Paint Peeling or Blistering
This is usually a sign of poor surface preparation or using the wrong type of paint. If the exhaust wasn’t cleaned properly, grease can cause the paint to lift. Blistering can occur if moisture was trapped or if the paint wasn’t designed for high heat.
- Address the root cause. If you are experiencing peeling or blistering, you will likely need to remove the affected paint. Sand down the area completely until you reach bare metal. Then, thoroughly clean and degrease the surface again.
- Ensure correct paint type. Double-check that you used a high-temperature, exhaust-specific paint. Regular paint will not withstand the heat and will eventually fail. Reapply using the correct type of paint and proper preparation steps.
- Follow curing instructions carefully. Improper heat curing is a common reason for premature paint failure. Make sure you follow the manufacturer’s recommended idling and cooling cycles to fully cure the paint. This process is essential for its durability.
Maintenance And Care
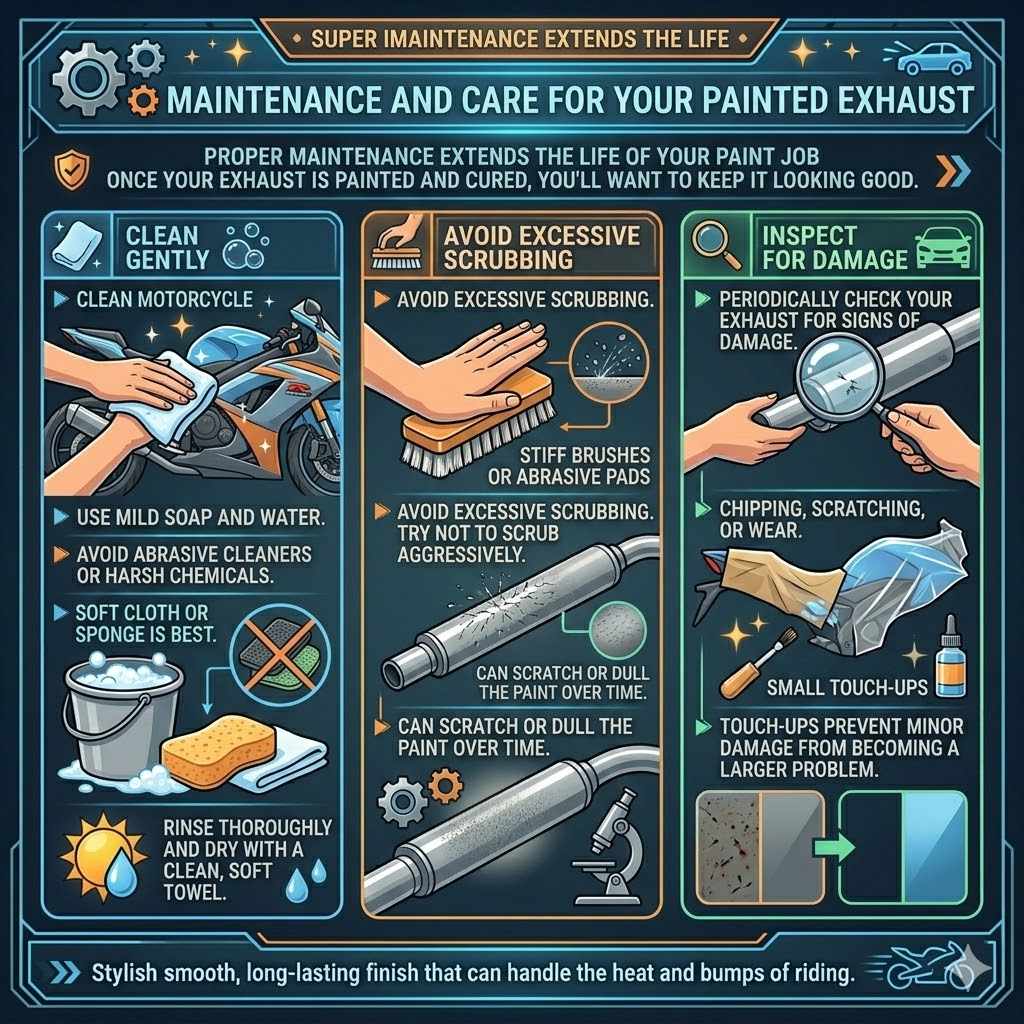
Once your exhaust is painted and cured, you’ll want to keep it looking good. Proper maintenance will extend the life of your paint job.
- Clean gently. When cleaning your motorcycle, use mild soap and water. Avoid abrasive cleaners or harsh chemicals on the painted exhaust. A soft cloth or sponge is best. Rinse thoroughly and dry with a clean, soft towel.
- Avoid excessive scrubbing. While some dirt and grime are unavoidable, try not to scrub the exhaust aggressively, especially with stiff brushes or abrasive pads. This can scratch or dull the paint over time.
- Inspect for damage. Periodically check your exhaust for any signs of chipping, scratching, or wear. Small touch-ups can prevent minor damage from becoming a larger problem.
Frequently Asked Questions
Question: How long does it take for exhaust paint to fully cure
Answer: It can take several days to a week for exhaust paint to fully cure, even after the heat curing process. The heat from the engine initiates the curing, but the paint continues to harden over time.
Question: Can I spray paint my motorcycle exhaust without removing it
Answer: Yes, you can spray paint your motorcycle exhaust without removing it. However, removing it often allows for better access and a more thorough and even paint application.
Question: What is the best type of paint for a motorcycle exhaust
Answer: The best type of paint for a motorcycle exhaust is a high-temperature, exhaust-specific spray paint, often ceramic or silicone-based, designed to withstand extreme heat.
Question: How many coats of paint should I apply
Answer: You should apply 3 to 5 thin, even coats of high-temperature exhaust paint, allowing for flash-off time between each coat.
Question: Why is surface preparation so important
Answer: Surface preparation is crucial because it ensures that the paint will adhere properly to the exhaust. Any grease, dirt, or old paint will prevent the new paint from sticking, leading to premature failure.
Wrap Up
Painting your motorcycle exhaust can be a rewarding project. By following these steps, you can achieve a clean, durable finish that looks great. Proper cleaning, sanding, and the right high-temperature paint are key.
Patience and thin coats will give you the best results.
Related pick: Check today's price on Amazon