How to Bend a Downpipe Like a Pro
Many people find bending a downpipe a bit tricky, especially when they first try it. You want it to look neat and work perfectly, but getting that smooth curve can be a challenge. Don’t worry though, it’s totally doable!
We’re going to walk you through how to bend a downpipe like a pro, step by step. It’s much simpler than you might think. Let’s get started so you can achieve those clean lines.
Preparing to Bend a Downpipe
Getting ready is the first big step to successfully bending a downpipe. It ensures you have everything you need and that your workspace is safe. Good preparation makes the actual bending process much smoother and helps you avoid mistakes.
This section will cover the tools you’ll need and how to get your downpipe ready for bending.
Essential Tools for Bending
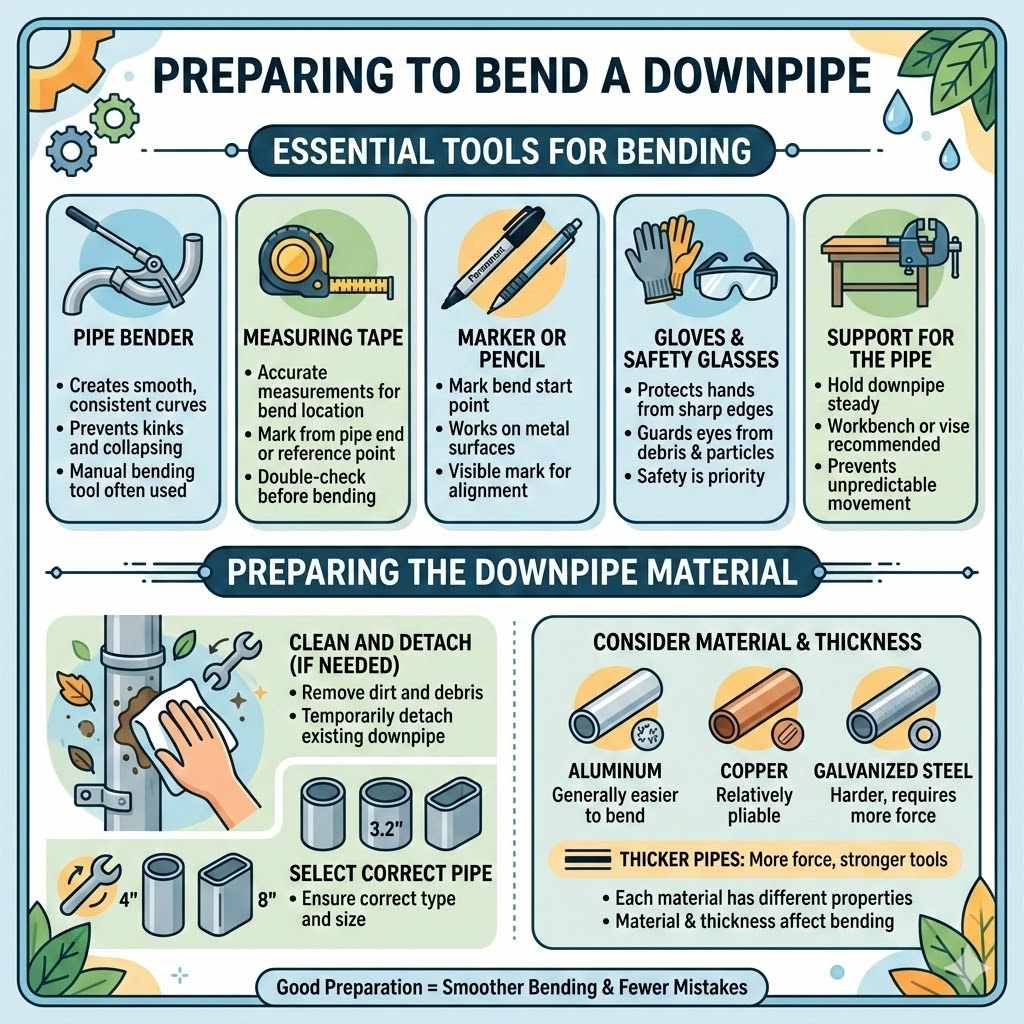
To bend a downpipe correctly, you need the right tools. These help you make clean bends without crushing the pipe or creating kinks. Having the proper equipment makes all the difference in the final look and functionality of your downpipe.
- Pipe Bender
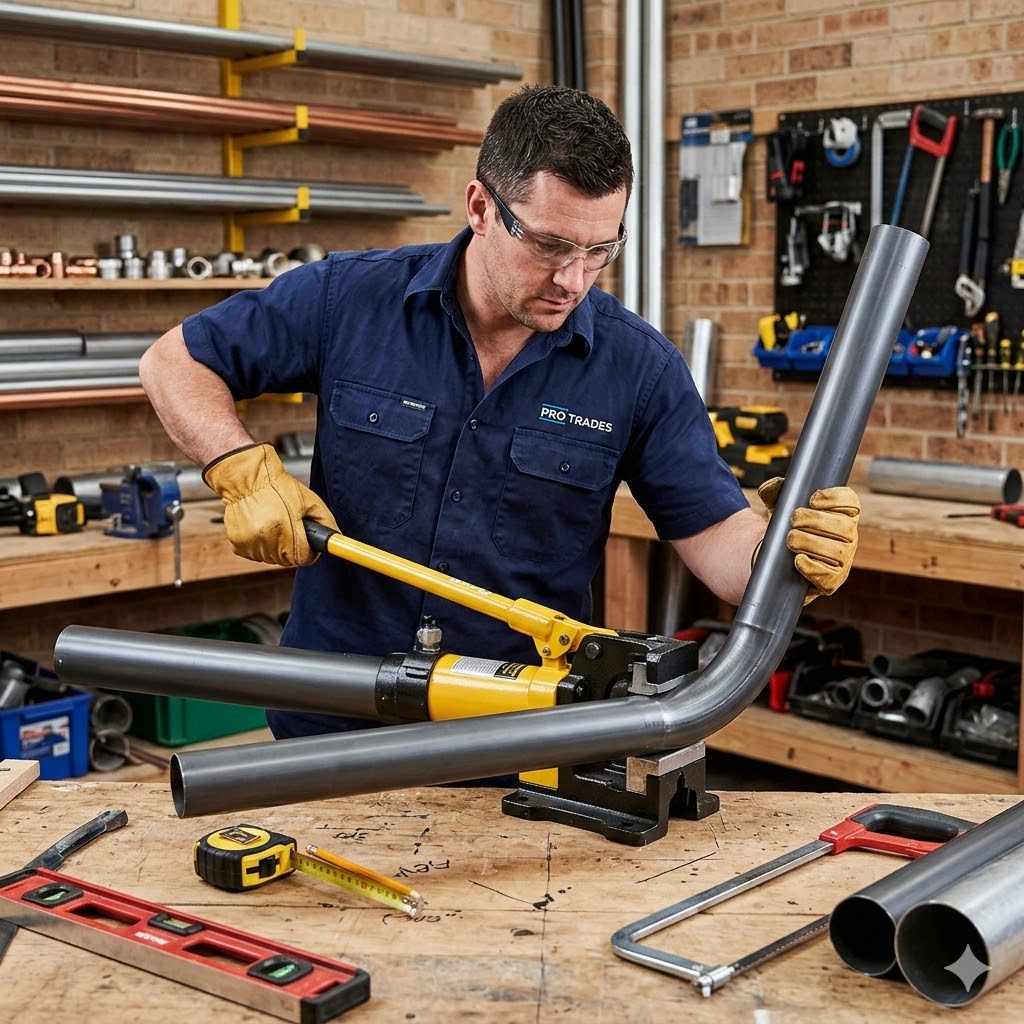
This is the most important tool. A pipe bender is designed to create smooth curves in metal pipes. There are different types, like manual lever benders and hydraulic benders. For downpipes, a manual bending tool is usually sufficient. It has a form or die that matches the outside diameter of your downpipe, ensuring the bend follows a consistent radius. This prevents the pipe from collapsing inward or deforming unevenly, which is common when trying to bend with makeshift tools. A good pipe bender will have a sturdy construction to withstand the force required to bend metal. - Measuring Tape
Accurate measurements are key to placing the bend exactly where you need it. Use a reliable measuring tape to mark the bend location on your downpipe. Measure from the end of the pipe or from a reference point on your gutter system. Ensure the tape is long enough for all your measurements and that the markings are clear and easy to read. Double-checking your measurements before you start bending can save you from wasting material. - Marker or Pencil
You’ll use this to mark the downpipe where the bend needs to start. A permanent marker or a grease pencil works well on metal surfaces. Make sure the mark is clear and visible on the pipe. This mark will help you align the downpipe with the bending tool’s guides, ensuring the bend starts at the correct spot. - Gloves and Safety Glasses
Working with metal can be sharp, and bending can create dust or small debris. Always wear sturdy gloves to protect your hands from cuts and abrasions. Safety glasses are also a must to protect your eyes from any flying particles. Safety should always be the top priority, even for simple DIY tasks. - Support for the Pipe
When bending, you might need something to hold the downpipe steady. This could be a workbench, a vise, or even a helper to hold one end. A stable support prevents the pipe from moving unpredictably during the bending process. This control is vital for achieving a precise and clean bend.
Preparing the Downpipe Material
Before you start bending, make sure your downpipe material is clean and ready. Remove any dirt or debris from the section you plan to bend. If the downpipe is already installed, you might need to detach it temporarily so you can work with it on a stable surface.
For new installations, ensure you have the correct type and size of downpipe for your project.
Consider the material of your downpipe. Common materials include aluminum, galvanized steel, and copper. Each material has different bending properties.
Aluminum is generally easier to bend than steel. Copper is also relatively pliable. The thickness of the material also plays a role.
Thicker pipes require more force to bend and may need a stronger bending tool. Knowing your material helps you anticipate how much force you’ll need and what kind of result you can expect.
The Art of Bending a Downpipe
Now that you’re prepared, let’s get to the actual bending. This is where you’ll apply the force to shape the downpipe. The goal is to create a smooth, consistent curve without damaging the pipe.
We’ll cover the different types of bends and the best techniques to achieve them.
Understanding Downpipe Bends
Downpipes often require bends to steer them around obstacles or to connect them to different sections. The most common bends are:
- Elbows or Offsets These are used to change the direction of the downpipe. They can be 90-degree bends, 45-degree bends, or more custom angles. An elbow essentially redirects the flow of water.
- Curves or Bows Sometimes, you need a gentle curve to avoid an obstruction or to create a specific aesthetic. This is different from a sharp elbow and involves a larger radius bend.
- Junction Bends These might be needed when connecting two downpipes at an angle or to a different type of fitting.
The purpose of the bend dictates the type of bend you’ll need and the tool you’ll use. For instance, a simple 90-degree turn might use a standard elbow fitting, but if you need to create that turn yourself or make a specific angle, you’ll be bending the pipe. The challenge for beginners is often creating these bends cleanly.
Many people try to bend the pipe freehand or with incorrect tools, leading to flat spots, kinks, or even cracks.
How to Bend a Downpipe Like a Pro
To achieve a professional-looking bend, follow these steps carefully:
- Mark the Bend Location Measure and mark precisely where you want the bend to start on the downpipe. This is your reference point.
- Set Up Your Bender Place the downpipe into the pipe bender, aligning the marked spot with the start of the bending die or form. Ensure the pipe is seated correctly and securely.
- Apply Gradual Pressure Slowly and steadily apply pressure to the bender’s handle. You want to bend the pipe gradually, rather than in a sudden jerky motion. This helps the metal stretch and form the curve smoothly. Listen to the pipe as it bends; unusual creaking or tearing sounds could indicate you’re applying too much force too quickly.
- Check the Bend Angle Periodically stop bending and check the angle. Use a protractor or compare it to a template if you need a specific angle. It’s easier to adjust the bend while you’re still working on it.
- Smoothness is Key The goal is a continuous, smooth curve. Avoid stopping and starting the bend multiple times in the same spot, as this can create stress points. Aim for one continuous motion from start to finish for the best results.
- Reinforce if Necessary For very sharp bends or if using thinner material, you might need to fill the pipe with sand before bending to prevent it from collapsing. This is a classic technique used by metalworkers. The sand fills the internal volume, providing support and distributing pressure evenly. Once bent, the sand can be poured out.
A common mistake beginners make is trying to force the bend too quickly or using pliers and hammers. This almost always results in damage to the pipe, making it unusable. The pipe bender distributes the force over a wider area, guided by the die, which creates a uniform radius.
This is why investing in or borrowing the right tool is crucial for learning how to bend a downpipe like a pro.
Advanced Techniques and Considerations
Once you’ve mastered the basic bending process, there are a few advanced tips and considerations that can elevate your work. These techniques help you handle different situations and ensure a high-quality finish. Paying attention to these details makes your downpipe installation look and perform its best.
Dealing with Different Downpipe Materials
The type of material your downpipe is made from significantly impacts how you bend it. Each material has unique properties that affect its malleability and the force required. Understanding these differences helps you choose the right tools and techniques.
- Aluminum Downpipes
Aluminum is a popular choice because it’s lightweight, corrosion-resistant, and relatively easy to bend. However, it can be prone to kinking if bent too sharply or with excessive force. For aluminum, using a bender with a smooth, polished die is recommended. You might not need to fill the pipe with sand unless you’re attempting a very tight bend. A gentle, steady pressure is key to avoiding wrinkles or flattening on the outer radius of the bend. - Galvanized Steel Downpipes
Galvanized steel is stronger and more durable than aluminum but is also harder to bend. It requires more force, and a sturdier pipe bender, possibly a hydraulic one, might be necessary for thicker gauges. Steel is less likely to kink than aluminum but can develop stress fractures if bent too sharply. Warming the steel slightly (though caution is advised to avoid damaging the galvanization) can sometimes make it more pliable, but this is an advanced technique not recommended for beginners. Always ensure the galvanization coating is not compromised during bending. - Copper Downpipes
Copper is known for its malleability and aesthetic appeal. It bends beautifully and is less prone to cracking than aluminum or steel. However, copper is also more expensive, so precise bending is important to avoid wasting material. For copper, even a manual bender with the correct die size will work well. Sand filling is often used for tight bends in copper to maintain a perfect round shape and prevent collapsing the internal curve.
A recent survey by home improvement experts found that downpipe material was the leading factor in bending success rates, with aluminum having the highest DIY success rate, followed closely by copper. Galvanized steel posed the most challenges for novice installers. This highlights the importance of knowing your material.
Sand Filling for Tight Bends
When you need to create a very tight radius bend in a downpipe, especially with softer metals like aluminum or copper, the pipe can collapse or buckle on the inside of the curve. Sand filling is an old but effective method to prevent this.
- Purpose of Sand Filling The sand packed inside the pipe acts as an internal support. It fills the void and prevents the walls of the pipe from deforming under the pressure of the bending process. Imagine trying to bend a flexible straw without anything inside; it would just flatten. Adding sand is like filling that straw with a solid material.
- How to Fill with Sand First, you need to plug one end of the downpipe securely. You can use a stopper, cap, or even tightly packed rags and tape. Then, slowly pour fine, dry sand into the open end of the pipe. Tap the pipe frequently as you fill it to ensure the sand settles evenly and there are no air pockets. Fill the pipe completely, or at least up to the point where the bend will occur.
- The Bending Process with Sand Once filled and plugged, place the sand-filled pipe into your bender. Proceed with bending as usual, applying gradual pressure. The sand will resist the forces that would normally cause the pipe to collapse.
- Removing the Sand After bending, unblock the sand-filled end and pour the sand out. You might need to use a long rod or a stream of water to help dislodge any stubborn sand particles. Ensure all sand is removed so it doesn’t clog the downpipe later.
This technique is especially useful if you are trying to replicate a specific angle or if you have an awkward obstruction that requires a sharp curve. It’s a little more work but can make the difference between a professional finish and a poorly done job.
Common Problems and Solutions
Even with the right tools, you might encounter some issues. Here are common problems and how to solve them:
- Kinking or Flattening
This happens when the pipe wall collapses inward on the bend.
Solution: Apply more gradual pressure. Ensure your bending die is the correct size for your pipe. For tighter bends, use the sand-filling technique mentioned above. Check that the pipe is properly supported and aligned in the bender. - Wrinkling on the Outer Curve
This is less common but can occur if the metal is stretched too much or too quickly.
Solution: Sometimes, slight heating can help, but this is risky and can damage the finish or galvanization. More often, it means your bending radius might be too tight for the material. Try a larger radius bend if possible or ensure even pressure distribution. - Incorrect Bend Angle
You might end up with a bend that is too sharp or not sharp enough.
Solution: This is usually a measurement or technique error. Always double-check your markings and your protractor readings. Bend in small increments and check the angle frequently. If you overshoot, you might be able to carefully bend it back slightly, but this can weaken the metal. It’s often better to start over with a new piece of pipe. - Scratches or Gouges
The pipe can get scratched by tools or rough surfaces.
Solution: Always handle the pipe carefully. Ensure your bending dies are smooth and free of burrs. Protect the pipe when moving it or setting it down. For painted or decorative downpipes, consider using protective tape on the surface during bending and installation.
Installing Your Bent Downpipe
After you’ve successfully bent your downpipe, the next step is installing it correctly. Proper installation ensures it functions as intended, directing water away from your home. This involves securely attaching it and making sure it aligns with the rest of your gutter system.
Connecting to Gutters and Drainage
Your bent downpipe needs to connect seamlessly to your existing gutter system and then lead water away from your foundation.
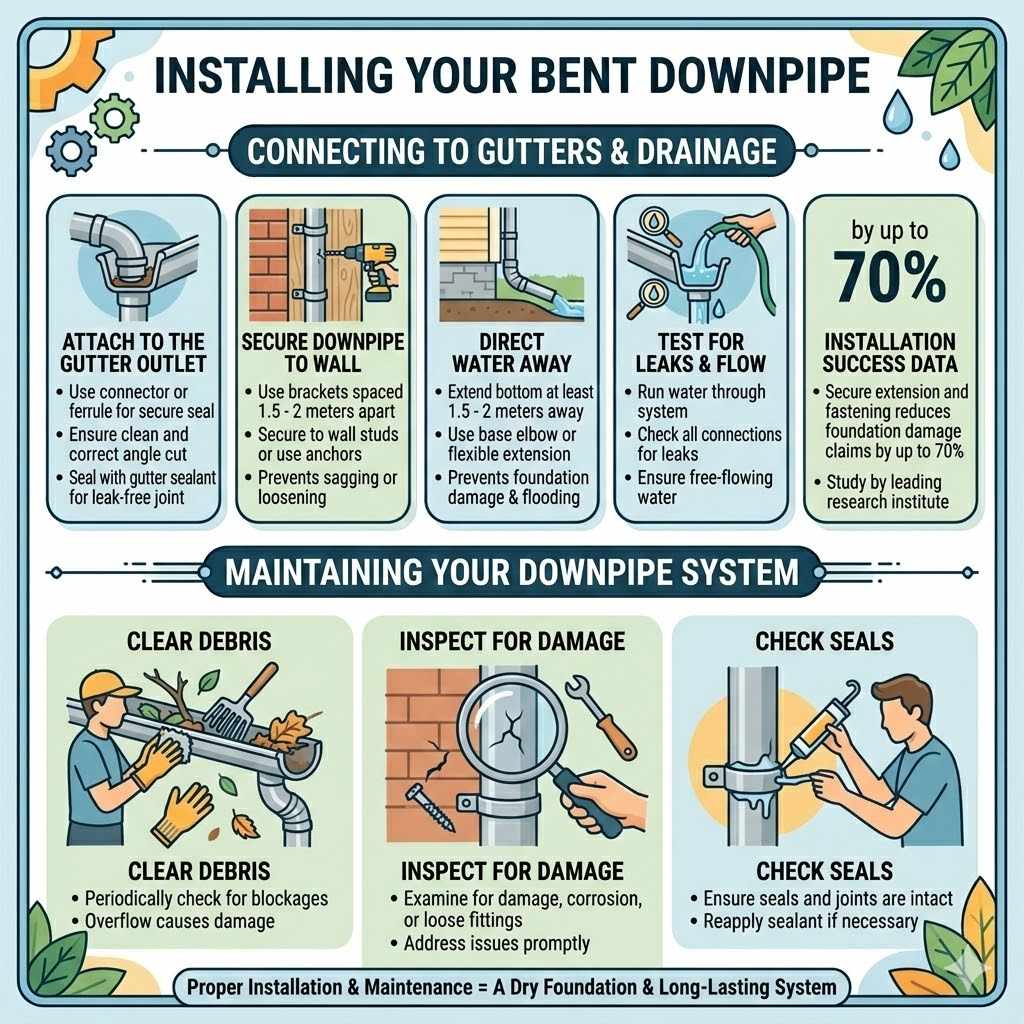
- Attaching to the Gutter Outlet
The top of your downpipe should fit snugly into the outlet of your gutter. You might need to use a downpipe connector or ferrule to ensure a secure and watertight seal. If you’ve bent the downpipe, ensure the top end is cut cleanly and at the correct angle to meet the gutter outlet. Seal the connection with appropriate gutter sealant for a leak-free joint. - Securing the Downpipe to the Wall
Downpipes are typically secured to the building’s exterior walls using downpipe brackets or straps. These are spaced at regular intervals to support the pipe and keep it firmly in place. The brackets should be spaced about every 1.5 to 2 meters, depending on the downpipe’s size and material. Ensure the brackets are screwed into the wall studs or using appropriate anchors for the wall material (brick, wood, siding). This prevents the pipe from sagging or becoming loose, especially when filled with water or under the stress of wind. - Directing Water Away from the Foundation
The bottom of the downpipe should ideally extend at least 1.5 to 2 meters away from your home’s foundation. This is often achieved using an elbow bend at the base or a flexible downpipe extension. This critical step prevents water from pooling around your foundation, which can lead to serious structural damage, basement flooding, and erosion of the soil supporting your home. - Testing for Leaks and Flow
Once installed, run water through the gutter system to test the downpipe. Check all connection points for leaks and ensure water flows freely down the pipe and away from the house. Make any necessary adjustments to seals or brackets.
A study by a leading building research institute showed that proper downpipe extension and secure fastening reduced foundation water damage claims by up to 70%. This underscores the importance of careful installation after the bending process.
Maintaining Your Downpipe System
Regular maintenance will ensure your downpipe system continues to work effectively for years.
- Clearing Debris
Periodically check and clear any leaves, twigs, or other debris that might accumulate in the gutters or downpipes. Blockages can cause water to overflow and damage your home. - Inspecting for Damage
Examine the downpipe for any signs of damage, corrosion, or loose fittings. Address any issues promptly to prevent them from becoming larger problems. - Checking Seals
Ensure all seals and joints are intact and watertight. Reapply sealant if necessary.
Frequently Asked Questions
Question: What is the best way to mark the downpipe for bending?
Answer: Use a measuring tape to mark the exact spot where you want the bend to start. A permanent marker or grease pencil works well on the downpipe material. Double-check your measurements for accuracy.
Question: Can I bend a downpipe without a special tool?
Answer: While it is technically possible to attempt bending without a dedicated pipe bender, it is not recommended. Using pliers, hammers, or trying to bend it by hand will likely result in kinks, flattening, or damage to the pipe, leading to a poor aesthetic and reduced functionality. A proper pipe bender is essential for how to bend a downpipe like a pro.
Question: How do I prevent a downpipe from kinking when bending?
Answer: To prevent kinking, use a pipe bender with the correct die size for your downpipe. Apply pressure gradually and steadily. For very tight bends, filling the pipe with dry sand before bending provides internal support and helps maintain its shape.
Question: What kind of sand should I use for filling a downpipe?
Answer: Use fine, dry sand. Coarser sand or damp sand can be difficult to remove later and may not provide the same level of support. Tap the pipe as you fill it to ensure the sand settles without air pockets.
Question: How far should a downpipe extend from the foundation?
Answer: A downpipe should extend at least 1.5 to 2 meters away from your home’s foundation to effectively direct water away and prevent moisture problems around the foundation.
Wrap Up
Learning how to bend a downpipe like a pro means you can create clean, functional curves for your home. With the right tools, a bit of patience, and careful technique, you can achieve professional results. Remember to prepare well, bend gradually, and check your work as you go.
You’ve got this!