How to Apply Flex Tape on Leaky Pipe: Proven Fix
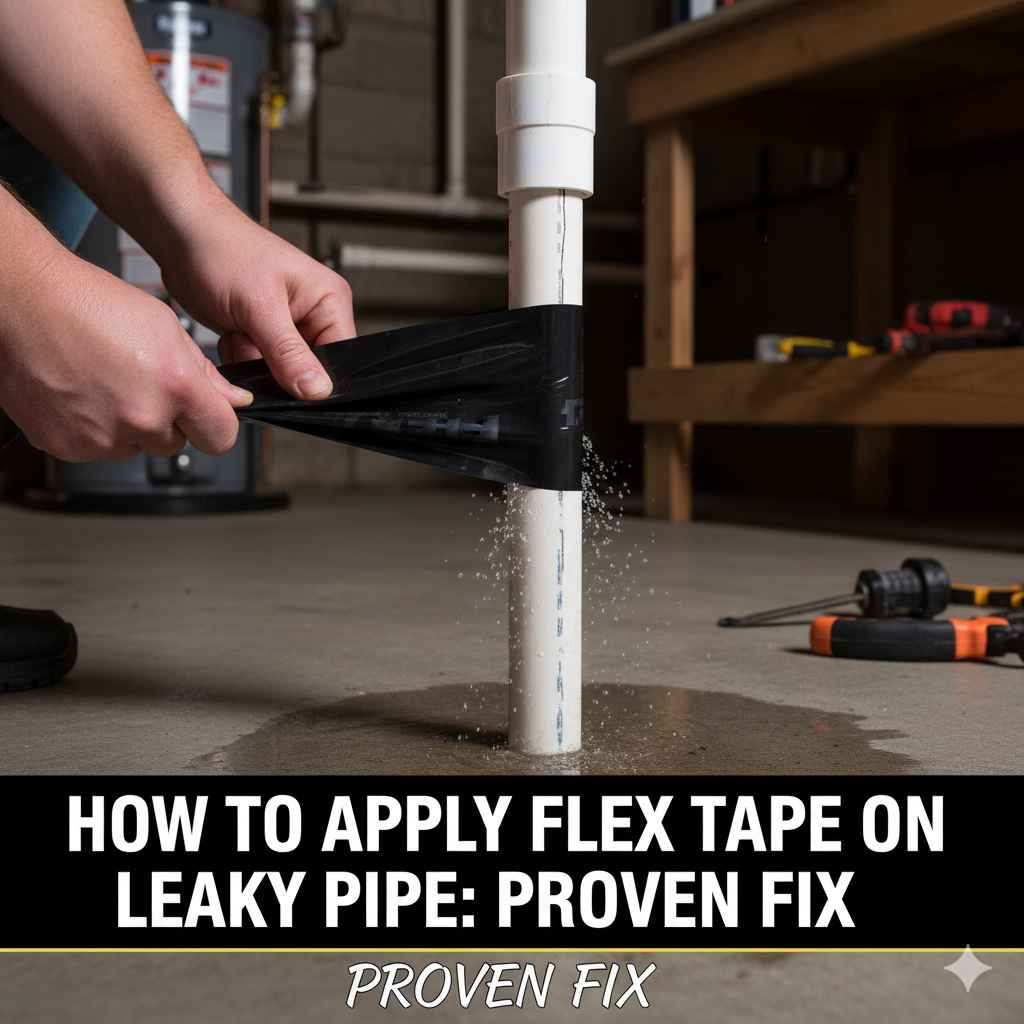
Applying Flex Tape to a leaky pipe is a straightforward, temporary fix that seals small to medium leaks. Clean and dry the area thoroughly, cut Flex Tape to size, and press it firmly over the leak, wrapping it securely. It’s a great DIY solution for emergencies until a permanent repair can be made.
Ever dealt with a dripping pipe under your sink or a mysterious puddle appearing in your garage? It’s a common headache! Those pesky leaks can cause water damage and waste precious resources. But don’t worry, there’s a surprisingly simple solution that can help you in a pinch: Flex Tape. You might have seen its infomercials, and yes, it actually works for many common pipe leaks. This guide will walk you through, step-by-step, how to use Flex Tape to get a handle on that leaky pipe, giving you peace of mind and preventing further damage. Let’s get those pipes sealed up!
Understanding Pipe Leaks and Flex Tape
Before we dive into the “how-to,” let’s quickly chat about why pipes spring leaks and what makes Flex Tape a viable option for a quick fix. Pipes can leak for a variety of reasons. Over time, corrosion can eat away at the metal, especially in older plumbing systems. Freezing temperatures can cause pipes to expand and even burst, creating more significant damage. Joints and fittings are also common culprits, as seals can degrade or crack. Sometimes, a simple crack can form due to stress or impact.
Flex Tape enters the scene as a super strong, waterproof, and incredibly versatile adhesive tape. Its unique rubberized backing conforms to uneven surfaces, and its aggressive adhesive grips on tightly, even underwater. This makes it an excellent candidate for sealing leaks in pipes, whether they’re made of PVC, metal, or other common plumbing materials. It’s not a permanent fix for major plumbing issues, but for those annoying drips and small to medium-sized leaks, it can be a real lifesaver, buying you time to plan a proper repair. Think of it as a superhero bandage for your pipes!
When Flex Tape is Your Best Friend (and When it’s Not)
Flex Tape is fantastic for certain pipe leak scenarios, but it’s important to know its limitations. Using it appropriately ensures the best results and avoids disappointment.
Situations Where Flex Tape Excels:
Small to Medium Leaks: Drips from pinholes, minor cracks, or corroded spots are ideal candidates.
Temporary Fixes: When you need to stop a leak immediately to prevent further damage before a professional plumber can arrive or you can schedule a permanent repair.
Emergency Situations: During a weekend, holiday, or late at night when repair services are unavailable or too expensive to call out for an immediate fix.
Low-Pressure Pipes: It works best on pipes that aren’t under extreme water pressure, like irrigation lines, garden hoses, or drain pipes.
Accessible Areas: When the leaky section of the pipe is easy to reach and clean.
When to Consider a Different Solution:
High-Pressure Pipes: Flex Tape is not designed for the constant, high pressure found in main water supply lines. A burst pipe under high pressure will likely blow through the tape.
Large Holes or Bursts: If a pipe has a significant section missing or has completely burst, Flex Tape won’t have enough surface area to create a strong enough seal.
Critical Plumbing: For main water supply lines that, if they fail, would cause catastrophic damage, it’s always best to call a professional immediately.
Extreme Temperatures: While it’s water-resistant, extreme heat or cold might affect its long-term adhesion.
Permanent Repair: Flex Tape is a patch, not a permanent solution. Always plan for a professional repair for long-term reliability.
Understanding these points will help you use Flex Tape effectively and manage your expectations. It’s a powerful tool for a specific set of problems.
Tools and Materials You’ll Need
Gathering your supplies before you start will make the whole process much smoother. Here’s a simple list of what you’ll need to tackle that leaky pipe with Flex Tape:
Flex Tape: Choose a color that blends in if you prefer, but the strength is the same regardless. Make sure you have enough to wrap the area generously.
Clean Rags or Paper Towels: You’ll need these to dry the pipe completely.
Rubbing Alcohol (Isopropyl Alcohol): This is crucial for cleaning the pipe surface and removing any grease or residue that could prevent the tape from sticking well.
Sandpaper (Medium Grits, e.g., 100-150 grit): This isn’t always necessary, but it can help roughen up a very smooth pipe surface for better adhesion.
Scissors or a Utility Knife: To cut the Flex Tape to the correct size.
Gloves (Optional): To keep your hands clean, especially if using rubbing alcohol.
Bucket or Towel: To catch any residual water.
Having these items ready means you can move quickly once you’ve identified the leak.
Step-by-Step Guide: How to Apply Flex Tape on a Leaky Pipe
This is where the magic happens! Follow these steps carefully to get a solid seal on your leaky pipe. Remember, preparation is key for a strong bond.
Step 1: Shut Off the Water Supply
This is the most important step for safety and effectiveness. You absolutely must turn off the water supply to the leaky pipe before attempting any repair.
Locate the Shut-Off Valve: This might be a small valve directly on the pipe, or you might need to shut off the main water supply to your house. For sinks, there are usually individual shut-off valves located behind the sink. For other pipes, you might need to find the main valve, often located where the water service enters your home (basement, crawl space, utility closet).
Turn Off the Valve: Turn the valve clockwise until it’s fully closed.
Open a Faucet: Open a faucet at the lowest point in your house and one closest to the leak. This will relieve any pressure remaining in the pipes and drain out residual water.
Step 2: Drain and Dry the Pipe Thoroughly
Any moisture or debris on the pipe surface will prevent the Flex Tape from adhering properly. Patience here pays off!
Allow Water to Drain: Let any remaining water drain from the pipe. You might want to place a bucket or towel underneath to catch drips.
Wipe Dry: Use a clean rag or paper towels to completely dry the area around the leak. Get into any crevices as best you can.
Ensure It’s Bone Dry: Even after wiping, residual moisture can remain. A completely dry surface is critical for the adhesive to bond. If the leak is under pressure, you might need to apply the tape quickly after drying or have someone assist you by keeping the water flow minimal after the initial drain.
Step 3: Clean the Pipe Surface
A clean surface is essential for the Flex Tape’s adhesive to work its magic.
Clean with Rubbing Alcohol: Dampen a clean rag or paper towel with rubbing alcohol (isopropyl alcohol).
Wipe the Leaky Area: Thoroughly wipe down the section of the pipe where the Flex Tape will be applied. This removes any grease, soap scum, or mineral deposits.
Allow Alcohol to Evaporate: Rubbing alcohol evaporates quickly, which is helpful. Ensure the area is dry again after cleaning.
Step 4: Lightly Sand the Surface (Optional but Recommended)
For a smoother pipe material, a little extra grip can make a big difference.
Gentle Abrasion: If the pipe is very smooth (like some PVC pipes), lightly scuff the surface with medium-grit sandpaper. The goal isn’t to remove material, but to create a slightly rougher texture for the adhesive to cling to.
Wipe Away Dust: After sanding, wipe the area again with a clean, dry rag to remove any dust.
Step 5: Cut the Flex Tape to Size
Measure twice, cut once! You want enough tape to securely cover the leak and extend onto the surrounding pipe.
Measure: Estimate how much tape you’ll need. It’s often best to have the tape overlap the damaged area by at least an inch on all sides. For a crack, you might want a piece long enough to wrap around the pipe at least once or twice.
Cut: Use sharp scissors or a utility knife to cut the Flex Tape. For curved pipes, cutting rounded corners on your tape pieces can help them lay more smoothly and prevent peeling.
Step 6: Apply the Flex Tape Firmly
This is the moment of truth. Apply with confidence and pressure!
Peel Backing: Carefully peel off the backing from one end of the Flex Tape piece.
Center and Press: Align the tape over the leak and press the exposed adhesive side firmly onto the pipe. Start in the center and work outwards.
Smooth Out Air Bubbles: Ensure there are no air bubbles trapped under the tape, as these can compromise the seal initially. Smooth them out towards the edges.
Wrap Tightly: If you are wrapping the tape around the pipe, apply firm, continuous pressure as you wrap. Overlap the tape onto itself generously. For longer cracks or corrosion, multiple overlapping strips might be necessary.
Seal the Edges: Pay special attention to sealing the edges of the tape. Press them down firmly to ensure a watertight bond.
Step 7: Apply More Layers if Necessary
For added security, especially on slightly larger leaks or areas expected to experience more stress, a second layer can be beneficial.
Overlap: Apply a second piece of Flex Tape, overlapping the first piece. Ensure the new layer extends beyond the first layer’s edges.
Press Firmly Again: Repeat the smoothing and pressing process for the second layer.
Step 8: Allow the Tape to Cure (Optional but Recommended for Best Results)
While Flex Tape bonds instantly, allowing it to cure for a while can strengthen the bond significantly, especially if it’s a more critical repair.
Wait: The longer you can wait before turning the water back on, the better the adhesion will be. Fleximount, the manufacturer, recommends waiting at least 30 minutes, but for critical repairs, waiting a couple of hours or even up to 24 hours can provide the strongest bond. Follow the product’s specific curing instructions if available.
Step 9: Turn Water Supply Back On and Check for Leaks
The final test!
Slowly Turn On Water: Slowly turn the water shut-off valve back on (counter-clockwise).
Inspect Carefully: Watch the repaired area closely for any signs of dripping or seepage.
Check Over Time: Monitor the repair periodically over the next few hours and days to ensure it holds.
Maintaining Your Flex Tape Fix
While Flex Tape is a robust temporary solution, it’s not a permanent one. Here’s how to manage your repair effectively:
Monitor Regularly: Keep an eye on the taped area. Look for any signs of bubbling, peeling, or new drips.
Avoid Harsh Chemicals: Don’t use abrasive cleaners or strong chemicals directly on the tape, as they could degrade the adhesive.
Recognize its Limits: Remember that Flex Tape is designed for emergencies and temporary fixes. It can fail under high pressure or prolonged stress.
Schedule Permanent Repairs: Your top priority should be to arrange for a qualified plumber or a permanent repair solution as soon as possible. This might involve replacing a section of pipe, repairing a joint, or fixing a valve. The Environmental Protection Agency (EPA) provides valuable information on maintaining safe drinking water systems, emphasizing the importance of professional plumbing for integrity.
Flex Tape vs. Other Temporary Pipe Repair Methods
Flex Tape isn’t the only option for a quick pipe fix, but it often stands out. Let’s compare it to some other common methods.
| Feature | Flex Tape | Pipe Repair Clamp | Epoxy Putty | Rubber + Hose Clamp |
|---|---|---|---|---|
| Ease of Application | Very Easy | Easy–Moderate | Moderate | Moderate |
| Speed of Fix | Very Fast (instant seal) | Fast | Moderate (needs curing) | Moderate |
| Strength | Good for small/medium leaks | Very Strong (best for cracks & holes) | Strong (cracks, holes) | Moderate (pressure-based) |
| Versatility | Works on most surfaces, even underwater | Works on metal & PVC; best on metal | Works on many materials | Best for round, smooth hoses |
| Durability | Temporary (weeks–months) | Long-lasting (months–1+ year) | Long-lasting (months–1 year) | Temporary (weeks–months) |
| Cost | Moderate | Moderate–High | Low–Moderate | Low |
| Appearance | Visible tape | Bulky metal clamp | Moldable finish | Visible rubber + clamp |
| Best For | Quick temporary fixes | Major leaks, structural cracks | Irregular surfaces & cracks | Hose leaks, emergency repair |
Pipe Repair Clamps: These are metal sleeves with a rubber gasket that wrap around the pipe and are secured with screws. They offer a robust seal for larger holes and cracks, and are often considered a more reliable temporary fix for higher pressure situations than Flex Tape.
Epoxy Putty: This two-part putty is mixed and then applied to the leak. It hardens into a solid patch. It’s great for irregular shapes and can be sanded and painted once cured, but requires careful mixing and curing time.
Rubber and Hose Clamp: This involves wrapping a piece of rubber around the leak and then securing it tightly with a hose clamp. It’s a very basic, low-cost method, often suitable for garden hoses or very low-pressure applications.
Flex Tape’s main advantage is its incredible ease of use and its ability to bond quickly to a wide range of materials, including wet surfaces, making it a go-to for immediate, accessible repairs.
Frequently Asked Questions (FAQ) about Flex Tape on Leaky Pipes
Here are some common questions beginner DIYers have about using Flex Tape for pipe leaks:
Q1: Can I use Flex Tape on hot water pipes?
A1: Flex Tape is generally rated for temperatures up to around 200°F (93°C). While it can work on hot water pipes for a temporary fix, prolonged exposure to high heat can degrade the adhesive over time. It’s best suited for cold or moderately warm water lines. For consistently hot water, consider it a very short-term emergency solution only.
Q2: How long does a Flex Tape repair typically last?
A2: The lifespan of a Flex Tape repair varies greatly depending on the pipe material, water pressure, temperature, and how well the area was prepared. It can last from a few days to several months. It is always recommended as a temporary solution until a permanent repair can be made.
Q3: Will Flex Tape work on PVC pipes?
A3: Yes, Flex Tape works well on PVC pipes. Ensure the surface is clean and dry. Lightly sanding the PVC can improve adhesion, especially if it feels very smooth.
Q4: Can I use Flex Tape on copper pipes?
A4: Absolutely. Flex Tape adheres well to copper pipes. As with any material, thorough cleaning and drying of the copper surface are essential for a good bond. Be mindful of any corrosion if that’s the cause of the leak.
Q5: What is the difference between Flex Tape and regular duct tape?
A5: Flex Tape is significantly stronger, thicker, and much more waterproof than regular duct tape. Its adhesive is designed to bond aggressively, even to wet surfaces, and creates a much more durable seal. Regular duct tape is not suitable for plumbing repairs as it will quickly fail when exposed to water pressure and moisture.
Q6: My pipe is leaking significantly. Can Flex Tape stop it?
A6: Flex Tape is most effective on small to medium leaks like pinholes, minor cracks, or corrosion spots. If you have a gushing leak or a burst pipe, Flex Tape is unlikely to hold. In such cases, your priority should be to shut off the water supply immediately and call a professional plumber.
* Q7: Do I need to use primer or any special cleaner before applying Flex Tape?
A7: While Flex Tape’s adhesive is very strong, using rubbing alcohol to clean the pipe surface is highly recommended. This removes oils and residues that can hinder adhesion. You do not need a special primer, but proper cleaning is crucial for the tape to stick effectively.
Conclusion
Dealing with a leaky pipe doesn’t have to send you into a panic. With a roll of Flex Tape and a few simple tools, you can often achieve a quick and effective temporary repair. Remember that preparation is key – thoroughly cleaning and drying the pipe is crucial for the tape’s adhesive to work optimally. Shutting off the water supply and then applying the tape firmly, ensuring good overlap and a tight seal, will give you the best chance for success.
While Flex Tape is a fantastic emergency solution that can save the day (and your floor from water damage), it’s vital to remember that it is a temporary fix. It buys you valuable time, but it’s not a substitute for professional plumbing repairs.