
Exhaust Manifold Stud Size and Thread Pitch Guide
Exhaust manifold studs are commonly M8x1.25 or M10x1.5, and some older engines use 5/16-18 or 3/8-16. Those are common examples, not defaults. Match diameter and thread pitch before buying nuts, and confirm whether each end uses the same thread form. Get it wrong and the nut can bind, strip, or crack the manifold, turning a cheap hardware job into broken studs and extra labor. This guide shows how to measure the stud, confirm pitch, and choose the correct matching nut before you order parts or remove damaged hardware.
What does this guide help you verify?
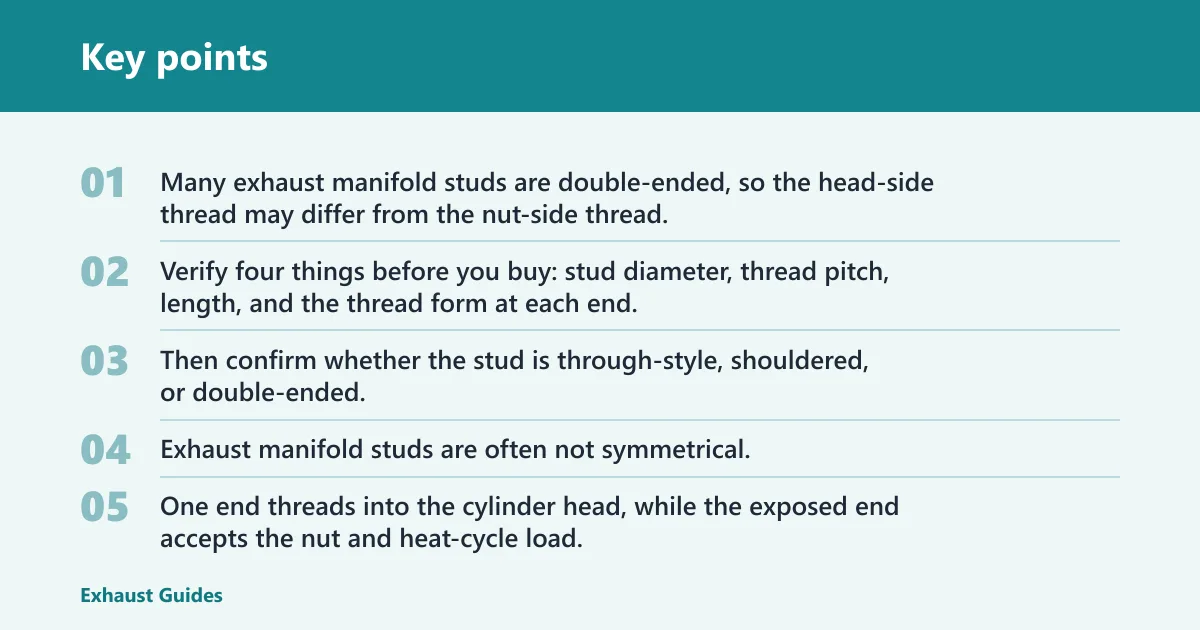


You are checking more than one thread. Many exhaust manifold studs are double-ended, so the head-side thread may differ from the nut-side thread. That means a replacement can look right in the package and still fail at the cylinder head, at the nut, or both.
Verify four things before you buy: stud diameter, thread pitch, length, and the thread form at each end. Then confirm whether the stud is through-style, shouldered, or double-ended. If the vehicle has a service manual or OEM parts catalog, use that as the final match point, especially where the catalog calls for special coatings, locking nuts, or shoulder lengths that a generic hardware-store replacement will not duplicate.
Why can head-side and nut-side threads differ?
Exhaust manifold studs are often not symmetrical. One end threads into the cylinder head, while the exposed end accepts the nut and heat-cycle load. The two ends may share the same diameter, or they may not. The pitch can also differ, so never assume both ends match because the outer nut looks familiar.
That distinction matters most on aluminum heads, where damaged internal threads are harder to repair cleanly than cast iron. If the head-side thread is wrong, the stud can bind before the manifold even seats, which can lead to a leak, a ticking sound, or a broken fastener during final tightening.
How do you identify the stud before you order?
Start with the stud that is still in the engine or the best surviving example from the set. Measure diameter first, then pitch, then exposed length. After that, look at the body shape to see whether you are dealing with a through-style, shouldered, or double-ended stud.
If the stud is missing, work from the adjacent fastener, the manifold pattern, or the OEM parts listing. A vehicle-specific exhaust manifold fastener kit is only useful if the stud count, nut count, and thread form match the engine family. A fitment-first approach is also more useful than matching only the nominal diameter, because some manifold studs use different pitch on each end.
Measure the major diameter. Use calipers across the outer thread peaks, not the valleys. For metric hardware, the result should be close to the nominal size, such as M8 or M10. For SAE hardware, use the nearest fractional size and confirm with a pitch gauge.
Check the thread pitch. Use a thread pitch gauge on the cleanest part of the stud. For metric threads, the gauge reads pitch in millimeters, such as 1.25 or 1.5. For SAE threads, count threads per inch and compare the gauge leaf that fits without daylight.
Measure the exposed length. Measure from the seating face to the end of the stud. Through-style and double-ended studs can show very different exposed lengths, so match the replacement to the manifold thickness and nut engagement, not just the overall length in the catalog.
Inspect the shoulder and drive style. Some studs have a plain shank, some have a shoulder, and some use an external hex or an internal hex-socket drive for installation. The drive feature does not tell you the thread pitch. It only helps you install or remove the stud without damaging the threads.
Confirm the catalog listing. Match your measurements against an OEM parts diagram or a service manual before you order. If the catalog lists a kit, check stud count, nut count, and any notes about self-locking or copper-coated nuts. If any detail conflicts with your measurement, trust the measurement and recheck the vehicle listing.
Say your stud measures close to M8 and the pitch gauge locks at 1.25 on the nut end, but the head-side threads are damaged. The remaining exposed threads can still mislead you into ordering the wrong replacement if the head-side pitch is different. Check both ends before the part number goes in your cart.
Suppose the outer end is gone and only the broken stump remains flush with the head. An adjacent fastener can give a clue, but the final call still needs the cylinder head thread verified against the catalog. That matters because a manifold leak can come back even after a new gasket if the stud bottoms out or crosses threads.
What size nut goes on an exhaust manifold stud?
The nut has to match the stud thread pitch first, then the wrench size comes second. A 10mm hex nut does not automatically mean M10 threads, and a larger hex can still sit on a smaller stud if the thread form matches. Check the pitch before you pick the wrench.
Flange nuts spread load across more surface area and are common on hot exhaust joints. Self-locking nuts can help resist loosening through heat cycling, while copper-coated nuts are often chosen where corrosion and repeated service are concerns. Use the style that matches the kit and the OEM note, not a random hardware-bin substitute, because generic replacements may not replicate the locking feature or shoulder length that the original hardware used.
One sourced replacement example lists Turbo Dodge exhaust manifold studs as 8mm x 1.25, with a matching 10mm hex nut size, 45mm stud length, eight studs, and eight copper-coated flange nuts. The page describes the hardware as a direct replacement with no modifications and says the nuts are self-locking. It also says the studs are direct replacements for factory grade 8 hardware and fit Turbo Dodge 2.2 and 2.5 engines.
When does nut style change the fit?
A flange nut can sit taller than a plain hex nut, and a self-locking insert can change how much thread is visible past the nut after tightening. That is normal if the catalog calls for it. What is not normal is a nut that runs out of thread before clamping the manifold flat against the head.
Do not confuse hex size with thread diameter. A 10mm hex wrench size is a tool fit, not a thread callout. If the stud is 8mm x 1.25, the wrench still may be 10mm, but the thread spec stays 8mm x 1.25.
How do you measure a damaged or missing stud?
Use the surviving threads, not the broken face, to identify pitch. If the stud is snapped, the exposed section may be too short for a full reading, so compare it with an adjacent fastener and confirm against the OEM catalog. For damaged heads, verify the internal thread before installing anything.
Clean the remaining threads. Brush away rust and carbon so the pitch gauge can seat correctly. Even a thin layer of debris can make 1.25 look like 1.5, or 18 TPI look like 16 TPI.
Match the pitch gauge. Try the metric leaves first if the vehicle family commonly uses metric fasteners, then check SAE leaves if the engine is older or catalog data points that way. The correct leaf sits flat across several threads with no rocking.
Measure the remaining diameter. Use calipers on the cleanest thread crest you can reach. If the stud is worn, compare the result with the adjacent fastener on the same manifold bank and use the larger, unworn section as your reference.
Check the head-side thread separately. Do not assume the nut-side pitch matches the block or cylinder head side. Many exhaust manifold studs are double-ended and can use different thread sizes or pitches on each end.
Cross-check the OEM listing. Search the exact engine code or VIN-based catalog if possible. That is the safest way to confirm whether the replacement is a through-stud, shouldered stud, or double-ended stud with a specific shoulder length or exposed-thread length.
A common first-timer mistake is measuring only the rusty outer end and calling it done. If the outer end is damaged or mushroomed, the gauge can lie. The better method is to compare the damaged side with the catalog and verify the thread that actually enters the head.
Exhaust manifold stud identification table
This table is a fitment aid, not a substitute for the vehicle catalog. Common sizes are shown so you can narrow the search before you remove parts. Always verify the head-side thread and the nut-side thread separately when the stud is double-ended. Listed sizes are common examples, not defaults, and OEM manifold studs may use different pitch on each end, special coatings, locking nuts, or shoulder lengths that generic hardware-store replacements do not replicate.
| Stud diameter | Common pitch | Nut hex size | Stud type | How to verify |
|---|---|---|---|---|
| M8 | 1.25 | 10mm hex is common | Through or double-ended | Measure the major diameter with calipers and confirm the pitch gauge sits flat on 1.25. Check the head side separately before ordering. |
| M10 | 1.5 | Commonly larger than 10mm hex; confirm by catalog | Through, shouldered, or double-ended | Use the pitch gauge on the cleanest threads and compare the exposed length to the OEM diagram. Do not rely on hex size alone. |
| 5/16 in. | 18 TPI | Varies by nut style | Older SAE applications | Count the pitch with an SAE gauge and compare the thread diameter to the adjacent fastener. Confirm the engine family in the parts catalog. |
| 5/16 in. | 24 TPI | Varies by nut style | Older SAE applications | Check that the 24 TPI leaf seats with no wobble. If 18 TPI feels close, do not guess; compare to the OEM listing before buying. |
| 3/8 in. | 16 TPI | Varies by nut style | Older SAE applications | Measure the diameter, then confirm the thread count per inch. Use the service manual if the stud is corroded or partially broken. |
For one catalog example, Turbo Dodge hardware is listed as 8mm x 1.25 with a 10mm hex nut, 45mm length, and eight studs plus eight copper-coated flange nuts. That single listing shows why you should not guess from one dimension alone. Length, nut style, and thread size all need to line up.
How do you remove and reinstall damaged exhaust manifold studs?
Exhaust hardware seizes because heat and rust work together over time. Exhaust gases can range from 1,200°F to over 1,600°F, and that cycling hardens corrosion and weakens old hardware. Penetrating oil, heat, and patience are usually the first tools to reach for, while drilling stays lower on the list unless the fastener is already beyond recovery.
Aluminum heads deserve extra care because cross-threading or over-torque can damage the internal threads quickly. Cast iron is more forgiving, but it still needs correct pitch and clean threads. If the head threads look stretched, rounded, or galled, repair them before reinstalling the stud.
What is the 5-step workflow for removing a damaged stud?
Soak the joint first. Apply penetrating oil to the exposed threads and let it work before turning anything. Reapply after a heat cycle if the fastener is still frozen, because thermal movement can draw the oil into the threads.
Use controlled heat. Heat the surrounding metal, not the stud alone, when the service manual allows it. Controlled heat can break the rust bond, but excessive heat near an aluminum head raises the chance of thread damage.
Try a MIG-welded nut. If the stud is broken off flush, welding a nut to the stub can provide a new grip point and add heat to the fastener. That method often works better than drilling first when enough stub remains for a weld.
Inspect the head threads. Run the replacement stud in by hand before final tightening. If it binds early, remove it and inspect for damaged threads rather than forcing it with a wrench.
Torque the nut carefully. Use a torque wrench for the final check so the fastener clamps without stripping the head or stretching the stud. Final tightening should be smooth; sudden resistance means stop and recheck fitment.
Picture a stud that comes out with a welded nut, but the replacement spins harder on the last few turns. That is not a reason to keep tightening. It usually points to damaged head threads or a pitch mismatch, and the fix is to stop and inspect before the manifold is pulled down unevenly.
Can you reuse exhaust manifold studs and nuts?
Reuse is acceptable only when the threads are clean, the shank is straight, the nut spins freely by hand, and the head threads show no damage. If the stud is pitted, necked down, or missing plating, replace it. If the nut is distorted or the locking feature no longer grips, replace that too.
A vehicle-specific fastener kit makes sense when the old hardware is mixed, corroded, or incomplete. It is also the better call when the catalog lists a direct replacement with the right stud count and nut count, like the Turbo Dodge example. OEM hardware is worth reusing only if it still matches the catalog and passes inspection.
What should you inspect before reuse?
- Thread peaks and roots for galling or flattening.
- Stud length and shoulder position against the catalog.
- Nut locking feature, flange face, and thread engagement.
- Cylinder head threads for pullout, ovality, or chips.
- Any sign that the stud has been overheated or bent.
If the manifold or gasket has a history of leaks, a fresh hardware kit is often the cleaner choice. That is especially true when the engine family uses mixed hardware or when one side of the stud is damaged enough to make a reused part uncertain.
Frequently asked questions
What size are exhaust manifold studs?
Most common exhaust manifold studs are M8 or M10 in metric applications, and older engines may use SAE sizes such as 5/16 in. or 3/8 in. The exact size depends on the engine family, so measure the diameter and confirm the pitch before ordering replacement nuts or studs.
What thread pitch do exhaust manifold studs use?
Common metric pitches are 1.25 and 1.5, while common SAE patterns include 18 TPI, 24 TPI, and 16 TPI. The pitch can differ between the head side and the nut side on some studs, so check both ends instead of assuming the same thread on each side.
Are exhaust manifold studs metric or SAE?
They can be either. Many newer and import applications use metric threads, while some older domestic engines use SAE. Do not guess from the vehicle brand alone. Use a thread pitch gauge, calipers, and the OEM parts catalog to confirm the correct replacement hardware.
How do I identify the right exhaust manifold stud for my engine?
Measure the diameter, pitch, and exposed length, then note whether the stud is through-style, shouldered, or double-ended. After that, verify the head-side thread separately from the nut-side thread. The final check should be the service manual or OEM parts catalog for your exact engine code.
How do I measure a broken exhaust manifold stud thread pitch?
Clean the remaining threads, then use a thread pitch gauge on the best section you have left. Compare the result with the adjacent fastener and the OEM listing if the broken end is too short to read cleanly. Never rely on the broken face itself, because damage can make the pitch look wrong.