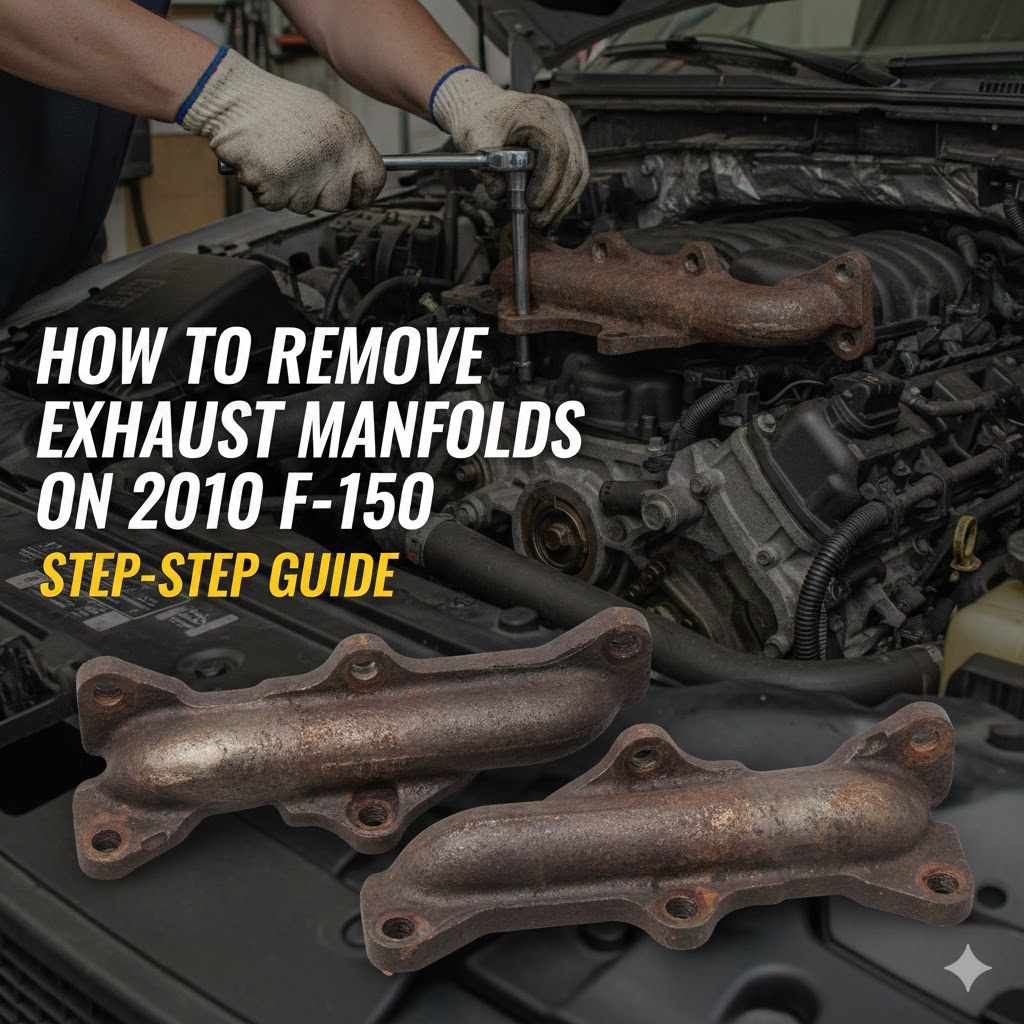
How to Remove Exhaust Manifolds On 2010 F-150
Working on your truck can be rewarding, but some jobs can seem a bit tricky for beginners. Removing the exhaust manifolds on a 2010 Ford F-150 is one of those tasks. You might be wondering if you can do it yourself.
The good news is, with the right steps, it’s totally doable. This guide will walk you through exactly how to remove exhaust manifolds on your 2010 F-150. We’ll break it down simply so you can get the job done.
Let’s get started with what you’ll need and the first steps.
Gathering Tools and Preparing Your 2010 F-150
Before you even think about turning a wrench, it’s super important to have all the right tools and safety gear ready. This part makes the whole process much smoother and safer. You’ll want to gather everything in one place so you don’t have to stop mid-job to find something.
Proper preparation means less stress and a better chance of success when you’re tackling How to Remove Exhaust Manifolds on 2010 F-150.
Essential Tools for Manifold Removal
Having the correct tools makes a big difference. You’ll need a good set of sockets and wrenches, including extensions and universal joints. A torque wrench is also a must for putting things back together correctly.
Make sure you have penetrating oil to loosen stubborn bolts and a breaker bar for extra leverage. Safety glasses are non-negotiable, and work gloves will protect your hands.
- Socket Set and Wrenches: A comprehensive set with various sizes is key. Metric sockets are usually needed for this truck.
- A good socket set should include deep and shallow sockets, along with various extensions and a ratchet. You’ll likely encounter 10mm, 13mm, and 15mm bolts and nuts, so ensure your set covers these. Universal joints are helpful for reaching bolts at awkward angles.
- Penetrating Oil: This is your best friend for rusted or seized bolts.
- Apply penetrating oil generously to all exhaust manifold bolts and nuts before you start. Let it soak for a while, even overnight if possible. This helps to break down rust and corrosion, making it easier to remove them without snapping.
- Breaker Bar and Torque Wrench: For leverage and precise reassembly.
- A breaker bar provides the extra torque needed for stuck bolts. A torque wrench is essential for tightening bolts to the manufacturer’s specifications when you reassemble the manifolds to prevent leaks or damage.
- Safety Gear: Protect yourself at all times.
Always wear safety glasses to protect your eyes from debris. Sturdy work gloves will prevent cuts and scrapes, and closed-toe shoes are a must. If you’re working under the truck, use jack stands for safety, never just a jack.
Preparing the F-150 for Work
Safety first! Make sure your truck is on a level surface and the engine is cool. You don’t want to work on hot exhaust parts.
If you need to lift the truck for better access, use jack stands. Never rely solely on a jack.
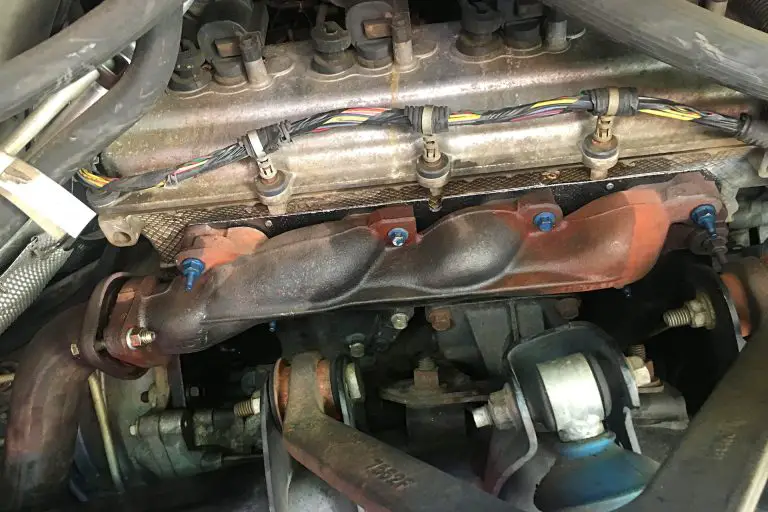
Disconnect the battery to prevent any electrical shorts. This is a standard safety procedure for most under-hood work. Locate the exhaust manifolds.
On most F-150s, there’s one on each side of the engine, connected to the exhaust system.

Removing the Exhaust Manifolds from Your F-150
This is where the actual work begins. You’ll be dealing with bolts that have been exposed to high heat and road grime for years. Patience and the right technique are crucial here.
Follow these steps carefully to remove the exhaust manifolds without causing more problems.
Accessing the Exhaust Manifold Bolts
The exhaust manifolds are bolted to the cylinder heads. You’ll need to get to the nuts or bolts that hold them on. Sometimes, other parts might be in the way, like heat shields or even the steering column on the driver’s side.
You might need to remove these first to get clear access.
Inspect the area around the manifold. Look for any brackets or supports that attach the manifold to the engine block or other components. These will also need to be unfastened.
Take pictures as you go, especially of how wiring harnesses or vacuum lines are routed, to help you remember during reassembly.
Dealing with Stubborn Bolts and Nuts
This is often the most challenging part. Bolts can become rusted and seized to the manifold or the studs. This is where your penetrating oil and breaker bar come in handy.
Spray penetrating oil on every bolt and nut. Give it time to work. If a bolt still feels stuck, try tightening it just a tiny bit before trying to loosen it.
This can sometimes break the corrosion seal. Heat can also be your friend, but use it cautiously with flammable penetrating oils.
If a bolt head rounds off or a stud breaks, don’t panic. There are methods to remove broken bolts, such as using bolt extractors or drilling them out. This is where having a well-stocked toolbox pays off.
Detaching the Manifold
Once all the bolts or nuts are removed, the manifold should be free. You might need to gently pry it away from the cylinder head if it’s stuck due to gasket material or corrosion.
Carefully wiggle the manifold to break any remaining seals. If it doesn’t come free easily, check if you missed any bolts or brackets. Once it’s loose, lower it carefully and set it aside.
Repeat the process for the other side of the engine.
Tips for a Smooth Removal
- Work systematically: Tackle one side at a time, or one bolt at a time.
- A methodical approach prevents you from missing steps or getting overwhelmed. It also allows you to focus on each bolt and its unique challenges. If you’re removing both sides, consider doing them sequentially rather than trying to do both at once, which can be more confusing.
- Clean as you go: Clear away rust and debris.
- As you loosen bolts and nuts, clean the threads and surrounding areas. This makes subsequent steps easier and helps prevent future issues. Use a wire brush to clean the mating surfaces on the cylinder head and the manifold once it’s removed.
- Patience is key: Don’t rush the process.
- Forcing things can lead to broken bolts or damaged parts. Take breaks if you get frustrated. The goal is a successful removal, not a quick one.
- Document everything: Take pictures and notes.
This is especially helpful when it comes to reassembly. Knowing where wires were routed or how brackets were positioned saves a lot of guesswork later.
Replacing the Exhaust Manifold Gasket and Manifold
After you’ve successfully removed the old exhaust manifolds, the next logical step is to prepare for their reinstallation. This usually involves replacing the gasket and ensuring the mating surfaces are clean. This is a crucial part of preventing exhaust leaks after your repair.
Cleaning Mating Surfaces
Before you install new gaskets or manifolds, both the cylinder head surface and the manifold’s flange must be perfectly clean. Any old gasket material, rust, or carbon buildup can prevent a proper seal.
Use a gasket scraper or a wire brush to carefully remove all residue. Be gentle on the cylinder head; you don’t want to scratch or gouge the aluminum. A clean, smooth surface is essential for a leak-free exhaust system.
Installing New Gaskets
Always use new exhaust manifold gaskets. Reusing old ones is a recipe for leaks. There are different types of gaskets, so make sure you get the correct ones for your 2010 F-150.
Some gaskets are dry, while others may require a thin bead of high-temperature exhaust sealant. Check the manufacturer’s recommendations for your specific gaskets. Place the gasket carefully onto the cylinder head or manifold, aligning it with the bolt holes.
Torque Specifications and Reassembly
This is a critical step for a lasting repair. Tightening the manifold bolts to the correct torque specification ensures a proper seal and prevents the bolts from loosening over time. Overtightening can also damage the gasket or the manifold.
Consult your F-150’s service manual for the exact torque sequence and values. Typically, you’ll tighten the bolts in stages and in a specific pattern, working from the center outwards. This ensures the manifold seats evenly against the cylinder head.
Common Issues and Solutions During Exhaust Manifold Removal
Even with careful planning, you might run into some common snags when performing this job. Knowing what to expect can help you overcome them efficiently.
Broken Bolts and Studs
This is perhaps the most frequent problem. When a bolt or stud breaks off flush with the cylinder head, it requires special attention.
- Bolt Extractors: Use a reverse-threaded bolt extractor set.
- You’ll need to drill a pilot hole into the center of the broken stud. Then, carefully tap in the extractor and turn it counter-clockwise. Be sure to use the correct size drill bit and extractor for the broken bolt to avoid further damage.
- Drilling Out the Bolt: If extractors fail, you may need to drill the bolt out completely.
- This is a more advanced technique. You’ll need to drill progressively larger holes until you reach the threads of the original bolt hole. You might need to re-tap the hole afterward to restore the threads.
- Patience and precision are key to avoid damaging the cylinder head.
- Welding a Nut: Sometimes, if a stud is broken but still protruding slightly, you can weld a nut onto it.
The heat from welding can help break the rust seal, and the nut provides a grip for removal. This method requires welding skills and equipment.
Corroded or Warped Manifolds
Older manifolds can become heavily corroded, sometimes to the point of being unusable. They can also warp over time, leading to exhaust leaks even with new gaskets.
Inspect your old manifolds carefully. If you see significant rust holes, cracks, or a warped surface (check with a straight edge), it’s best to replace the manifold. Aftermarket options are available and can sometimes be an upgrade.
Access Challenges
Depending on your specific F-150 configuration, you might find that other components block access to the manifold bolts. This is particularly true on the driver’s side due to the steering shaft.
You may need to remove heat shields, brackets, or even disconnect parts of the steering system to gain clearance. Always refer to a repair manual for your truck model to identify these components and the correct procedure for their removal and reinstallation.
Statistics on Exhaust Manifold Failures
Exhaust manifold leaks are a common issue in many vehicles. A study by Auto Parts Warehouse indicated that exhaust system repairs, including manifold issues, are among the top 10 most common vehicle repairs performed annually. For trucks like the F-150 that often experience harsh driving conditions and heavy use, the lifespan of exhaust components can be reduced.
| Component | Typical Failure Mode | Estimated Lifespan (Years/Miles) |
|---|---|---|
| Exhaust Manifold | Cracking, Warping, Gasket Failure | 8-12 Years / 100,000-150,000 Miles |
| Exhaust Manifold Gasket | Degradation, Blown Seal | Same as manifold, or sooner if leaks occur |
These figures are estimates, and actual lifespan can vary greatly based on climate, driving habits, and maintenance. For instance, trucks used for towing or off-roading might experience more stress on the exhaust system.

FAQ
Question: How long does it typically take to remove exhaust manifolds on a 2010 F-150
Answer: For an experienced mechanic, it might take 2-4 hours per side. For a DIYer with moderate experience, it could take 4-8 hours or even a full weekend, especially if you encounter stubborn bolts.
Question: Do I need to remove the wheel to access the exhaust manifolds
Answer: Not usually for the exhaust manifolds themselves, but if you need to lift the truck for better access or if a bolt is particularly difficult, you might need to remove the front wheels to safely use jack stands or a lift.
Question: Can I drive my F-150 with a leaking exhaust manifold
Answer: It’s not recommended. Leaking exhaust can be dangerous as toxic fumes can enter the cabin. It also reduces engine performance and fuel efficiency, and can cause other exhaust components to fail prematurely.
Question: What is the most common cause of exhaust manifold failure
Answer: The most common causes are thermal cycling (repeated heating and cooling leading to stress and cracking), corrosion from road salt and moisture, and often, the failure of the manifold gasket which allows hot exhaust gases to escape and erode the manifold surfaces.
Question: Are there any special tools needed for a 2010 F-150 exhaust manifold
Answer: While no single tool is exclusively for the 2010 F-150, a good set of extensions, universal joints, a breaker bar, and a reliable torque wrench are essential. A quality penetrating oil is also vital for dealing with seized fasteners.
Summary
This guide has covered how to remove exhaust manifolds on your 2010 F-150. We’ve looked at the tools you need, the steps for careful removal, dealing with tough bolts, and preparing for reinstallation. By following these instructions, you can successfully tackle this repair yourself and get your truck back in top shape.
Remember to work safely and take your time for the best results.