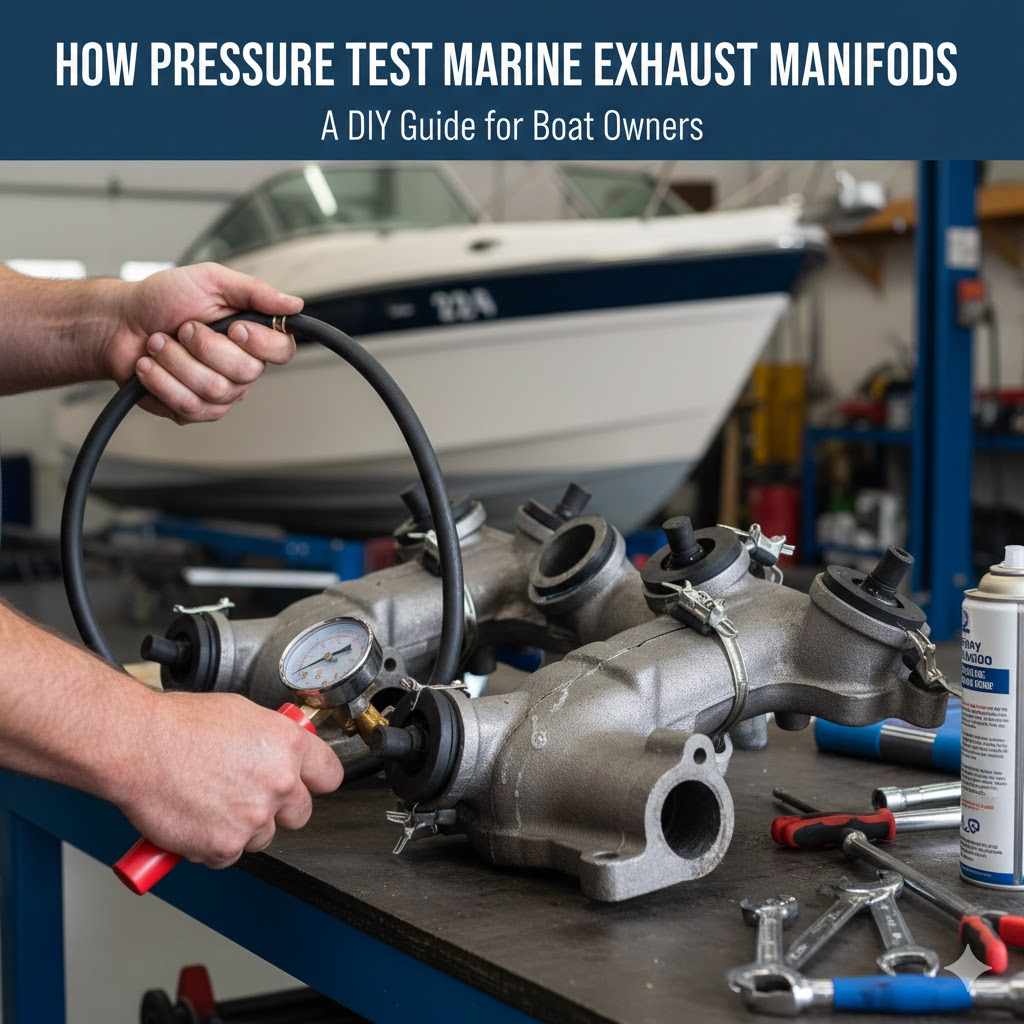
How to Pressure Test Marine Exhaust Manifolds
Many boat owners find testing their marine exhaust manifolds a bit tricky. It’s not always clear where to start, especially if you’re new to engine maintenance. You might worry about causing more harm than good.
But don’t fret! We’re going to walk through this step-by-step. This guide will make learning How to Pressure Test Marine Exhaust Manifolds simple and easy to follow.
We’ll get your boat running smoothly again.
Why Pressure Test Marine Exhaust Manifolds
Checking your marine exhaust manifolds for leaks is really important for your boat’s engine health and safety. Exhaust leaks can cause a lot of problems, like letting harmful fumes into the boat cabin or damaging engine components. Understanding why and when to perform a pressure test helps prevent these issues.
It’s a proactive step that saves you from bigger, more expensive repairs down the line. This section explains the signs of a leaky manifold and why testing is the best way to find out for sure.
Common Signs of Exhaust Manifold Leaks
Several clues can point to a problem with your exhaust manifolds. You might notice a strong smell of exhaust fumes inside the boat, especially when the engine is running. This is a big red flag.
Another sign is a change in the engine’s sound. You might hear a puffing or hissing noise coming from the exhaust system.
Sometimes, you’ll see black soot or carbon deposits around the manifold or exhaust risers. This often indicates that exhaust gases are escaping. You might also experience a loss of engine power.
This can happen because the exhaust system isn’t working as it should, affecting engine performance.
Corrosion is another common issue. Older manifolds can rust or pit, creating weak spots where leaks can form. If you see rust streaks or significant pitting, it’s time to investigate further.
Keep an eye out for any unusual moisture or dampness around the manifold area, as this could also signal a leak.
The Importance of a Proper Seal
An exhaust manifold’s job is to safely guide hot exhaust gases from the engine cylinders out of the boat. A tight, leak-free seal is vital for this process. When this seal is broken, several things go wrong.
First, dangerous carbon monoxide gas can enter the boat’s interior. This is a serious safety hazard.
Second, exhaust leaks can cause the engine to overheat. The escaping hot gases can damage nearby engine parts. They can also lead to premature wear and tear on the manifold itself and the exhaust risers.
A well-sealed system ensures that the engine runs efficiently and lasts longer.
Think of it like a plumbing system. If pipes have holes, water leaks out, causing damage. Exhaust systems work similarly.
A leak means the system isn’t doing its job, and that leads to other problems. Regular checks, including pressure testing, are key to keeping everything working as it should.
Preventing Costly Engine Damage
Ignoring small exhaust leaks can lead to big problems. When exhaust gases leak, they can corrode or damage other engine components. This includes things like spark plugs, starter motors, and even engine wiring.
The heat from the escaping gases can also cause materials to degrade faster.
A small leak might start as a minor annoyance, but it can quickly turn into a major repair bill. For example, a leak near the starter motor could cause it to fail prematurely. If exhaust gases get into the cooling system, they can cause overheating and severe engine damage.
By performing regular pressure tests, you catch these leaks early. This allows for timely repairs. Fixing a small leak is much cheaper and easier than replacing a damaged engine component or dealing with extensive corrosion.
Proactive maintenance saves you money and keeps your boat reliable.

Tools and Materials Needed for Testing
To successfully pressure test your marine exhaust manifolds, you’ll need a few specific tools. Having the right equipment makes the job much easier and ensures accurate results. This section will cover everything from the pressure testing kit itself to basic hand tools and safety gear.
Having these items ready before you start will save you time and frustration.
Exhaust Manifold Pressure Testing Kit
The most important tool is a specialized exhaust manifold pressure testing kit. These kits typically include an adapter that fits into the exhaust port, a pressure gauge, and a hand pump or air compressor connection. Some kits also come with various adapter sizes to fit different engine models.
When choosing a kit, look for one designed for marine engines. Marine engines operate in a harsh environment, and the testing equipment needs to withstand this. Ensure the kit is compatible with your specific engine’s exhaust system.
The adapter is key; it needs to create a secure seal within the exhaust manifold’s opening.
The pressure gauge is crucial for monitoring the air pressure you introduce. It should have a clear, easy-to-read dial. The pump allows you to slowly increase the pressure to the recommended level.
Some kits use a simple hand pump, while others connect to an air compressor for faster inflation. Always follow the kit manufacturer’s instructions.
Basic Hand Tools
You will also need some common hand tools. A set of wrenches and sockets is essential for removing and reinstalling any components that might be in the way of accessing the exhaust ports. You might need a screwdriver for hose clamps or brackets.
A good flashlight will help you see into tight spaces and inspect the manifold for any signs of leaks during the test. It’s also helpful to have some rags or shop towels handy for cleaning up any residual water or debris around the exhaust ports. A small bucket can be useful for catching drips.
Make sure your tools are in good condition. Rusty or worn tools can make the job harder. Having the right size tools readily available means you won’t have to stop and search for them.
This keeps the process moving smoothly.
Safety Gear
Safety should always be your top priority. When working on an engine, especially with pressurized air, it’s important to protect yourself. Wear safety glasses or goggles to shield your eyes from any debris or unexpected air release.
Gloves are also recommended to protect your hands from grease, dirt, and potential sharp edges. If you’re working in an area with poor ventilation, consider wearing a respirator, especially if you suspect there might be residual exhaust fumes.
Always ensure the engine is completely cool before you begin any work. Working on a hot engine can lead to severe burns. If you’re unsure about any step or feel uncomfortable, it’s always best to consult a professional marine mechanic.
Your safety comes first.
Step-by-Step Guide How to Pressure Test Marine Exhaust Manifolds
Now that you have your tools ready, let’s get to the actual process of testing your marine exhaust manifolds. This step-by-step guide breaks down each action clearly. Following these instructions carefully will help you find any leaks efficiently and safely.
Step 1 Preparing the Engine and Manifold
First, make sure the engine is completely cool. This is very important for safety. You don’t want to burn yourself.
Next, you need to access the exhaust manifolds. This might mean removing some covers or other engine parts that are in the way.
Locate the exhaust ports on the manifold. These are where the exhaust gases exit the manifold on their way to the exhaust riser and then out of the boat. You need to be able to get to these ports to attach your testing equipment.
It’s also a good idea to clean the area around the exhaust ports. Use a rag to wipe away any dirt, oil, or debris. This helps ensure a good seal when you attach the testing adapter.
A clean surface makes the connection much more reliable.
Step 2 Attaching the Pressure Testing Adapter
Take your exhaust manifold pressure testing kit. Select the correct adapter for your manifold’s exhaust port. The adapter should fit snugly into the port.
Some adapters may have a rubber seal or O-ring to help create a tight fit.
Carefully insert the adapter into the exhaust port. Ensure it is seated properly and feels secure. You don’t want it to pop out when you start applying air pressure.
If your kit has a locking mechanism, engage it now.
If you are testing multiple cylinders from one manifold, you may need to block off the other exhaust ports. Some kits come with plugs or blanking plates for this purpose. This ensures the pressure builds up correctly in the section you are testing.
Step 3 Pressurizing the Manifold
Connect the pressure gauge and the pump to the adapter. Now, you’re ready to add air. Use the hand pump or air compressor to slowly and steadily increase the pressure.
Do this very gradually.
Refer to your engine’s service manual or the pressure testing kit instructions for the recommended test pressure. This is usually a low pressure, typically around 5-10 PSI. Over-pressurizing can damage the manifold or other engine components.
Watch the pressure gauge closely as you pump. Once you reach the target pressure, stop pumping. The goal is to see if the pressure holds.
You are looking for any significant drop in pressure, which indicates a leak.
Step 4 Inspecting for Leaks
With the manifold under pressure, it’s time to look and listen for leaks. Start by carefully inspecting the entire manifold. Look for any signs of air escaping.
You might hear a hissing sound.
You can also use a solution of soapy water. Spray or brush soapy water onto the manifold, especially around gaskets, joints, and any suspected weak spots. If there’s a leak, you’ll see bubbles forming where the air is escaping through the soapy water.
Pay close attention to the areas where the manifold bolts to the cylinder head and where the exhaust riser connects. These are common places for leaks to occur. If you can’t pinpoint the leak by sight or sound, the soapy water method is very effective.
Step 5 Releasing Pressure and Reassembly
Once you have completed your inspection and noted any leaks, it’s time to release the pressure. Slowly and carefully open the release valve on your pressure testing kit. This will let the air out gradually.
Do not release pressure too quickly.
After the pressure is completely released, remove the testing adapter from the exhaust port. If you had to remove any other engine components to access the manifold, now is the time to put them back.
Make sure all bolts are tightened to the manufacturer’s recommended torque specifications. Reinstall any covers or parts you removed. Ensure everything is secure.
Your pressure test is now complete.
Troubleshooting Common Issues
Even with careful work, you might run into a few snags during the testing process. This section helps you deal with common problems you might encounter. Knowing how to fix these issues will ensure your test is successful and accurate.
Difficulty Getting a Good Seal
Sometimes, it’s hard to get the testing adapter to seal perfectly in the exhaust port. This can be due to dirt, corrosion, or wear on the port’s opening or the adapter itself.
Try cleaning the exhaust port opening more thoroughly. You can use a wire brush or sandpaper gently to remove any rust or carbon buildup. Also, inspect the rubber seal on your adapter; if it’s damaged, it might need to be replaced.
Some testers have a flexible hose that allows for a bit more maneuverability, which can help achieve a better seal. Ensure you are using the correct adapter size for your port. A slightly loose fit can often be improved with a bit of plumber’s tape or a specialized sealant designed for exhaust systems, but use these sparingly and ensure they are rated for the heat.
Pressure Dropping Rapidly
If the pressure gauge shows a fast drop, it means you have a significant leak. This could be a large crack in the manifold, a blown gasket, or a loose connection.
Go back to Step 4 and thoroughly inspect the manifold, especially around gaskets and bolt areas. The soapy water method is excellent for finding these large leaks quickly. Check all connections in your testing setup as well; sometimes the leak is in the adapter or hose.
If the leak is from a gasket, it might need replacing. If it’s a crack in the manifold itself, the manifold will likely need to be repaired or replaced. Large leaks often have a very obvious source, like a loud hissing sound.
Inaccurate Pressure Readings
An inaccurate pressure reading could be due to a faulty gauge or a leak in your testing equipment itself. If you suspect the gauge is wrong, try testing it with a known pressure source, if possible.
Check all the connections between your pump, gauge, and adapter. Ensure they are tight and not leaking air. Sometimes, a small leak in the testing setup can cause the pressure to seem lower than it actually is.
If you’ve ruled out leaks in your setup and the gauge seems to be working, but the pressure still doesn’t build or hold correctly, there might be a more serious issue with the manifold itself, or potentially the test pressure is too low for the test setup to register accurately on the gauge under load. Always follow the manufacturer’s recommended pressure for the test.
Maintenance and Prevention Tips
Regular maintenance is key to keeping your marine exhaust manifolds in good condition. By following a few simple tips, you can help prevent leaks and extend the life of your manifolds. Proactive care saves you time and money.
Regular Visual Inspections
Make it a habit to visually inspect your exhaust manifolds whenever you are working on your boat’s engine. Look for any signs of rust, corrosion, or cracks. Pay attention to the gasket surfaces where the manifold meets the engine block and the exhaust riser.
Keep an eye out for any black soot or carbon deposits around the manifold and riser. These are strong indicators of exhaust leaks. Also, check for any signs of moisture or coolant leaks, as these can accelerate corrosion.
Cleanliness helps. Keeping the area around the manifolds clean makes it easier to spot potential problems. A clean engine bay also helps prevent dirt and debris from causing premature wear.
Use Quality Gaskets and Sealants
When you replace exhaust manifolds or risers, always use high-quality gaskets and sealants designed for marine exhaust applications. Cheap parts can fail prematurely, leading to leaks and further damage.
Ensure gaskets are installed correctly and that the mating surfaces are clean and smooth. If the manufacturer recommends a specific sealant, use it. This ensures a proper seal and helps prevent leaks under high heat and pressure.
Using the correct torque specifications when tightening bolts is also critical. Over-tightening can crush gaskets, and under-tightening can lead to leaks. Always refer to your engine’s service manual for these details.
Address Corrosion Promptly
Corrosion is a major enemy of marine exhaust systems. If you notice any signs of rust or pitting, address it immediately. Small areas of surface rust can often be cleaned and treated.
For more advanced corrosion or pitting, the affected area might need repair or replacement. Some specialized coatings can help protect against further corrosion. Regular flushing of the cooling system can also help reduce the corrosive effects of stagnant water.
Consider using a corrosion inhibitor in your cooling system. This helps protect metal parts from the harsh marine environment. Proactive treatment of corrosion can prevent leaks from forming and extend the life of your manifolds significantly.

Frequently Asked Questions
Question: How often should I pressure test my marine exhaust manifolds?
Answer: It’s a good idea to pressure test your marine exhaust manifolds at least once a year, or more often if you notice any signs of exhaust leaks like unusual smells or sounds. Checking them before the boating season begins is also a wise practice.
Question: Can I use regular shop air for pressure testing?
Answer: Yes, you can use regulated shop air from a compressor, but always use a regulator to ensure you do not exceed the recommended test pressure. Pumping manually is often preferred as it allows for slower, more controlled pressure increases.
Question: What is considered a significant pressure drop?
Answer: A significant pressure drop is usually anything more than 1-2 PSI over a 5-10 minute period, depending on the specific test procedure and manifold design. Always check your engine’s service manual for specific guidelines.
Question: What happens if I find a leak in the manifold?
Answer: If you find a leak, you’ll need to address it. Small leaks might be fixable by replacing a gasket or tightening bolts. Larger leaks, cracks, or severe corrosion in the manifold itself will likely require repair or replacement of the manifold.
Question: Can I test exhaust manifolds while they are still on the boat?
Answer: Yes, the process described is for testing while the manifolds are installed on the engine, making it convenient for routine checks. You just need access to the exhaust ports.
Summary
Learning how to pressure test marine exhaust manifolds is straightforward with the right tools and steps. This process helps you find leaks early, protecting your engine and ensuring safety. Regularly checking for leaks with a simple pressure test can prevent costly repairs and keep your boat running smoothly for years to come.