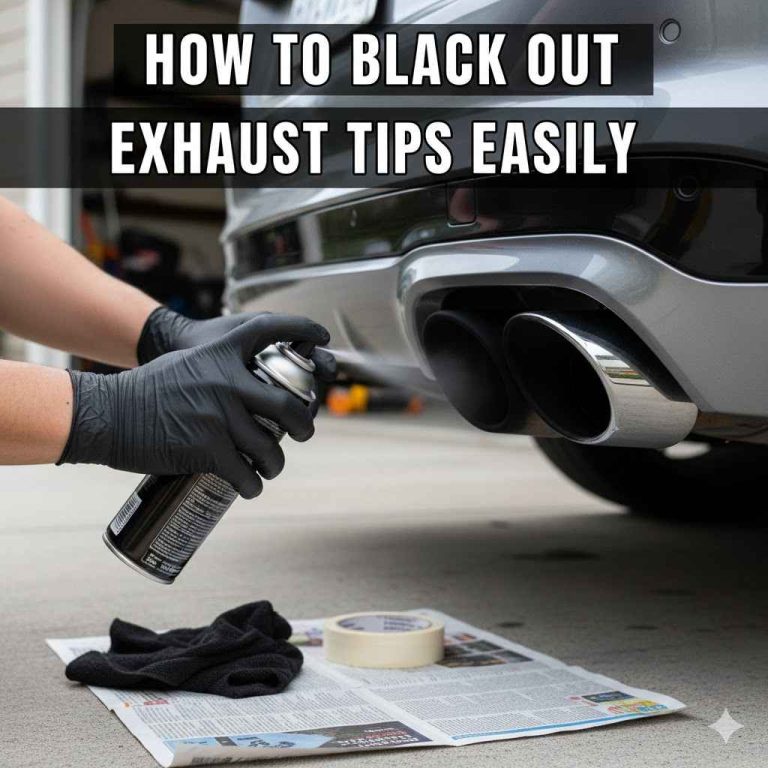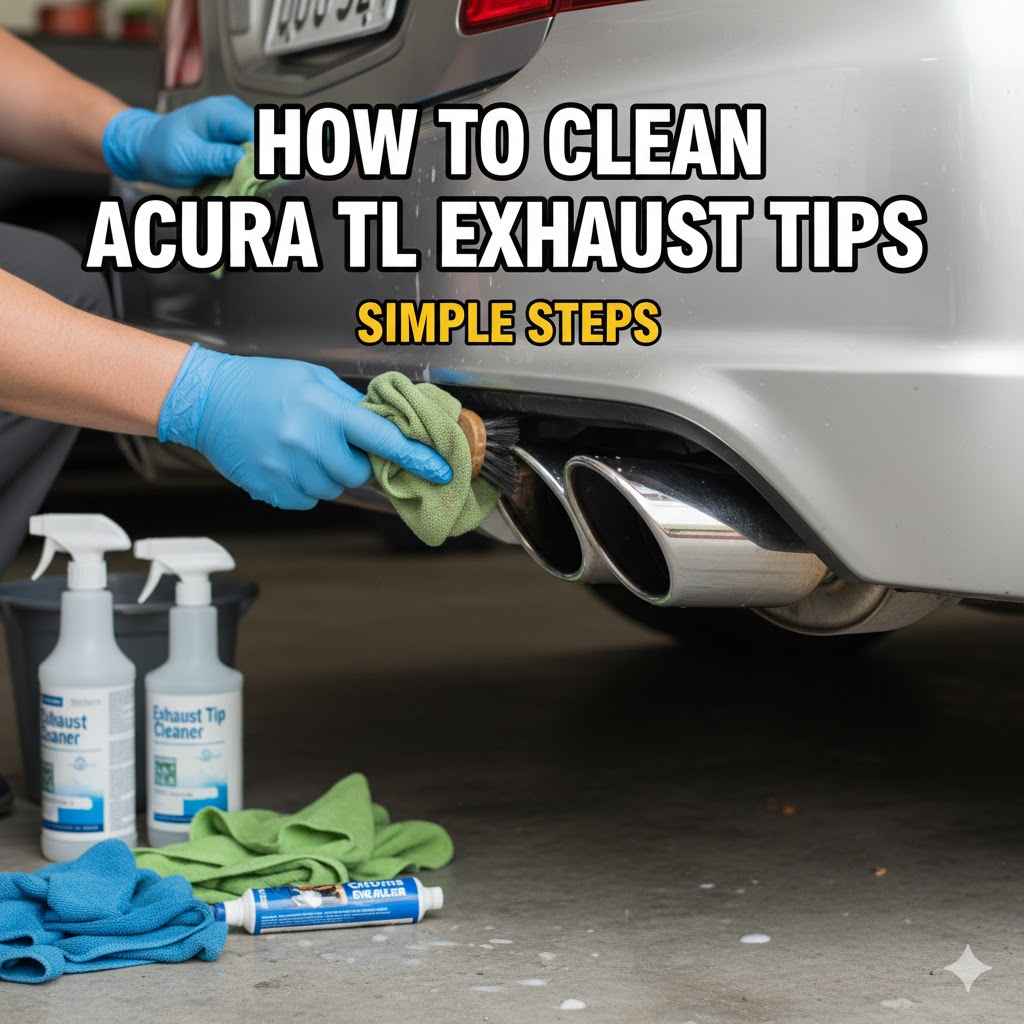
How to Clean Acura TL Exhaust Tips Simple Steps
Keeping your Acura TL looking its best often means paying attention to those little details, and the exhaust tips are no exception. For many car owners, especially those new to detailing, the idea of cleaning them can seem a bit tricky. You might wonder if you’ll scratch them or use the wrong cleaner and cause damage.
But don’t worry, it’s much easier than it looks! This guide will show you exactly How to Clean Acura TL Exhaust Tips with simple steps that anyone can follow. Get ready to make them shine like new again.
Making Your Acura TL Exhaust Tips Shine Bright
This section will guide you through the entire process of cleaning your Acura TL exhaust tips. We’ll cover everything from gathering your supplies to the final polishing steps. You’ll learn why clean exhaust tips make a big difference in your car’s overall appearance and how easy it is to achieve a show-car finish right at home.
We’ll break down each part of the cleaning so it’s easy to understand.
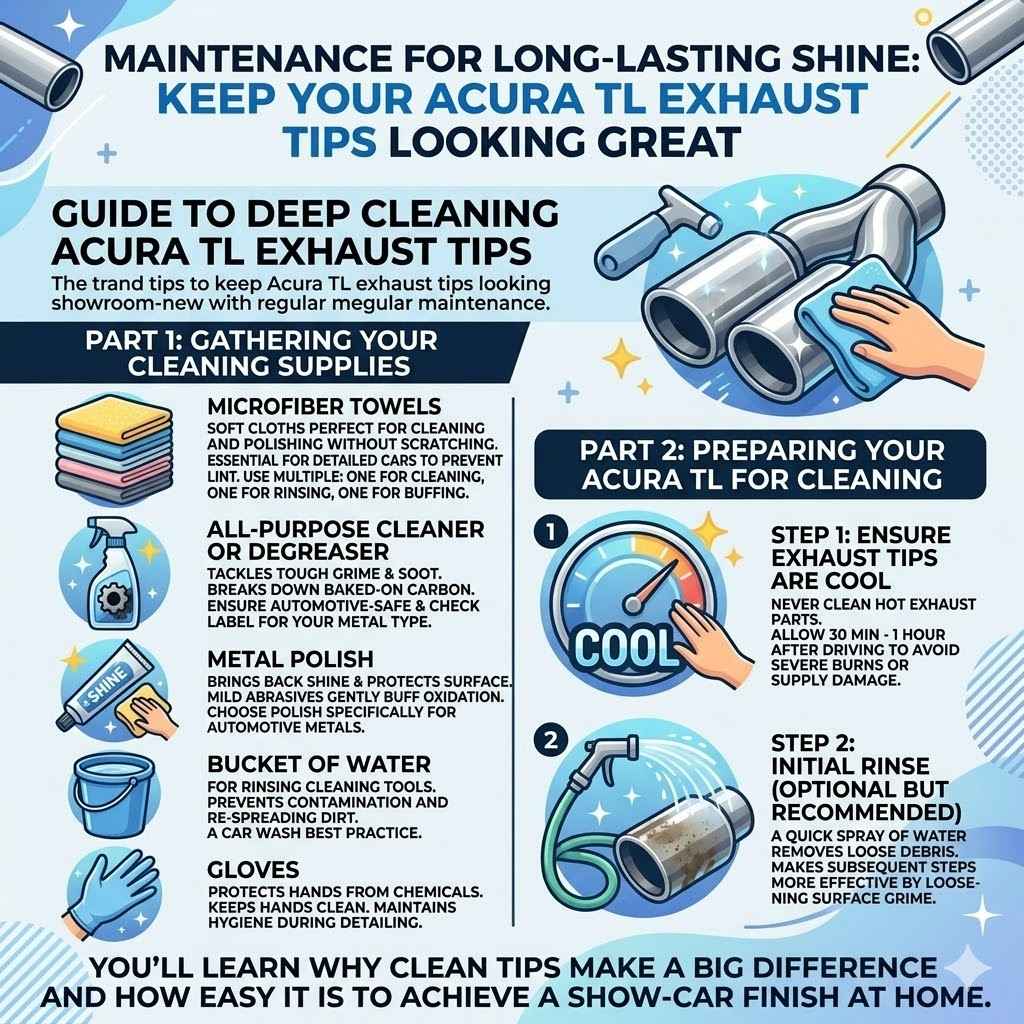
Gathering Your Cleaning Supplies
Before you start cleaning, having the right tools makes the job go much smoother. You don’t need a lot of fancy equipment. Simple items from around the house or a local auto parts store will do the trick.
Having everything ready means you can get right to work and finish up quickly.
Microfiber Towels: These soft cloths are perfect for cleaning and polishing without scratching. They trap dirt and grime effectively.
Microfiber towels are essential for car detailing. They are made of very fine fibers that are excellent at picking up dirt, dust, and grease. Unlike regular cotton towels, they don’t leave behind lint, which is especially important when you want a streak-free finish.
For cleaning exhaust tips, you’ll want a few of these – one for cleaning, one for rinsing, and one for buffing.
All-Purpose Cleaner or Degreaser: This will tackle the tough grime and soot. Make sure it’s safe for automotive finishes.
An all-purpose cleaner or a dedicated automotive degreaser is your go-to for removing baked-on carbon and road film from exhaust tips. These cleaners are formulated to break down stubborn grease and soot without harming the metal. Always check the label to ensure it’s suitable for your exhaust tip material, whether it’s chrome, stainless steel, or titanium.
Metal Polish: This brings back the shine and protects the surface.
Metal polish is what gives your exhaust tips that mirror-like finish. It contains mild abrasives that gently buff away oxidation and minor scratches. Many polishes also leave behind a protective layer that helps to repel dirt and prevent future tarnishing.
Choose a polish specifically designed for automotive metals.
Bucket of Water: For rinsing your cleaning tools.
A simple bucket of clean water is necessary for rinsing your microfiber towels and wash mitts. This prevents you from spreading dirt back onto the exhaust tips or your car’s paint. Keeping a separate bucket for rinsing is a good practice in car washing to avoid contamination.
Gloves: To protect your hands from cleaning chemicals.
Wearing gloves is a good idea when working with cleaning chemicals. It keeps your hands clean and protected from any harsh ingredients in the cleaners. It also helps maintain good hygiene during the detailing process.
Preparing Your Acura TL for Cleaning
Before you even think about spraying cleaner, it’s important to make sure your exhaust tips are cool to the touch. Hot exhaust components can cause cleaning products to evaporate too quickly or even bake onto the surface, making them harder to remove and potentially causing damage. Letting your car sit for a while after driving ensures a safe and effective cleaning experience.
Ensure Exhaust Tips Are Cool: Never clean hot exhaust parts.
This is a critical safety step. Exhaust systems get extremely hot during operation. Touching hot metal can cause severe burns.
Allowing the exhaust tips to cool down completely, which can take at least 30 minutes to an hour after driving, is vital for your safety and to prevent damage to your cleaning supplies or the exhaust tips themselves.
Initial Rinse (Optional but Recommended): A quick spray of water can remove loose debris.
Sometimes, a gentle spray of water from a hose can loosen and remove light dust and dirt. This initial rinse helps to make the subsequent cleaning steps more effective by removing the surface layer of grime. It’s a good way to start the process and get the exhaust tips ready for a deeper clean.
Deep Cleaning Your Acura TL Exhaust Tips
Now that you have your supplies and your car is prepped, it’s time for the real cleaning. This involves using your cleaner to break down stubborn soot and grime. We’ll go step-by-step to make sure you get the best results without any hassle.
This is where the magic starts to happen, and you’ll begin to see the difference.
Applying The Cleaner
Spray your chosen all-purpose cleaner or degreaser directly onto the exhaust tips. Let it sit for a few minutes, following the product’s instructions. This allows the cleaner to work its magic, breaking down the stubborn carbon deposits and soot that cling to the metal.
Don’t let it dry on the surface.
Spray Cleaner Generously: Cover all areas of the exhaust tips.
Make sure to spray enough cleaner to coat the entire surface of the exhaust tips. Pay attention to any corners or hidden areas where soot might accumulate. Even coverage ensures that the cleaner can work effectively across the whole tip, lifting dirt and grime.
Let It Dwell: Allow time for the cleaner to break down grime.
The dwell time, or the amount of time you let the cleaner sit, is important. It gives the active ingredients in the cleaner a chance to loosen the bonds of the dirt and soot to the metal. Check the product label for recommended dwell times, but generally, a few minutes is sufficient.
You don’t want it to dry out.
Avoid Spraying on Paint: Protect your car’s finish.
Be careful not to overspray the cleaner onto your car’s painted surfaces. Some degreasers can be harsh on paint. If you do get some on the paint, wipe it off immediately with a damp microfiber towel.
This prevents any potential damage to your car’s clear coat.
Agitating the Surface
After the cleaner has had time to work, you’ll need to gently scrub the exhaust tips. A microfiber towel or a soft-bristled brush is ideal here. Scrub in a back-and-forth or circular motion, depending on the shape of your tips, to lift away the loosened grime.
This is where you remove the visible dirt.
Use a Soft Brush or Towel: Gentle scrubbing is key.
For most exhaust tips, especially chrome or polished stainless steel, a soft-bristled brush or a clean microfiber towel is perfect for scrubbing. A brush can get into crevices better, while a towel is great for larger, flatter surfaces. Avoid using abrasive pads or stiff brushes, as they can scratch the metal.
Work in Sections: Focus on one tip at a time.
It can be easier to manage the cleaning process by working on one exhaust tip at a time. This way, you can ensure each tip gets thorough attention. You won’t rush the process and can see your progress clearly as you work your way around the exhaust system.
Rinse Tools Frequently: Keep your scrubbing tool clean.
As you scrub, your brush or towel will pick up a lot of grime. Rinse it often in your bucket of clean water. This ensures you’re not just smearing the dirt around but actually removing it from the exhaust tips.
A clean tool works much better.
Rinsing Off the Cleaner
Once you’ve scrubbed away the grime, it’s time to rinse everything off. Use clean water to thoroughly wash away all the cleaner residue and loosened dirt. Make sure no traces of the cleaning product are left behind, as this can lead to spots or streaks later on.
Thoroughly Rinse: Remove all cleaner and dirt.
Use a hose or a bucket of clean water to rinse the exhaust tips completely. You want to be sure all the cleaner, soap suds, and lifted dirt are washed away. If you used a pressure washer, use a low setting to avoid any damage.
A good rinse is crucial for a clean finish.
Check for Missed Spots: Inspect carefully.
As you rinse, take a moment to look closely at the exhaust tips. Are there any spots you missed during scrubbing? If you see any remaining soot or grime, you may need to reapply a little cleaner and scrub that specific area again before giving it a final rinse.
Restoring the Shine to Your Acura TL Exhaust Tips
After the deep clean, your exhaust tips will look much better, but they might still be a bit dull. This next step is all about bringing back that brilliant shine and protecting them. This is where you really transform the look of your exhaust.
Applying Metal Polish
This is the step that brings back the mirror finish. Apply a small amount of metal polish to a clean microfiber cloth. Rub it onto the exhaust tips using a circular motion.
You will notice the polish start to lift off a grey residue – this is the oxidation and grime being removed.
Apply Polish Sparingly: A little goes a long way.
You don’t need a lot of metal polish to get great results. Apply a small, dime-sized amount to your microfiber cloth to start. You can always add more if needed.
Too much polish can make the buffing process more difficult and waste product.
Work in Small Areas: Polish one section at a time.
It’s best to work the polish into small sections of the exhaust tip. This allows you to see the effect of the polish immediately and ensure you’re getting an even application. Continue rubbing until you see the polish working and starting to dull down as it removes the grime.
Rub Until Residue Appears: This shows it’s working.
As you rub the polish onto the metal, you’ll start to see a dark, grey residue form on the surface. This residue is the polish lifting away tarnish, oxidation, and microscopic imperfections from the metal. Keep working the area until this residue is clearly visible, indicating the polish is doing its job.
Buffing and Finishing
Once you’ve applied the polish to the entire surface and have worked it in, it’s time to buff. Use a clean, dry microfiber towel to buff away the polish residue. Use firm, circular motions to bring out a brilliant shine.
You’ll be amazed at how much your exhaust tips sparkle.
Buff with a Clean Towel: Reveal the shine.
Take a fresh, dry microfiber towel and start buffing the polished surface. Use firm, circular motions. The residue from the polish will transfer to this towel, and the exhaust tip underneath will begin to gleam.
You are essentially polishing off the polish.
Achieve a Mirror Finish: Admire your work.
Keep buffing until the exhaust tips have a deep, mirror-like shine. You can use a separate clean section of the towel or a new towel if the first one becomes too saturated with residue. The goal is a reflection so clear you can see yourself in it.
Repeat if Necessary: For extremely dull tips.
If your exhaust tips were particularly neglected and still not as shiny as you’d like, don’t hesitate to repeat the polishing and buffing process. Sometimes, stubborn oxidation requires a second application of metal polish to achieve that perfect shine. Just make sure to use clean cloths for each application.
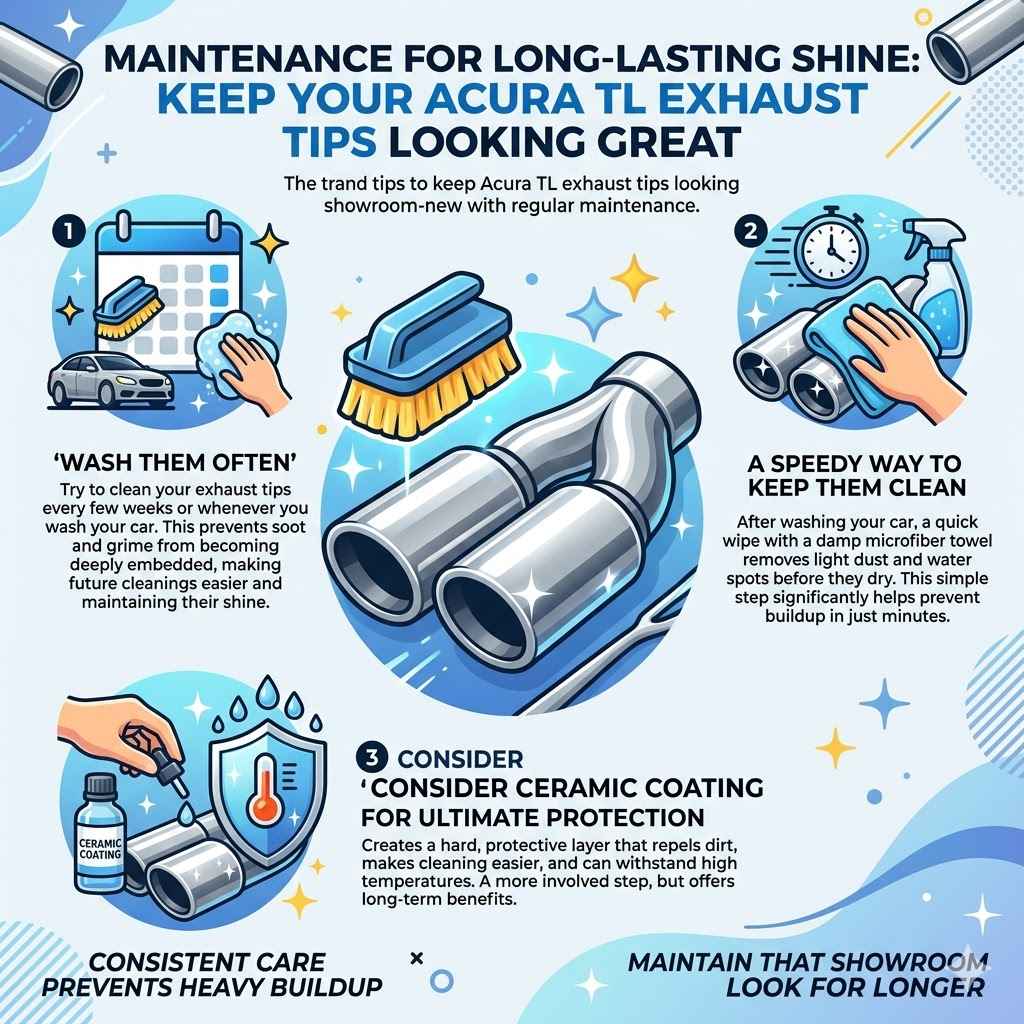
Maintenance for Long-Lasting Shine
To keep your Acura TL exhaust tips looking great, a little regular maintenance goes a long way. Consistent cleaning prevents heavy buildup, making future cleanings much easier. These tips will help you maintain that showroom look for longer.
Regular Cleaning Schedule: Wash them often.
Try to clean your exhaust tips every few weeks or whenever you wash your car. This prevents soot and grime from becoming deeply embedded, which makes the cleaning process quicker and easier each time. Consistent care is the best way to maintain their shine.
Quick Wipe-Downs: A speedy way to keep them clean.
After washing your car, a quick wipe-down of the exhaust tips with a damp microfiber towel can remove light dust and water spots before they dry. This simple step takes only a minute or two but significantly helps in preventing buildup.
Consider Ceramic Coating: For ultimate protection.
For those who want the absolute best in protection and ease of maintenance, consider a ceramic coating specifically designed for exhaust tips. Ceramic coatings create a hard, protective layer that repels dirt, makes cleaning easier, and can withstand high temperatures. It’s a more involved step but offers long-term benefits.
Frequently Asked Questions
Question: How often should I clean my Acura TL exhaust tips
Answer: You should aim to clean your Acura TL exhaust tips about once a month or every time you wash your car to prevent heavy buildup and keep them looking their best.
Question: Can I use household cleaners on my exhaust tips
Answer: It’s best to use automotive-specific cleaners like all-purpose cleaners or degreasers designed for metal. Some household cleaners can be too harsh and damage the finish.
Question: What if my exhaust tips are very rusty
Answer: For rust, you might need a more aggressive rust remover or a stronger metal polish. Always test in an inconspicuous area first and follow product instructions carefully.
Question: Will cleaning my exhaust tips improve performance
Answer: Cleaning your exhaust tips will not affect your car’s performance. It is purely an aesthetic enhancement to make your Acura TL look better.
Question: How can I protect my exhaust tips after cleaning
Answer: After cleaning and polishing, you can apply a metal sealant or a ceramic coating specifically made for exhaust systems to help maintain the shine and make future cleaning easier.
Conclusion
You’ve learned how to easily clean your Acura TL exhaust tips. With simple supplies and a few straightforward steps, you can remove soot and grime. Polishing them brings back a brilliant shine.
Keep up with regular cleaning to maintain that great look. Your Acura TL will look fantastic.