How to Add Resonator to Catback Exhaust: Essential Guide
Adding a resonator to your catback exhaust is a straightforward DIY project that can reduce exhaust drone and refine your car’s sound. This guide provides essential steps, tool recommendations, and safety tips to help you successfully install a resonator on your catback exhaust system.
Does your car’s exhaust sometimes sound… a bit much? Maybe there’s an annoying drone at certain speeds, or the noise is just harsher than you’d like. You’re not alone! Many car owners experience this, and thankfully, there’s a simple solution: adding a resonator. This guide is here to walk you through exactly how to add a resonator to your catback exhaust, step by step. We’ll make it easy, safe, and rewarding, even if you’re new to working on cars. Get ready to enjoy a smoother, more pleasant exhaust note!
Why Add a Resonator to Your Catback Exhaust?
Your car’s exhaust system is like its voice. It channels the gases out, but it also plays a big role in how your car sounds. A catback exhaust system is everything after the catalytic converter. While many performance catbacks sound great, they can sometimes introduce unwanted noise, like a loud, droning hum at highway speeds. This is where a resonator comes in.
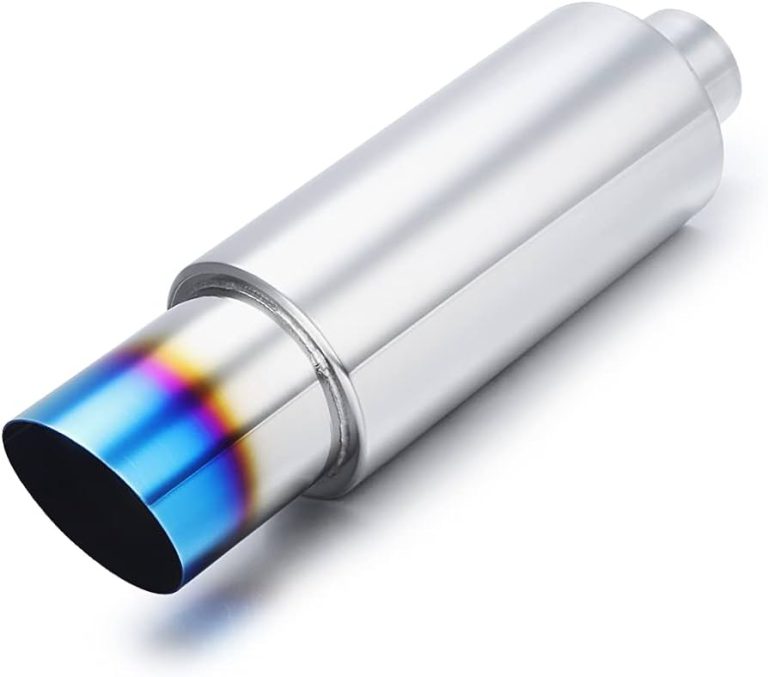
A resonator is essentially a muffler designed to cancel out specific sound frequencies. Think of it like noise-canceling headphones for your car’s exhaust. It doesn’t silence the exhaust entirely, but it targets and reduces those raspy, unpleasant tones and that persistent drone. Adding a resonator to your existing catback exhaust is a popular and effective way to:
- Reduce Drone: Eliminate that annoying humming sound that can be tiring on long drives.
- Deepen the Tone: Achieve a smoother, richer exhaust note.
- Improve Sound Quality: Make your exhaust sound more refined and less harsh.
- Maintain Performance: Unlike some mufflers, resonators are designed for minimal impact on exhaust flow and horsepower.
This upgrade is perfect for those who love the sound of a performance exhaust but want to dial back the intensity for everyday driving. It’s a relatively simple modification that can significantly enhance your driving experience. Let’s get to how you can do it yourself!

Understanding Your Exhaust System: The Basics
Before we dive into installing a resonator, let’s make sure we understand what we’re working with. Your car’s exhaust system starts at the engine and runs all the way to the back. The main components typically include:
- Exhaust Manifold: Collects exhaust gases from the engine cylinders.
- Catalytic Converter: Reduces harmful emissions.
- Resonator: (Optional, but what we’re adding!) Targets and cancels specific sound frequencies.
- Muffler: Reduces overall exhaust noise.
- Exhaust Pipes: Connect all the components.
- Exhaust Tip: The visible end of the system.
A catback exhaust refers to everything from the catalytic converter back. This is the part of the system most commonly modified for sound and performance. Adding a resonator usually means inserting it into one of the pipes in the catback section, often before the muffler or sometimes as a standalone unit in the mid-pipe.
Choosing the Right Resonator
Not all resonators are created equal! Selecting the right one for your specific catback exhaust and vehicle is crucial for getting the sound you want. Here are some key factors to consider:
Types of Resonators
The two main types you’ll encounter are:
- Chambered Resonators: These use a series of internal chambers that reflect sound waves, causing them to cancel each other out. They are often effective at reducing drone but can sometimes add a bit of back pressure.
- Helmholtz Resonators: These are like a tuned chamber that’s specifically designed to cancel a particular frequency. They are very effective at targeting specific drone notes without significantly impacting overall flow. Think of them like a wine bottle – blowing across the top creates a specific tone.
Size and Inlet/Outlet Diameter
This is critical for a proper fit. You’ll need to measure the outer diameter of your existing exhaust pipes where you plan to install the resonator. Resonators come in various diameters (e.g., 2-inch, 2.25-inch, 2.5-inch, 3-inch). You want the inlet and outlet of the resonator to match or be very close to the diameter of your pipes to avoid creating restrictions or leaks.
Length and Shape
Resonators come in different lengths and shapes (straight-through, offset, dual inlet/outlet). Consider the available space in your catback system. A “straight-through” resonator is generally easiest to fit and often has the least impact on flow. Measure the space where the resonator will go to ensure it will fit without hitting the chassis or other components.
Material
Most aftermarket resonators are made from stainless steel or aluminized steel. Stainless steel is more durable and corrosion-resistant, making it a better long-term investment, especially if you live in an area with road salt. Aluminized steel is more affordable but may not last as long.
Tools and Materials You’ll Need
Having the right tools makes any job easier and safer. Here’s a list of essentials for installing a resonator to your catback exhaust:
Essential Tools
- Safety Glasses: Eye protection is a must when working under your car.
- Gloves: Protect your hands from grease, dirt, and sharp edges.
- Jack and Jack Stands: To safely lift and support your vehicle. Never work under a car supported only by a jack!
- Socket Wrench Set: For removing existing clamps or bolts.
- Torque Wrench: To tighten bolts to the manufacturer’s specifications if applicable.
- Measuring Tape: To measure pipe diameters and clearances.
- Marker: For marking cut lines if needed.
- Hacksaw or Reciprocating Saw (with metal cutting blade): For cutting existing exhaust pipes if a clamp-on resonator isn’t an option.
- Drill (optional): If you need to drill holes for hangers or custom mounts.
- Angle Grinder (optional): For cutting or cleaning up pipe edges.
- Penetrating Oil (like WD-40 or PB Blaster): To loosen stubborn bolts and clamps.
Materials
- Resonator: The chosen resonator that matches your pipe diameter and fits your space.
- Exhaust Clamps: U-bolt clamps or band clamps specifically designed for automotive exhaust systems. Ensure they are the correct size for your pipe diameter.
- Exhaust Hangers (if needed): Rubber or metal hangers to properly support the new resonator.
- High-Temperature Exhaust Sealant (optional but recommended): To ensure a leak-free seal at the joints.
- New Exhaust Pipe Section (if cutting and welding): If you opt for a weld-in resonator, which is more advanced. We’re focusing on clamp-on for beginners.
Always consult your vehicle’s service manual for specific torque specifications and other relevant information. For reference on safe lifting practices, check out resources from organizations like the National Highway Traffic Safety Administration (NHTSA).
Step-by-Step Guide: Adding a Resonator to Your Catback Exhaust
This guide assumes you’re installing a clamp-on resonator, which is the most beginner-friendly method. Welding is a more permanent and robust solution but requires specialized tools and skills.
Step 1: Preparation and Safety First!
Safety is paramount. Ensure your vehicle is parked on a level surface. Engage the parking brake and block the wheels with wheel chocks. Using a jack, carefully lift the rear of the vehicle high enough to comfortably work underneath. Securely place jack stands under the vehicle’s frame or designated support points. Double-check stability before going underneath.
Put on your safety glasses and gloves. Locate your factory or aftermarket catback exhaust system. You’ll be looking for a section of pipe, usually between the catalytic converter and the muffler, where you can fit the new resonator.
Step 2: Measure and Plan
Determine the best location to install the resonator. It should be in a straight section of pipe if possible. Measure the outer diameter of your exhaust pipe. This is crucial for ensuring your new resonator has the correct inlet and outlet sizes.
Measure the length of the resonator and consider any space needed for the clamps. Ensure the resonator won’t hang too low or interfere with suspension components, driveshafts, or fuel lines. You might need to temporarily position it to get a visual idea of the fit.
Step 3: Remove Any Obstructions (If Necessary)
Some exhaust systems might have existing components or hangers that need to be temporarily moved or removed to make space for the resonator. If you need to remove a section of pipe, you’ll typically find it secured by exhaust clamps or bolts. Loosen these using your socket wrench and penetrating oil if they’re rusty.
If the resonator is going in the place of a section you need to remove, you might need to cut the existing pipe. Use a hacksaw or reciprocating saw for this. Measure accurately and make clean cuts.
Step 4: Install the Resonator
This is where the resonator itself goes on. If you’ve cut out a section of pipe, you might need to slide a new piece of pipe into place to connect the gap before attaching the resonator. For clamp-on installations:
- Slide one end of the resonator onto the exhaust pipe.
- If you had to cut a section, attach the new pipe section to the other end.
- Position the resonator and pipe section correctly within the exhaust system.
- Using the appropriate exhaust clamps (U-bolt or band clamps), secure the resonator to the existing pipes.
- Ensure the clamps are positioned to capture both the resonator’s inlet/outlet and the existing exhaust pipe.
Tip: For a better seal, you can apply a thin bead of high-temperature exhaust sealant around the pipe before sliding the resonator on. This helps prevent exhaust leaks.
Step 5: Secure and Tighten
Once the resonator is in place and the clamps are on, begin tightening the bolts on the clamps. Tighten them evenly, alternating between sides, to ensure a snug and leak-free fit. Don’t overtighten, as this can crush the exhaust pipe or damage the clamp. Tighten them firmly until the resonator is secure and doesn’t wiggle.
If you had to remove or reposition any exhaust hangers, re-install them now to properly support the added weight and ensure proper positioning of the new resonator.
Step 6: Inspect for Leaks and Clearances
Before lowering the vehicle, start the engine and let it run for a few minutes. Carefully feel around the new resonator and its connections for any signs of exhaust leaks (you might hear a puffing sound or feel escaping gas). If you find a leak, try tightening the clamps a bit more, or apply more exhaust sealant and re-tighten.
Also, double-check clearances again. With the engine running, the exhaust system can vibrate and move. Ensure there are no contact points with the chassis or other components. Look for any signs of rubbing or interference.
Step 7: Lower the Vehicle and Test Drive
Once you’re confident there are no leaks and clearances are good, carefully lower the vehicle back to the ground. Take your car for a test drive. Listen for the exhaust drone. Do you notice it’s gone or significantly reduced? Listen for any new rattles or unusual noises. Drive at various speeds, especially those where you noticed drone before.
If everything sounds good and feels right, congratulations! You’ve successfully added a resonator to your catback exhaust.
Resonator Installation Methods: Clamp-On vs. Weld-On
While this guide focuses on the clamp-on method, understanding the differences helps you choose the best approach for your situation.
| Feature | Clamp-On Resonator | Weld-On Resonator |
|---|---|---|
| Installation Difficulty | Beginner-friendly, requires basic tools. | Intermediate to advanced, requires welding equipment and skill. |
| Tools Required | Screwdrivers, wrenches, jack, jack stands, potentially a saw. | Welder (MIG, TIG, or Flux Core), grinder, cutting tools, safety gear for welding. |
| Permanence | Removable and adjustable. | Permanent, very durable connection. |
| Leak Potential | Higher potential for leaks if clamps aren’t tight or seals fail over time. | Very low potential for leaks if welded properly. |
| Cost | Generally lower due to less specialized labor/equipment. | Can be higher if professional welding is required. |
| Ideal For | DIYers, testing sound before permanent install, temporary fixes. | Enthusiasts seeking a robust, leak-proof, long-term solution. |
For most beginners looking to simply add a resonator to their existing catback, the clamp-on method is the most accessible and practical. It allows you to test the results before committing to a permanent modification.
Troubleshooting Common Issues
Even with the best intentions, you might run into a snag. Here are some common problems and how to solve them:
- Exhaust Leaks:
- Cause: Loose clamps, damaged pipe/resonator flange, poor seal.
- Solution: Retighten clamps evenly. Apply more high-temperature exhaust sealant and re-tighten. Inspect pipes and resonator for cracks or damage. If the pipe is corroded, it might need replacement.
- Resonator Rattles:
- Cause: Resonator hitting the chassis or other components, loose hanger, internal baffle issue (rare).
- Solution: Check clearances with the engine running. Adjust the position of the exhaust system or add/move hangers. Ensure all clamps are tight.
- Sound Not as Expected:
- Cause: Incorrect resonator type for the frequency you want to cancel, resonator placed in the wrong part of the exhaust, other exhaust leaks elsewhere.
- Solution: Research different resonator types or consult with exhaust specialists. Double-check for leaks throughout the entire exhaust system. Sometimes, a resonator needs to be paired with a specific muffler for the best effect.
- Difficulty Fitting:
- Cause: Resonator is the wrong size/shape, exhaust pipes are not perfectly aligned.
- Solution: Double-check measurements before purchasing. For clamp-on, you might need an exhaust adapter if pipe diameters don’t match perfectly. Gentle persuasion with a rubber mallet might help align pipes, but avoid excessive force. If it’s a major fitment issue for a clamp-on, you might need to consider cutting existing pipe for a cleaner fit or opt for a professional installation.
If you’re struggling with a particular issue, don’t hesitate to consult online automotive forums specific to your car model or a local exhaust shop. They often have a wealth of knowledge and practical solutions.

FAQ: Your Resonator Questions Answered
Here are some common questions beginners ask about adding a resonator:
Q1: Will adding a resonator affect my car’s performance?
A: Typically, no. Resonators are designed to cancel sound frequencies, not restrict exhaust flow significantly. Unlike some larger mufflers, they are engineered for minimal impact on horsepower and torque. For optimal flow, ensure the resonator’s internal diameter matches your catback pipe diameter.
Q2: How do I know which size resonator to buy?
A: Measure the outer diameter of your exhaust pipe where you plan to install it. Then, choose a resonator with inlet and outlet diameters that match this measurement. For example, if your pipes are 2.5 inches in outer diameter, you’ll need a 2.5-inch resonator.