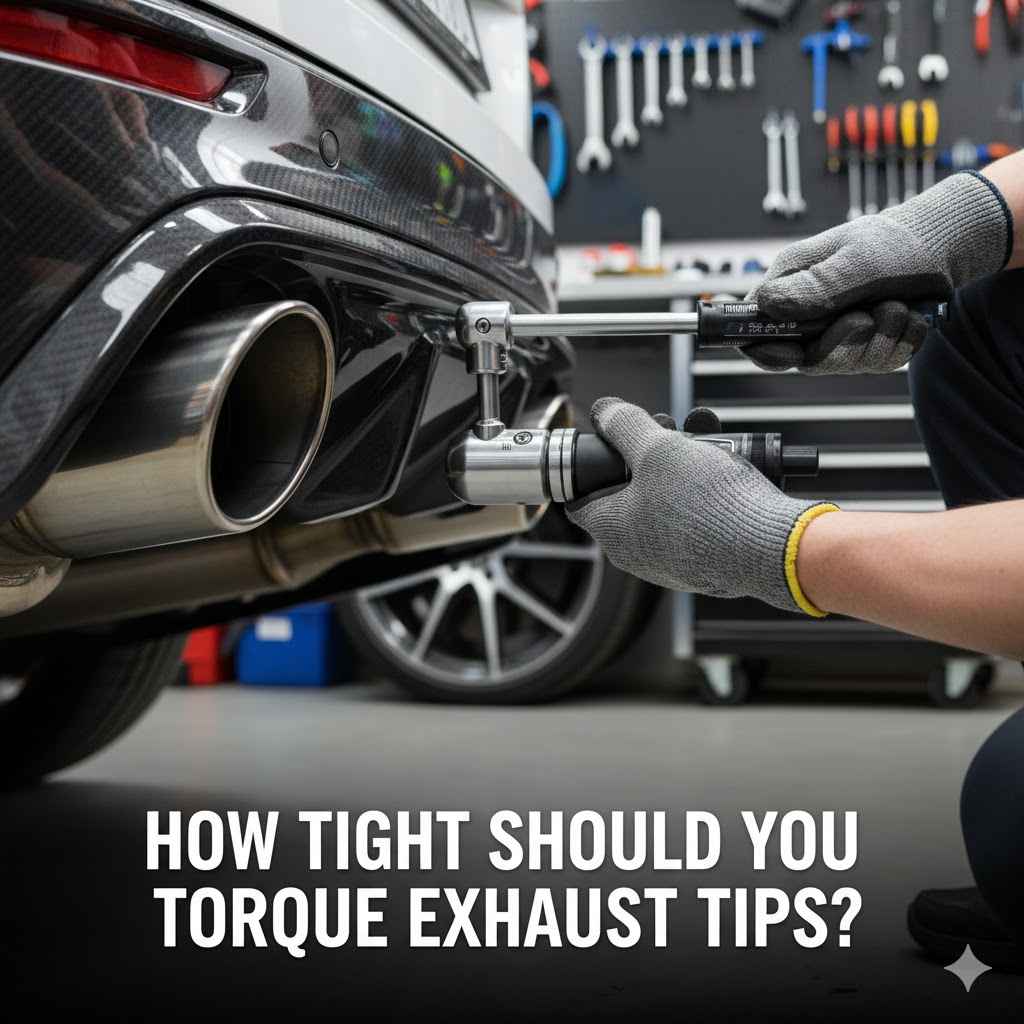
How Tight Should You Torque Exhaust Tips?
When you’re working on your car, especially adding new exhaust tips, you might wonder, How Tight Should You Torque Exhaust Tips? It can be a bit confusing for folks new to car care. You don’t want them too loose, or they might fall off. But you also don’t want them too tight, which could cause damage.
Don’t worry, this guide will make it super simple. We’ll walk through it step-by-step so you can get it just right. Let’s find out the perfect tightness.
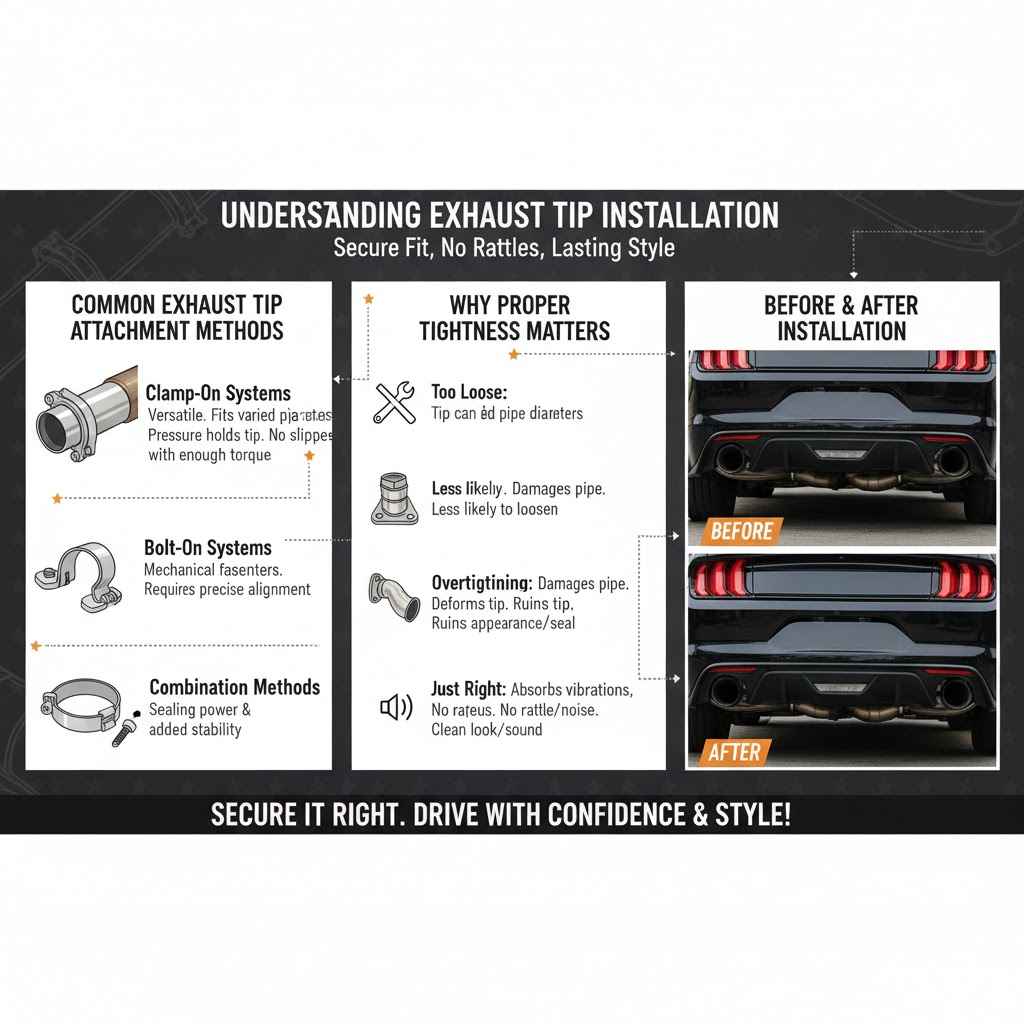
Understanding Exhaust Tip Installation
Getting exhaust tips fitted correctly is more than just making them look good. It’s about ensuring they stay securely in place and don’t cause any problems for your exhaust system. Many car owners find this step tricky because there isn’t always a single, clear answer.
Different tips and mounting methods mean different approaches. This section will explain the basics you need to know before we get to the tightening part.
The main goal is a secure fit. This means the tips won’t vibrate loose or rattle. It also means they won’t put undue stress on the exhaust pipe itself.
Imagine driving down the road and hearing a clunk from your rear bumper. That’s usually a sign that something isn’t quite right with the exhaust tip attachment.
We will cover the common ways exhaust tips are attached. This includes clamping systems and bolt-on designs. Knowing these will help you understand why the tightening process varies.
It’s all about making sure your new tips are a perfect and lasting addition to your vehicle’s appearance.
Common Exhaust Tip Attachment Methods
Exhaust tips come in various styles, and how they attach to your car’s existing exhaust pipe is key. Understanding these methods helps you figure out what you’re working with. It also guides you on the best way to secure them.
Most tips use either a clamp system or a bolt-on method. Each has its own way of achieving a tight fit.
Clamp-on tips are very common. They usually involve a sleeve that slides over the exhaust pipe. Then, a clamp, often a U-bolt or a band clamp, squeezes the sleeve around the pipe.
This pressure is what holds the tip in place. The tightness of this clamp is what we’ll focus on later.
Bolt-on tips might involve special adapters or flanges. These are bolted directly to the exhaust pipe or a hanger. Sometimes, the tip itself has bolts that go through a bracket.
The goal is always the same: a strong, vibration-resistant connection.
Clamp-on systems use a band or U-bolt to create pressure. This is the most frequent type for aftermarket tips.
The explanation for clamp-on systems is that they are versatile. They can fit pipes of slightly different diameters. This makes them a popular choice for many car owners who want an easy upgrade.
The clamp’s ability to grip the pipe securely is its main advantage. Without enough pressure, the clamp might slip.
Bolt-on systems often use nuts and bolts. These create a more rigid connection, relying on mechanical fasteners.
Bolt-on methods provide a very secure attachment. They are less likely to loosen over time due to vibration compared to some clamp systems. However, they might require more precise alignment and can be slightly more complex to install.
The bolts need to be tightened evenly.
Some tips use a combination of methods. This might involve a clamp plus a small set screw for extra security.
This dual approach offers the best of both worlds. You get the sealing power of a clamp and the added stability of a screw. It’s important to know if your specific tip has such a feature.
It affects how you’ll torque or tighten it.
Why Proper Tightness Matters
Getting the tightness just right for your exhaust tips is important for a few reasons. It’s not just about them looking good; it’s about how they perform and last. If they are too loose, you risk them falling off.
This can be dangerous and cause damage to your car or other vehicles.
On the flip side, overtightening can also cause problems. You could damage the exhaust pipe, especially if it’s thinner metal. It might also deform the exhaust tip itself, ruining its appearance or seal.
Finding that sweet spot ensures a safe and lasting installation.
The vibrations from your engine and the road are constantly at work. A loose tip can rattle and make noise. This can be annoying and might indicate a problem.
A well-tightened tip will absorb these vibrations better and create a cleaner look and sound. It’s about making sure everything works as it should.
Determining the Correct Torque
So, you’re ready to tighten those exhaust tips. But how much is enough? The question of How Tight Should You Torque Exhaust Tips?
is best answered by understanding torque specifications. Torque is a measure of rotational force. It tells you how much twisting force is applied when tightening a fastener.
For exhaust tips, this is usually measured in foot-pounds (ft-lbs) or Newton-meters (Nm).
Most aftermarket exhaust tips come with instructions. These instructions are your best guide. They often specify a torque range.
Sticking to this range is crucial for a secure and safe installation. If no specific torque is given, there are general guidelines we can follow.
It’s important to use a torque wrench for this job. This tool allows you to apply a precise amount of force. Guessing can lead to overtightening or undertightening.
A torque wrench takes the guesswork out of the process, ensuring you achieve the perfect fit.
Using a Torque Wrench
A torque wrench is a tool designed to measure the amount of force applied to a fastener, like a bolt or nut. When installing exhaust tips that use clamps or bolts, using a torque wrench is highly recommended. It ensures you tighten things to the exact specification needed, no more and no less.
To use a torque wrench, you first need to know the required torque value. This is often found in the exhaust tip manufacturer’s instructions. If it’s not there, you might have to rely on general guidelines for similar hardware.
Once you have the value, you set your torque wrench to that number.
Attach the wrench to the bolt or nut. Then, tighten it slowly and steadily. You’ll usually hear or feel a click when the set torque is reached.
At that point, you stop applying force. This prevents over-tightening, which can strip threads or crack components.
Set the torque wrench to the manufacturer’s recommended value. This is typically in ft-lbs or Nm.
For example, if the instructions say 15-20 ft-lbs, you would set your wrench to that range. Many wrenches have a dial or click mechanism for this. Always ensure the wrench is calibrated for accuracy.
Slowly and smoothly turn the wrench. Apply even pressure to the fastener.
Avoid jerky movements. Smooth application helps you feel the torque build up correctly. This is especially important when you’re close to the target torque.
Stop immediately when the wrench indicates the set torque has been reached. This is usually a click or a beep.
This is the most critical step. The tool signals that you’ve applied the correct force. Continuing to tighten after this point can cause damage.
Torque Specifications for Common Clamps
For clamp-style exhaust tips, the torque applied to the clamp itself is crucial. These clamps are usually U-bolts or band clamps. The manufacturer’s instructions are the best source for exact torque figures.
However, if you don’t have them, general ranges exist for common clamp sizes.
For a typical U-bolt clamp on an exhaust tip, you might see specifications ranging from 10 to 25 ft-lbs. The exact number depends on the size of the U-bolt, the thickness of the clamp, and the material of the exhaust pipe. Smaller clamps on thinner pipes will require less torque.
Band clamps, which often wrap around the pipe and secure with a screw or bolts, might have slightly different requirements. The focus here is on compressing the band enough to create a seal without crushing the exhaust pipe. Often, the tightening for band clamps is more about achieving a snug fit by feel rather than a strict torque value, unless bolts are involved.
It’s worth noting that exhaust pipes are often made of stainless steel or aluminized steel. These materials can withstand some pressure, but they can also be deformed if too much force is applied. This is why using a torque wrench is so important to avoid damaging your exhaust system.
Typical U-bolt clamps might require 10-25 ft-lbs of torque. This ensures a secure grip without damaging the pipe.
This range is a good starting point. The higher end of the range is for larger, sturdier clamps. The lower end is for smaller ones or when attaching to a less robust exhaust pipe.
Always check the clamp manufacturer’s recommendations if available. They know their product best.
This advice is standard across many automotive parts. The maker of the component is the ultimate authority on its use and installation. They have specific data for their designs.
Avoid overtightening, as it can deform the clamp or the exhaust pipe. This can lead to leaks or a weak connection.
Deforming the pipe can create stress points. This might lead to premature rust or cracks over time. The tip could also become crooked.
What to Do Without Specific Torque Values
Sometimes, you might buy exhaust tips, and they don’t come with specific torque settings. This can happen with universal tips or when replacing a clamp. In these situations, you need to use a bit of good judgment and follow general automotive practices.
The goal is to achieve a secure fit without causing any damage.
For U-bolt clamps, a common approach is to tighten them until they are snug, then give them about a quarter to a half turn more. You want the clamp to grip the pipe firmly, but you shouldn’t have to strain yourself to turn the wrench. A good rule of thumb is to tighten until the gap between the two sides of the U-bolt is minimal, and the clamp is clearly holding the tip in place.
If your exhaust tips use bolts to secure a flange or bracket, look at the size of the bolts. Smaller bolts (e.g., M6 or 1/4 inch) will require less torque than larger ones (e.g., M8 or 5/16 inch). For smaller bolts, a torque of 8-15 ft-lbs might be sufficient.
For larger bolts, you might go up to 20-30 ft-lbs, depending on the material.
It’s always better to err on the side of caution. You can always tighten a little more if you notice any looseness later. It’s much harder to fix damage caused by overtightening.
A visual inspection and a firm shake test can help you determine if the tip is secure enough.
Tighten clamps until snug, then add a small additional turn (e.g., 1/4 to 1/2 turn). This provides a secure grip.
This “snug plus a bit” method is often sufficient for many clamp applications. It’s a practical approach when precise numbers aren’t available.
For bolt-on applications, consider the bolt size. Smaller bolts need less torque than larger ones.
This principle applies broadly in mechanics. Larger fasteners are designed to handle greater loads and stresses. It’s a proportional relationship.
Always perform a shake test after tightening. The tip should not move freely.
This is a simple but effective way to confirm your work. If it feels loose, a little more tightening might be needed. If it feels solid, you’re likely good to go.
Installation Steps and Best Practices
Now that you understand the importance of torque and how to measure it, let’s walk through the installation process. Following these steps will help ensure your exhaust tips are installed correctly and securely. This is the practical part where you apply what you’ve learned.
Start by making sure your exhaust pipe is clean and free of rust or debris. This helps ensure a good seal and prevents corrosion. You might need a wire brush or some cleaner for this.
Then, prepare your exhaust tips. If they are clamp-on style, slide the clamp onto the exhaust pipe first, or onto the tip, depending on the design.
Position the exhaust tip correctly. It should be centered and straight. Once you are happy with the position, begin tightening the clamp or bolts.
Use your torque wrench, if specified, or follow the general guidelines we discussed.
After tightening, it’s a good idea to check your work. Give the tip a gentle shake to ensure it’s stable. You can also start your car and listen for any unusual rattling sounds.
A quick visual check from behind your car will confirm that the tips are aligned as you intended.
Preparing the Exhaust Pipe
Before you can attach any new exhaust tips, it’s vital to prepare the existing exhaust pipe properly. A clean surface ensures a better fit and a more secure connection. This step is often overlooked, but it can make a big difference in the longevity of your installation.
Start by letting your exhaust system cool down completely. Working on hot exhaust components can lead to burns. Once cool, inspect the end of the exhaust pipe where the tip will attach.
Look for any rust, dirt, or old sealant. These can prevent the clamp from gripping effectively or cause the tip to sit unevenly.
Use a wire brush or steel wool to clean off any surface rust or grime. For stubborn deposits, you might need a bit of degreaser or an automotive cleaning spray. Wipe the pipe down with a clean cloth afterward to remove any residue.
A smooth, clean surface is ideal for a tight and reliable fit.
Ensure the exhaust pipe is completely cool before starting. Safety first!
This prevents accidental burns and makes the work more comfortable. It’s a basic but crucial safety precaution for any car work.
Clean the end of the exhaust pipe thoroughly. Remove rust, dirt, and any other contaminants.
A clean surface allows for maximum contact and grip between the tip, the clamp, and the pipe. This is essential for a secure fit.
Use a wire brush or steel wool for stubborn debris. A clean pipe ensures optimal performance and appearance.
This cleaning process sets the stage for a professional-looking and secure installation. It’s a small effort that yields significant results.
Positioning and Alignment
Once the exhaust pipe is prepped, the next step is carefully positioning and aligning the new exhaust tip. This is where the visual aspect comes into play. You want the tips to look straight and evenly spaced from the bumper or bodywork.
Proper alignment makes a big difference in the overall appearance of your vehicle’s rear end.
Slide the exhaust tip onto the exhaust pipe. If it’s a clamp-on style, you might need to loosen the clamp first to allow the tip to slide on. Many tips have a specific depth they should be inserted onto the pipe.
Check the manufacturer’s guidelines for this, as it ensures the clamp has enough material to grip securely. Too little insertion might lead to a loose fit, while too much might make the tip sit too far in.
With the tip loosely in place, step back and look at it from different angles. Ensure it is centered with the cutout in the bumper or diffuser. If you have dual exhaust tips, make sure they are evenly spaced from the center of the vehicle.
Use a measuring tape if necessary to get the distances perfectly matched.
Once you are satisfied with the alignment, you can proceed to tighten the clamp or bolts. It’s much easier to make final adjustments to alignment when the tip is not yet fully secured. Taking your time here prevents having to redo the job later.
Slide the exhaust tip onto the pipe to the recommended depth. Consult the tip manufacturer’s instructions for guidance.
This depth is often designed to ensure both a good appearance and a secure clamping area. It’s a balance between aesthetics and function.
Step back and view the tip from multiple angles. Check for centering and equal spacing.
This step is crucial for symmetry. It ensures the exhaust tips look intentional and professionally installed.
If you have dual tips, measure the distance from the center of your vehicle to each tip to ensure they are even.
Precision here leads to a more polished and pleasing final look. It shows attention to detail.
Final Tightening and Checks
After you’ve achieved the perfect position and alignment, it’s time for the final tightening. This is where you apply the correct torque, or snugness, to secure the exhaust tip. Remember the goal: a firm grip that won’t loosen over time but also won’t damage anything.
If you’re using a torque wrench, set it to the specified value and tighten the clamp or bolts. Make sure to tighten evenly if there are multiple bolts. If you’re going by feel, tighten until the clamp is snug and the tip feels solid.
Avoid excessive force.
Once tightened, give the exhaust tip a good shake. It should feel solid and not move around freely. If it does, try tightening it a bit more, checking again.
If it feels very stiff or you feel like you’re forcing it too much, you might have overtightened it.
A visual inspection is also important. Ensure the tip hasn’t shifted out of alignment during tightening. Many installers also recommend starting the car and listening for any unusual noises like rattling or buzzing from the exhaust tips.
This can indicate a loose connection that needs further tightening.
Apply final torque using your torque wrench or by feel until snug. Avoid over-tightening.
This step is the culmination of your installation. Getting it right ensures the tips stay put and look great. It’s the last mechanical action you’ll take.
Perform a shake test. The tip should be stable and show no significant movement.
This simple test confirms the effectiveness of your tightening. It’s a hands-on way to verify security.
Start the engine and listen for any rattling or unusual sounds. Address any noises with further tightening if necessary.
This auditory check is an important final step for any exhaust-related work. It ensures your car sounds as good as it looks.
Troubleshooting Common Issues
Even with careful installation, sometimes things don’t go perfectly. You might encounter a few common issues when installing or tightening exhaust tips. Knowing how to handle these problems can save you frustration and ensure a successful outcome.
Don’t let a small hiccup stop you from enjoying your new exhaust tips.
One common problem is that the tip still feels loose after tightening. This could be due to a worn-out clamp, a slightly damaged exhaust pipe, or simply not enough torque applied. Another issue is when the tip won’t slide on easily, suggesting it might be too small or the pipe has too much corrosion.
Overtightening can also lead to problems, such as stripping the threads on a bolt or clamp, or even cracking the exhaust pipe. If you notice any of these issues, it’s important to address them correctly. We’ll explore solutions for these scenarios to help you finish the job right.
Exhaust Tip Still Loose After Tightening
If your exhaust tip still feels loose after you’ve tightened the clamp or bolts, don’t panic. There are a few likely reasons for this, and each has a solution. The goal is to achieve a secure fit that won’t cause problems down the road.
One possibility is that the clamp itself is not the correct size for your exhaust pipe. If it’s too large, it won’t be able to grip the pipe effectively, even when fully tightened. In this case, you’ll need to
Another reason could be that the exhaust pipe is slightly rusted or corroded, creating an uneven surface. This can prevent the clamp from getting a solid grip. Cleaning the pipe again with a wire brush or using a small piece of sandpaper might help.
You could also try using a high-temperature exhaust sealant for added grip, although this is usually a last resort.
Finally, it’s possible that the clamp you’re using is simply not strong enough. Some cheaper clamps can stretch or lose their clamping force over time. Consider upgrading to a heavy-duty clamp, often made of stainless steel, which will provide a more robust and lasting hold.
Ensure the clamp is the correct size for your exhaust pipe. A clamp that is too large will not hold securely.
This is a fundamental aspect of mechanical fitting. The tool must be the right size for the job to function correctly.
Re-clean the exhaust pipe surface if it’s rusted or corroded. A smooth surface aids in clamp grip.
Corrosion is the enemy of a good seal. Removing it is often the key to a secure connection.
Consider upgrading to a heavy-duty clamp for a stronger, more reliable hold.
Sometimes, a better quality part is the simplest solution to a persistent problem. It’s an investment in durability.
Dealing with Overtightening
Overtightening exhaust tips can lead to several problems, the most common being stripped threads or a damaged exhaust pipe. If you’ve used too much force, you might hear a grinding sound, or the bolt might spin without tightening further. This indicates the threads are compromised.
If you’ve stripped the threads on a bolt or nut, the best solution is to replace the fastener. Try to find an identical one. If the threads on the clamp itself are damaged, you might need to replace the entire clamp.
For lightly damaged exhaust pipes, sometimes a small amount of exhaust repair putty can seal small cracks or deformities, but this is a temporary fix.
In more severe cases where the exhaust pipe is significantly deformed or cracked due to overtightening, it might require replacement of that section of the exhaust system. This is why it’s so important to use a torque wrench and avoid forcing fasteners. Always stop when you feel resistance or when your torque wrench clicks.
If you feel you’ve gone too far and hear a crunching or grinding, stop immediately. Assess the damage before proceeding. It’s better to identify a problem early and fix it properly than to let a small issue become a major repair.
If threads are stripped, replace the bolt, nut, or clamp immediately.
Stripped threads mean the fastener can no longer hold securely. Replacement is the only reliable fix.
For minor pipe damage, consider exhaust repair putty as a temporary solution.
This putty can fill small gaps and prevent immediate leaks. However, it’s not a permanent fix for significant damage.
Stop immediately if you hear grinding or crunching sounds. Assess the damage and plan for repair.
These sounds are clear warnings that something is not right. Acting quickly can prevent more costly damage.
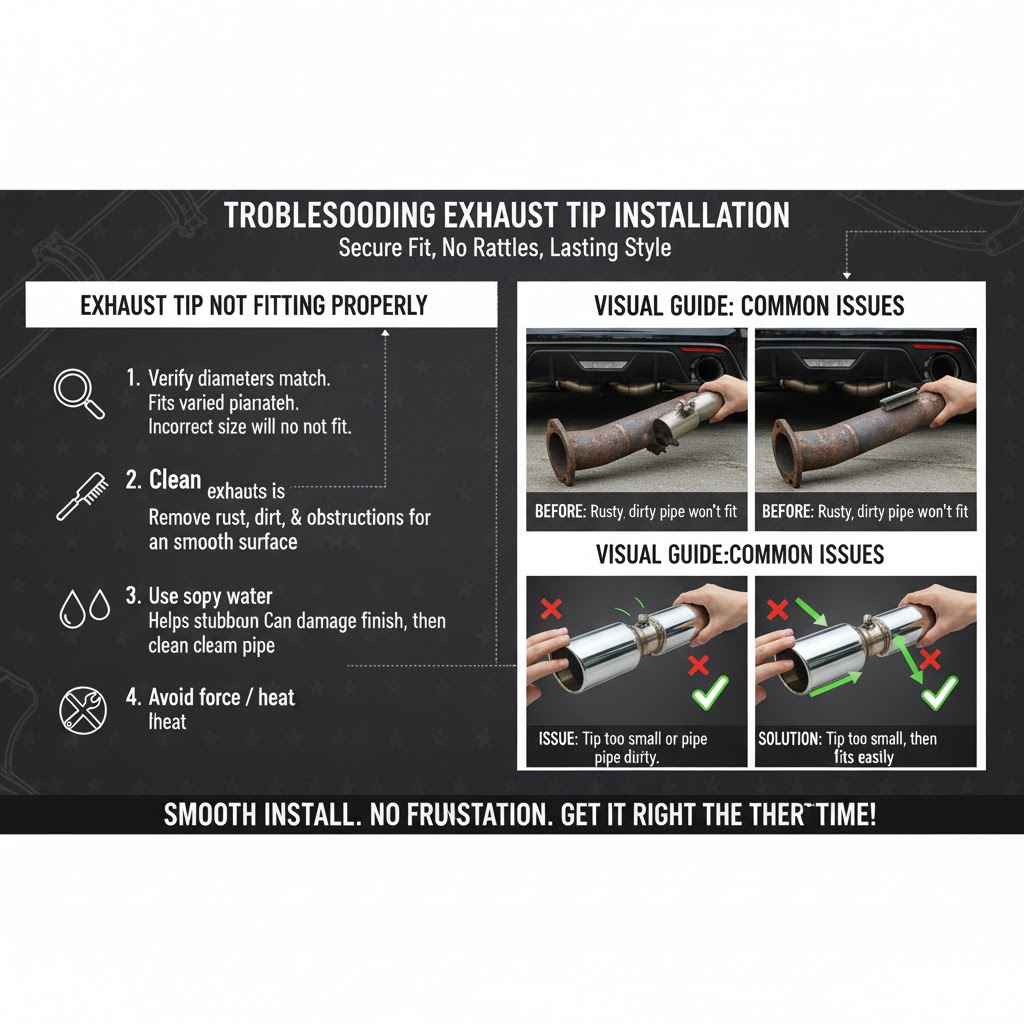
Exhaust Tip Not Fitting Properly
If your exhaust tip simply won’t fit onto the exhaust pipe, it can be frustrating. This usually comes down to two main issues: the tip is too small for the pipe, or the pipe is too dirty or corroded to allow the tip to slide on.
First, double-check that you have the correct exhaust tip for your vehicle’s exhaust pipe diameter. Most aftermarket tips will list the compatible pipe diameter. If you’ve confirmed they are the right size, the problem is likely debris or corrosion on the pipe.
As mentioned before, a thorough cleaning with a wire brush or steel wool is essential.
Sometimes, the exhaust pipe might have a slight taper or a flange that prevents the tip from sliding on all the way. You might need to gently work the tip onto the pipe. A bit of lubricant, like soapy water, can sometimes help the tip slide on more easily, but be sure to clean it off afterward.
Avoid using petroleum-based lubricants, as they can degrade rubber components if present.
If the tip is slightly too small, and the pipe is clean, you might be able to very carefully use a heat gun to slightly expand the tip, but this is risky and can damage the finish or the tip itself. It’s generally better to ensure you have the correct size tip from the start.
Verify that the exhaust tip’s diameter matches your vehicle’s exhaust pipe diameter.
This is the most basic check. An incorrect size will simply not fit, no matter what you do.
Thoroughly clean the exhaust pipe to remove any rust, dirt, or obstructions.
A clean, smooth surface is key for any part to slide on and attach correctly.
Use soapy water as a lubricant to help the tip slide on, then clean it off.
This simple trick can make a stubborn fit much easier. It lubricates without causing damage.
Frequently Asked Questions
Question: How do I know if my exhaust tip is too tight or too loose?
Answer: If the tip rattles or moves significantly when you gently shake it, it’s likely too loose. If you had to use excessive force to tighten it, or if you hear grinding or crunching sounds, it might be too tight or the threads are damaged.
Question: Can I use a regular wrench instead of a torque wrench?
Answer: For most exhaust tip clamps, a regular wrench can be used if you’re careful. However, a torque wrench ensures you don’t overtighten, which can damage the pipe or the clamp. It’s highly recommended for precise tightening.
Question: What if my exhaust tip has set screws instead of a clamp?
Answer: Set screws usually require tightening until they are snug against the exhaust pipe. They don’t typically have specific torque values, but you want them to hold the tip firmly in place without stripping the screw head.
Question: How often should I check the tightness of my exhaust tips?
Answer: It’s a good idea to check them after a week of driving and then periodically, perhaps every few months or during regular vehicle maintenance. Vibrations can sometimes cause them to loosen over time.
Question: Can overtightening damage the exhaust sound?
Answer: While overtightening itself doesn’t directly change the exhaust note, a damaged or improperly sealed tip could lead to leaks or rattles that affect the sound. A secure, well-fitted tip contributes to the intended exhaust performance.
Summary
Getting your exhaust tips correctly torqued is essential for a secure, good-looking installation. Always refer to manufacturer instructions for specific torque values. If none are provided, aim for snugness with a torque wrench when possible, avoiding overtightening.
Proper preparation and careful alignment are key to a lasting and attractive finish.