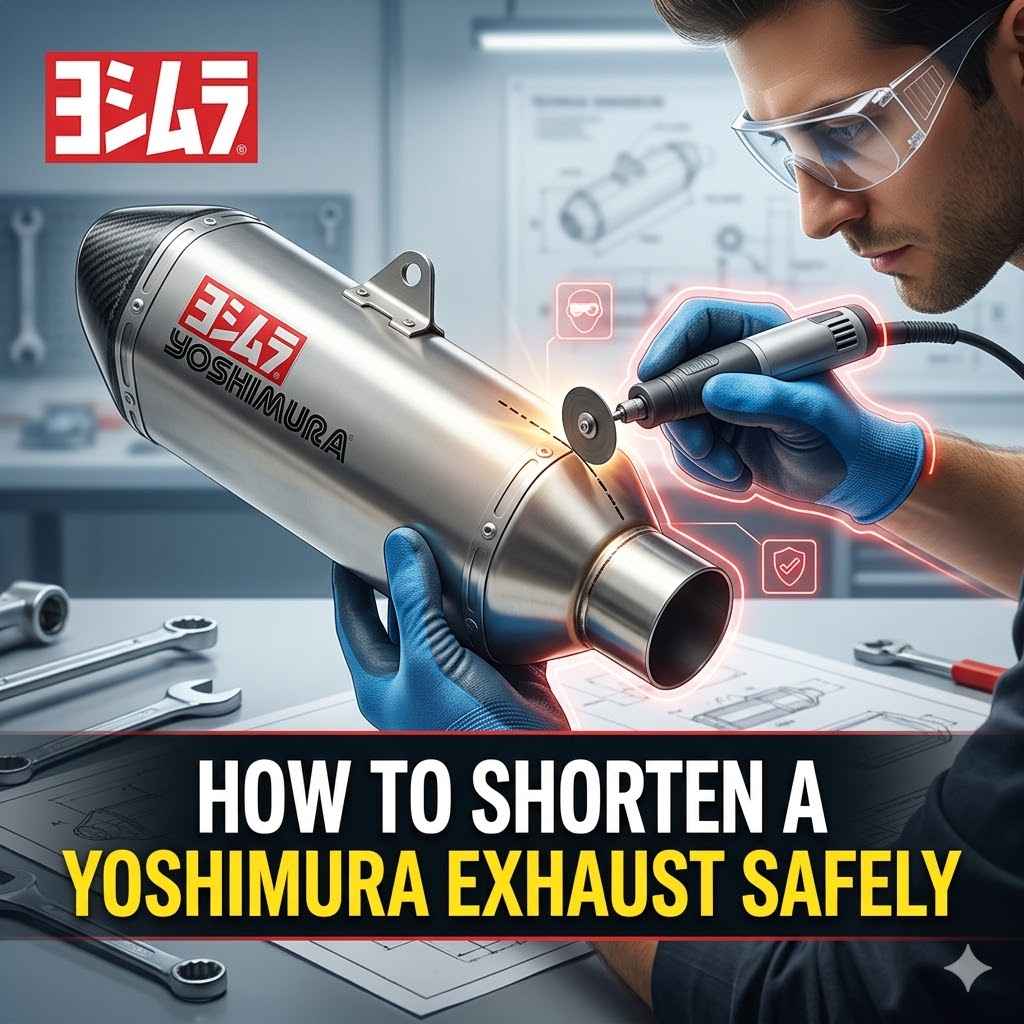
How to Shorten a Yoshimura Exhaust Safely
Many motorcycle riders love the sound and look of a Yoshimura exhaust. Sometimes, though, you might want it a bit shorter to change the style or fit. Doing this yourself can seem tricky, especially if you’re new to working on your bike.
But don’t worry, it’s totally doable. This guide will walk you through How to Shorten a Yoshimura Exhaust Safely with simple steps. We’ll cover everything you need to know so you can get the job done right.
Preparing to Shorten Your Yoshimura Exhaust
Before you grab any tools, getting ready is super important. This section is all about making sure you have everything you need and understand the basics of shortening your Yoshimura exhaust. Safety first is key, and that includes having the right gear and knowing what you’re working with.
We’ll go over the tools you’ll need, some safety tips, and what to think about before cutting. This groundwork will make the actual cutting much easier and safer.
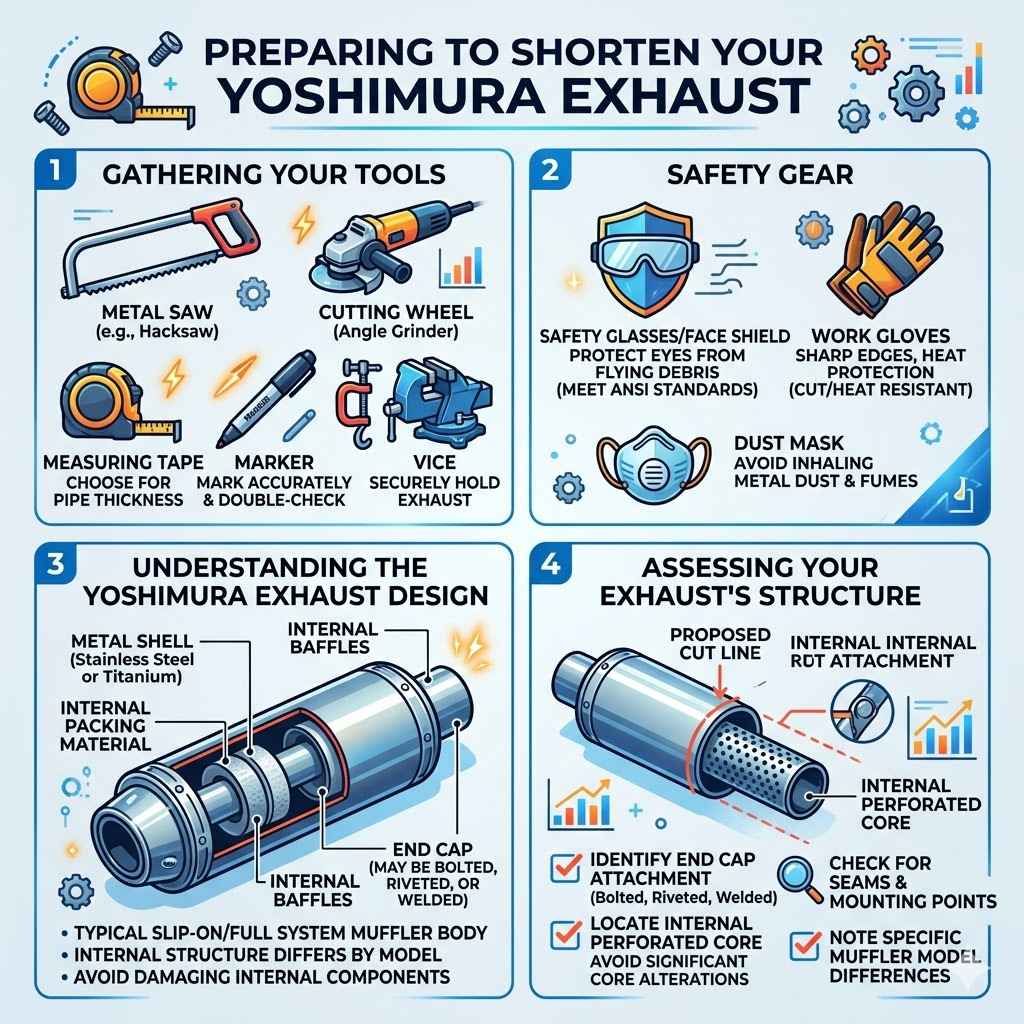
Gathering Your Tools and Safety Gear
To shorten your Yoshimura exhaust, you need the right equipment. This ensures a clean cut and keeps you safe. Having the proper tools makes a big difference in the final result.
- Metal Saw or Cutting Wheel A metal saw, like a hacksaw with a fine-tooth blade for metal, or an angle grinder with a cutting disc, is essential. The choice depends on the thickness of the exhaust pipe. A good metal saw will give you a cleaner cut. An angle grinder is faster but requires more control. Make sure your cutting disc is rated for metal. Always check the blade or disc for any damage before starting. A dull blade can make cutting harder and less precise.
- Measuring Tape and Marker A reliable measuring tape is crucial for accuracy. A permanent marker, like a Sharpie, will help you mark your cut line clearly on the exhaust. Double-check your measurements before marking. A small mistake here can lead to an unwanted outcome. Using a light color marker on a dark pipe can help visibility.
- Clamps or Vice To hold the exhaust securely in place while cutting, you’ll need clamps or a vice. This is vital for safety and accuracy. If the exhaust moves during cutting, you could get an uneven cut or injure yourself. C-clamps or adjustable clamps work well. A vice is ideal if you have one that can accommodate the exhaust pipe. Ensure the clamps are tightened enough to prevent any slipping.
- Safety Glasses or Face Shield Protection for your eyes is non-negotiable. Metal shavings and debris can fly off during cutting. A full face shield offers the best protection. Make sure your safety glasses meet ANSI standards. Even with a shield, it’s good practice to wear glasses underneath. Keep your face as far from the cutting path as possible.
- Gloves Sturdy work gloves will protect your hands from sharp edges and heat. Some gloves are also cut-resistant, which is a bonus. Heat-resistant gloves are especially useful if the exhaust has been used recently and is still warm. Always inspect your gloves for holes or tears before use. Good grip is also important for handling tools.
- Dust Mask A dust mask will protect your lungs from metal dust and fumes generated during cutting. While not as critical as eye protection, it contributes to overall safety. A simple N95 mask is usually sufficient. Avoid breathing in the fine metal particles.
Understanding the Yoshimura Exhaust Design
Yoshimura exhausts are known for their quality and performance. They are typically made from durable materials like stainless steel or titanium. Most Yoshimura systems are slip-on or full systems.
Slip-ons replace the muffler section. Full systems replace the header pipes and muffler. The part you’ll likely be shortening is the muffler body.
These are usually constructed from a metal shell wrapped around internal packing material. Shortening it means cutting off the end section of this shell.
Knowing where the internal components are is important. Some mufflers have removable end caps. Others are welded shut.
If it’s welded, you’ll need to cut through the welds. Understanding the construction helps you avoid damaging internal baffles or packing. This prevents performance issues later.
Assessing Your Yoshimura Exhaust’s Structure
Before making any cuts, take a good look at your specific Yoshimura exhaust. Yoshimura makes many models, and their designs can vary slightly. Some mufflers are straight-through designs, while others have more complex baffle systems.
You need to see how the end cap is attached. Is it bolted, riveted, or welded? This will determine how you approach removing it.
Some Yoshimura exhausts have an internal perforated core. This core runs through the muffler and is crucial for sound dampening. If you cut too much off, you might cut into this core.
You want to shorten the outer shell without significantly altering the internal structure if possible. Look for any seams or mounting points for the end cap. These are good indicators of where to begin your work.
The Process of Shortening Your Yoshimura Exhaust
Now that you’re prepared, it’s time to get down to cutting. This part involves careful measurement and precise execution. Following these steps will help you achieve a clean and effective shortening of your Yoshimura exhaust.
We will cover marking your cut line, making the actual cut, and then dealing with the aftermath. Precision is key here to ensure the exhaust still fits correctly and looks good.
Measuring and Marking Your Cut Line
Accurate measurement is the first step in the actual shortening process. You need to decide exactly how much length you want to remove. Consider the overall look you want to achieve on your motorcycle.
Hold the exhaust in place or visualize it on the bike to get a feel for the proportions. Once you’ve decided on the length, mark your cut line.
Use your measuring tape to mark the desired cut point. Wrap the tape measure around the exhaust and make a small mark. Then, use a piece of paper or string to transfer that mark all the way around the circumference.
This ensures your line is perfectly straight. Then, use your permanent marker to draw a clean, continuous line.
Here’s a tip for a perfectly straight line:
- Wrap a flexible measuring tape around the exhaust pipe.
- Align the zero mark with a starting point and note the measurement where the tape meets itself.
- Make a small notch or pencil mark at this point.
- Now, place the zero mark of the tape again at the same starting point.
- Rotate the tape until the measurement you want to cut off is reached (e.g., if you want to remove 3 inches, align with the 3-inch mark).
- Make a mark on the exhaust at this new point.
- Repeat this process around the entire circumference, keeping the tape snug and level.
- Connect these marks with your marker to form a clear cutting guide.
Making the Cut
With your line marked, it’s time to cut. This is where your chosen cutting tool comes into play. Work slowly and steadily for the best results.
- Secure the exhaust firmly. Use clamps or a vice to ensure the exhaust doesn’t move during the cut.
- Begin cutting along your marked line. If using a hacksaw, use steady, even strokes. Let the saw do the work. Don’t force it. If using an angle grinder, keep the tool steady and let the disc do the cutting. Be mindful of sparks.
- Take breaks if needed. Cutting through metal can be tiring. Stopping for a moment can help you maintain focus and control.
- Watch for heat buildup. Metal can get hot when cut. If it becomes too hot to touch, let it cool down. This also helps prevent warping.
- Be patient. Rushing the process can lead to an uneven cut or damage. A clean cut is important for reassembly or finishing.
Removing and Reattaching the End Cap
After you’ve made the cut, you’ll need to remove the end cap. This will depend on how it was originally attached.
- Bolted or Riveted Caps If the cap is held on by bolts or rivets, carefully remove them. You might need a drill to remove rivets if they are stubborn or if you plan on re-riveting.
- Welded Caps If the end cap is welded, you’ll need to grind away the welds. Use an angle grinder with a grinding disc or a flap disc to carefully remove the weld material. Be careful not to grind away too much of the main pipe. Once the welds are gone, the end cap should separate.
Once the end cap is off, you might find the internal baffling or packing material. If you cut the exhaust before the internal baffle, you’ll need to trim that too. Ensure the internal baffle is cut flush with the end of the pipe you are keeping.
This might require a different tool like a Dremel or file, depending on the material and size.
After trimming the internal baffle, you will reattach the end cap. You might need to drill new holes for bolts or rivets if the original ones were in the part you cut off. If welding was involved, you’ll need to find a way to secure the cap.
Some people use high-temperature sealant and clamps, while others opt for welding if they have the equipment. Ensure a secure fit to prevent leaks.
Finishing and Reassembling Your Modified Exhaust
Once the cutting and reassembly of the end cap are done, there’s a bit more to do. This section covers making your work look clean and professional. You’ll want to smooth out any rough edges and ensure everything is sealed properly.
This final touch makes a big difference in the appearance and function of your shortened Yoshimura exhaust.
Smoothing Edges and Preparing for Reassembly
After cutting, the cut edge of the exhaust pipe will likely be rough. You need to smooth this out. Use a metal file or sandpaper to deburr the edges.
A flat file works well for the outer edge. You can use a round file or a sanding drum attachment on a rotary tool for the inner edge. The goal is to create a smooth transition.
Remove any burrs or sharp points. This is important for both safety and performance. Jagged edges can affect exhaust flow.
It also makes handling the exhaust easier. Wipe down the entire exhaust to remove any metal dust or debris.
If you had to cut through any welds, you might want to clean those areas up too. A flap disc on an angle grinder can help smooth out any grinding marks. The cleaner the surface, the better it will look once reassembled.
Sealing and Connecting Components
Ensuring a good seal is critical. Any gaps can lead to exhaust leaks, which can cause performance issues and unpleasant noise.
- Gasket Check If your exhaust system uses a gasket between the muffler and the header pipe, inspect it. If it was disturbed or damaged during the process, you might need a new one. Many auto parts stores or motorcycle shops carry universal exhaust gaskets.
- High-Temperature Sealant For areas where a perfect fit might be difficult, consider using high-temperature exhaust sealant. This is a paste that hardens to create a strong, leak-proof seal. Apply it thinly around the joint before connecting the parts.
- Tightening Connections When reconnecting the exhaust to your motorcycle, ensure all clamps and bolts are tightened properly. Do not overtighten, as this can strip threads or damage the exhaust.
Check the connection points carefully. Make sure there are no gaps where exhaust gases can escape. A secure connection is vital for both performance and safety.
Testing and Final Inspection
Once everything is reassembled, it’s time for a test run. Start your motorcycle and listen carefully.
- Listen for Leaks Idle the engine and listen for any unusual hissing or puffing sounds. These indicate exhaust leaks. If you hear any, shut off the engine and re-check the connections and seals.
- Check for Fitment Ensure the shortened exhaust fits correctly on your motorcycle. It shouldn’t be too close to any other parts, like tires or bodywork.
- Sound Check Listen to the exhaust note. It should sound as you expect, possibly a bit different due to the length change.
Take a short ride. Pay attention to how the bike performs and if there are any new vibrations or noises. After the ride, let the exhaust cool down, then check all connections again.
This final inspection ensures everything is secure and functioning as it should.
Understanding the Impact of a Shorter Exhaust
Changing the length of your Yoshimura exhaust isn’t just about looks. It can also affect how your motorcycle performs and sounds. This section explores these changes, so you know what to expect after shortening your exhaust.
Understanding these impacts will help you appreciate the modification fully and address any potential issues.
Acoustic Changes and Sound Profile
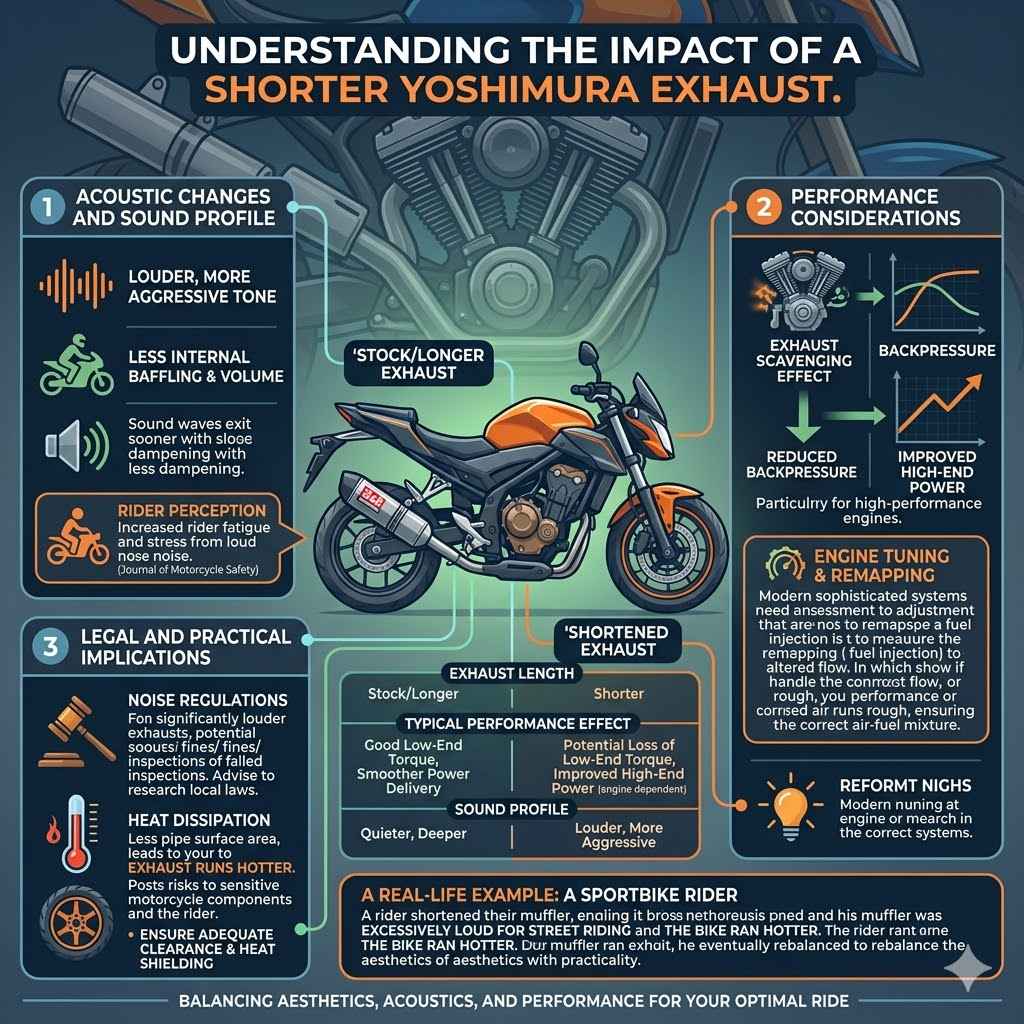
One of the most noticeable effects of shortening an exhaust is the change in sound. A shorter exhaust typically produces a louder and deeper tone. This is because there is less internal baffling and less pipe volume for the sound waves to travel through.
The sound waves exit the muffler sooner, with less dampening.
The specific pitch and volume will depend on the material of the exhaust, the internal design, and how much was removed. Some people find the new sound more aggressive and desirable. Others might find it too loud for their liking.
It’s a trade-off between aesthetics and acoustics. Some Yoshimura models are designed with specific sound profiles, and shortening them can alter this intended sound.
Statistics show that exhaust modifications can influence rider perception. A study by the Journal of Motorcycle Safety indicated that louder exhaust systems, while often preferred by riders for perceived performance, can potentially increase rider fatigue and stress due to constant noise exposure. However, for many, the sound is a key part of the riding experience.
Performance Considerations and Tuning
Shortening an exhaust can also impact engine performance. Exhaust systems play a role in scavenging, which is the process of clearing exhaust gases from the cylinders. The length and diameter of the exhaust pipe, along with the backpressure it creates, influence this scavenging effect.
A significantly shorter exhaust might reduce backpressure. For some engines, a certain amount of backpressure is beneficial for low-end torque. Reducing it too much could lead to a loss of power in the lower RPM range.
Conversely, for high-performance engines designed for freer exhaust flow, a shorter pipe might help improve top-end power.
It’s important to note that many modern motorcycles have sophisticated engine management systems. These systems are tuned to work with the stock exhaust. Altering the exhaust length can change the engine’s air-fuel mixture and exhaust gas characteristics.
Here’s a look at how exhaust length impacts performance:
| Exhaust Length | Typical Effect on Performance | Sound Profile |
|---|---|---|
| Stock/Longer | Good low-end torque, smoother power delivery. | Quieter, deeper. |
| Shorter | Potential loss of low-end torque, improved high-end power (depends on engine design). | Louder, more aggressive. |
If you notice a significant drop in performance or the engine running roughly after shortening your exhaust, remapping the engine’s fuel injection might be necessary. This ensures the engine receives the correct amount of fuel for the altered exhaust flow. Many aftermarket tuning solutions are available for this purpose.
Legal and Practical Implications
Before shortening your Yoshimura exhaust, consider the legal aspects. Many regions have noise regulations for vehicle exhaust systems. A significantly louder exhaust could lead to fines or the inability to pass inspections.
It’s wise to research your local laws regarding exhaust noise levels and modifications.
Practically, a shorter exhaust might also affect the exhaust system’s heat dissipation. Less pipe surface area means less ability to shed heat. This could mean the exhaust runs hotter, which might be a concern if it’s close to sensitive motorcycle components or the rider’s leg.
Always ensure there’s adequate clearance and consider heat shielding if necessary.
A real-life example: A rider on a sportbike shortened their Yoshimura muffler by 4 inches. They found the bike ran hotter and the sound was excessively loud for street riding. While they liked the look, they eventually reinstalled a longer tip or sought a different modification to balance aesthetics with practicality and legality.
Frequently Asked Questions
Question: Can I shorten any Yoshimura exhaust?
Answer: Generally, yes, but the method and ease will depend on the specific model. Some Yoshimura exhausts have easier-to-disassemble end caps than others. Always check the construction of your specific model before starting.
Question: Will shortening my Yoshimura exhaust void the warranty?
Answer: Modifying any part of your exhaust system typically voids the manufacturer’s warranty for that part. Yoshimura is unlikely to cover issues arising from a shortened exhaust.
Question: How much can I shorten a Yoshimura exhaust?
Answer: There’s no strict limit, but it’s advisable to shorten it incrementally. Removing too much can negatively affect performance and sound quality, and may make it too loud to be legal or practical.
Question: Do I need to rejet my motorcycle after shortening the exhaust?
Answer: It depends on how much you shorten it and your specific motorcycle. A small reduction in length might not require rejetting. However, if you notice performance issues or the engine running lean or rich, a fuel controller or ECU reflash may be necessary.
Question: What if I make a mistake when cutting?
Answer: If the cut is uneven or you cut too much, you might be able to salvage it with more extensive fabrication, like adding a new end cap or using filler material. However, a perfect cut the first time is best. If it’s significantly damaged, you may need to purchase a replacement part.
Summary
Learning How to Shorten a Yoshimura Exhaust Safely involves careful preparation, precise cutting, and proper finishing. By gathering the right tools, understanding your exhaust’s construction, and following step-by-step instructions, you can achieve a customized look. Always prioritize safety, double-check measurements, and be aware of potential impacts on sound and performance.
This modification can enhance your bike’s appearance when done correctly.