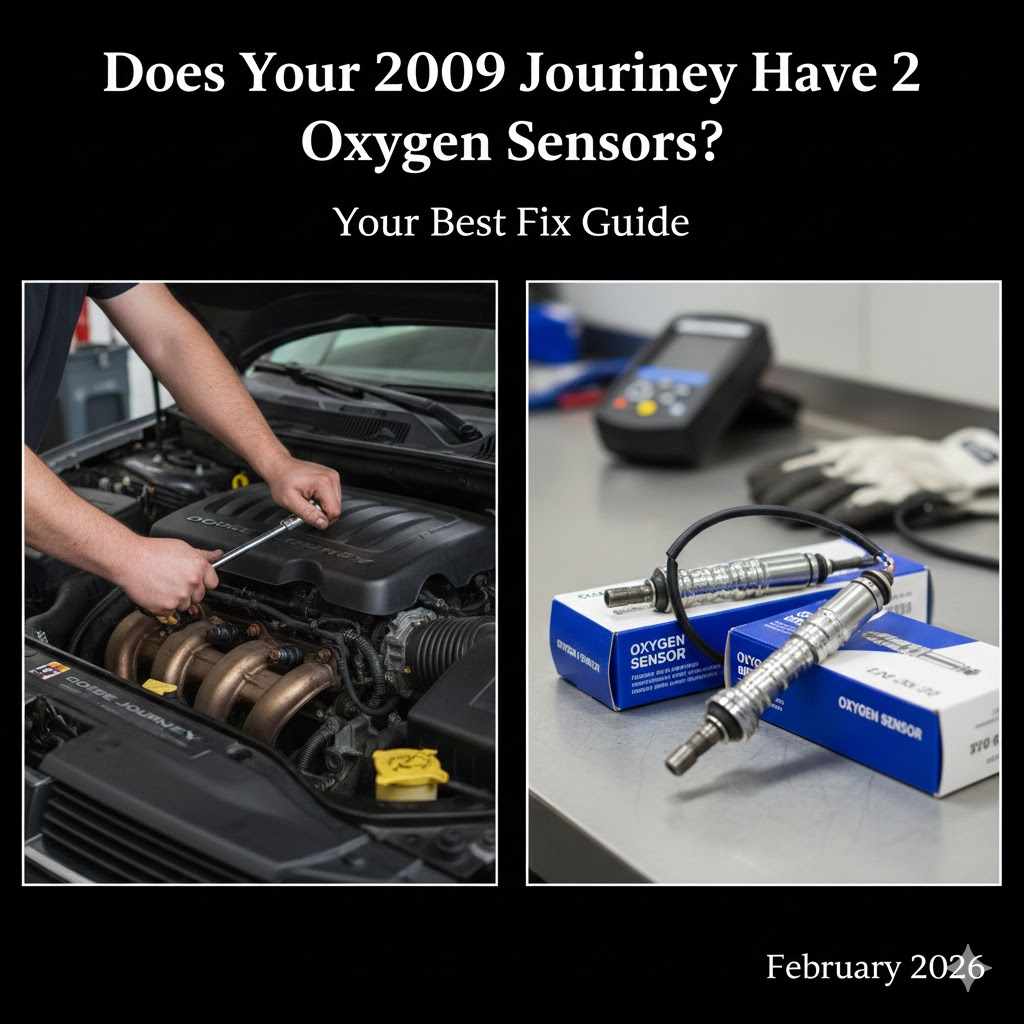
Does Your 2009 Dodge Journey Have 2 Oxygen Sensors? Your Best Fix Guide
Yes, a 2009 Dodge Journey with the 4-cylinder engine has two oxygen sensors. If you have the V6 engine, it has four oxygen sensors—two upstream and two downstream. Identifying your engine type is the first step to finding and fixing the correct sensor for better fuel economy and engine performance.
Is your check engine light glowing on your dashboard? It can be a frustrating sight. Many times, this little light points to a faulty oxygen sensor. You might wonder how many your 2009 Dodge Journey even has. Don’t worry, you’ve come to the right place. This guide is here to help you understand, locate, and even replace them yourself. We will walk through everything, step-by-step. Let’s get your Journey running smoothly again!
Understanding Oxygen Sensors in Your 2009 Dodge Journey
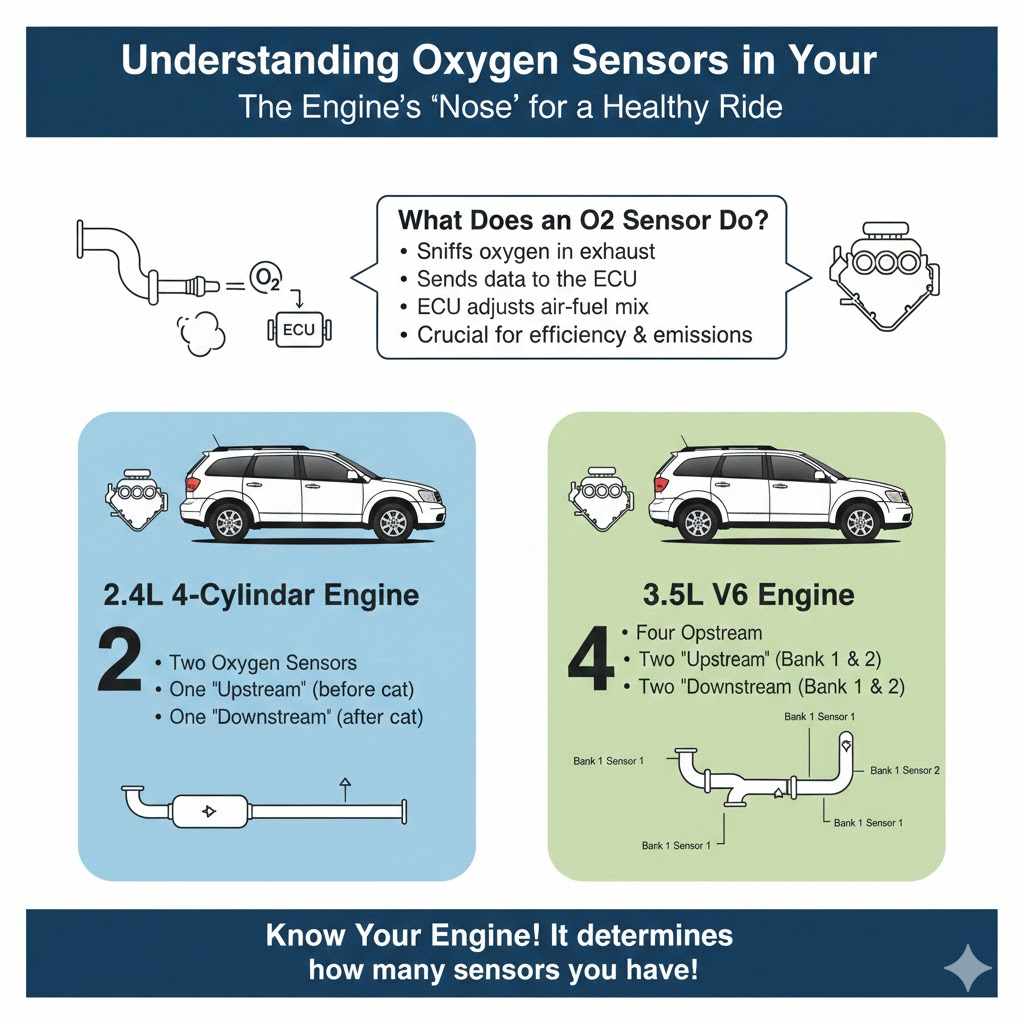
Before we dive into fixing things, let’s talk about what these sensors do. Think of an oxygen sensor, or O2 sensor, as a nose for your car’s exhaust. It sniffs the unburned oxygen in the gases leaving your engine. It then sends this information to your car’s main computer, the Engine Control Unit (ECU).
Why does the computer need this info? It helps the ECU figure out the perfect mix of air and fuel for your engine. A good mix means your car runs efficiently, burns less gas, and produces fewer harmful emissions. When a sensor goes bad, it sends wrong information, and your car’s performance suffers.
How Many Sensors Does My Journey Have? It Depends on the Engine.
The number of oxygen sensors in your 2009 Dodge Journey depends entirely on which engine is under the hood. Dodge offered two options that year, and each has a different setup.
- The 2.4L 4-Cylinder Engine: This engine has two oxygen sensors.
- The 3.5L V6 Engine: This more powerful engine has four oxygen sensors.
It’s that simple! If you’re not sure which engine you have, you can check the sticker under your hood or your owner’s manual. Knowing your engine type is the key to buying the right parts and finding where they go.
Upstream vs. Downstream: What’s the Difference?
You’ll often hear the terms “upstream” and “downstream” when talking about O2 sensors. These names just describe their location relative to a very important part of your exhaust system: the catalytic converter.
- Upstream Sensor (Bank 1, Sensor 1): This sensor is located before the catalytic converter. It measures the raw exhaust coming directly from the engine. This is the primary sensor the ECU uses to adjust the air-fuel mixture in real-time. It has the biggest impact on performance and fuel economy.
- Downstream Sensor (Bank 1, Sensor 2): This sensor is located after the catalytic converter. Its job is to check the efficiency of the catalytic converter itself. It sniffs the exhaust after it has been cleaned up. If the readings from the upstream and downstream sensors are too similar, it tells the computer that the catalytic converter isn’t working properly.
For V6 engines, you have two sets of these sensors, one for each “bank” of cylinders. “Bank 1” is typically the side of the engine with cylinder #1, and “Bank 2” is the other side. So, a V6 Journey will have a Bank 1 Sensor 1, Bank 1 Sensor 2, Bank 2 Sensor 1, and Bank 2 Sensor 2.
Where to Find the Oxygen Sensors on Your 2009 Dodge Journey
Now for the hands-on part: finding the sensors. You’ll need to look along your exhaust pipe. It runs from the engine all the way to the back of your car. The sensors look like small spark plugs with a wire coming out of the top.
Location on a 2.4L 4-Cylinder Engine
Finding the sensors on the 4-cylinder model is straightforward since there are only two.
- Upstream Sensor (Bank 1, Sensor 1): Look at the front of the engine, near the top. You will see the exhaust manifold, which is a set of pipes collecting exhaust from the engine. The upstream sensor is screwed directly into this manifold. It’s often the easiest one to see and reach.
- Downstream Sensor (Bank 1, Sensor 2): To find this one, you’ll need to look underneath the car. Follow the exhaust pipe from the engine toward the back. After a short distance, you’ll find the catalytic converter (a small, muffler-like box). The downstream sensor is screwed into the pipe just after this converter.
Location on a 3.5L V6 Engine
With four sensors, the V6 can seem more complex, but the logic is the same. You just have two of everything.
- Bank 1 (Rear Bank): This is the bank of cylinders closer to the firewall (the wall between the engine and the passenger cabin).
- Upstream Sensor (Bank 1, Sensor 1): This is often the trickiest one to reach. It’s located on the rear exhaust manifold, tucked between the engine and the firewall.
- Downstream Sensor (Bank 1, Sensor 2): Follow the exhaust pipe from the rear bank down and under the car. You’ll find this sensor screwed into the pipe after the first catalytic converter.
- Bank 2 (Front Bank): This is the bank of cylinders closer to the front bumper and radiator.
- Upstream Sensor (Bank 2, Sensor 1): This one is much easier to see. It’s on the front exhaust manifold, right at the front of the engine bay.
- Downstream Sensor (Bank 2, Sensor 2): Follow the exhaust from the front bank. This sensor is located after the second catalytic converter, further down the exhaust system.
Signs Your Oxygen Sensor is Failing
Your car will usually give you a few clear hints that an O2 sensor is on its way out. If you notice any of these, it’s time to investigate.
- Check Engine Light: This is the most common sign. A code reader can pull specific codes like P0135, P0141, or P0171, which point directly to a faulty sensor or circuit.
- Poor Fuel Economy: Are you visiting the gas station more often? A bad sensor can cause your engine to run “rich,” meaning it uses more fuel than it needs to.
- Rough Idle or Misfires: If your car shakes or sputters when you’re stopped, the incorrect air-fuel mixture from a bad sensor could be the cause.
- Failed Emissions Test: O2 sensors are a critical part of your car’s emissions system. A bad one is an almost guaranteed way to fail an emissions inspection.
- Sluggish Performance: Does your Journey feel slow or hesitant when you accelerate? The engine isn’t getting the right instructions from the ECU, leading to poor performance.
The Best Fix: A Step-by-Step Replacement Guide
Ready to get your hands dirty? Replacing an oxygen sensor is a very achievable job for a beginner. With the right tools and a little patience, you can save a lot of money compared to a trip to the mechanic. Let’s get started!
Gather Your Tools and Parts
Having everything ready before you start makes the job go much smoother. You won’t need a huge collection of tools, just a few key items.
| Tool/Part | Why You Need It |
|---|---|
| New Oxygen Sensor | Make sure you get the correct one for your engine and sensor location (e.g., Bank 1, Sensor 1). |
| OBD-II Code Scanner | This is essential for confirming which sensor is bad and for clearing the check engine light afterward. |
| Oxygen Sensor Socket | This special socket has a slit down the side to fit over the sensor’s wire. It’s a must-have. |
| Ratchet and Extension | To turn the O2 sensor socket. An extension can help you reach tight spots. |
| Penetrating Oil (like PB Blaster or WD-40) | Sensors can get seized in the exhaust pipe due to heat and rust. This helps loosen them. |
| Anti-Seize Compound | This prevents the new sensor from getting stuck, making future removal much easier. (Note: Many new sensors come with it pre-applied). |
| Safety Glasses and Gloves | Always protect your eyes and hands when working under a car. |
| Jack and Jack Stands | You may need these to safely lift the vehicle to access the downstream sensors. |
Safety First!
Your safety is the top priority. Before you touch a single bolt, follow these simple rules:
- Work on a Cool Engine: Your exhaust system gets extremely hot. Let the car sit for at least a few hours to cool down completely before you start.
- Use a Level Surface: Always work on flat, solid ground. Never work on a slope or soft dirt.
- Secure the Vehicle: If you need to lift your Journey, use a proper jack at the designated lift points and ALWAYS secure it with jack stands. For more information on vehicle safety, you can refer to guidelines from the National Highway Traffic Safety Administration (NHTSA).
- Disconnect the Battery (Optional but Recommended): Disconnecting the negative battery terminal is a good practice to prevent any electrical shorts.
The Replacement Process: Step-by-Step
Follow these steps carefully, and you’ll have that new sensor installed in no time.
- Identify the Bad Sensor: Plug your OBD-II scanner into the port under your dashboard (usually near the steering column). Turn the key to the “On” position without starting the engine. Read the diagnostic trouble codes (DTCs). The code will tell you exactly which sensor has failed (e.g., P0135 points to a problem with the Bank 1, Sensor 1 heater circuit). Write it down!
- Locate the Sensor: Using our guide from earlier, find the physical location of the faulty sensor on your exhaust system.
- Apply Penetrating Oil: Spray a generous amount of penetrating oil onto the base of the old sensor where it screws into the exhaust pipe. Let it sit for at least 15-20 minutes. This will make removal much easier. If it’s really stuck, you can apply it and let it sit overnight.
- Disconnect the Electrical Connector: Follow the wire from the sensor to its electrical plug. There’s a small plastic tab you’ll need to press to release the clip. Be gentle—these clips can become brittle over time. Never pull on the wires themselves.
- Remove the Old Sensor: Place your O2 sensor socket over the sensor, making sure the wire fits through the slot. Attach your ratchet and turn counter-clockwise to loosen it. It might take a bit of force to break it free.
- Prepare the New Sensor: Unbox your new sensor. Most new sensors come with anti-seize compound already applied to the threads. If yours doesn’t, apply a small amount to the threads only. Be very careful not to get any on the sensor tip itself, as this can ruin it.
- Install the New Sensor: Carefully thread the new sensor into the exhaust pipe by hand to avoid cross-threading. Once it’s hand-tight, use your socket and ratchet to snug it down. Check the new sensor’s box for specific torque specs, but a good rule of thumb is about a quarter-turn past hand-tight. Do not over-tighten!
- Reconnect the Electrical Connector: Plug the new sensor’s wire back into the vehicle’s wiring harness. You should hear a “click” to confirm it’s secure.
- Clear the Trouble Codes: Get back in your car and use your OBD-II scanner to erase the diagnostic codes. This will turn off the check engine light.
- Test Drive: Start the car and take it for a 10-15 minute drive. This allows the car’s computer to recognize the new sensor and adjust accordingly. The check engine light should stay off. Congratulations, you’re done!
Choosing Your Replacement Sensor: OEM vs. Aftermarket
When you shop for a new O2 sensor, you’ll see two main types: OEM and aftermarket. Here’s a quick breakdown to help you decide.
| Sensor Type | Pros | Cons |
|---|---|---|
| OEM (Original Equipment Manufacturer) |
|
|
| Aftermarket |
|
|
For most DIYers, a high-quality aftermarket sensor from a trusted brand like Bosch, Denso, or NTK is a fantastic choice that balances cost and performance perfectly.
Frequently Asked Questions (FAQ)
1. How much does it cost to replace an O2 sensor on a 2009 Dodge Journey?
If you do it yourself, you can expect to pay between $30 and $80 for the part itself. If you take it to a mechanic, the total cost including labor will likely be between $150 and $300, depending on the shop’s labor rates and which sensor needs replacing.
2. Can I drive my car with a bad oxygen sensor?
You can, but it’s not recommended for long. Driving with a bad O2 sensor will cause poor fuel economy (wasting money), increase harmful emissions, and can eventually lead to more expensive damage to your catalytic converter, which can cost over $1,000 to replace.
3. What is the most common O2 sensor to fail?
The upstream sensor (Bank 1, Sensor 1) is usually the one that fails first. It is exposed to the hottest and dirtiest exhaust gases directly from the engine, so it works the hardest and tends to wear out faster than the downstream sensor.
4. How long do oxygen sensors typically last?
Modern oxygen sensors are designed to last a long time, often between 60,000 and 100,000 miles. However, factors like engine condition, fuel quality, and driving habits can affect their lifespan.
5. Do I need a special tool to replace an oxygen sensor?
Yes, it is highly recommended that you use an “oxygen sensor socket.” This special tool has a cut-out on the side that allows it to fit over the sensor’s wire. While you might be able to use a regular deep socket in some cases, the O2 sensor socket makes the job much easier and safer.
6. Will replacing my O2 sensor fix my bad gas mileage?
If a faulty O2 sensor was the cause of your poor fuel economy, then yes, replacing it should bring your gas mileage back to normal. A new sensor allows the engine’s computer to create the most efficient air-fuel mixture, saving you money at the pump.
7. I replaced the sensor, but the check engine light came back on. What now?
If the light returns, first, re-read the code. If it’s the same code, check your work. Ensure the electrical connection is secure and that you didn’t damage the wiring. If it’s a different code, you may have another underlying issue. Problems like vacuum leaks or a faulty MAF sensor can sometimes mimic O2 sensor symptoms.
Conclusion: You’ve Got This!
Tackling an automotive repair like replacing an oxygen sensor can feel intimidating at first, but now you know everything you need to succeed. You know that your 2009 Dodge Journey has either two (4-cylinder) or four (V6) sensors. You know what they do, where to find them, and how to spot the signs of failure.
Most importantly, you have a clear, step-by-step guide to replace one yourself. By following the steps, putting safety first, and taking your time, you can fix your vehicle, turn off that pesky check engine light, and restore your Journey’s performance and efficiency. It’s a rewarding project that not only saves you money but also builds your confidence as a car owner. Happy wrenching!