Is Replacing Exhaust Tip Bad? Essential Guide
Quick Summary: Replacing your exhaust tip is generally not bad; it’s a straightforward enhancement that can improve your car’s look and sound without negatively impacting performance or safety. This guide will walk you through why, how, and what to consider before you swap yours out.
Many car owners wonder about tiny upgrades that can make a big difference. One of these is the exhaust tip. You might see shiny, larger, or uniquely shaped tips on other cars and think, “Could I do that?” or perhaps, “Is this going to cause problems with my car?” You’re not alone in asking, “Is replacing exhaust tip bad?” The good news is, for the most part, it’s a simple and safe modification. This guide is here to demystify the process, showing you that it’s an achievable DIY project for most car owners. We’ll cover everything from understanding why you’d want to change it to the easy steps involved, and what to avoid.
Why Consider Replacing Your Exhaust Tip?
Changing your exhaust tip is more about customization and a bit of personal flair than a performance upgrade. It’s one of the easiest and most affordable ways to give your vehicle a more distinct look. Think of it like changing the shoes on your car – it can completely alter its style!
Aesthetic Appeal
Let’s be honest, the stock exhaust tip that came with your car might be a bit plain. Often, manufacturers use simple, single-walled, or smaller tips. Replacing it with a larger, polished chrome, carbon fiber, or even a uniquely angled tip can instantly give your car a sportier, more aggressive, or more luxurious appearance. It’s a quick win for your car’s curb appeal.
Sound Enhancement (Minor)
While an exhaust tip alone won’t drastically change your car’s sound profile, a larger or differently shaped tip can subtly alter the exhaust note. Sometimes, it can make the existing sound a bit deeper or more resonant. However, for significant sound changes, you’d typically need to look at muffler or full exhaust system replacements.
Protection & Durability
Some aftermarket exhaust tips are made from more durable materials, like stainless steel or titanium, which can resist rust and corrosion better than standard tips. This means they’ll look good for longer and can offer a bit more protection against road debris or harsh weather conditions over time.
Personalization
Your car is an extension of your personality. Swapping out an exhaust tip is a simple way to express your style. Whether you prefer a sleek, subtle look or a bold, attention-grabbing one, there’s a tip out there for you.
Is Replacing Exhaust Tip Bad? The Truth for Beginners
The short answer is: No, replacing your exhaust tip is generally not bad for your car. It’s a cosmetic or minor functional change that, when done correctly, poses no risk. Think of it this way: the exhaust tip is the very end of your exhaust system. It’s primarily responsible for directing the exhaust gases away from your vehicle and, visually, giving your car’s rear a finished look. It doesn’t impact engine performance, emissions, or the fundamental functioning of your exhaust system. However, like any car maintenance, there are best practices to follow to ensure it’s done safely and effectively.
Common Concerns Addressed:
- Performance Impact: Replacing just the tip won’t affect your engine’s horsepower or fuel efficiency. These are determined by the engine, catalytic converter, muffler, and piping. The tip is just the final flourish.
- Emissions: The exhaust tip has no role in controlling your car’s emissions. That’s the job of the catalytic converter.
- Noise Levels: As mentioned, the change in sound is usually minimal. You won’t suddenly have a roaring race car if your original exhaust system is quiet.
- Legality: In most places, simply replacing the exhaust tip is perfectly legal as long as it doesn’t make your vehicle excessively loud (i.e., exceeding local noise ordinances) or have sharp edges that could be a safety hazard.
Types of Exhaust Tips
Exhaust tips come in various styles, materials, and mounting methods. Understanding these will help you choose the right one for your car and your DIY skills.
Materials:
- Chrome-plated Steel: Popular for its shiny appearance and affordability. Can be prone to rust over time if not cared for.
- Stainless Steel: More durable and corrosion-resistant than chrome-plated steel. Offers a lasting shine and a premium look.
- Carbon Fiber: Lightweight, strong, and offers a very modern, sporty aesthetic. Can be more expensive.
- Titanium: Extremely lightweight and strong, often featuring a distinctive burnt blue or rainbow finish. Usually the most expensive option.
Mounting Styles:
This is crucial for installation. Most tips fall into one of these categories:
- Clamp-on: These are the easiest to install. They slide over your existing exhaust pipe and are secured with bolts or a clamp. Ideal for beginners.
- Weld-on: These require welding for a permanent, secure fit. This is best left to professional exhaust shops or those with welding experience.
- Bolt-on (Direct Fit): Some tips are designed to bolt directly onto a specific exhaust system, often using existing hanger points or adapter pieces. These can range from easy to moderately difficult depending on design.
Shapes and Sizes:
- Straight Cut: A clean, no-nonsense look.
- Rolled Edge (Double Wall): Features a rolled edge on a thicker, often double-walled tip for a beefier appearance.
- Angled Cut: Provides a sporty look, following the angle of the bumper.
- Oversized/Universal: Larger diameter tips that can give a more muscular look.
- Specific Fit: Designed for particular makes and models, ensuring a perfect match.
DIY vs. Professional Installation: What’s Right for You?
The good news is that most exhaust tip replacements are DIY-friendly! For clamp-on and some bolt-on styles, you likely won’t need much more than a few basic tools and a bit of patience.
DIY Installation:
Pros:
- Saves money on labor costs.
- Provides a great sense of accomplishment.
- Allows you to learn more about your car.
Professional Installation:
Pros:
- Ensures a perfect, secure fit, especially for complex or weld-on types.
- Saves you time and potential frustration.
- Professional shops have specialized tools and expertise.
For this guide, we’ll focus on the easiest DIY method: the clamp-on exhaust tip.
Essential Tools and Materials for Replacing Your Exhaust Tip (DIY)
Before you start, gather everything you’ll need. This makes the process smooth and prevents last-minute runs to the store.
- New Exhaust Tip: Make sure it’s compatible with your car’s exhaust pipe diameter and of a style you like. Clamp-on designs are great for beginners.
- Socket Wrench Set or Adjustable Wrench: To tighten the clamp or bolts.
- Screwdriver (Phillips or Flathead): Might be needed depending on the clamp design.
- Wire Brush or Steel Wool: To clean the end of your existing exhaust pipe.
- Penetrating Oil (e.g., WD-40): To help loosen any stubborn clamps or bolts, though usually not needed for new installations.
- Gloves: To protect your hands from dirt and sharp edges.
- Safety Glasses: Always a good idea when working on your car.
- Rag or Shop Towels: For cleaning up.
Step-by-Step Guide: How to Replace Your Exhaust Tip (Clamp-On Style)
This guide focuses on the most common and beginner-friendly method: the clamp-on exhaust tip. It requires minimal tools and no modifications to your existing exhaust system.
Step 1: Cool Down Your Exhaust System
This is crucial for safety. Never work on a hot exhaust system. Hot exhaust pipes can cause severe burns. Allow your car to sit for at least an hour, or preferably longer, until the exhaust components are completely cool to the touch. You can always perform this step when the car has been parked overnight.
Step 2: Measure Your Existing Exhaust Pipe
Before buying a new tip, measure the outer diameter of your current exhaust pipe where the new tip will attach. This ensures you get a tip that will fit snugly. Most clamp-on tips come in various sizes, so having this measurement is vital. You can often find your car’s specifications online in your owner’s manual or reputable automotive sites that list vehicle specs.
Step 3: Clean the End of Your Existing Exhaust Pipe
Use a wire brush or steel wool to thoroughly clean the end of your current exhaust pipe. Remove any rust, dirt, or carbon buildup. A clean surface will ensure the new tip mounts securely and looks its best. Wipe it down with a rag afterwards.
Step 4: Position the New Exhaust Tip
Slide the new exhaust tip onto the cleaned end of your existing exhaust pipe. Ensure it’s pushed on as far as it will comfortably go. Adjust its position so that it looks straight and is centered relative to your car’s bumper, or how you want it to appear visually.
Tip: Some drivers like to have the tip stick out a bit beyond the stock pipe, while others prefer it flush. This is purely aesthetic and up to your preference.
Step 5: Secure the New Exhaust Tip
Locate the clamp or bolts on the new exhaust tip. Use your socket wrench or screwdriver to gradually tighten these fasteners. Tighten them evenly on all sides of the clamp. Don’t overtighten initially; snug them up to hold the tip in place.
Step 6: Check Alignment and Final Tightening
Step back and look at the tip from a few angles. Does it look straight? Is it centered? Make any minor adjustments needed. Once you’re happy with the alignment, fully tighten the clamp bolts until the tip is held very securely. It should not wiggle or move at all. Again, avoid extreme overtightening, which could damage the clamp or the tip.
Step 7: Test Fit and Sound Check
Start your car and let it run for a few minutes. Listen for any unusual rattling or exhaust leaks. While the tip itself shouldn’t cause leaks, a poorly fitted tip might shift and create noise. Ensure the tip remains firmly in place.
Tips for Choosing the Right Exhaust Tip
Selecting the perfect exhaust tip involves more than just picking the shiniest one. Here are some factors to consider:
Compatibility is Key
The most crucial factor is ensuring the tip fits your car’s existing exhaust pipe. Check the diameter carefully. Many aftermarket tips are universal, meaning they fit a range of diameters via their clamping mechanism. Others are model-specific.
Material Matters
Stainless steel offers a great balance of durability, appearance, and cost. Carbon fiber looks modern and is lightweight. Chrome is classic but requires more upkeep to prevent rust.
Style and Aesthetics
Consider your car’s overall look. A subtle tip might complement a luxury sedan, while a larger, angular one could suit a sports car. Look at your bumper’s design – does it have cutouts? What kind of look are you going for?
Size Appropriately
An oversized tip can look great, but it should still look proportional to your car. If it’s too large, it can look awkward. Similarly, if it’s too small, it might get lost or look undersized.
Legality and Noise
Always check your local regulations regarding vehicle modifications. While tips are usually fine, excessively large or loud-sounding setups could draw unwanted attention from law enforcement.
Maintenance for Your New Exhaust Tip
To keep your new exhaust tip looking its best and lasting longer, a little regular care goes a long way.
- Regular Cleaning: Wash your car regularly, including the exhaust tip. Use a good car wash soap and water. For chrome or stainless steel, a microfiber cloth is best to avoid scratches. Avoid abrasive cleaners.
- Polishing: For chrome and stainless steel, consider using a metal polish specifically designed for automotive use every few months. This will restore shine and help protect the metal. Brands like Meguiar’s or Mothers offer excellent metal polishes.
- Ceramic Coating (Optional): For ultimate protection and shine, especially for high-end stainless steel or carbon fiber tips, a ceramic coating can be applied. This creates a durable, hydrophobic layer that repels dirt and makes cleaning easier. You can find DIY ceramic coating kits.
- Inspect the Clamp: Periodically check the clamp securing the tip. Ensure it’s still tight and not showing signs of rust or damage.
Troubleshooting Common Issues
Even with simple modifications, minor hiccups can occur. Here’s how to handle them:
Rattling Noise
Cause: The tip is not tight enough and vibrating against the exhaust pipe or bumper. It could also be touching something it shouldn’t.
Solution: Re-tighten the clamp securely. Check if the tip is positioned correctly and not touching other parts of the car.
Tip Spins Freely
Cause: The clamp is not providing enough grip, or the pipe surface isn’t clean enough for traction.
Solution: Ensure the end of the exhaust pipe is clean and free of rust. Re-tighten the clamp, ensuring it bites into the pipe. If the clamp is damaged or stripped, you may need a new clamp. For some clamp-on styles, a small amount of high-temperature exhaust sealant can help grip, but this is usually not necessary for basic clamp-ons.
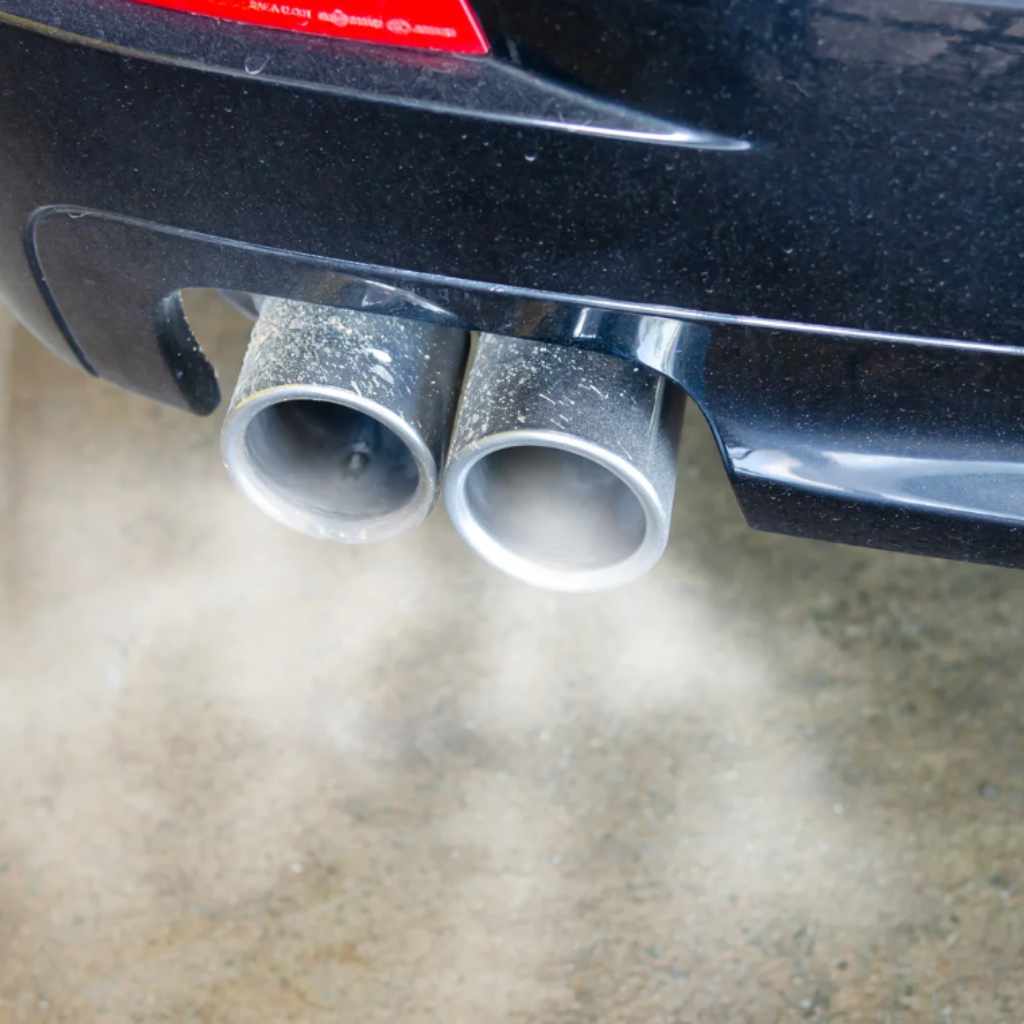
Corrosion or Rust (Especially on Chrome)
Cause: Moisture, road salt, and lack of cleaning can cause rust, particularly on lower-quality chrome plating.
Solution: For light rust, try using a dedicated chrome polish and a fine steel wool (0000 grade) or a polishing compound with a microfiber cloth. For significant rust, the tip may need to be replaced. Consider upgrading to stainless steel next time. Regular cleaning and polishing are the best prevention.
When You Should Seek Professional Help
While most exhaust tip replacements are simple, there are situations where it’s best to consult a professional:
- Weld-on Tips: These require welding equipment and expertise. Improper welding can lead to leaks or structural issues.
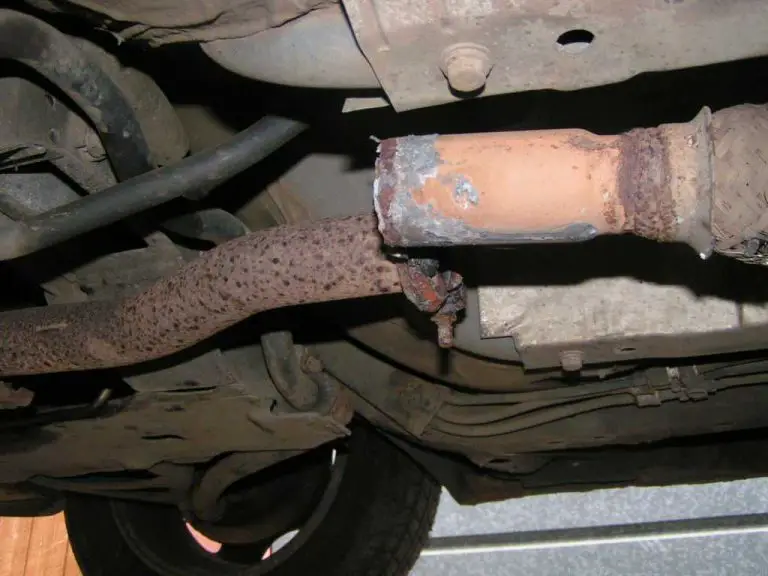
- Rust-Seized Existing Tip: If your current exhaust tip is severely rusted and stuck to the pipe, trying to force it off can damage the underlying exhaust pipe. A professional shop has the tools to remove it safely.
- Complex Exhaust Systems: Some vehicles have integrated exhaust systems or unique mounting points that require specialized knowledge.
- Desire for a Performance Upgrade: If you’re looking to change the sound significantly or improve performance, a professional exhaust shop can advise on and install larger mufflers, resonators, or full cat-back systems.
A reputable exhaust shop or a general auto repair facility can perform these tasks efficiently and safely. You can usually find a local shop through online searches for “auto exhaust repair near me” or checking reviews on sites like Google Maps.
Frequently Asked Questions (FAQ)
Q1: Will changing my exhaust tip affect my car’s warranty?
A: In most cases, no. Replacing an exhaust tip is considered a cosmetic modification and typically doesn’t void your vehicle’s factory warranty. However, it’s always a good idea to check your specific warranty documentation or ask your dealership if you have concerns.
Q2: How much does it typically cost to replace an exhaust tip?
A: For a DIY clamp-on tip, the cost is just the price of the tip itself, which can range from $20 to $150 or more, depending on the material and brand. Professional installation for a simple tip might add another $50-$100 in labor.
Q3: Can I use exhaust tape or sealant to attach a tip?
A: While some high-temperature exhaust sealants can help create a better seal or add grip, they are generally not a substitute for proper clamping or welding. For clamp-on tips, relying solely on sealant without a secure clamp is not recommended and could lead to the tip falling off.
Q4: What’s the difference between a muffler tip and an exhaust tip?
A: An exhaust tip is the decorative end piece that attaches to the tailpipe. A muffler is a functional component of the exhaust system designed to reduce noise. Sometimes, a new muffler comes with an integrated tip, or you might replace both the muffler and add a new tip.