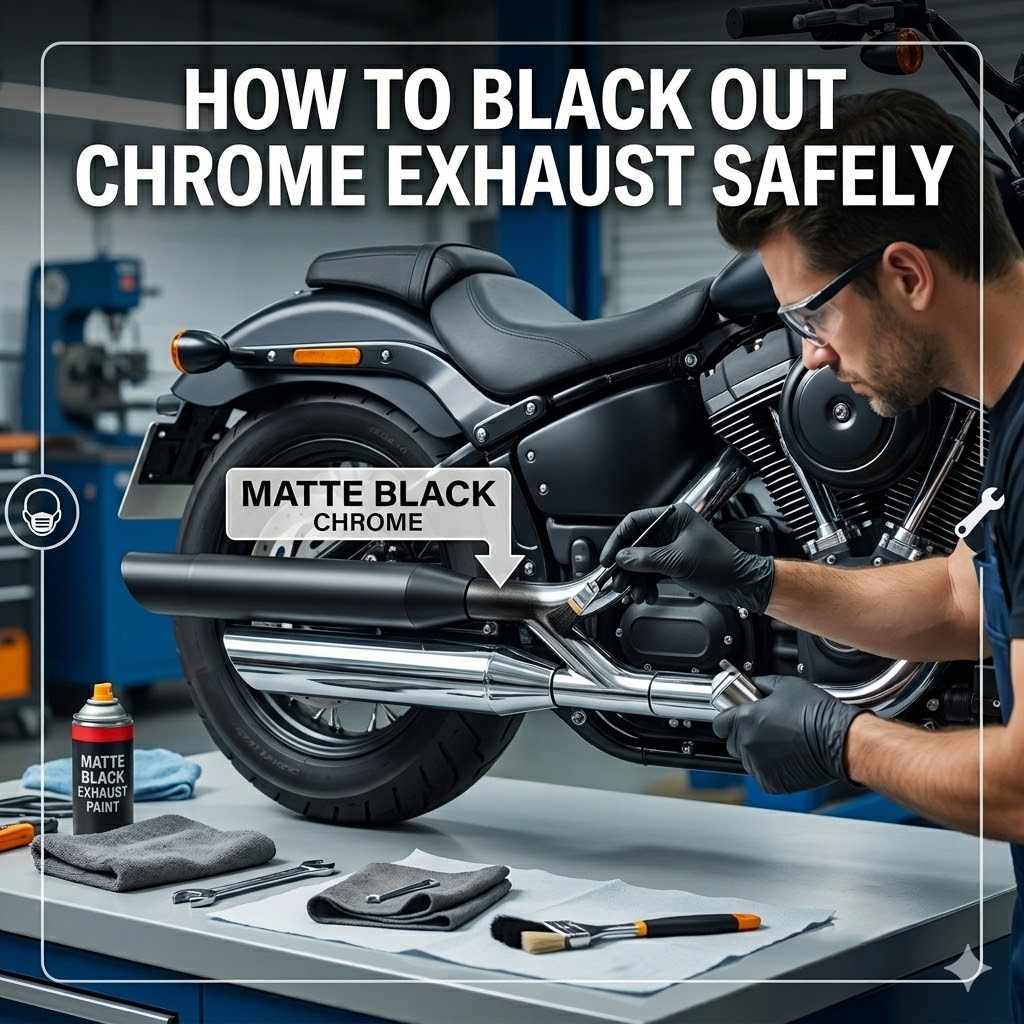
How to Black Out Chrome Exhaust Safely
Doing a custom paint job on your car’s exhaust can really change its look. Many car owners want a sleek, blacked-out exhaust to match a stealthy or aggressive style. However, if you’re new to car modifications, figuring out How to Black Out Chrome Exhaust Safely might seem a bit tricky. You might worry about damaging the chrome, the finish not lasting, or even safety hazards. Don’t worry! This guide breaks down the process into simple steps so anyone can achieve a great result. Let’s get started on making your exhaust look amazing.
Choosing the Right Method for Blacking Out Exhaust
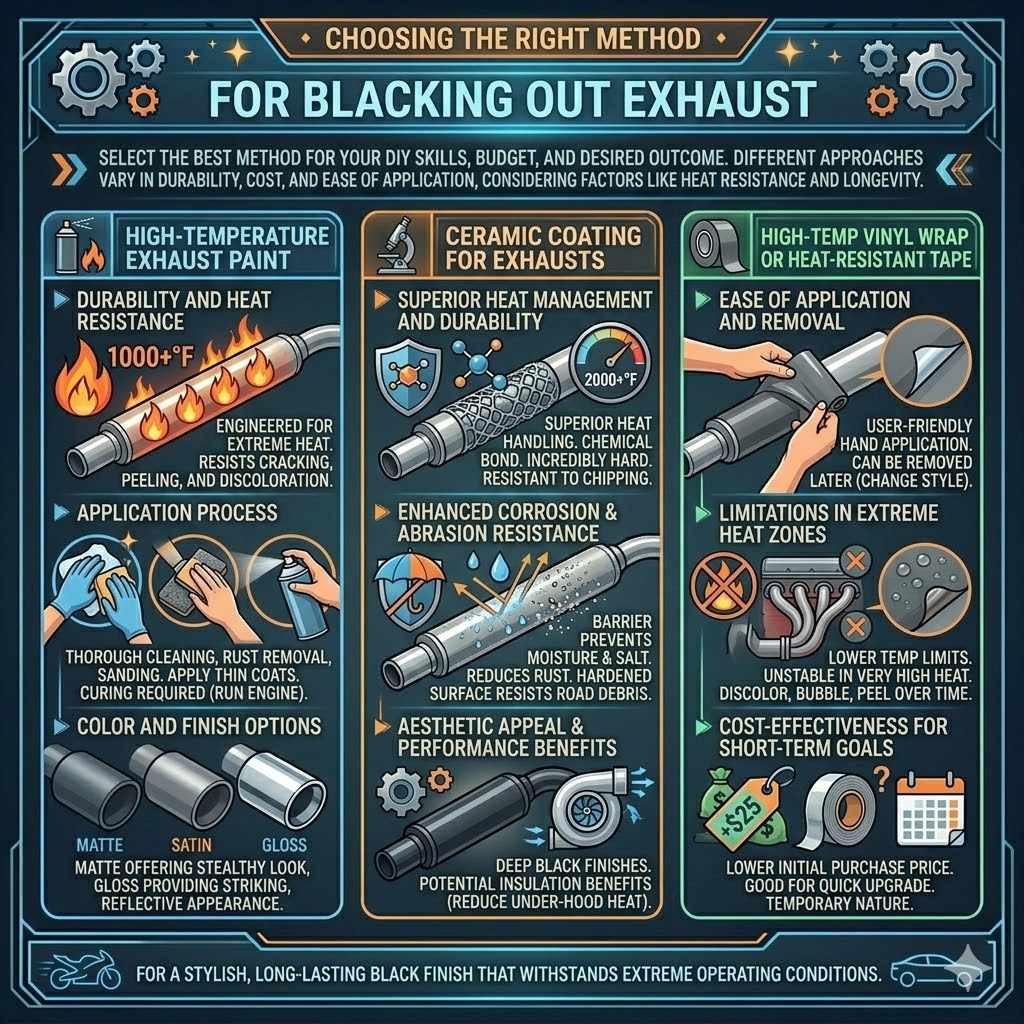
Selecting the best method to transform your chrome exhaust into a deep, matte, or gloss black finish is a key first step. Different approaches offer varying levels of durability, cost, and ease of application. Understanding these options will help you pick the one that best suits your DIY skills, budget, and desired outcome. This section explores the most common and effective ways to achieve that desired blackout effect, considering factors like heat resistance and longevity.
High-Temperature Exhaust Paint
This is often the go-to method for its balance of accessibility and performance. High-temperature exhaust paint is specifically formulated to withstand the extreme heat generated by exhaust systems, which can easily reach hundreds of degrees Fahrenheit. Unlike regular spray paints, it contains special binders and pigments that resist cracking, peeling, and discoloration under these harsh conditions. When applying this paint, surface preparation is absolutely critical to ensure proper adhesion and a long-lasting finish.
Durability and Heat Resistance
High-temperature exhaust paints are engineered to handle temperatures well over 1000 degrees Fahrenheit (about 538 degrees Celsius), sometimes even higher depending on the brand and specific product. This extreme heat resistance means the paint is unlikely to burn off or degrade quickly, which is essential for an exhaust component that constantly experiences thermal stress. The binders in these paints form a strong bond with the metal surface, creating a protective layer that can withstand thermal expansion and contraction without failing. A properly applied coat can last for years under normal driving conditions.
Application Process
The application typically involves cleaning the exhaust thoroughly, removing all rust, dirt, grease, and any existing chrome polish. Many recommend sanding the surface to create a profile for the paint to adhere to. After cleaning and drying, multiple thin coats of the high-temperature paint are applied, allowing adequate drying time between each layer as per the manufacturer’s instructions. Curing the paint often involves running the engine to reach operating temperature, which helps the paint harden and reach its full durability.
Color and Finish Options
While the primary goal is black, these paints come in various shades of black, including matte, satin, and gloss finishes. Matte finishes offer a subtle, stealthy look, while gloss finishes provide a more striking, reflective appearance. Some specialty paints might also offer ceramic coatings, which can provide even greater durability and heat protection. The choice of finish depends entirely on the aesthetic you are aiming for with your vehicle.
Ceramic Coating for Exhausts
Ceramic coating is a more premium and often more durable option. It involves applying a liquid polymer that chemically bonds with the metal surface, creating a hard, protective, and aesthetically pleasing layer. This method offers superior heat resistance and can also provide benefits like corrosion protection and easier cleaning. While it might require professional application for the best results, some DIY kits are available for enthusiasts.
Superior Heat Management and Durability
Ceramic coatings are renowned for their ability to handle extremely high temperatures, often exceeding 2000 degrees Fahrenheit (about 1093 degrees Celsius). This makes them ideal for the hottest parts of an exhaust system. The coating forms a molecular bond with the metal, creating a surface that is incredibly hard and resistant to chipping, scratching, and fading. This exceptional durability often translates to a longer lifespan compared to traditional paints, making it a worthwhile investment for many vehicle owners.
Enhanced Corrosion and Abrasion Resistance
Beyond just heat, ceramic coatings offer excellent protection against the elements. They create a barrier that prevents moisture and road salt from reaching the metal, significantly reducing the risk of rust and corrosion. The hardened surface is also more resistant to minor abrasions from road debris, helping to maintain the exhaust’s appearance over time. This multi-faceted protection ensures your exhaust looks good and stays protected from environmental damage.
Aesthetic Appeal and Performance Benefits
Ceramic coatings can dramatically alter the appearance of your exhaust, offering deep black finishes in matte, satin, or gloss. Some coatings can also help to insulate the exhaust, reducing under-hood temperatures, which can potentially lead to minor performance gains by keeping the intake air cooler. The smooth surface of the coating can also help exhaust gases flow more efficiently, though this effect is typically subtle for most street vehicles.
High-Temperature Vinyl Wrap or Heat-Resistant Tape
For a less permanent or more temporary solution, specialized high-temperature vinyl wraps or heat-resistant tapes can be used. These materials are designed to adhere to metal surfaces and withstand moderate heat. They offer a quick way to change the look of your exhaust, and they can be removed later if you decide to revert to the original chrome or try a different style. However, their durability is generally lower than paint or ceramic coatings, especially in very high-heat areas.
Ease of Application and Removal
Vinyl wraps and tapes are often chosen for their user-friendliness. They can be applied by hand with some basic tools, and they conform to the shape of the exhaust pipes. The adhesive is designed to hold firm but also allow for removal without damaging the underlying chrome, making them a good option for those who like to change their vehicle’s appearance frequently. This temporary nature is a major advantage for many DIYers.
Limitations in Extreme Heat Zones
While designed for heat, these materials typically have lower temperature limits compared to ceramic coatings or high-temp paints. The areas closest to the engine and exhaust manifold, which experience the most intense heat, might be unsuitable for these wraps. They can potentially discolor, bubble, or peel over time in these hot spots, requiring more frequent maintenance or reapplication. It’s crucial to check the product’s temperature specifications carefully.
Cost-Effectiveness for Short-Term Goals
For a quick visual upgrade or for a project where long-term durability isn’t the primary concern, vinyl wraps and tapes can be a very cost-effective solution. The initial purchase price is often lower than professional ceramic coating, and the DIY application saves on labor costs. This makes them an attractive option for budget-conscious enthusiasts or those experimenting with different looks before committing to a permanent change.
Preparation is Key How to Black Out Chrome Exhaust Safely
Proper preparation is absolutely essential for a lasting and professional-looking finish when you’re learning How to Black Out Chrome Exhaust Safely. Skipping or rushing this stage is the most common reason for paint failure, peeling, or a finish that doesn’t look as good as it could. Think of it as building a strong foundation for a house; without it, everything else will eventually crumble. This section will guide you through the critical steps to ensure your exhaust is ready for its new black look.
Thorough Cleaning and Degreasing
Before any paint or coating can be applied, the chrome exhaust must be impeccably clean. Any trace of oil, grease, brake dust, dirt, or old polish will act as a barrier, preventing the new finish from adhering properly. This means using powerful degreasers designed for automotive surfaces. You’ll want to clean the entire surface area that will be treated, ensuring you reach into any nooks and crannies.
Using Automotive Degreasers
Specialized automotive degreasers are formulated to break down tough automotive contaminants like road film, oil, and wax. Apply the degreaser generously to the cool exhaust pipes. You may need to use a brush or a scouring pad to gently scrub away stubborn grime. After scrubbing, rinse the exhaust thoroughly with water. It’s often recommended to rinse multiple times to ensure all degreaser residue is removed, as leftover chemicals can also interfere with adhesion.
Importance of a Contaminant-Free Surface
Even fingerprints can leave behind oils that can cause adhesion problems. After degreasing and rinsing, avoid touching the surface with bare hands. Wear clean gloves to prevent transferring oils from your skin to the exhaust. A truly clean surface is paramount. If you’re unsure if it’s clean enough, it’s usually best to clean it again. This step is non-negotiable for a professional and durable finish.
Removing Existing Coatings or Polish
If the chrome has been treated with wax or polish in the past, these substances need to be completely removed. Many automotive polishes contain silicone or other waxes that will prevent paint from sticking. A good degreaser should take care of most of this, but sometimes a specific metal prep cleaner or a solvent wipe might be needed to ensure all residues are gone. Always refer to the instructions of the product you plan to use for recommended cleaning agents.
Sanding for Adhesion
While chrome is smooth, most paints and coatings require a slightly roughened surface to grip onto. This is where sanding comes in. It creates a microscopic texture that allows the new finish to bond securely. The grit of sandpaper you use is important; you want something fine enough not to create deep scratches but coarse enough to provide that necessary tooth.
Choosing the Right Grit Sandpaper
For most chrome exhaust applications, a medium-grit sandpaper like 220-grit is a good starting point. This is enough to dull the shine of the chrome and create a surface for paint to adhere to. If the chrome is heavily pitted or has imperfections, you might start with a slightly coarser grit like 150, but always follow up with a finer grit to smooth out the surface. For some ceramic coatings, a finer grit like 400 might be recommended.
Dry vs. Wet Sanding Techniques
You can dry sand, which is faster, or wet sand, which can produce a smoother finish and reduce dust. When wet sanding, use water with a bit of mild soap. This helps to lubricate the sandpaper and wash away debris, preventing the sandpaper from clogging. Whichever method you choose, ensure you sand evenly across the entire surface.
Creating an Even Surface Profile
The goal of sanding is not to remove the chrome but to create a uniform, matte finish. You want to eliminate the mirror-like shine and
Masking Off Surrounding Areas
Protecting parts of your vehicle that you don’t want to paint is as important as preparing the surface you do want to paint. This includes the body panels, tires, wheels, and any other components that could be accidentally sprayed. Careful masking ensures a clean, professional look and saves you from having to clean up overspray later.
Using Automotive Masking Tape and Paper
High-quality automotive masking tape is essential. It adheres well but can be removed without leaving residue or damaging the paint underneath. You’ll also need masking paper or plastic sheeting to cover larger areas. Ensure the tape is pressed down firmly along the edges to prevent paint from seeping underneath.
Protecting Sensitive Components
Pay special attention to areas like sensors, oxygen ports, or any stickers or emblems you want to preserve. For exhaust tips that are partially decorative and partially functional, you might need to be extra precise with your masking to get a clean line between the treated and untreated sections. Sometimes, using a flexible masking tape that can follow curves is necessary.
Creating Clean Lines and Edges
The precision of your masking directly impacts the final appearance. If you’re painting the entire exhaust pipe, you’ll want to mask off a clean transition point where the painted section meets the rest of the exhaust or vehicle body. This attention to detail will make your DIY job look like it was done by a professional.
Applying the Blackout Finish
Once your exhaust system is meticulously prepped, it’s time for the application itself. This is where the transformation happens. Following the specific instructions for your chosen product—be it high-temperature paint, ceramic coating, or vinyl wrap—is crucial. Even with general guidelines, always defer to the manufacturer’s recommendations for the best results.
Using High-Temperature Spray Paint
High-temperature spray paint is a popular choice for its ease of use and effectiveness. The key to a great finish lies in applying multiple thin coats rather than one heavy one. This prevents runs and drips, and ensures even coverage for maximum durability.
Technique for Even Coating
Hold the spray can about 8-12 inches (20-30 cm) away from the surface. Use smooth, sweeping motions, overlapping each pass by about 50%. Start spraying before the surface and continue spraying past it to avoid pooling at the start and end of each stroke. Apply very light coats initially, allowing them to tack up slightly before applying subsequent coats.
Multiple Thin Coats for Durability
Most high-temperature paints recommend 2-4 thin coats. The total thickness of the paint layer is important for its performance under heat. Applying too little might not provide adequate protection, while too much can lead to runs, uneven texture, and potential peeling. Read the product label for the recommended number of coats and drying times between them.
Curing Process Explained
Many high-temperature exhaust paints require a curing process to reach their full hardness and heat resistance. This typically involves gradually heating the painted exhaust system. Often, this means starting the engine and letting it idle for a period, then increasing RPMs, and repeating this process a few times according to the paint manufacturer’s instructions. This heat drives off any remaining solvents and fully hardens the coating.
Applying Ceramic Coating
Ceramic coating, especially for DIY application, requires careful preparation and application. While professional application offers the highest quality, DIY kits can provide excellent results if done correctly. These coatings are often applied as a liquid and then cured, usually with heat.
Application Methods (Spraying vs. Wiping)
Ceramic coatings can come in spray form, similar to paint, or as a liquid that is applied with an applicator pad or cloth. Spray-on coatings generally offer more even coverage, especially for complex shapes. Liquid coatings require careful application to ensure an even layer without streaks or dry spots. Always follow the product’s specific application instructions.
Heat Curing Requirements
Like high-temperature paints, ceramic coatings need to be cured. This is often done by gradually heating the coated surface. For exhaust components, this usually involves starting the engine and allowing it to reach operating temperature, then potentially increasing the engine speed for a short period. Some coatings might require multiple heat cycles over a few days.
Layering for Enhanced Protection
Some ceramic coating systems allow for multiple layers to be applied. Each layer can build upon the previous one, providing enhanced durability, heat resistance, and a deeper aesthetic finish. Ensure you follow the recoat window specified by the manufacturer; applying layers too close together or too far apart can compromise the coating’s integrity.
Using Heat-Resistant Vinyl Wrap or Tape
For wraps and tapes, the process is more about careful application to ensure a smooth, bubble-free finish that adheres well and can withstand the heat.
Cutting and Fitting the Material
Carefully measure and cut the vinyl wrap or tape to the correct size and shape. Use a sharp utility knife for clean cuts. For curved surfaces, you might need to use a heat gun (on a low setting) to make the vinyl more pliable and easier to conform to the shape.
Applying with Minimal Bubbles
When applying, start in the center and work your way outwards, using a squeegee to smooth out the material and push out any trapped air bubbles. Overlapping edges slightly can help create a secure seal. For tapes, ensure they are wrapped tightly and uniformly.
Adhesion and Durability Considerations
While these materials are heat-resistant, their adhesion can be affected by extreme temperatures. It’s vital to ensure the surface is clean and dry before application. For areas that experience the highest heat, like the manifold connection, these materials might not be the best choice for long-term application. Periodically check the material for signs of lifting or discoloration, especially in high-heat zones.
Safety Precautions When Working with Exhausts
Working on your car’s exhaust system requires specific safety precautions because of the heat involved and the chemicals used. Always prioritize your safety to avoid burns, injuries, or health issues. This guide on How to Black Out Chrome Exhaust Safely includes crucial safety measures to keep you protected throughout the process.
Working with Cool Exhaust Components
The most critical safety rule is to always work on a completely cool exhaust system. Exhaust components can retain heat for hours after a vehicle has been turned off. Touching a hot exhaust can cause severe burns. Ensure the vehicle has been sitting for a significant period, ideally overnight, before you begin any work.
Allowing Ample Cooling Time
Even if the exhaust feels cool to the touch initially, it’s wise to allow extra time. Use a non-contact infrared thermometer to confirm the surface temperature is below 80 degrees Fahrenheit (about 27 degrees Celsius) before you start cleaning or sanding. This simple step can prevent painful burns.
Identifying Hot Spots
Some parts of the exhaust, like catalytic converters or turbochargers, can remain hotter for longer periods. Be particularly cautious around these areas. Always assume the exhaust is hot until proven otherwise.
Handling Hot Components (If Necessary)
If you absolutely must work with a warm component (which is strongly discouraged), use heavy-duty, heat-resistant gloves and appropriate tools to maintain maximum distance from the hot surface. Never use your bare hands.
Ventilation and Personal Protective Equipment (PPE)
Many products used for exhaust modification, including paints, degreasers, and solvents, emit fumes that can be harmful if inhaled. Wearing the right protective gear is non-negotiable.
Importance of Good Ventilation
Always perform this work in a well-ventilated area. An open garage with the door fully open, or working outdoors, is ideal. Avoid working in confined spaces like a closed garage or shed, as fumes can build up to dangerous levels.
Respiratory Protection
Wear a respirator mask designed for organic vapors. A simple dust mask is not sufficient to protect you from the chemical fumes released by paints and solvents. Ensure the mask fits snugly to create a proper seal around your nose and mouth.
Eye and Skin Protection
Always wear safety glasses or goggles to protect your eyes from chemical splashes, dust, and debris. Wear long sleeves, long pants, and chemical-resistant gloves to protect your skin from contact with degreasers, solvents, and paint.
Disposal of Materials and Waste
Proper disposal of chemical waste, paint cans, and used rags is important for environmental safety and compliance with local regulations.
Hazardous Waste Disposal
Degreasers, solvents, and leftover paints are often considered hazardous waste. Do not pour them down drains or dispose of them in regular trash. Check with your local municipality or waste disposal center for guidelines on how to properly dispose of these materials.
Handling Used Rags and Applicators
Rags and applicators used with solvents or paints can be flammable. To prevent spontaneous combustion, lay them flat to dry in a safe, well-ventilated area away from heat sources before disposing of them in a sealed metal container.
Maintaining Your Blacked-Out Exhaust
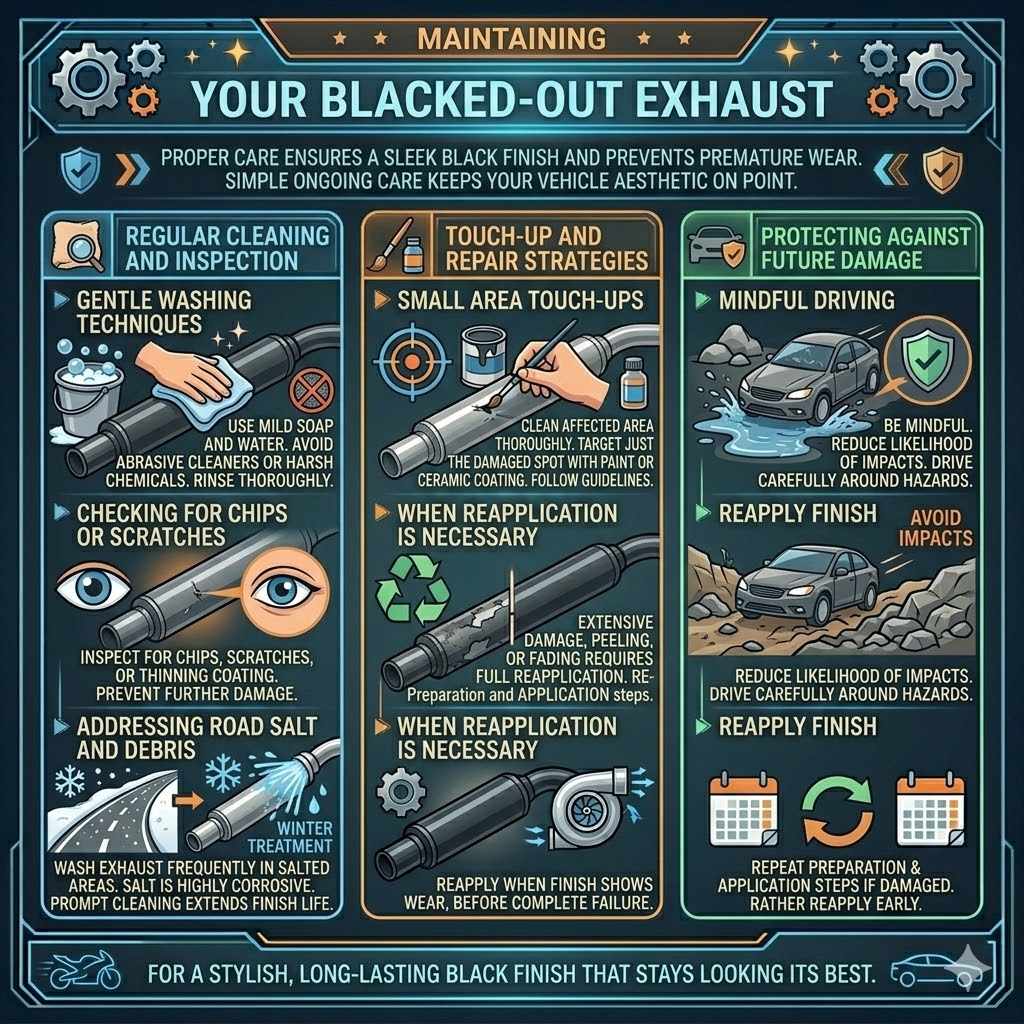
Once you’ve successfully transformed your chrome exhaust to a sleek black finish, a little ongoing care will ensure it stays looking its best for a long time. Proper maintenance prevents premature wear and keeps your vehicle’s aesthetic on point.
Regular Cleaning and Inspection
Just like the rest of your car, the exhaust system benefits from regular cleaning. This helps remove road grime, salt, and other debris that can degrade the finish over time. Inspecting the exhaust periodically also allows you to catch any early signs of damage or wear.
Gentle Washing Techniques
When washing your vehicle, use a mild soap and water solution. Avoid abrasive cleaners or harsh chemicals, as these can strip or damage the protective coating. A soft cloth or sponge is best for cleaning the exhaust pipes. Rinse thoroughly to remove all soap residue.
Checking for Chips or Scratches
After cleaning, take a moment to inspect the exhaust for any chips, scratches, or areas where the coating might be thinning. Small imperfections can be touched up with the same paint or coating product used for the initial application, preventing further damage.
Addressing Road Salt and Debris
In areas where roads are treated with salt during winter, it’s especially important to wash your exhaust frequently. Salt is highly corrosive and can attack any protective coating, leading to rust and degradation. Promptly cleaning off road salt can significantly extend the life of your blackout finish.
Touch-Up and Repair Strategies
Despite best efforts, minor damage can occur. Having a plan for touching up and repairing your exhaust will keep it looking fresh and prevent small issues from becoming bigger problems.
Small Area Touch-Ups
For minor chips or scratches, you can often perform a small touch-up. Clean the affected area thoroughly. If using spray paint, you might be able to use a small brush or carefully spray from a very short distance to target just the damaged spot. For ceramic coatings, follow the manufacturer’s guidelines for localized repairs.
When Reapplication is Necessary
If the damage is extensive, or if the coating has started to peel or fade significantly, it might be time to consider a full reapplication. This means repeating the preparation and application steps. It’s better to reapply when the finish starts to show wear than to wait until it’s completely failed.
Protecting Against Future Damage
While you can’t completely avoid road debris or harsh weather, being mindful of your driving can help. Avoiding driving through deep puddles where debris is kicked up, or taking care when driving over rough terrain, can reduce the likelihood of impacts that could damage the exhaust finish.
Frequently Asked Questions
Question: Can I black out my exhaust if it’s already rusted
Answer: If your exhaust has light surface rust, you can often sand it down completely to bare metal and then proceed with blacking it out using high-temperature paint or ceramic coating. However, if the rust is deep and has caused significant pitting or holes, it might be better to replace the affected parts of the exhaust system before attempting to coat it.
Question: How long does high-temperature exhaust paint typically last
Answer: The lifespan of high-temperature exhaust paint varies greatly depending on the product quality, application method, and driving conditions. Under ideal conditions, a quality paint job can last anywhere from 1 to 3 years or even longer. Factors like extreme heat cycles, exposure to salt, and physical impacts can shorten its life.
Question: Do I need to remove the exhaust system to paint it
Answer: For most applications, especially for exhaust tips or visible pipes, you can paint them while they are still attached to the vehicle, provided you mask off surrounding areas thoroughly. However, if you want to ensure the most thorough application and access to all areas, especially for internal components or if there’s significant rust, removing the exhaust system may be beneficial.
Question: Will blacking out my exhaust affect its performance
Answer: Generally, blacking out a chrome exhaust with paint or ceramic coating will not significantly affect the performance of your vehicle. While some ceramic coatings can offer minor insulating benefits that might slightly improve airflow or reduce under-hood temperatures, the aesthetic change itself has a negligible impact on engine performance.
Question: Is it safe to spray paint my exhaust myself
Answer: Yes, it is safe to spray paint your exhaust yourself as long as you follow all safety precautions, including working in a well-ventilated area, wearing appropriate personal protective equipment (respirator, gloves, eye protection), and using products specifically designed for high-temperature exhaust systems. Proper preparation and application are key to both safety and a good finish.
Summary
Learning how to black out chrome exhaust safely involves careful preparation, choosing the right materials like high-temperature paint or ceramic coating, and applying them correctly. Always prioritize safety by working on cool parts, using good ventilation, and wearing protective gear. With these steps, you can achieve a stylish, durable black finish for your exhaust.