Are Gibson Mufflers Reversible? Proven Fixes
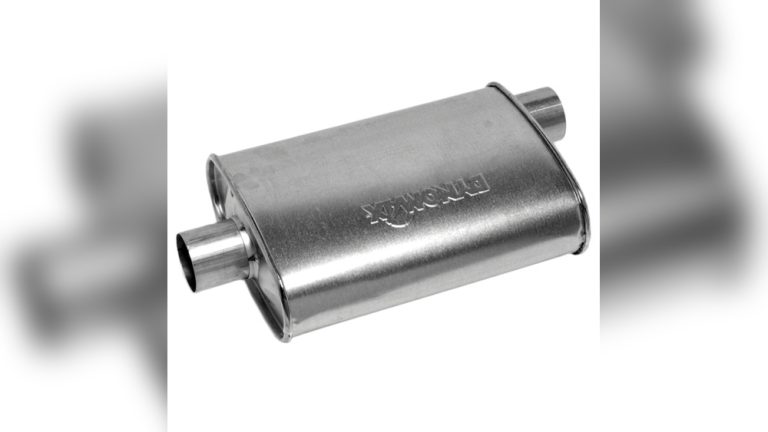
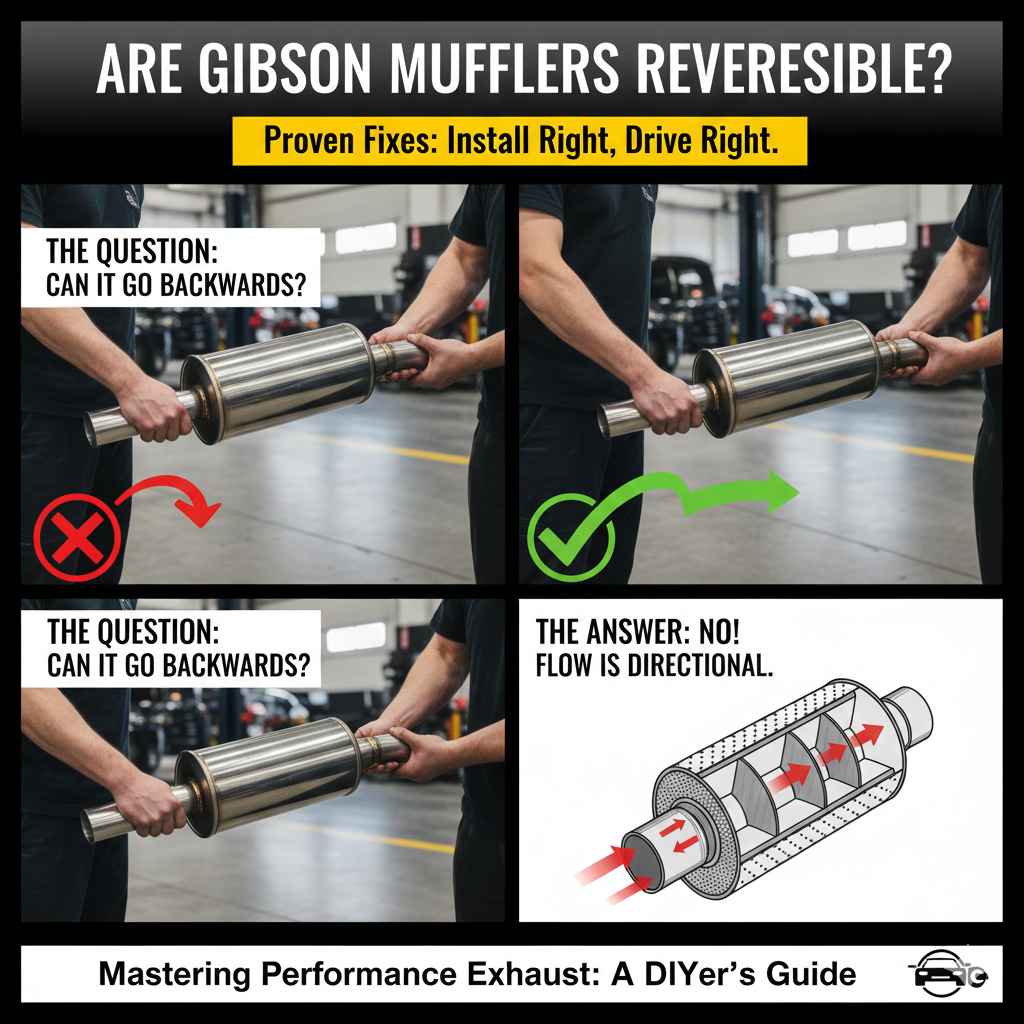
Yes, most Gibson mufflers are designed to be reversible, meaning you can usually remove them and reinstall the original stock muffler or swap them for a different aftermarket unit. Reversibility depends on the installation method—bolt-on systems are easiest, while welded setups require cutting and professional re-welding for reversal.**
Are you thinking about changing the sound or performance of your ride? Maybe you love the aggressive tone of your Gibson muffler now, but you need to quiet things down for a new daily commute. A common question pops up: “Are Gibson mufflers reversible?” It’s a valid concern because nobody wants a permanent modification if they plan to change things later. Dealing with exhaust modifications can feel tricky, especially if you are new to car maintenance.
The good news is that many modern exhaust components, including those from Gibson, are designed with the end-user in mind. We are here to clear up the confusion. This guide will walk you through exactly what “reversible” means for your Gibson muffler, how installation style matters, and the straightforward steps you need to take to switch things back safely.
Understanding Exhaust Reversibility: What Does It Really Mean?
When we talk about an exhaust part being “reversible,” we are simply asking: Can I take this part off and put the original factory part back on without causing permanent damage to the rest of the exhaust system?
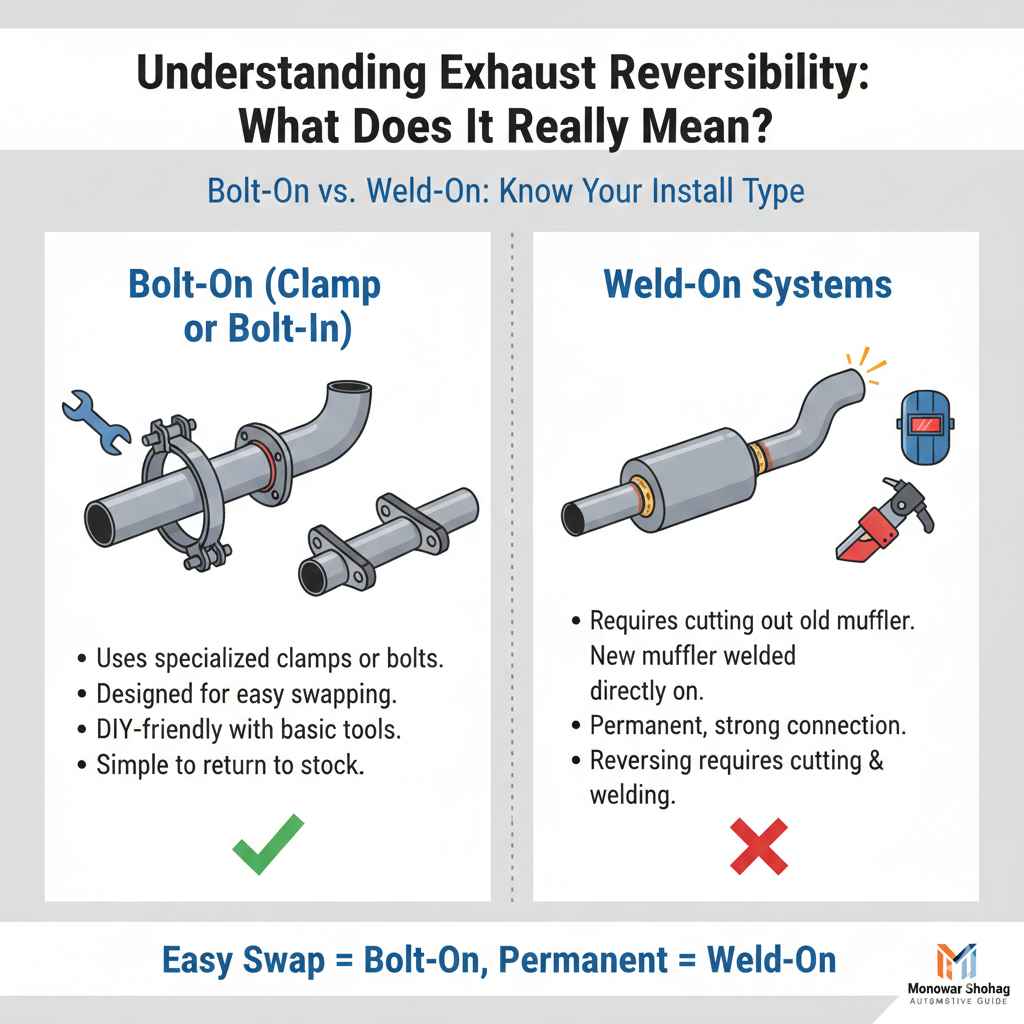
For Gibson mufflers, reversibility hinges almost entirely on how the muffler was attached to your vehicle in the first place. There are two main installation styles, and one makes reversing the process much simpler than the other.
The Two Main Installation Types
Think of this as the difference between using LEGOs (easy to take apart) and super glue (hard to undo). Your Gibson muffler setup will fall into one of these two categories:
- Bolt-On (Clamp or Bolt-In) Systems: These systems use specialized clamps, U-bolts, or bolts that go through flanges to secure the new muffler in place. They are designed specifically for easy swapping.
- Weld-On Systems: These systems require a professional to cut out the old muffler and weld the new Gibson muffler directly into the exhaust pipe. This creates a very strong, permanent connection.
If your system is bolt-on, reversing the installation is usually something you can do in your driveway with basic tools. If it was welded, reversibility requires tools and skills—specifically, cutting tools and welding equipment—to undo the previous work.
Section 1: How to Determine if Your Gibson Muffler is Reversible
Before you grab a wrench, you need to play detective. A quick inspection underneath your car will tell you everything you need to know about the ease of reversing your Gibson muffler installation.
Step 1: Visual Inspection for Clamps and Bolts
Crawl safely under the vehicle (remember safety first—use jack stands on a flat surface!). Look closely where the muffler connects to the pipes coming from the front of the car (the mid-pipe) and where it connects to the tailpipe exiting the back.
If you see:
- Large metal clamps hugging the pipe connections.
- Visible bolts threaded through mating flanges.
- Hanger brackets that slot onto rubber hangers (these are usually standard, but note how the muffler is physically held up).
Conclusion: You likely have a bolt-on system, which means your Gibson muffler is highly reversible.
Step 2: Checking for Welds
If you don’t see any clamps or visible bolts connecting the muffler body to the adjacent pipes, look for shiny or dark, rough seams where the metal tubes meet the muffler ends.
If you see:
- A continuous, smooth seam of metal fusing the muffler pipe to the rest of the system.
- Evidence that the pipe diameter was cut and then fused back together.
Conclusion: Your system was welded. Reversing this requires cutting the welds, which means it is not instantly reversible without tools.
Section 2: Reversing a Bolt-On Gibson Muffler (The Easy Fix)
This is the ideal scenario. If your Gibson muffler uses clamps or bolts, reversing the modification is straightforward maintenance. This process is often done when upgrading to a new system or when an original component fails and needs replacement.
Tools You Will Need
Make sure you have these items ready before you start. Safety gear is non-negotiable!
| Tool Category | Specific Tool | Purpose |
|---|---|---|
| Safety Gear | Safety Glasses, Gloves | Protect eyes and hands from rust and sharp edges. |
| Loosening/Tightening | Socket Wrench Set & Breaker Bar | To loosen stubborn nuts and bolts. |
| Clamps | Pipe Cutter or Reciprocating Saw (if clamps are rusted solid) | For cutting through rusted clamps, only as a last resort. |
| Lubrication | Penetrating Oil (like PB Blaster or WD-40 Specialist Rust Remover) | To free up rusted bolts and clamps. |
| Handling | Jack and Jack Stands (rated for your vehicle weight) | To safely raise and support the vehicle. |
Step-by-Step Reversal Guide (Bolt-On)
Follow these steps carefully to swap your Gibson muffler back to stock:
- Safety First: Park and Secure the Vehicle. Park the car on a flat, level surface. Engage the parking brake. Use wheel chocks behind the rear wheels.
- Raise and Support the Car. Use a quality floor jack to lift the necessary section of the car. Immediately place sturdy jack stands under the frame or designated support points. Never work under a car supported only by a jack.
- Locate and Lubricate Connections. Find all the clamps or bolts securing the Gibson muffler. Spray these connection points liberally with penetrating oil. Let it soak for at least 15 minutes. This prevents snapping old bolts.
- Loosen the Clamps/Bolts. Use your socket wrench or breaker bar to loosen the hardware. If you are reinstalling the stock muffler, you may need to use the breaker bar, as factory hardware often tightens down very securely.
- Disconnect Hangers. Carefully wiggle the muffler assembly. You may need to use a pry bar to gently leverage the rubber hanger isolators off the metal pins holding the muffler in place. Have a helper support the weight as you do this if the muffler is heavy.
- Remove the Gibson Muffler. Slide the old muffler out of the exhaust piping connections.
- Install the Stock Muffler. Line up your original (or new replacement) muffler. Slide the ends into the pipe openings.
- Secure the Hangers. Reattach the rubber isolators onto the mounting pins. A little soapy water on the rubber can help them slide on easier.
- Tighten Connections. Place the clamps or bolts back on the connection points. Tighten them snugly, but do not overtighten, especially if they are clamp-style fittings. You want a tight seal without crushing the pipes.
- Final Check. Lower the car. Double-check that all connections are secure and the muffler is sitting level and properly spaced away from any moving parts or fuel lines. Visit NHTSA (National Highway Traffic Safety Administration) resources for general vehicle safety standards before driving.
Section 3: Reversing a Welded Gibson Muffler (The Advanced Fix)
If your Gibson muffler was welded in, reversing it is not a simple swap; it’s a small exhaust repair job. This process is often necessary if the welds fail or if you want to install a different muffler that requires a bolt-on connection.
Important Note: Welding requires specific safety precautions and knowledge. If you are unsure, hiring a professional muffler shop is the safest and most reliable route. This ensures proper fitment and exhaust flow.
Tools Required for Weld Reversal
This job requires cutting tools, so treat them with extreme caution:
- Angle Grinder with a metal cutting disc OR a Reciprocating Saw (Sawzall) with a metal blade.
- Welding equipment (MIG or TIG welder) if you plan to reinstall the stock muffler via welding.
- Safety gear (Welding helmet, heavy gloves, fire extinguisher nearby).
- New universal exhaust clamps or U-bolts if converting to a bolt-on setup.
Step-by-Step Reversal Guide (Welded)
- Secure and Support. Safely lift and support the vehicle as described in the bolt-on section. Ensure ample clearance to work around the welded joints.
- Mark the Cut Lines. Clearly mark the exhaust pipe on both sides of the muffler, ensuring you cut just outside the weld bead. Leaving a small section of the old pipe attached to the new muffler stub can sometimes help align the stock part later.
- Cut the Welds. Carefully use your angle grinder or reciprocating saw to cut through the pipe on both sides of the muffler. Cut slowly to avoid overheating or damaging the surrounding components.
- Remove the Old Muffler. Once both sides are cut, the Gibson muffler should come free.
- Prepare for Reinstallation. If you are reinstalling the stock muffler, you will need to remove the remaining stub of the Gibson pipe from the stock pipe ends if necessary, or simply slip the stock muffler into place.
- Reattach Stock Components. You now have two options for reconnection:
- Option A (Recommended): Convert to Bolt-On. Use a universal clamp-style coupler pipe section (available at most auto parts stores) to bridge the gap between the stock pipes and the new stock muffler. This is reversible in the future.
- Option B: Weld It Back. If you are confident in your welding skills, re-weld the stock muffler into place using proper exhaust welding techniques.
- Inspect and Lower. Check all connections for fit and alignment. Lower the vehicle and test the system for leaks before driving aggressively. For more information on safe exhaust modification practices, consult guides from reputable engineering sources, such as those provided by SAE International (Society of Automotive Engineers).
Section 4: When Reversibility Becomes Complicated
Sometimes, even if the original installation was technically “bolt-on,” reversing the process is harder than it looks. This usually happens due to environmental factors affecting your car.
The Rust Factor
If your vehicle lives in a region that uses road salt during the winter (common in the Northeast or upper Midwest), rust is your biggest enemy. Clamps and bolts that were easily accessible a year ago might now be fused solid.
Signs of severe rust issues:
- Bolts that turn a quarter turn and then seize up.
- Clamps that are visibly flaking or broken apart.
- The pipe itself appears corroded near the joint.
In these cases, the system is mechanically reversible (no welding was involved), but it requires more force, specialized tools (like a reciprocating saw to cut rusted clamps), and potentially replacing the hardware entirely (new nuts, bolts, and clamps).
Mismatched Pipe Sizes
Gibson often sells full cat-back or axle-back systems that are designed to fit perfectly with specific factory pipe diameters. If a previous owner used an improper adapter or a universal muffler kit to install the Gibson muffler, the stock muffler might not slide onto the remaining pipe stub correctly.
The Fix: You may need to purchase a short section of pipe coupler and exhaust clamps to bridge the size mismatch when reinstalling the factory unit. This ensures a tight seal.
Section 5: Benefits of Reversible Exhaust Modifications
Why is it good that Gibson mufflers are often designed to be reversible? It gives you flexibility as a car owner.
Flexibility and Resale Value
Keeping the option open to go back to stock is crucial for several reasons:
- Warranty Concerns: Some factory warranties can be voided by non-OEM (Original Equipment Manufacturer) exhaust changes, especially if a performance upgrade causes a related engine code. Being able to revert easily minimizes risk.
- Resale Value: Many buyers prefer factory configurations, especially if they plan to use the car for long highway commutes where loud exhausts can become tiresome. A reversible upgrade retains higher perceived value.
- Local Regulations: Noise ordinances change. What is legal today might be restricted tomorrow. Being able to quickly swap to a quieter factory muffler keeps you compliant.
Performance vs. Daily Driving Trade-Offs
Performance mufflers like Gibson are tuned for sound and flow. However, sometimes that flow comes at the expense of low-end torque or creates drone on long highway trips. Reversibility allows you to:
- Test the Gibson muffler for a few months.
- If you experience annoying highway drone, easily switch back to the stock muffler until you are ready for a different aftermarket solution.

Frequently Asked Questions (FAQ) About Gibson Muffler Reversibility
Q1: Do all Gibson mufflers require welding?
No. Gibson offers both direct-fit, bolt-on kits (often called axle-back or cat-back systems) that use clamps, and universal mufflers that require welding. Always check the product description or the physical connections to confirm.
Q2: Can I use the clamps that came with my Gibson muffler to reinstall the stock muffler?
Generally, no. The Gibson clamps are sized specifically for the Gibson muffler’s inlet/outlet diameters. If you remove the Gibson muffler, you should inspect the stock muffler ends and use new, correctly sized clamps or bolts to secure the stock unit.
Q3: Is it safe to use a breaker bar to remove a rusted bolt on my exhaust?
It’s better to use penetrating oil first. If the bolt still won’t move, yes, a breaker bar provides the necessary leverage, but be prepared for the bolt to potentially snap. If it snaps, you will have to drill out the remaining stud or use an angle grinder to cut off the head.
Q4: How long does it take to reverse a bolt-on Gibson muffler swap?
If the hardware is not rusted, the entire process (lifting, removing, reinstalling the stock muffler, and lowering) can often be done in 1 to 2 hours for a beginner.
Q5: If my Gibson muffler was welded, can I just cut the pipes and drive without a muffler temporarily?
No, this is unsafe and often illegal. Running without a muffler exposes you to extremely loud noise levels, high exhaust heat near the cabin floor, and will cause your vehicle to fail emissions or noise inspections. Always replace the removed component with a proper part.
Q6: Will switching back to stock affect my engine’s computer or performance tunes?
Switching just the muffler (the part after the catalytic converter) will generally not affect your engine computer (ECU) or performance tunes. Changes that affect oxygen sensor readings (like removing catalytic converters) are what cause performance or warning light issues.
Conclusion: Confidence in Your Exhaust Choices
Understanding whether your Gibson muffler is reversible boils down to one key detail: the connection method. If it was bolted on, you have the freedom and flexibility to switch back to stock or upgrade again whenever you wish. If it was welded, the reversibility depends on your willingness and ability to cut and re-weld pipes—a job often best left to a professional shop.
No matter which scenario you face, approaching the exhaust system with the right tools, a focus on safety (always use jack stands!), and clear steps will ensure that your maintenance or modification goals are met. You now have the knowledge to inspect your setup and confidently handle the reversal process, keeping your vehicle running safely and sounding exactly how you want it to.