Are 69 Mustang Mufflers Bolted? Essential Guide
Are 69 Mustang Mufflers Bolted? Yes, typically, 1969 Mustang mufflers are primarily attached using bolted flange connections, allowing for easier installation and maintenance compared to welded systems. While some minor exhaust system components might be welded, the mufflers themselves are designed to be bolted on for accessibility.
Owning a classic like a 1969 Ford Mustang is a fantastic experience, and keeping its exhaust system in top shape is part of the fun. A common question many Mustang owners, especially those new to classic car maintenance, ask is about how the mufflers are attached. Are they welded, or are they bolted? This can be confusing because exhaust systems vary a bit. Don’t worry! We’ll break it down simply. This guide will help you understand exactly how your ’69 Mustang’s mufflers are connected, whether you’re planning a simple repair or a full exhaust upgrade. We’ll cover what to look for and what tools you might need. Let’s dive in and get your Mustang sounding and performing its best!
Understanding Your 1969 Mustang’s Exhaust System
The exhaust system on your 1969 Mustang is more than just a way to quiet down the engine’s roar. It plays a crucial role in your car’s performance, efficiency, and even its emissions. For a classic car like the ’69 Mustang, understanding its exhaust is key to maintaining its originality and ensuring it runs smoothly.
The Role of Mufflers
Mufflers are specifically designed to reduce the noise created by the engine’s combustion process. They use internal chambers, baffles, and sometimes packing material to absorb sound waves. Without functional mufflers, your Mustang would be incredibly loud, and in many places, illegal to drive due to noise regulations.
Exhaust System Components
A typical exhaust system includes several parts working together:
Exhaust Manifold/Headers: Attached to the engine, these collect exhaust gases from the cylinders.
Downpipes/Head Pipes: These pipes carry the exhaust gases from the manifolds towards the rest of the system.
Catalytic Converter (if applicable): Though unlikely to be standard on a ’69 Mustang from the factory, some aftermarket or later modifications might include one for emissions control.
Resonators (sometimes): These help tune the exhaust note further, often used in conjunction with mufflers.
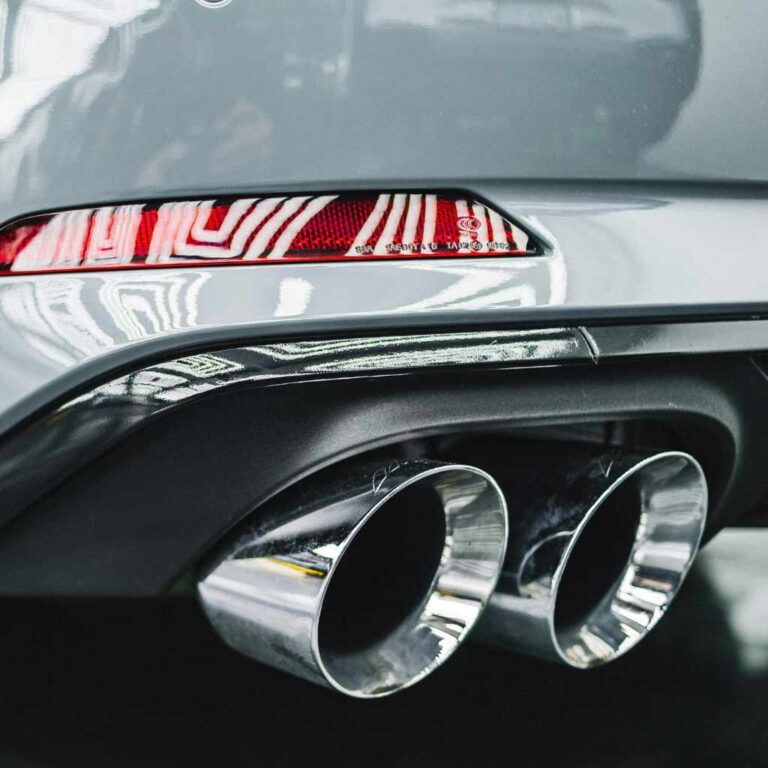
Mufflers: The primary noise reducers.
Tailpipes: These direct the exhaust gases out from the rear of the vehicle.
Clamps and Hangers: These hold the entire system together and attach it to the car’s frame.
The way these parts connect is vital. Some connections use flanges with bolts, while others might be slip-fit and secured with clamps, or in some cases (though less common for mufflers on this era Mustang), welded.

Are 1969 Mustang Mufflers Bolted or Welded?
For the 1969 Ford Mustang, the mufflers themselves are typically bolted on, rather than welded. This design choice was common for vehicles of that era and offers several advantages for maintenance and repair.
The Flange Connection Explained
Most 1969 Mustang muffler installations utilize a flanged connection. This involves two metal plates (flanges) – one on the end of the pipe leading to the muffler and another on the muffler inlet – that are designed to meet precisely. These flanges usually have holes that line up with each other. Heavy-duty bolts, often accompanied by gaskets, are then used to secure these flanges together.
This bolted flange system creates a strong, leak-free seal when tightened correctly. The use of gaskets is essential to ensure an airtight connection, preventing exhaust leaks that can affect performance and potentially allow harmful gases into the cabin.
Why Bolted is Common for Mufflers
Several factors make bolted mufflers a practical choice for the ’69 Mustang:
Ease of Replacement: If a muffler rusts out or gets damaged, a bolted connection allows for relatively straightforward removal and replacement without needing specialized welding equipment. You can often do it yourself with basic tools.
Maintenance Access: Accessing other parts of the exhaust system, or performing repairs on the chassis, is easier when mufflers can be unbolted and moved aside.
Flexibility: Bolted flanges can accommodate slight misalignments better than welded joints.
Cost-Effectiveness: For manufacturers, bolted systems can sometimes be more cost-effective to assemble on the production line, and for owners, they reduce repair costs.
When You Might See Welds
While the mufflers themselves are generally bolted, other parts of the exhaust system might incorporate welds. For instance, the pipes might be welded to the muffler inlet or outlet on some aftermarket systems, or hanger brackets could be welded to the pipes. However, for the muffler-to-pipe connection, especially on original or well-maintained systems, you’ll primarily find bolts.
Identifying Your Muffler Attachment Method
To know for sure how your 1969 Mustang’s mufflers are attached, you’ll need to get under the car and take a look. Safety first! Always ensure the vehicle is securely supported on jack stands on a level surface before going underneath. Never rely solely on a jack.
What to Look For
When you’re under your Mustang, inspect the areas where the pipes connect to the mufflers. Here’s what to search for:
Bolts and Nuts: Look for visible bolt heads and nuts clamping two metal pieces together. These are usually found on flanges.
Flanges: These are flat metal surfaces that butt up against each other, typically with circular holes for bolts to pass through.
Gaskets: You might see a ring of material (often dark gray or black) sandwiched between the flanges. This is an exhaust gasket.
Clamps: Some systems might use U-bolt clamps or band clamps to join pipes. While less common for the primary muffler connection on a ’69 Mustang, they can be used elsewhere or on some aftermarket setups.
Welds: Look for smooth, continuous seams where metal has been fused together. If the connection between the pipe and the muffler looks like one solid piece without fasteners, it’s likely welded.
Tools You Might Need for Inspection and Removal
Even for a simple inspection, having a few basic tools handy can be helpful. If you find bolted connections, these tools will be essential for removal or replacement:
Safety Glasses: To protect your eyes from debris.
Work Gloves: To protect your hands.
Jack and Jack Stands: Crucial for safely getting under the vehicle.
Socket Set and Ratchet: You’ll need sockets of various sizes, likely including common inch-sized sockets (e.g., 7/16″, 1/2″, 9/16″) for the bolts.
Wrenches: Both standard and possibly some longer wrenches for leverage.
Penetrating Oil (like PB Blaster or Liquid Wrench): Essential for loosening rusted bolts. Spray this on the bolts and nuts liberally and let it soak for a good while (even overnight if possible).
Wire Brush: To clean rust and debris from bolts, nuts, and flanges before attempting to loosen them.
Breaker Bar: For extra torque on stubborn bolts.
Torque Wrench: If you plan to reassemble, this is necessary for tightening bolts to the correct specification, ensuring a good seal and preventing over-tightening.
Step-by-Step: Checking Your Muffler Connections
1. Safety First: Park your Mustang on a flat, level surface. Engage the parking brake firmly.
2. Lift and Secure: Use your jack to lift the rear of the car. Place sturdy jack stands under the frame rails or axle housing to support the vehicle securely. Gently lower the car onto the jack stands.
3. Visual Inspection: Carefully slide under the car and locate the mufflers. Follow the exhaust pipes from the front of the car towards the rear.
4. Examine Connections: At each end of the muffler, look closely at how the pipe meets the muffler body.
If you see bolts going through flanges, it’s a bolted connection. If the pipe and muffler appear to be smoothly joined without any fasteners, it’s likely welded.
5. Note Details: Make a note of the size of the bolts and nuts if they are present. This will help you gather the right tools if you decide to replace the mufflers.
A great resource for automotive repair information, including diagrams and specifications for classic vehicles, can be found through databases like those provided by NHTSA (National Highway Traffic Safety Administration), although specific models may require searching through automotive forums or factory service manuals for precise details on exhaust configurations.
Replacing Your 1969 Mustang Mufflers: A Beginner’s Guide
If you’ve determined your mufflers are bolted on and are considering replacing them, it’s a very achievable DIY project for beginners.
Why Replace Mufflers?
Rust and Corrosion: The most common reason. Over time, the moisture and heat of exhaust gases cause mufflers to rust from the inside out, leading to holes and leaks.
Damage: Road debris, impacts, or improper support can damage mufflers.
Performance/Sound Upgrade: You might want a different exhaust note or improved flow with aftermarket mufflers.
Choosing Replacement Mufflers
When selecting new mufflers for your ’69 Mustang, consider:
Fitment: Ensure they are designed specifically for the 1969 Mustang model and engine.
Material: Stainless steel offers better rust resistance than standard aluminized steel but is more expensive.
Sound: Mufflers come in various designs affecting sound level and tone (e.g., chambered, straight-through, turbo style). Research to find a sound you like. Popular choices for classic Mustangs often include chambered mufflers for a deep, classic sound.
Tools and Parts Checklist
New Mufflers (correct for your Mustang)
New Exhaust Gaskets (if required by your new mufflers/flanges)
New Flange Bolts and Nuts (recommended as old ones will likely be rusted and difficult to reuse)
Penetrating Oil
Wire Brush
Socket Set, Ratchet, and Extension
Wrenches
Jack and Jack Stands
Safety Glasses and Gloves
Optional: Exhaust Sealant (for added leak protection)
Optional: New Exhaust Hangers and Hardware (if old ones are rusted)
Step-by-Step Removal and Installation
1. Prepare the Vehicle: As before, lift and securely support the Mustang on jack stands. Ensure you have ample working space.
2. Apply Penetrating Oil: Generously spray penetrating oil on all bolts and nuts connecting the mufflers. Let it soak for at least 30 minutes, ideally longer, to break down rust.
3. Loosen and Remove Old Mufflers: Using your socket set and ratchet, carefully attempt to loosen the bolts. If they don’t budge, reapply penetrating oil and try again. A breaker bar can provide extra leverage.
Once the bolts are removed from one side, you might need to unbolt the tailpipes from the mufflers as well.
With all fasteners removed, carefully lower the old mufflers. They can be heavy and awkward, so be prepared. If rusted through, they might fall apart.
4. Clean the Flanges: Use a wire brush to thoroughly clean any rust, dirt, or old gasket material from the mating surfaces of the pipes and the new muffler flanges. A clean, flat surface is crucial for a good seal.
5. Install New Gaskets: If your new mufflers or flanges require gaskets, carefully place them in position. Some gaskets have a specific orientation for optimal sealing.
6. Position New Mufflers: Carefully lift the new mufflers into place. Align the flanges with the corresponding pipes. It might be helpful to loosely hang the mufflers first using a single bolt or clamp to hold them in place while you work on the other side.
7. Install New Bolts and Nuts: Insert the new flange bolts through the aligned holes. Thread on the new nuts.
8. Tighten Gradually: snug up all the bolts on both sides of the muffler. Then, begin tightening them in a crossing pattern (like tightening lug nuts on a wheel) to ensure even pressure.
9. Torque to Specification: If you have a torque wrench, tighten the bolts to the manufacturer’s recommended torque setting. This is crucial for a leak-free seal. If a specific torque value isn’t available, tighten them firmly and evenly. Consult Ford truck and classic Mustang forums for common torque recommendations if factory specs are elusive.
10. Reattach Tailpipes: If you had to unbolt the tailpipes, reattach them now, ensuring a good fit.
11. Final Check: Double-check all connections to ensure they are tight and properly aligned.
12. Lower the Vehicle: Carefully raise the car off the jack stands and lower it to the ground.
13. Start and Inspect: Start the engine and listen for any exhaust leaks (often identified by a puffing or blatting sound). You can also carefully feel around the connections for escaping exhaust gas.
Common Issues with 1969 Mustang Exhaust Systems
While bolted mufflers simplify replacement, exhaust systems on classics like the ’69 Mustang are prone to certain issues.
Rust and Corrosion
This is the number one enemy of any exhaust system, especially older vehicles. Moisture from condensation, road salt, and the exhaust gases themselves eat away at the metal.
Symptoms: Rattling noises, loud exhaust, visible holes or thin spots, rust trails.
Mitigation: Regular inspection, considering stainless steel components for replacements, and using rust-inhibiting coatings on new parts can help.
Loose or Broken Hangers
Exhaust hangers are rubber or metal brackets that support the exhaust system and absorb vibrations. If they break or rust away, the exhaust can sag, rattle, or put stress on the connections.
Symptoms: Exhaust hanging low, rattling sounds over bumps, hitting the chassis.
Solution: Replace broken hangers and ensure all mounting points are secure.
Leaking Flange Gaskets
Even with bolted flanges, a blown or improperly installed gasket will cause leaks.
Symptoms: Ticking or puffing sounds, especially when the engine is cold, reduced performance, potential for exhaust fumes entering the cabin.
Solution: Replace the gasket and ensure the flanges are clean and flat before reassembly. Tighten bolts evenly.
Damaged Pipes or Mufflers
Physical damage from road debris or impacts can lead to bends, kinks, or holes.
Symptoms: Dents, scrapes, holes, loud noises.
Solution: Depending on the damage, pipes might be repaired (welded) or replaced. Severely damaged mufflers need replacement.
Choosing the Right Exhaust System Components
When modifying or replacing the exhaust on your ’69 Mustang, understanding the options is key.
Original Style vs. Aftermarket Performance
Original Style: Aims to replicate the look, sound, and performance of the factory system. Good for concourse restorations or maintaining authenticity.
Aftermarket Performance: Designed for improved flow, different sound profiles, or optimized for specific engine modifications. This can include high-flow mufflers, performance headers, and larger diameter piping.
Material Matters: Aluminized Steel vs. Stainless Steel
Aluminized Steel: A common and more affordable option. Steel is coated with aluminum to provide decent corrosion resistance. A good balance for budget-conscious repairs.
Stainless Steel: Offers superior corrosion resistance and longevity, especially in harsh climates. It’s more expensive but a worthwhile investment for durability. For exhaust components, different grades of stainless steel exist, with T409 being common for exhaust parts offering good rust resistance, while T304 is even more durable but pricier. According to API (American Petroleum Institute), material selection is critical for durability in demanding environments, and this principle extends to automotive applications where extreme conditions prevail.
Chambered vs. Straight-Through Mufflers
Chambered Mufflers: These use internal baffles and passages to create sound waves that cancel each other out, reducing noise. They are known for producing a deep, aggressive, classic muscle car tone, often favored by Mustang owners.
Straight-Through Mufflers: These contain perforated tubes and packing material (like fiberglass) that allow exhaust gases to flow more freely while still muffling sound. They typically produce a louder, more exotic tone and can offer slightly better performance due to reduced restriction.

Frequently Asked Questions (FAQ)
Q1: Are all 1969 Mustang mufflers bolted?
A1: While the vast majority of factory and common aftermarket mufflers for the 1969 Mustang use bolted flange connections, there’s always a small chance of a custom or repaired system having welded mufflers. However, bolted is the standard and most likely configuration.
Q2: What size bolts are typically used for 1969 Mustang muffler flanges?
A2: Common sizes for exhaust flange bolts on classic American cars like the ’69 Mustang are often 7/16-inch or 1/2-inch. It’s best to check your specific vehicle or measure if possible.
Q3: Can I replace my mufflers without lifting the car?
A3: It is highly discouraged and unsafe. You need ample space and a secure platform to work underneath the vehicle. Always use jack stands on a level surface.