
How to Blue Exhaust Tips For Custom Look
Want your car to stand out? Blue exhaust tips can give it that cool, custom look. Many people think it’s hard to do, especially if you’re new to car mods.
But it’s actually quite simple! We’ll show you exactly how to get awesome blue tips step-by-step. Get ready to make your ride unique.
Achieving Blue Exhaust Tips For Custom Look
Getting blue exhaust tips for your car is a popular way to add a personal touch. It’s a modification that catches the eye and makes your vehicle look more performance-oriented. Many car owners start with simple visual upgrades, and blued tips are high on that list.
The process might seem tricky at first because it involves heat. However, with the right approach and a little patience, anyone can achieve this stylish effect. This section will guide you through the basics of why exhaust tips turn blue and what makes this look so appealing.
We will cover the science behind the color change and the expectations for results.
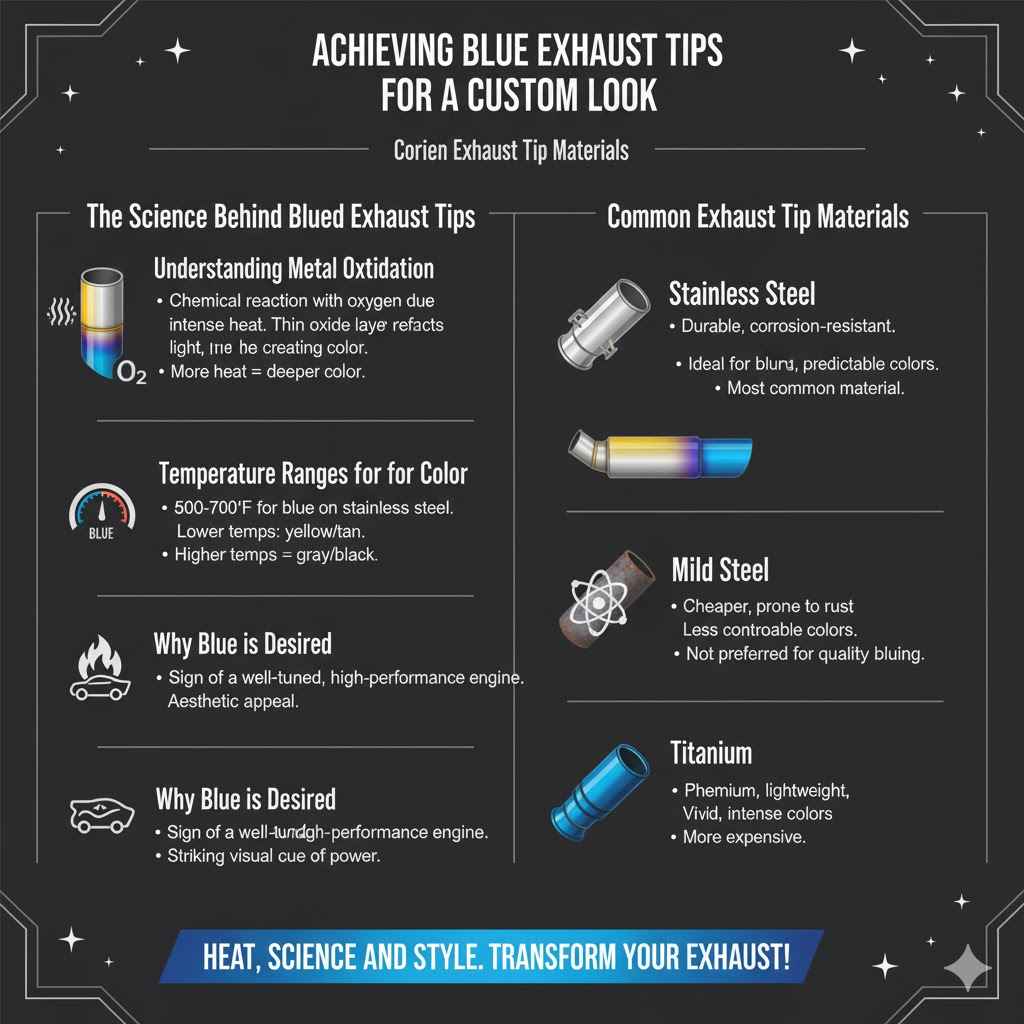
The Science Behind Blued Exhaust Tips
Exhaust tips turn blue naturally due to heat. When exhaust gases, which are very hot, pass through the tailpipe, they transfer that heat to the metal. This intense heat causes the metal’s surface to oxidize.
Oxidation is a chemical reaction where the metal interacts with oxygen. The specific color that appears, like blue, purple, or even yellow, depends on the temperature reached and the type of metal. For stainless steel, common in exhaust systems, higher temperatures will cause a spectrum of colors.
Blue is typically achieved at temperatures between 500 and 700 degrees Fahrenheit (260-370 degrees Celsius). This process is similar to how heated metal in a forge can change color.
Understanding Metal Oxidation
This refers to the chemical process where a metal reacts with oxygen, often in the presence of water or air. For exhaust tips, the high temperatures from engine exhaust accelerate this process. The heat causes a thin layer of metal oxide to form on the surface. This oxide layer refracts light differently than the original metal, creating the visible colors. The more heat applied, the thicker the oxide layer can become, and the deeper the color.
Temperature Ranges for Color
Different temperatures produce different colors on stainless steel. Lower temperatures might give a light straw or yellow color. As the temperature increases, it moves through tan, brown, purple, and then finally to blue. Very high temperatures can even lead to gray or black colors if the metal overheats or if carbon deposits form. Achieving a consistent blue requires controlled heating within the specific temperature window.
Why Blue is Desired
The blue color is often seen as a sign of a well-tuned, high-performance engine. It suggests the exhaust system is getting hot enough to indicate that the engine is working efficiently. This aesthetic appeal is why many car enthusiasts aim for this specific color. It’s a visual cue that hints at power and performance without needing to modify the engine itself. The contrast of the blue against the rest of the car can be quite striking.
Common Exhaust Tip Materials
The material of your exhaust tip greatly influences how it will react to heat and the final color achieved. Not all metals behave the same way when heated. Understanding the material helps predict the outcome and choose the right method for bluing.
Most aftermarket exhaust tips are made from stainless steel or mild steel. Some premium options might use titanium, which can produce vibrant colors.
Stainless Steel
This is the most common material for exhaust tips due to its durability and resistance to rust and corrosion. Stainless steel is ideal for bluing because it reacts predictably to heat. It can achieve a beautiful spectrum of colors, including the desired blue. Different grades of stainless steel might react slightly differently, but most will produce good results.
Mild Steel
Mild steel is cheaper than stainless steel but is more prone to rust. When heated, mild steel will also change color, but the process is often less controllable and the colors might not be as vibrant or as long-lasting as those on stainless steel. It can also result in a more uneven color application. For this reason, stainless steel is usually preferred for achieving a professional-looking blue tip.
Titanium
Titanium is a premium material known for its lightweight strength and incredible heat resistance. When heated, titanium can produce very bright and vivid colors, often more intense than those seen on stainless steel. However, titanium exhaust tips are significantly more expensive, and the bluing process might require different techniques due to its unique properties and higher heat tolerance.
How to Blue Exhaust Tips For Custom Look Step-by-Step
This guide walks you through the entire process of bluing your exhaust tips. We’ll cover everything from preparing your tips to the actual heating and finishing. You’ll learn about the tools you need and important safety measures.
Following these steps carefully will help you achieve stunning blue tips that enhance your car’s appearance. This method focuses on using a propane torch, which is accessible for most DIY enthusiasts.
Preparation Is Key
Before you start heating, proper preparation is crucial. This ensures a clean surface for even heating and prevents unintended damage. You want the metal to be free of any dirt, grease, or old coatings.
This will allow the heat to directly affect the metal and create the color consistently.
Clean the Exhaust Tips Thoroughly
Start by washing your exhaust tips with soap and water. Use a degreaser to remove any oil or grime. After washing, dry them completely. You might want to use a cleaner like rubbing alcohol for a final wipe-down. This removes any residue that could cause hot spots or uneven coloring.
Inspect for Damage or Rust
Check your exhaust tips for any rust spots or dents. If there’s rust, you’ll need to remove it using steel wool or a wire brush. Minor dents can sometimes be smoothed out, but significant damage might affect the final look. A smooth, clean surface is essential for the best results.
Gather Your Tools and Safety Gear
You will need a propane torch, heat-resistant gloves, safety glasses, and a fire extinguisher. If you plan to remove the tips, you’ll also need wrenches or sockets. Ensure you are in a well-ventilated area away from flammable materials. Safety is the top priority when working with heat and an open flame.
Applying Heat For Color
This is the most exciting part – creating the color! The goal is to heat the metal evenly until you see the desired colors appear. Patience is important here, as rushing can lead to uneven bluing or overheating.
Move the flame constantly to distribute the heat.
Start by holding the propane torch a few inches away from the exhaust tip. Keep the flame moving in a sweeping motion, covering the entire surface. You will begin to see colors develop.
Watch as the metal goes from straw yellow to brown, then purple, and finally to blue. The blue color appears at specific temperatures. You are looking for a vibrant, consistent blue.
Controlled Heating Technique
Use a consistent, sweeping motion with the torch. Do not hold the flame in one spot for too long. This will cause hot spots and uneven coloring. The key is to gradually increase the temperature across the entire surface. Watch the colors change in front of you.
Recognizing the Color Stages
As you heat, you’ll see a progression of colors. Typically, it starts with a pale yellow, then moves to tan, purple, and finally blue. You want to stop heating once you achieve the desired shade of blue. If you continue heating too much, you might go past blue into darker purples or even black.
Achieving an Even Blue
For an even blue, ensure you cover all areas of the tip repeatedly. Work your way around the tip, slightly overlapping your passes. It may take several passes to get a uniform color. Some people prefer a gradient effect, with different colors showing. If you want a solid blue, keep heating the entire surface evenly.
Cooling and Finishing Touches
Once you have the perfect blue color, it’s important to let the tips cool down properly. This helps to set the color and prevents any further unwanted reactions. After cooling, you can apply a protective coat to help preserve the look.
Allow Tips to Cool Slowly
Once you achieve the desired blue, turn off the torch. Let the exhaust tips cool down naturally in the air. Do not try to cool them with water, as this can cause thermal shock and potentially damage the metal or create an uneven finish. This slow cooling process helps the oxide layer stabilize.
Applying a Protective Coating
After the tips are completely cool, you can apply a high-heat clear coat or a ceramic coating. This will protect the blued finish from fading due to road grime, moisture, and further heat cycles. It also makes cleaning easier. Follow the product’s instructions for application.
Reinstall or Enjoy Your New Look
If you removed your exhaust tips, reinstall them carefully. Once everything is back in place, start your car and let it run for a bit. You should see the blue color intensify slightly as the exhaust system heats up again. Your custom look is now complete!
Maintaining Your Blued Exhaust Tips
Keeping your blued exhaust tips looking great requires some basic care. Like any part of your car’s exterior, they can get dirty and potentially lose their luster over time. With regular cleaning and attention, you can ensure your custom blue finish lasts for a long time.
This section covers how to clean them and what to do if the color starts to fade.
Regular Cleaning Routine
The best way to maintain the appearance of your blued tips is through consistent cleaning. This removes dirt, salt, and other elements that can degrade the finish. Think of it as keeping any other part of your car looking its best.
Gentle Washing
Wash your exhaust tips regularly with mild car soap and water. Use a soft cloth or sponge to avoid scratching the surface. Rinse thoroughly to remove all soap residue. This simple step prevents the buildup of corrosive elements.
Avoiding Harsh Chemicals
Stay away from abrasive cleaners, steel wool, or strong chemical solvents. These can strip away the protective coating or even damage the blued finish itself. Stick to pH-neutral car care products.
Drying Thoroughly
After washing, always dry the tips completely with a clean microfiber towel. This prevents water spots, which can be unsightly and potentially leave mineral deposits that dull the finish over time.
Addressing Fading or Wear
Even with good care, exhaust tips are exposed to extreme conditions. Over time, the blue color might fade, especially if the protective coating wears off or if the tips are subjected to very high temperatures consistently. Fortunately, it’s usually possible to restore the look.
Touch-Up Bluing
If the color fades significantly, you can repeat the heating process. Clean the tips thoroughly again, and carefully reapply heat following the steps outlined earlier. You might only need to heat certain areas that have lost their color.
Reapplying Protective Coating
If the fade is due to wear of the protective layer, reapply a high-heat clear coat or ceramic coating. Ensure the tips are clean and cool before applying the new coat. This will refresh the look and provide renewed protection.
Consider Professional Help
For very stubborn fading or if you’re not comfortable redoing the process, a professional detailer or custom car shop can often help restore the finish. They have specialized tools and knowledge for these kinds of repairs.
Factors Affecting Longevity
The lifespan of your blued exhaust tips depends on several factors. Understanding these can help you manage expectations and take proactive steps. The intensity of the heat cycles and the quality of the initial bluing process play big roles.
Driving Habits
Frequent short trips where the exhaust doesn’t get fully hot might not set the color as well. Long drives where the exhaust gets very hot can help set the color but might also accelerate fading over extended periods. Driving in extreme weather conditions, like heavy rain or snow, can also impact the finish.
Quality of Material and Coating
As mentioned, stainless steel holds color better than mild steel. Also, a good quality high-heat ceramic coating applied correctly makes a significant difference in protecting the blued finish from environmental factors and heat degradation.
Maintenance Frequency
Cars that are cleaned regularly, especially the exhaust area, tend to maintain their custom look longer. Neglecting cleaning allows corrosive elements to sit on the surface, slowly breaking down the finish and the protective layer.
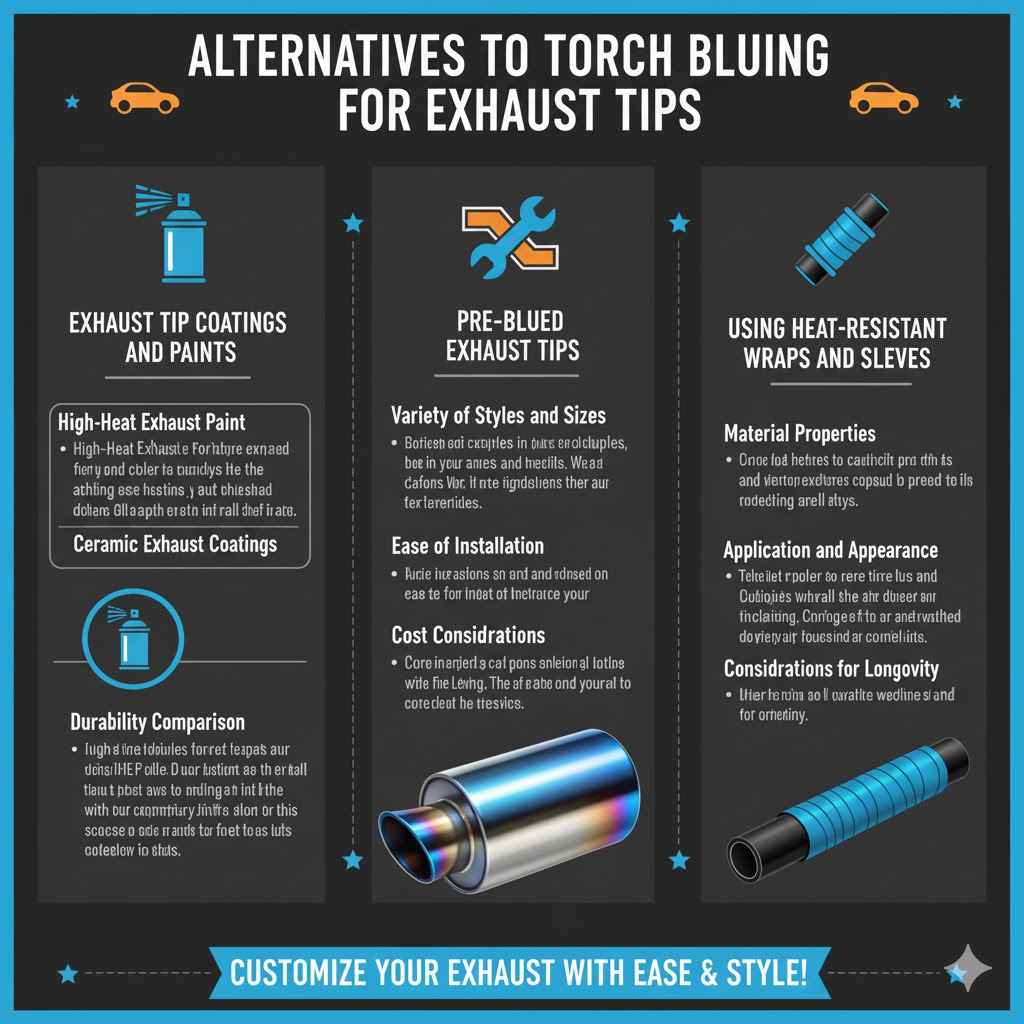
Alternatives to Torch Bluing For Exhaust Tips
While torch bluing is a popular and effective method, it’s not the only way to achieve blue exhaust tips. Some people might prefer alternative methods due to safety concerns, tool availability, or the desire for different visual effects. Exploring these options can help you find the best fit for your project and comfort level.
These methods can offer different levels of durability and application ease.
Exhaust Tip Coatings and Paints
One of the most common alternatives to heat bluing is using specialized paints or ceramic coatings designed for high temperatures. These products come in various colors, including vibrant blues, and can be applied directly to the exhaust tips. This method is often simpler and less intimidating for beginners.
High-Heat Exhaust Paint
Many brands offer spray paints specifically formulated to withstand the extreme heat of exhaust systems. These paints are available in a wide range of colors. You simply clean the tips, mask off any surrounding areas, and spray on multiple thin coats. The result is a uniform color that looks great.
Ceramic Exhaust Coatings
Ceramic coatings offer a very durable finish and can also provide a blue color. These are usually applied professionally, but some DIY kits are available. Ceramic coatings are known for their heat resistance and can protect the underlying metal effectively, potentially lasting longer than regular paint.
Durability Comparison
While paint can chip or fade over time, a properly applied ceramic coating is often more resistant to the elements and heat cycles. However, achieving the specific iridescent blue look of torch bluing can be harder with paints or coatings, which tend to have a more solid, opaque color.
Pre-Blued Exhaust Tips
For those who prefer a professional, factory-like finish without doing the work themselves, pre-blued exhaust tips are an excellent option. Many aftermarket manufacturers sell exhaust tips that have already been blued. This eliminates the need for any DIY heat application or painting.
Variety of Styles and Sizes
You can find pre-blued tips in various styles, including straight cut, rolled edge, and angled cut. They come in different diameters to fit a wide range of vehicles. Choosing a pre-blued tip ensures a consistent and high-quality finish.
Ease of Installation
Installing pre-blued tips is typically straightforward. They often bolt directly onto your existing exhaust system or can be welded in place by a professional. This is the quickest way to achieve the desired look.
Cost Considerations
Pre-blued exhaust tips can be more expensive than buying raw tips and bluing them yourself. However, the convenience and guaranteed professional finish might be worth the extra cost for many car owners. The quality of the bluing and the material used will affect the price.
Using Heat-Resistant Wraps and Sleeves
Another less common but possible method involves using heat-resistant wraps or sleeves that have a blue appearance or can be colored blue. These are typically applied over the existing exhaust tips. While this method is less permanent and might not offer the same aesthetic as true bluing, it can be a temporary or budget-friendly option.
Material Properties
These wraps are usually made from fiberglass or carbon fiber composites designed to withstand high temperatures. Some might have a pre-colored blue finish, while others can be treated with heat-resistant dyes.
Application and Appearance
Application involves wrapping the material around the exhaust tip and securing it, often with ties or adhesive. The appearance can vary greatly depending on the product. It may not provide the same smooth, integrated look as actual blued metal.
Considerations for Longevity
The durability of wraps can be a concern, as they might become brittle or fade over time due to constant heat exposure and road debris. They can also trap moisture, potentially leading to corrosion of the underlying exhaust tip if not managed carefully.
Frequently Asked Questions
Question: How long does it take to blue exhaust tips?
Answer: The actual heating process for one tip usually takes only a few minutes. However, the entire process, including preparation, cleaning, heating, and cooling, can take an hour or two per tip, depending on your experience and how carefully you work.
Question: Will bluing damage my exhaust tips?
Answer: If done correctly with controlled heat, bluing should not damage your exhaust tips. Overheating or holding the flame in one spot for too long can potentially weaken the metal or cause warping. Always use a moving flame and be patient.
Question: How do I know when to stop heating to get the blue color?
Answer: Watch the metal as you heat it. You will see colors change from yellow to purple to blue. The moment you achieve the shade of blue you like, stop heating.
It’s better to stop slightly early and reheat if needed than to overheat.
Question: Can I blue chrome exhaust tips?
Answer: It is generally not recommended to try to blue chrome-plated exhaust tips. The chrome plating can burn off at high temperatures, and the underlying metal might not react the same way. It’s best to use raw stainless steel or mild steel tips for bluing.
Question: What if I don’t have a propane torch?
Answer: While a propane torch is common, you could potentially use a MAPP gas torch for faster heating, but be even more careful. For a safer, no-heat option, consider using high-heat exhaust paint or buying pre-blued tips.
Conclusion
Learning how to blue exhaust tips for a custom look is an achievable DIY project. You can transform your car’s rear end with vibrant blue hues. Remember to prepare the surface well, heat evenly, and let them cool slowly.


