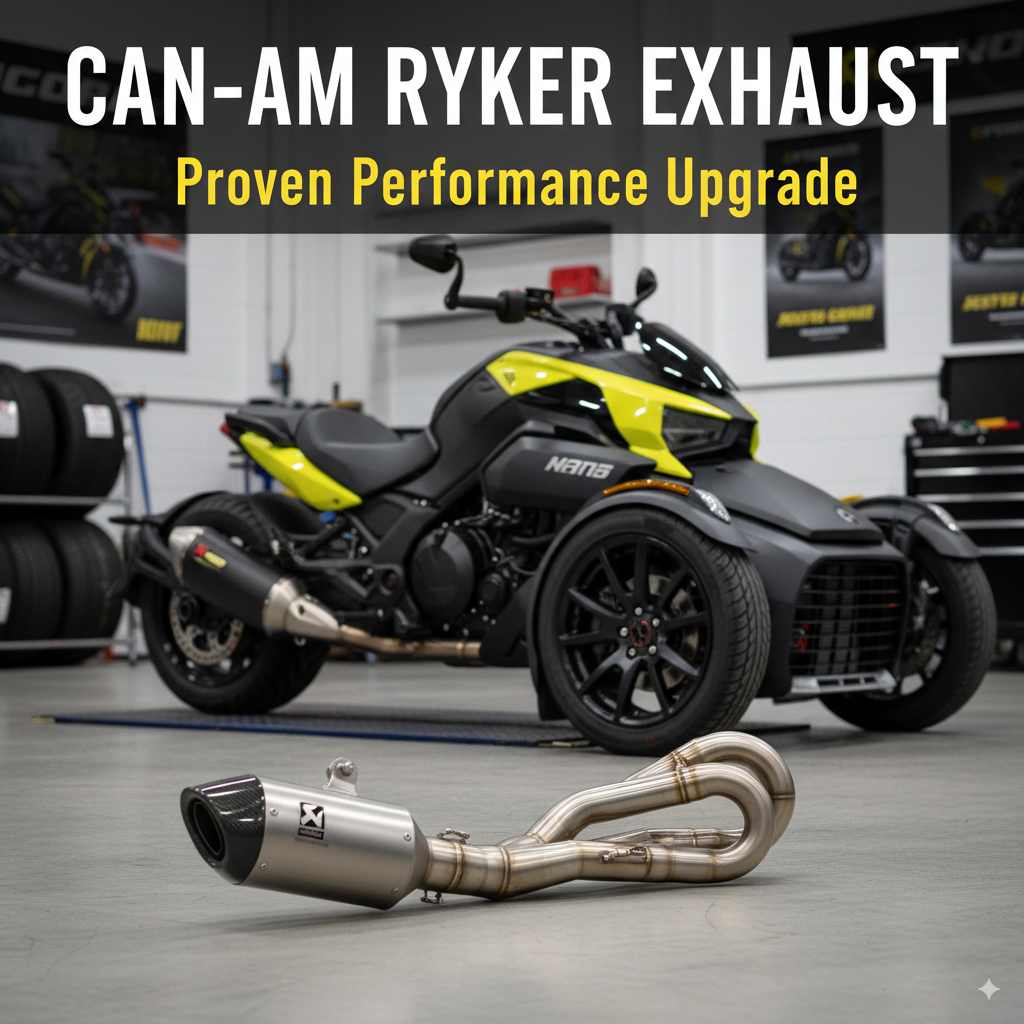
Can Am Ryker Exhaust: Proven Performance Upgrade
Yes, upgrading your Can-Am Ryker exhaust is a proven performance upgrade. It can unlock more power, improve throttle response, and give your Ryker a much-needed aggressive sound boost. This guide breaks down everything a beginner needs to know about choosing and installing a new exhaust for your Ryker.
Are you looking to give your Can-Am Ryker a bit more pep in its step and a throatier growl to match? You’re not alone! Many Ryker owners feel their machine is capable of more. Sometimes, the stock exhaust can feel a little… quiet and restrained. It’s a common desire among riders to unlock that hidden potential.
Don’t worry if you’re new to this. Upgrading your exhaust system might sound complicated, but it’s actually a very achievable and rewarding project for any Ryker owner. We’re here to walk you through it, step by step. You’ll learn what makes a difference and how to get the best results for your Ryker. Let’s dive in and get your machine sounding and performing its best!
Why Upgrade Your Can-Am Ryker Exhaust Performance?
Upgrading your Can-Am Ryker exhaust system isn’t just about making it louder (though that’s a fun part!). There are several solid reasons why riders choose to make this change. For beginners, understanding these benefits can help you see why it’s considered a “proven performance upgrade.”
Performance Gains and Throttle Response
Think of your engine like a runner’s lungs. A restrictive exhaust is like trying to breathe through a straw. When you upgrade to a less restrictive exhaust, your engine can exhale gases more freely. This improved “breathing” means the engine doesn’t have to work as hard.
As a result, you often experience a noticeable increase in horsepower and torque. This translates to quicker acceleration and a more responsive throttle. Imagine less hesitation when you twist the grip – that’s the power of a better-flowing exhaust!
Enhanced Sound for a More Aggressive Ride
Let’s face it, the stock exhaust on many vehicles can be a bit… tame. The Can-Am Ryker, with its sporty design, often deserves a sound that matches. An aftermarket exhaust can transform the sound profile from a mild hum to a deep, aggressive rumble that truly announces your presence.
This isn’t just about noise pollution; it’s about creating an auditory experience that excites you and matches the thrilling mechanics of the Ryker. A well-designed exhaust can offer a rich, satisfying tone that enhances the overall riding experience.
Weight Reduction
Stock exhaust systems are often built for durability and cost-effectiveness, which can mean they are made of heavier materials. Aftermarket exhausts, especially those made from titanium or high-grade stainless steel, can be significantly lighter.
Reducing weight on any vehicle, including a three-wheeled motorcycle like the Ryker, can have a positive impact on its handling and acceleration. Less weight means the engine has less mass to move, subtly improving overall performance.
Improved Aesthetics
Beyond sound and performance, a new exhaust can dramatically change the look of your Can-Am Ryker. Many aftermarket exhausts feature sleek, modern designs, polished finishes, or carbon fiber accents that complement the Ryker’s unique styling.
Swapping out the bulky stock muffler for a more compact and stylish aftermarket unit can give your Ryker a more finished and customized appearance.

Understanding Your Can-Am Ryker Exhaust System
Before diving into upgrades, it’s helpful to know the basic parts of your Ryker’s exhaust system. Even though the Ryker has a unique setup compared to traditional motorcycles, the core principles are similar.
The Basic Components
1. Exhaust Manifold/Header Pipe: This is where the exhaust gases first exit the engine cylinders. It collects the gases and directs them towards the rest of the system.
2. Catalytic Converter (if equipped): Many modern vehicles have a catalytic converter designed to reduce harmful emissions. Depending on your region and the specific Ryker model, this could be part of the manifold or a separate piece. Upgrades might bypass or replace this.
3. Mid-Pipe/Connection Pipe: This pipe connects the header or catalytic converter to the muffler.
4. Muffler/Silencer: This is the component most people associate with the exhaust’s sound. Its primary job is to reduce noise by using internal baffles or packing materials. This is also the most common part replaced during an aftermarket upgrade.
5. Tailpipe: The final section of the exhaust system that expels gases into the atmosphere.
How Exhaust Works
Exhaust gases are a byproduct of combustion inside your Ryker’s engine. These hot gases need to be safely expelled. The exhaust system’s job is to channel these gases away from the rider and the engine, reduce their noise, and, in many cases, treat them to lower emissions.
The flow of these gases is critical. If the system is too restrictive, it chokes the engine, leading to lower power output and poorer efficiency. A well-designed performance exhaust system aims to optimize this flow.
Choosing the Right Can-Am Ryker Exhaust
With so many options available, picking the perfect exhaust for your Can-Am Ryker can feel overwhelming. Here’s how to navigate the choices like a pro.
Types of Exhaust Systems for the Ryker:
Slip-On Mufflers: This is the most common and easiest upgrade. A slip-on replaces the stock muffler with an aftermarket one but often uses the factory header pipe and connection. They are generally more affordable and easier to install.
Full Systems: A full exhaust system replaces everything from the header pipes all the way to the tailpipe. These offer the most significant performance gains but are also more expensive and complex to install. For the Ryker, this usually means replacing the entire factory unit from the engine back.
Key Factors to Consider:
Performance Goals: Are you looking for a slight boost or a significant power increase? A slip-on will give you some improvement, while a full system will likely yield more substantial gains.
Sound Level and Tone: Do you prefer a deep rumble, a raspy roar, or something in between? Most manufacturers provide sound samples or descriptions. Remember to check local noise regulations.
Materials: Stainless steel offers durability and good value. Titanium is lighter and more expensive. Carbon fiber sleeves are often used for aesthetics and weight savings on the muffler body.
Ease of Installation: Slip-ons are beginner-friendly. Full systems can be more involved and may require custom tuning.
Emissions and Legality: Be aware of local laws regarding exhaust modifications, especially catalytic converters. Some aftermarket exhausts are not street legal for certain areas or use. Always check the manufacturer’s claims and local regulations. For instance, in the US, modifications primarily affecting emissions can be an issue. Organizations like the EPA provide guidelines.
Brand Reputation and Reviews: Look for reputable brands known for quality and customer satisfaction. Read reviews from other Ryker owners to gauge real-world performance and sound.
Popular Brands for Can-Am Ryker Exhausts:
While offerings can change, several brands consistently produce quality exhausts for the powersports market. When searching for your Ryker, you might encounter names like:
Akrapovič: Known for premium quality, performance, and sophisticated styling.
Yoshimura: A long-standing name in performance exhausts, offering great sound and power.
Two Brothers Racing (TBR): Often praised for performance gains and distinctive sound profiles.
SC-Project: Popular among sportbike and performance enthusiasts for aggressive styling and sound.
Other brands geared towards powersports like FMF Racing or K&N might also offer options or be worth exploring for their specialized components.
How to Calculate Potential Performance Gains from an Exhaust Upgrade
While specific numbers vary greatly by Ryker model, exhaust design, and other modifications, understanding how an exhaust impacts performance involves a few key principles.
| Factor | Impact on Performance | Explanation |
|---|---|---|
| Reduced Backpressure | Increased Horsepower & Torque; Improved Throttle Response | A less restrictive exhaust allows the engine to expel spent gases more efficiently, meaning the engine works less hard during exhaust strokes. |
| Lighter Weight | Improved Acceleration & Handling | Less mass for the engine to move means the vehicle can accelerate faster. Reduced unsprung weight can also subtly improve handling. |
| Optimized Pipe Diameter & Length | Enhanced Power Delivery at Specific RPM ranges (e.g., low-end torque or high-end horsepower) | Engineering the exhaust dimensions can tune where in the engine’s RPM range the greatest performance benefit is felt. |
| Improved Gas Velocity | Better Scavenging Effect | Proper exhaust gas velocity helps ‘pull’ new intake charge into the cylinder more effectively, leading to a more complete combustion cycle. |
Note: For the most accurate performance figures, always consult the specifications provided by the exhaust manufacturer for your specific Can-Am Ryker model. Dyno tests conducted by independent shops or well-respected automotive sites (.edu or reputable industry journals) can also offer valuable data.
DIY Installation: A Step-by-Step Guide for Beginners
Installing a slip-on exhaust is a fantastic DIY project. It’s a great way to start learning about your Ryker’s mechanics and save money on labor.
Tools and Supplies You’ll Likely Need:
Socket Set & Wrenches: Metric sizes will be needed for your Ryker.
Torque Wrench: Crucial for tightening bolts correctly to avoid damage or leaks.
Screwdriver Set: For any fasteners.
Penetrating Oil (like WD-40): To help loosen stubborn bolts or clamps.
New Exhaust Gasket (if required): Some systems may need a new gasket where the slip-on connects to the header. Manufacturers usually specify this.
Gloves and Safety Glasses: Always protect yourself!
Shop Rags: For cleaning up.
Exhaust Hanger/Support: To hold the exhaust in place if needed during removal/installation.
Anti-seize Compound: To apply to exhaust bolts to make future removal easier.
Step-by-Step Installation (Slip-On Muffler):
Always refer to your Ryker’s owner’s manual and the specific instructions that come with your new exhaust for the most accurate guidance.
1. Prepare Your Ryker: Park your Ryker on a level surface. Ensure the parking brake is engaged or the wheels are chocked. Let the engine cool down completely to avoid burns.
2. Locate the Stock Muffler: Identify the existing muffler and where it connects to the header pipe or mid-pipe.
3. Remove the Stock Muffler: There might be a mounting bracket holding the muffler to the Ryker’s frame. Locate and remove the bolts securing this bracket. You may need to support the muffler as you remove the last bolt.
There will likely be a clamp or bolts where the muffler connects to the rest of the exhaust system. Loosen or remove these. Sometimes, the stock muffler can be ‘wiggled’ and then pulled off the header pipe. If it’s stuck, a gentle tap with a rubber mallet might help.
4. Clean Connection Points: Once the old muffler is off, clean the end of the header pipe or mid-pipe where the new exhaust will connect. Ensure it’s free of dirt, rust, and old gasket material.
5. Prepare the New Exhaust: If your new exhaust came with a new gasket, install it now according to the instructions.
Apply a thin layer of anti-seize compound to the bolts that will hold your new muffler and its bracket.
6. Install the New Muffler: Slide the new slip-on muffler onto the header pipe or mid-pipe. Ensure it’s seated correctly.
Align the mounting bracket of the new muffler with the Ryker’s frame mounting points.
Start all bolts and clamps by hand to ensure they thread in easily.
7. Tighten Securely: Using your socket set, snug up all the clamps and bolts.
Use your torque wrench to tighten the bolts to the manufacturer’s specified torque values. This is crucial. Overtightening can strip threads or crack components; undertightening can lead to exhaust leaks.
8. Double-Check Everything: Inspect all connections and fasteners. Make sure there’s no wobble and everything is secure.
9. Start the Engine: Start your Ryker and let it idle for a few minutes. Listen for any unusual noises or exhaust leaks (you might hear a puffing sound). Look for any signs of leaks around the connections.
If you hear or see leaks, shut off the engine, let it cool, and re-check your connections and torque settings.
10. Test Ride: Go for a short, gentle test ride. Listen to the new sound and notice any changes in performance.
Important Note: Some aftermarket exhausts, especially full systems or those that significantly alter airflow, may require a fuel management system or ECU reflash (re-mapping of the engine’s computer). This ensures the engine receives the correct fuel-air mixture for optimal performance and longevity. Check the exhaust manufacturer’s recommendations for your specific Ryker model. If you’re unsure about any step, consulting a professional mechanic is always the safest bet.
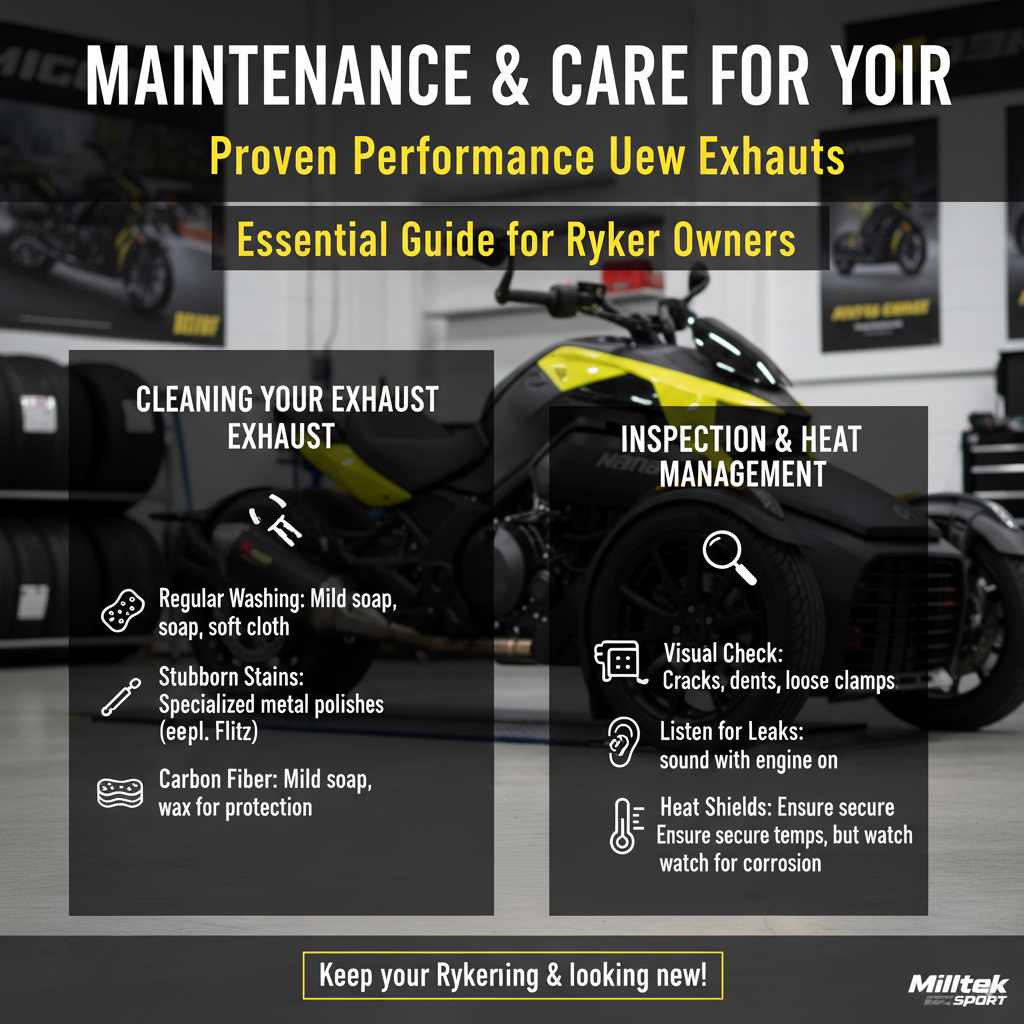
Maintenance and Care for Your Ryker’s New Exhaust
Once you’ve installed your new Can-Am Ryker exhaust, a little regular care will keep it looking and performing great for a long time.
Cleaning Your Exhaust
Regular Washing: When you wash your Ryker, gently clean the exhaust with mild soap and water. Avoid abrasive scrubbers that can scratch the finish.
Stubborn Stains/Discoloration: For discoloration (especially on stainless steel or titanium exhausts from heat), specialized exhaust polishes or cleaners can be very effective. Always test in an inconspicuous area first. Products like Flitz metal polish or specific exhaust cleaners are often recommended.
Carbon Fiber: Clean carbon fiber with mild soap and water. Avoid harsh chemicals. A good quality car wax can help protect the finish.
Checking for Leaks and Damage
Periodically, especially after long rides or if you notice a change in sound, inspect your exhaust system:
Visual Inspection: Look for any signs of cracks, dents, or rust. Check that all clamps and mounting hardware are still tight and present.
Listen for Leaks: While the engine is running, listen closely around the header-to-muffler connection (and anywhere else components join). You might hear a hissing or puffing sound if there’s a leak. Small leaks can often be fixed by re-torquing bolts or replacing a gasket.
Understanding Heat Shields and Heat Wrap
Heat Shields: Many aftermarket exhausts come with heat shields to protect your legs and body from the hot exhaust pipe. Ensure these are securely mounted.
Heat Wrap: Some enthusiasts wrap their header pipes or full systems with heat-resistant wrap. This can help reduce under-hood temperatures and give a more aggressive, race-inspired look. However, it can also trap moisture, potentially leading to corrosion if not installed correctly.
FAQ: Your Can-Am Ryker Exhaust Questions Answered
Q1: Will a new exhaust void my Can-Am Ryker warranty?
Generally, modifying your exhaust system may affect your warranty on those specific parts or related components if the modification is found to be the cause of a failure. However, simply replacing your muffler with a slip-on usually doesn’t void the entire warranty on your Ryker. It’s always best to check your warranty documentation or speak with your dealer to understand the specific policy.
Q2: How much horsepower can I expect from a Can-Am Ryker exhaust upgrade?
The horsepower gains vary significantly based on the specific Ryker model, the type of exhaust (slip-on vs. full system), and whether other modifications like a tune are done. A slip-on might give you a modest gain of 2-5 HP, while a full system combined with a tune could potentially offer 5-10 HP or more. Always check the manufacturer’s claims and look for independent dyno results for your model.
Q3: Is it hard to install a Can-Am Ryker exhaust myself?
Installing a slip-on muffler is generally considered easy for beginners. It usually involves removing a few bolts and a clamp. Installing a full system can be more complex and might require more tools and mechanical know-how. If you’re comfortable with basic tools and following instructions, a slip-on is a very achievable DIY project.
Q4: Will a louder exhaust make my Ryker illegal?
This depends entirely on your local laws and regulations regarding exhaust noise levels. Many aftermarket exhausts are designed to be louder than stock. Always check your local ordinances. In some regions, there are specific decibel limits for vehicle exhausts. Manufacturers may offer different options (e.g., some with removable dB killers) to comply with regulations.
Q5: Do I need to re-map or tune my Ryker after installing a new exhaust?
For a slip-on muffler that doesn’t drastically change airflow, a tune might not be absolutely necessary, but it can sometimes optimize performance. For full exhaust systems or systems that significantly alter exhaust flow, a tune or ECU reflash is often recommended or even required to ensure the engine runs efficiently, safely, and at its best. Check the exhaust manufacturer’s specific recommendations.


