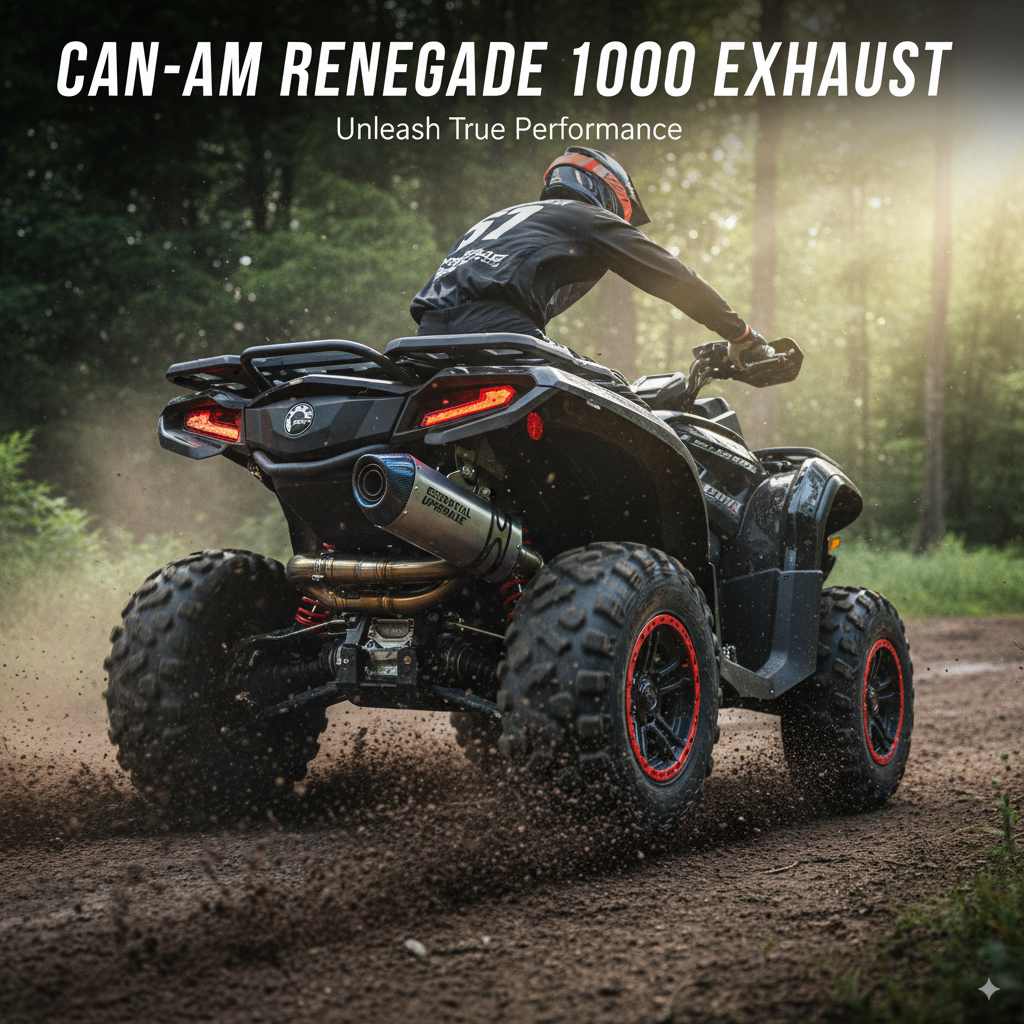
Can Am Renegade 1000 Exhaust: Essential Upgrade
Can Am Renegade 1000 Exhaust: An Essential Upgrade for Performance and Sound
Yes, upgrading your Can-Am Renegade 1000’s exhaust is indeed an essential upgrade for many riders. A new exhaust system can significantly boost performance, improve throttle response, and deliver a much more satisfying and aggressive sound, transforming your riding experience. It’s a popular and often recommended modification for this powerful ATV.
Getting more out of your Can-Am Renegade 1000 is something many riders dream about. You’ve got a beast of an ATV, and you want it to sound and perform like one! Sometimes, the stock exhaust just doesn’t cut it, leaving you wanting more power, a deeper rumble, or better responsiveness. It can feel a bit frustrating when you know your Renegade 1000 has more to give. Don’t worry, though! Upgrading your exhaust is a fantastic way to unlock that hidden potential. This guide will walk you through why it’s a great idea and what you need to know.
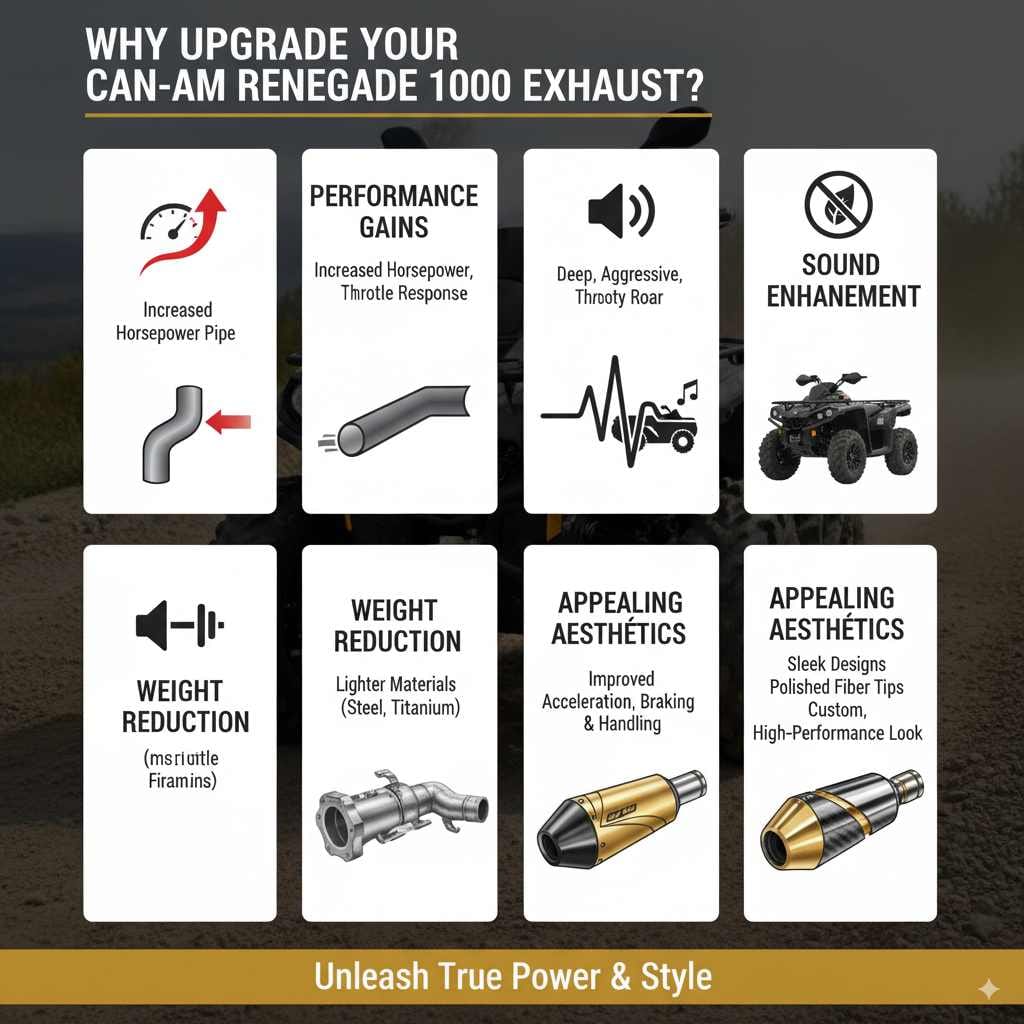
Why Upgrade Your Can-Am Renegade 1000 Exhaust?
Your ATV’s exhaust system does more than just quiet down the engine’s noise. It plays a crucial role in how efficiently your engine breathes and performs. The stock exhaust is often designed to meet strict noise regulations and is built for longevity and general use, not necessarily for maximum performance.
Performance Gains
A common reason for upgrading is to gain more horsepower and torque. Aftermarket exhausts are typically designed with less restrictive piping and mufflers. This easier flow allows the engine to expel exhaust gases more quickly and efficiently. Think of it like this: if you were trying to exhale through a straw versus a wide pipe, the wide pipe would be much easier! This improved “breathing” leads to:
Increased Horsepower: You’ll feel a noticeable jump in power, especially at the higher RPMs.
Improved Torque: The ATV will feel more responsive off the line and easier to get moving.
Better Throttle Response: Quicker reactions when you twist the throttle mean a more connected feel to your machine.
Sound Enhancement
Let’s be honest, the sound of a powerful engine is part of the fun! The stock exhaust on many ATVs, while functional, can sound a bit muffled or tame. An aftermarket exhaust can give your Renegade 1000 that deep, aggressive, and throaty roar that truly complements its performance. This isn’t just about making noise; it’s about having an audio experience that matches the thrill of the ride.
Weight Reduction
Stock exhausts are often made from heavy steel to ensure durability. Many aftermarket options are constructed from lighter materials like stainless steel or even titanium. Replacing your heavy stock system with a lighter one can:
Improve acceleration and braking.
Enhance overall handling and maneuverability.
Slightly reduce the ATV’s total weight, making it feel more agile.
Appealing Aesthetics
Beyond sound and performance, a new exhaust can dramatically change the look of your Renegade 1000. Many aftermarket exhausts feature sleek designs, polished finishes, or carbon fiber tips that add a custom, high-performance look to your ATV. It’s a way to personalize your ride and make it stand out.
Types of Can-Am Renegade 1000 Exhaust Systems
When you start looking at upgrades, you’ll find there are a few main types of exhaust systems available for your Renegade 1000:
Full Systems
A full exhaust system replaces everything from the exhaust headers (which connect directly to the engine cylinders) all the way back to the muffler tip.
Pros: Offers the most significant gains in performance and sound because it optimizes the entire exhaust flow.
Cons: Typically the most expensive option and requires the most involved installation.
Slip-On Mufflers
This is a popular choice for beginners because it’s simpler and more affordable. A slip-on muffler replaces only the stock muffler, usually attaching to the existing header pipe.
Pros: Easier to install, less expensive than a full system, provides a noticeable improvement in sound and a modest performance boost.
Cons: Performance gains are not as substantial as a full system.
Header Pipes (Exhaust Manifolds)
Some riders choose to upgrade just the header pipes, which are the pipes coming directly from the engine. This can improve exhaust flow leaving the engine.
Pros: Can offer decent performance improvements, especially when paired with a slip-on muffler.
Cons: Installation can be more challenging than a slip-on, and gains are typically less than a full system or a slip-on combined with stock headers.
Key Features to Consider When Buying
When you’re ready to shop for a Can-Am Renegade 1000 exhaust, keep these features in mind:
Material
Stainless Steel: Durable, corrosion-resistant, and offers a good balance of performance and longevity. It’s the most common choice.
Titanium: Very lightweight and strong, offering excellent performance but at a higher cost.
Carbon Fiber: Often used for muffler bodies or tips, it’s extremely light and durable, contributing to a premium look and weight savings.
Sound Level
Exhausts are often rated by their sound output, usually in decibels (dB). Some manufacturers offer different muffler packing options or inserts to adjust the sound volume. Check local regulations regarding noise limits, as some areas can be quite strict.
Emissions Compliance
Ensure the exhaust system you choose is street legal or compliant with any regulations in your riding areas. Some high-performance systems may involve removing emissions control devices, which could be illegal for trail riding or use on public lands. Always research your local laws. For information on emissions standards in the United States, you can refer to resources from the Environmental Protection Agency (EPA).
Weight
As mentioned earlier, weight is a factor for performance. Compare the weight of the aftermarket option to your stock system if shedding pounds is a priority.
Brand Reputation and Reviews
Look for established brands known for quality and performance in the powersports industry. Reading reviews from other Renegade 1000 owners can provide valuable insights into real-world performance, durability, and installation experiences.
Popular Brands for Can-Am Renegade 1000 Exhausts
Several reputable brands offer excellent exhaust options for the Can-Am Renegade 1000. Here are a few you’ll often see mentioned:
FMF Racing: Known for high-performance off-road exhausts, with popular lines like the “Q4” for quieter operation and the “Power Bomb” header system to boost power.
Yoshimura: A legendary name in performance exhausts, Yoshimura offers systems known for their killer sound and significant power gains.
HMF Racing: Specializes in exhausts for ATVs and UTVs, offering options like their “Performance Series” and “Dual Racing Series.”
Trinity Racing: Produces performance exhaust systems designed to maximize power and sound for Can-Am vehicles.
MBRP: Offers durable stainless steel exhaust systems that provide a noticeable upgrade in performance and sound at a competitive price point.
Can Am Renegade 1000 Exhaust Installation: A Beginner’s Guide
Installing a new exhaust system on your Can-Am Renegade 1000 can seem daunting, but with careful preparation and the right tools, it’s a manageable DIY project for most enthusiasts. We’ll cover the general steps for a slip-on muffler installation, as it’s the most common and beginner-friendly upgrade. Full system installations can be more complex and may require removing more body panels or components.
Safety First!
Before you begin, always prioritize safety:
Cool Engine: Ensure your ATV’s engine is completely cool to avoid burns.
Stable Surface: Park your Renegade on a flat, stable surface.
Protective Gear: Wear gloves and eye protection.
Manual: Keep your Can-Am’s owner’s manual and the new exhaust system’s instructions handy.
Tools You’ll Likely Need
Ratchet set with various metric sockets (common sizes include 8mm, 10mm, 12mm, 13mm).
Wrench set (metric).
Screwdrivers (Phillips and flathead).
Pliers.
Torque wrench (highly recommended for proper tightening of bolts).
Penetrating oil (like WD-40) for stubborn bolts.
New exhaust gasket (sometimes included, sometimes needs to be purchased separately if replacing the header connection).
Anti-seize lubricant (for exhaust bolts to prevent future seizing).
A soft cloth or rags for cleaning.
Step-by-Step Slip-On Muffler Installation
1. Locate the Stock Muffler: Your stock muffler is usually the largest component of the exhaust system, found towards the rear or side of the ATV.
2. Remove Heat Shields (if applicable): Some stock mufflers have heat shields that might need to be removed to access the mounting bolts or the connection point. Carefully remove these, noting where each bolt came from.
3. Loosen and Remove the Muffler Clamp: The muffler is typically secured to the header pipe with a clamp. Loosen the bolts on this clamp. You might need to spray some penetrating oil if it’s corroded.
4. Remove the Muffler Mounting Bolts: Locate the bolts that secure the muffler to the ATV’s frame or mounting bracket. Remove these bolts. Keep track of them, as you may reuse them or need to transfer hardware.
5. Remove the Stock Muffler: Gently twist and pull the stock muffler away from the header pipe. It might be a snug fit. If it’s stuck, a gentle tap with a rubber mallet or some careful wiggling should help. Be prepared for a bit of soot or carbon to come out.
6. Prepare the New Muffler: Inspect your new slip-on muffler. If it came with new hardware or a gasket, ensure you have it ready. Clean the connecting end of the new muffler if necessary.
7. Install the New Muffler: Slide the new muffler onto the header pipe. You might need to loosen the header pipe slightly (at its mounting points to the engine, not where it connects to the muffler) to get a better fit if it’s very tight.
8. Secure the New Muffler with Clamp: Position the new muffler so it aligns correctly with the mounting bracket. Slide the new muffler clamp over the connection point where the new muffler meets the header pipe. Tighten the clamp bolts, but don’t fully tighten them yet.
9. Install Mounting Bolts: Align the new muffler’s mounting bracket with the ATV’s frame or bracket. Install the bolts you removed earlier (or new ones provided). Again, don’t fully tighten everything just yet.
10. Align and Tighten: Once everything is loosely in place, make sure the new muffler is straight and not touching any other parts of the ATV. Now, use your torque wrench to tighten all bolts and the clamp to the manufacturer’s specifications. This is crucial to prevent leaks and ensure proper fitment. Refer to the exhaust manufacturer’s installation guide for exact torque values. For general guidance on torque specifications used in automotive applications, you can consult resources like those found through engineering societies, though specific ATV torque values vary significantly.
11. Reinstall Heat Shields: If you removed any heat shields, reinstall them over the new muffler.
12. Final Check: Double-check all bolts and clamps are secure. Start the engine and listen for any exhaust leaks (you might hear a hiss or puffing sound). If you find a leak, try tightening the clamp slightly or check the gasket connection.
Using Your New Exhaust System
After installation, take your Renegade 1000 for a short, low-speed test ride. Listen for any unusual noises and feel for improved throttle response. It’s also a good idea to re-check the exhaust system bolt tightness after your first few rides, as vibrations can sometimes loosen them.
Maintenance for Your Aftermarket Exhaust
Aftermarket exhausts, especially those made from stainless steel or titanium, require some basic maintenance to keep them looking and performing their best:
Cleaning: Wash your exhaust regularly with soap and water, just like the rest of your ATV. For stubborn dirt or mud, a degreaser can be helpful.
Polishing: Stainless steel exhausts can be polished to a shine using a metal polish designed for automotive use.
Inspection: Periodically check the exhaust for any signs of damage, rust, or loose connections.
Repacking Mufflers (if applicable): Some performance mufflers have removable end caps and utilize packing material. This material can degrade over time, reducing silencing and performance. Check your exhaust manufacturer’s recommendations for repacking intervals. This can often be done at home.
Comparison: Stock vs. Aftermarket Exhaust for Can-Am Renegade 1000
To help visualize the benefits and differences, let’s look at a general comparison. Note that specific figures can vary greatly depending on the exact aftermarket exhaust chosen.
| Feature | Stock Exhaust | Aftermarket Exhaust (Typical Performance Slip-On) | Aftermarket Exhaust (Typical Full System) |
|---|---|---|---|
| Material | Heavy Steel | Stainless Steel | Stainless Steel/Titanium |
| Weight | Heavy | Lighter than Stock | Significantly Lighter than Stock |
| Horsepower | Standard | +5-10% (estimated) | +10-15%+ (estimated) |
| Torque | Standard | Noticeable Improvement | Significant Improvement |
| Sound | Muffled, Quiet | Deeper, Louder, More Aggressive | Very Aggressive, Loud |
| Throttle Response | Standard | Improved | Sharper, More Immediate |
| Aesthetics | Functional, Basic | Often Sleeker Design, Polished Finish | High-Performance Look, Custom Tips |
| Installation | Factory Installed | Moderate DIY (Slip-on) | More Involved DIY or Professional Installation |
| Cost | Included with ATV | Moderate ($200 – $600 approx.) | High ($600 – $1500+ approx.) |
| Emissions** | Designed for Compliance | Varies: May or may not be compliant | Often Not EPA/CARB compliant (check locally) |
Note: Performance gains are estimates and can depend on other modifications like intake and tuning.*
Many riders find that a good quality slip-on exhaust offers the best balance of cost, ease of installation, and performance improvement for their Can-Am Renegade 1000.
Frequently Asked Questions (FAQ)
Q1: Will a new exhaust void my Can-Am warranty?
A1: Modifying your exhaust system could potentially affect your warranty, especially if the modification is deemed the cause of an engine issue. However, many riders upgrade without experiencing warranty problems. It’s wise to check your Can-Am warranty terms and consult with your dealer if you have concerns. Often, the manufacturer’s warranty only covers issues directly caused by the aftermarket part.
Q2: Do I need to tune my Renegade 1000 after installing a new exhaust?
A2: For most slip-on aftermarket mufflers, a tune is not strictly necessary for basic operation and safety, but it can help you get the most out of the new exhaust. For full systems, or if you are also changing the air intake, a reflash or custom ECU tune is highly recommended to optimize fuel mapping, maximize performance, and prevent potential engine damage from running too lean.
Q3: How much louder will my Renegade 1000 be with an aftermarket exhaust?
A3: This varies greatly by brand and model. Some are designed to be significantly louder and more aggressive, while others aim for a throatier tone without being excessively ear-splitting. Many manufacturers provide sound clips or decibel ratings on their websites. Always consider local noise regulations.
Q4: Can I install a full exhaust system myself?
A4: A full exhaust system installation is more complex than a slip-on. It often involves removing more body panels, dealing with header pipes that are closer to the engine, and potentially recalibrating the system. While possible for experienced DIYers, it’s a good idea to have some mechanical experience or consider professional installation if you’re a beginner for a full system.
Q5: What is the lifespan of an aftermarket exhaust?
A5: High-quality aftermarket exhausts, especially those made from stainless steel or titanium, are built to last. With proper care and maintenance, they can last as long as your ATV, often outliving the stock exhaust. However, materials like carbon fiber can be susceptible to damage from impacts, and packing materials in mufflers will eventually need replacement.
Q6: Where can I find reliable installation guides and videos?
A6: Most reputable aftermarket exhaust manufacturers provide detailed installation instructions with their products. You can also find a wealth of helpful videos on YouTube created by both manufacturers and other riders who have installed these systems on Renegade 1000s. Searching for your specific exhaust model and “Can-Am Renegade 1000 install” should yield good results.


