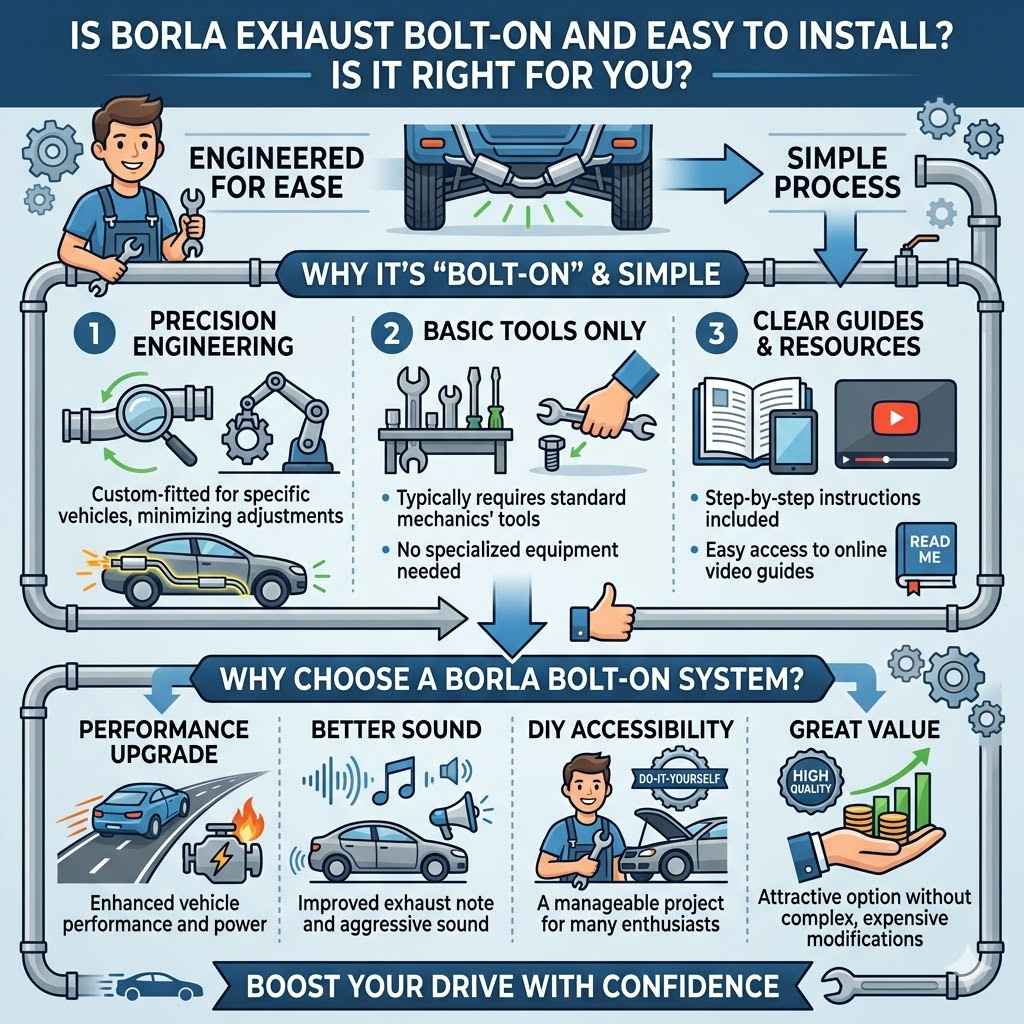
Is Borla Exhaust Bolt-On and Easy to Install
Many car owners wonder, Is Borla Exhaust Bolt-On and Easy to Install? This is a common question, especially for those new to car modifications. You might be excited about a new exhaust sound but worried about the process. Some exhaust systems can be tricky, making you think you need a professional.
We’re here to show you that upgrading your Borla exhaust can be straightforward. Follow these simple steps, and you’ll be enjoying your new sound in no time.
Understanding Borla Exhaust System Installation
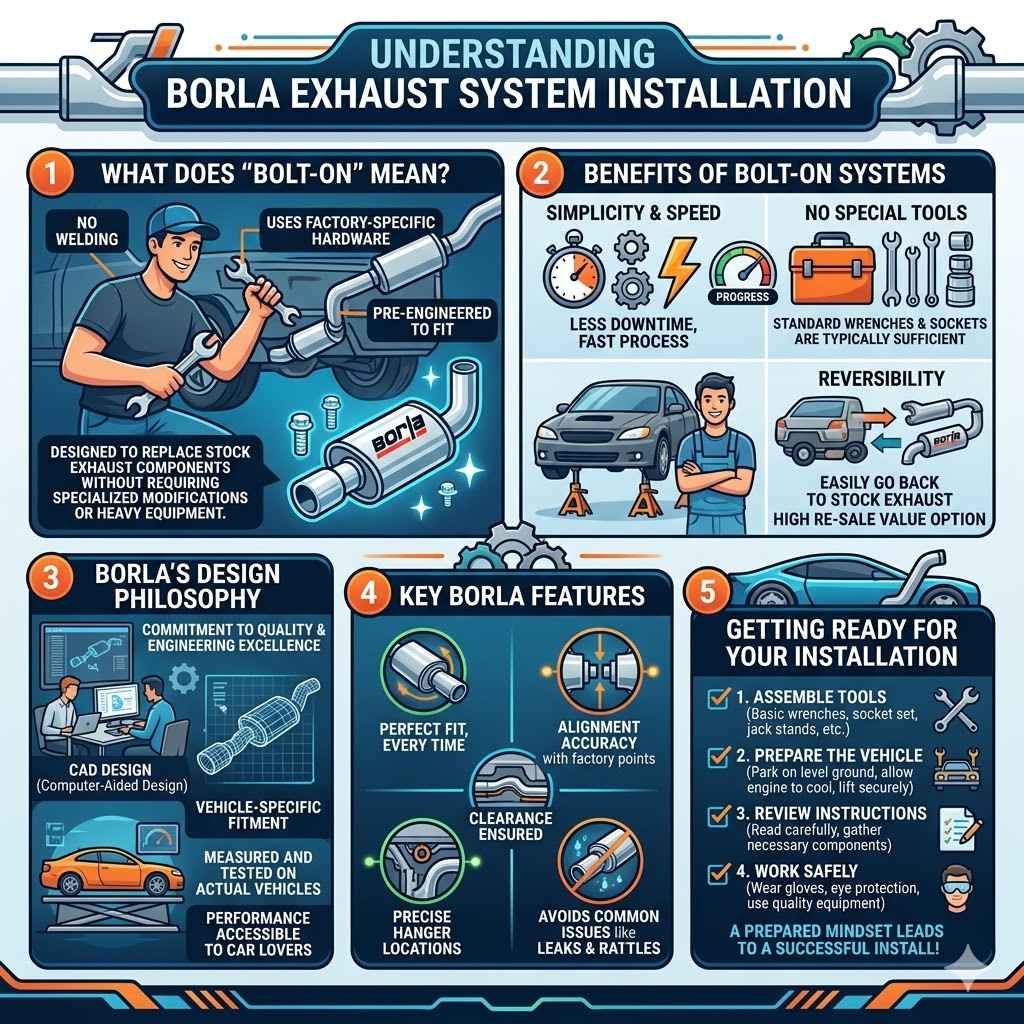
This section will break down what it means for an exhaust to be “bolt-on” and how that relates to Borla’s products. We’ll explore why this is a key feature for many car owners and what makes Borla stand out in terms of user-friendly installation. Think of this as your guide to knowing what to expect before you even start.
What Does Bolt-On Mean
When we talk about a “bolt-on” exhaust system, we mean it’s designed to
This design is a huge plus for many car enthusiasts. It lowers the barrier to entry for making upgrades. You don’t need specialized welding equipment or extensive mechanical knowledge.
The components are engineered with precision to ensure a perfect fit. This saves time and money, as you’re less likely to need to pay a mechanic for complex fitting procedures. Borla has built a reputation on creating these types of user-friendly performance parts.
Benefits of Bolt-On Systems
Simplicity and Speed
Bolt-on systems are all about making things easy and fast. Because they are designed to directly replace factory parts, the installation process is usually much quicker than custom exhaust setups. This means you can spend less time under your car and more time enjoying the upgraded sound and performance.
No Special Tools Required
For the most part, you won’t need a lot of fancy tools for a bolt-on installation. Standard wrenches, sockets, and perhaps a breaker bar are usually all that’s necessary. This makes it a project that many DIYers can tackle in their own garage or driveway.
It removes the need to invest in expensive, specialized equipment.
Reversibility
One great aspect of bolt-on exhaust systems is that they are usually completely reversible. If you ever decide to sell your car or want to go back to the stock exhaust for any reason, you can simply unbolt the aftermarket system and reinstall the original one. This is not always possible with welded or heavily modified exhaust systems.
Borla’s Design Philosophy
Borla Performance Industries is known for its commitment to quality and engineering excellence. A significant part of their design philosophy centers on creating performance exhaust systems that are not only powerful and great-sounding but also practical for the end-user to install. They invest heavily in research and development to ensure their products fit vehicles as intended.
This means that when you purchase a Borla exhaust, you’re getting a system that has been carefully measured and tested on the specific vehicle models it’s designed for. They use advanced CAD (Computer-Aided Design) software and often test fit their systems on actual vehicles. This attention to detail is what allows their systems to be so effective as bolt-on replacements.
They aim to make performance accessible to a wider audience of car lovers.
This focus on fitment is crucial for a bolt-on experience. A poorly designed part, even if it’s meant to be bolt-on, can lead to frustration, stripped bolts, exhaust leaks, and the need for additional work. Borla’s reputation is built on avoiding these issues.
Their engineers strive to replicate or improve upon the factory fitment, ensuring that the hangers align and the pipes clear the chassis components without interference.
Assessing the Ease of Borla Exhaust Installation
Now that we know what “bolt-on” means and Borla’s approach, let’s look at the practical side of installing their exhaust systems. We’ll break down the typical steps involved and discuss any challenges you might encounter. This will give you a clear picture of whether it’s a job you can do yourself.
Typical Installation Steps
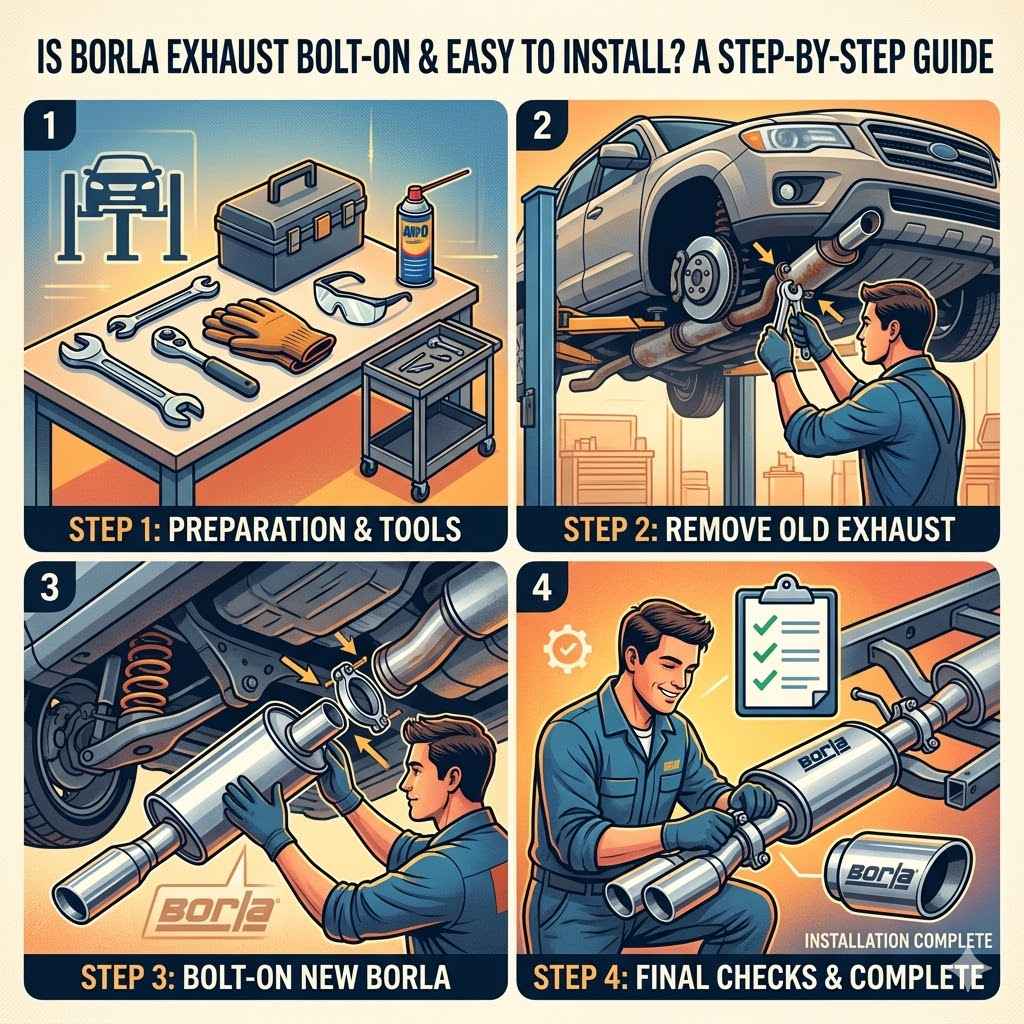
Installing a Borla exhaust system generally follows a predictable set of steps. While the exact process can vary slightly depending on the specific vehicle and the exhaust system model, the core procedure remains consistent. It’s designed to be as straightforward as possible, allowing many owners to complete the job at home.
The first step usually involves safely lifting and supporting the vehicle. This is crucial for access and safety. Once the car is secure, the next step is to unbolt and remove the factory exhaust system.
This often starts from the rear and works forward. You’ll typically need to deal with hangers that secure the exhaust to the underbody.
After the old exhaust is removed, the new Borla system is then fitted. This involves aligning the new pipes with the existing exhaust manifold or catalytic converter and connecting them using the provided hardware. Then, the new hangers are attached to secure the system.
Finally, all connections are tightened, and the vehicle is lowered. A final check for leaks and clearances is always a good idea.
Removing the Stock Exhaust
Safely Lifting the Vehicle
Before starting any work underneath your car, it is absolutely essential to lift it safely and securely. Using a reliable floor jack and placing sturdy jack stands under the designated support points is critical. Never rely solely on a jack to hold the vehicle.
Ensure the car is stable on the stands before proceeding.
Locating and Disconnecting Exhaust Sections
Your stock exhaust system is typically made up of several pieces: the muffler, the tailpipes, and the mid-pipe. You’ll need to identify where these sections are joined together. Many systems use clamps or flanges secured by bolts to connect these components.
You will also need to disconnect the exhaust from the engine or catalytic converter at the front of the system.
Dealing with Hangers and Mounts
Exhaust systems are held in place by rubber hangers that attach to brackets on the vehicle’s frame or body. These hangers can sometimes be stiff or difficult to remove. A penetrating lubricant can help loosen them.
You may also need to gently pry the exhaust pipe out of the hanger. Take note of where each hanger is positioned to help with installing the new system.
Installing the New Borla Exhaust
Aligning and Connecting Components
Once the old exhaust is out, begin fitting the new Borla exhaust. Start by loosely attaching the main sections. This allows you to make adjustments to ensure everything lines up correctly before fully tightening.
Pay close attention to the way the factory system was routed to replicate it.
Securing with Provided Hardware
Borla systems come with all the necessary bolts, nuts, and clamps. Use these provided parts to secure the exhaust sections together and to the vehicle. Ensure all connections are snug but avoid overtightening, which can strip threads or damage components.
Torque specifications, if provided, should be followed.
Attaching Hangers and Final Tightening
Transfer or attach the new hangers to the new exhaust pipes. This is often the most fiddly part, as you may need to lift sections of the exhaust to get the hangers into their brackets. Once everything is in place and aligned, go back and systematically tighten all the bolts and clamps.
A final check for clearance is important.
Potential Challenges and How to Overcome Them
While Borla exhaust systems are known for their ease of installation, a few common issues can arise. These are generally minor and manageable for most DIYers. Being aware of them can help you prepare and prevent unnecessary frustration during the process.
One common challenge is dealing with rusted or seized bolts on the original exhaust. Over time, exposure to the elements can cause these fasteners to become very difficult to remove. Using a good quality penetrating oil and allowing it to soak in for a while can help.
Sometimes, a bit of heat from a torch can also loosen stubborn bolts, but this should be done with caution to avoid damaging surrounding parts.
Another potential issue is the fitment of hangers. Rubber hangers can be old and brittle, or the new exhaust might require them to be positioned slightly differently. Having an extra pair of hands can be very helpful here, as it allows one person to hold the exhaust in place while another works on securing the hangers.
Patience is key; don’t force parts if they don’t seem to align easily.
Dealing with Rusted Fasteners
Use of Penetrating Oil
This is your best friend when dealing with rusty bolts. Spray a generous amount of penetrating oil (like PB Blaster or Liquid Wrench) onto the bolts and nuts of the old exhaust system. Let it sit for at least 15-30 minutes, or even overnight for severely rusted parts.
This allows the oil to seep into the threads and break down the rust.
Applying Gentle Heat
If penetrating oil alone doesn’t work, a propane torch can be used to heat the bolt or nut. The heat causes the metal to expand, which can help break the rust bond. Apply heat to the nut rather than the bolt itself.
Be extremely cautious when using heat near fuel lines, wiring, or rubber components. Have a fire extinguisher nearby.
Using a Breaker Bar and Impact Sockets
A standard wrench might not provide enough leverage. A breaker bar offers more torque to loosen stubborn bolts. Using impact sockets is also recommended, as they are designed to withstand higher torque without cracking.
If the bolt head starts to round off, consider using a bolt extractor socket.
Alignment and Hanger Issues
The Importance of Loosely Fitting First
Never fully tighten any part of the exhaust system until all components are in place and loosely connected. This provides the necessary wiggle room to align everything properly. Once all the pipes and hangers are in their general positions, you can then go back and systematically tighten everything down.
Having a Helper Can Be a Game Changer
Trying to hold a heavy exhaust section in place with one hand while trying to attach a hanger or bolt with the other can be incredibly difficult. A second person can make a huge difference. They can help lift, position, and support the exhaust, making the alignment process much smoother and safer.
Adjusting Hanger Position
Sometimes the new exhaust hangers might require slight adjustments to the mounting brackets on the vehicle. This could involve loosening a bracket, shifting it slightly, and then re-tightening. In rare cases, if a hanger seems impossible to fit, a Borla technical representative can advise on the best course of action or if a different hanger is needed.
Borla Exhaust Installation: Step-by-Step Guide
This section provides a more detailed, sequential guide to installing your Borla exhaust. We’ll walk you through each stage, offering tips and considerations to ensure a successful DIY installation. This is where we put all the pieces together for a clear, actionable plan.
Preparation and Safety First
Before you even think about touching your car’s exhaust, proper preparation and safety measures are paramount. This stage sets the foundation for a smooth and successful installation. Rushing this part can lead to errors or, worse, injuries.
First, gather all the necessary tools. This typically includes a socket set with various metric and SAE sizes, wrenches, a torque wrench, a breaker bar, penetrating oil, safety glasses, gloves, and a good quality floor jack with jack stands. Ensure you have a clean, well-lit workspace.
If working on a driveway, make sure it’s level and stable.
Safety is non-negotiable. Always use sturdy jack stands to support the vehicle. Never work under a car supported only by a jack.
Wear safety glasses to protect your eyes from debris. Gloves will protect your hands from grease, rust, and sharp edges. Ensure you have a fire extinguisher nearby if you plan to use any heat.
Tools and Equipment Checklist
Socket Set and Wrenches
You’ll need a comprehensive set of sockets and wrenches in both metric and SAE sizes. Common sizes for exhaust bolts range from 10mm to 15mm and 3/8 inch to 9/16 inch. Include deep sockets for reaching recessed nuts.
Torque Wrench
Essential for tightening bolts to the manufacturer’s specifications. Overtightening can damage parts, while undertightening can lead to leaks or components coming loose. Refer to your Borla installation instructions for specific torque values.
Breaker Bar and Extensions
For stubborn bolts that require extra leverage, a breaker bar is invaluable. Various extensions for your socket wrench will help you reach difficult areas.
Safety Gear
Safety glasses are a must to protect your eyes from falling debris or rust. Work gloves will prevent cuts and scrapes. Hearing protection is also recommended, especially if using power tools or dealing with loud exhaust components.
Penetrating Oil and Anti-Seize Compound
As mentioned, penetrating oil is key for rusted bolts. An anti-seize compound should be applied to new bolts before installation to prevent them from seizing in the future, making future removal easier.
Ensuring Vehicle Stability and Access
Proper Jacking Technique
Consult your vehicle’s owner’s manual for the correct jacking points. Place the jack under the designated point and lift the vehicle until you have enough clearance to position your jack stands. Make sure the jack stands are placed on a solid part of the frame or chassis.
Secure Jack Stand Placement
Position the jack stands under strong structural points of the vehicle, typically the frame rails or reinforced pinch welds. Lower the vehicle slowly onto the jack stands, ensuring they are stable and properly supporting the weight. Give the car a gentle push to confirm it’s secure before going underneath.
Clearance for Movement
Ensure you have enough room to work comfortably around the exhaust system. You may need to remove wheels for better access, depending on your vehicle and the exhaust system design. Clear the work area of any tools, equipment, or obstructions that could impede your movement or pose a tripping hazard.
Removing the Old Exhaust
This stage involves carefully detaching your existing exhaust system from your car. It’s important to be systematic and patient, especially if dealing with older, rusted components. Taking photos as you go can be helpful for reassembly.
Start at the rear of the vehicle and work your way forward. You’ll typically encounter clamps, bolts, and rubber hangers. Loosen any clamps holding sections together.
Then, unbolt the exhaust from the manifold or catalytic converter. As you release each section, gently support it to prevent it from dropping suddenly.
Pay close attention to how the exhaust is routed and how the hangers are positioned. You might need to use a pry bar or a specialized exhaust hanger removal tool to detach the rubber hangers from their brackets. If bolts are seized, use penetrating oil and allow it time to work.
In some cases, cutting rusted bolts might be the easiest solution.
Detaching Exhaust Sections
Loosening Clamps and Bolts
Locate all the clamps and bolts that connect the various sections of your exhaust system. Use the appropriate socket or wrench to loosen them. If a clamp is rusted, you may need to carefully pry it open slightly or use a wire brush to clean it before attempting to loosen the bolt.
Unbolting from Manifold or Catalytic Converter
At the front of the exhaust system, you’ll find bolts that connect it to the exhaust manifold or catalytic converter. These bolts can often be rusted and difficult to remove. Apply penetrating oil and allow it to soak.
You may need a longer wrench or breaker bar to get enough leverage.
Supporting and Lowering the Old System
As you remove bolts and clamps, the exhaust system will become loose. It’s a good idea to have a helper or use a jack stand to support the weight of the exhaust as you work. This prevents it from falling unexpectedly and causing damage or injury.
Once all connections are free, carefully lower the old system to the ground.
Releasing Rubber Hangers
Using a Pry Bar or Hanger Tool
Exhaust hangers are usually made of sturdy rubber that stretches onto a metal post. You can often use a pry bar to gently lever the rubber hanger off the post. A specialized exhaust hanger removal tool, which slides between the rubber and the post, can make this task much easier and prevent damage to the hanger.
Lubrication for Stubborn Hangers
If the hangers are stuck, spray some penetrating oil or soapy water onto the rubber and the metal post. This can help lubricate the connection, allowing the hanger to slide off more easily. Wiggle the exhaust pipe back and forth gently while applying pressure to the hanger.
Note Hanger Placement for New System
Before removing the old hangers completely, take note of their position on the vehicle’s underbody. This will help you correctly position the hangers for your new Borla exhaust system, ensuring the new pipes are supported in the right places and hang at the proper height.
Installing the New Borla Exhaust
This is the exciting part where you get to fit your new Borla performance exhaust. The key here is to work systematically, ensuring proper alignment before tightening everything down. This will result in a leak-free and well-fitting system.
Begin by loosely fitting the main sections of the Borla exhaust. Start from the front and work your way back. Hang the pipes using the new rubber hangers.
Once all sections are loosely connected and hanging in place, check the overall alignment. Ensure there is adequate clearance between the exhaust pipes and any chassis components, fuel lines, or brake lines.
Once you are satisfied with the alignment, begin tightening the clamps and bolts. Work your way from the front to the rear, gradually tightening each connection. Use a torque wrench to tighten fasteners to the specifications provided by Borla.
This ensures a secure installation that prevents leaks and rattles.
Fitting Components and Aligning Pipes
Assemble Loosely First
Before you tighten any bolts or clamps, loosely connect all the sections of your new Borla exhaust. This allows you to adjust the position of each pipe to achieve the best fit and alignment. Make sure that the pipes are not touching any other parts of the car’s undercarriage.
Using Provided Hangers and Brackets
Your Borla exhaust will come with new hangers or be designed to use the factory hanger locations. Attach the new hangers to the exhaust pipes and then connect them to the corresponding brackets on your vehicle’s chassis. This is often a step where an extra pair of hands is very useful.
Visual Check for Clearance
With everything loosely in place, take a good look at the entire exhaust system. You need to ensure that no part of the exhaust is touching the frame, the fuel tank, brake lines, or suspension components. Small gaps are necessary to prevent vibrations and potential damage.
Turn the wheels of the car to full lock in both directions to check clearance during steering.
Tightening and Securing the System
Systematic Tightening Process
Once the alignment is perfect, begin the tightening process. Start at the very front of the exhaust system, near the engine or catalytic converter, and work your way back. Tighten clamps and bolts incrementally, moving from one connection to the next.
Applying Torque Specifications
It’s crucial to tighten all fasteners to the torque specifications recommended by Borla. Using a torque wrench ensures that the connections are secure without being overly tight, which could strip threads or warp flanges. Your Borla installation guide will list these specifications.
Final Inspection and Leak Check
After all bolts are tightened, double-check that all hangers are properly seated and that the exhaust system is securely mounted. Start the engine and listen for any unusual noises or leaks, especially from the connections. You can also use a soap and water solution sprayed on the joints; bubbles will indicate a leak.
Is Borla Exhaust Bolt-On and Easy to Install Is It Right For You
Considering the design and typical installation process, it’s clear that Borla exhaust systems are engineered for ease of installation. The “bolt-on” nature of these systems significantly simplifies the process for most car owners. This makes them a very attractive option for those looking to upgrade their vehicle’s performance and sound without the hassle and expense of complex modifications.
The straightforward, step-by-step approach outlined above demonstrates that with basic tools and some patience, most DIY enthusiasts can successfully install a Borla exhaust. The company’s commitment to precision engineering ensures that their products fit vehicles as intended, minimizing the need for specialized skills or equipment. This user-friendly design philosophy is a major reason for Borla’s popularity among car enthusiasts.
Ultimately, the question of Is Borla Exhaust Bolt-On and Easy to Install? has a very positive answer. The brand’s focus on bolt-on designs, combined with clear installation guides and readily available online resources, makes it a highly accessible upgrade for a wide range of vehicle owners.
You can feel confident tackling this project yourself and enjoying the enhanced driving experience that a Borla exhaust provides.
Frequently Asked Questions
Question: Do I need any special tools to install a Borla exhaust system
Answer: Generally, no. Most Borla exhaust systems are designed to be bolt-on and can be installed using common hand tools like socket sets, wrenches, and a torque wrench. Special tools are usually not required, making it a DIY-friendly project.
Question: How long does it typically take to install a Borla exhaust
Answer: For a typical bolt-on Borla exhaust system, installation can take anywhere from 1 to 3 hours for someone with basic mechanical experience. If you’re new to car modifications, it might take a bit longer, perhaps up to half a day, especially if dealing with rusted bolts.
Question: Will a Borla exhaust void my car’s warranty
Answer: In most cases, installing an aftermarket exhaust like Borla will not void your vehicle’s warranty, especially if it does not affect other warranted components. However, it’s always a good idea to check your specific vehicle’s warranty documentation or consult your dealership.
Question: Can I install a Borla exhaust myself or should I hire a professional
Answer: Many car owners successfully install Borla exhaust systems themselves due to their bolt-on design. If you are comfortable with basic car maintenance and have the necessary tools, it’s a manageable DIY project. If you lack confidence or experience, hiring a professional mechanic is always an option.
Question: What if I encounter problems during installation
Answer: If you run into difficulties, such as seized bolts or alignment issues, take a break and re-assess. Refer to the specific installation instructions that came with your Borla exhaust. Borla also offers customer support, and there are numerous online forums and videos where other enthusiasts share their experiences and solutions.
Summary
Borla exhaust systems are designed to be bolt-on and are generally easy to install for DIYers. Their precise engineering ensures a direct fit with the factory mounting points, eliminating the need for welding or cutting. With common tools and by following the steps for preparation, removal, and installation, most owners can successfully upgrade their exhaust system and enjoy improved sound and performance.