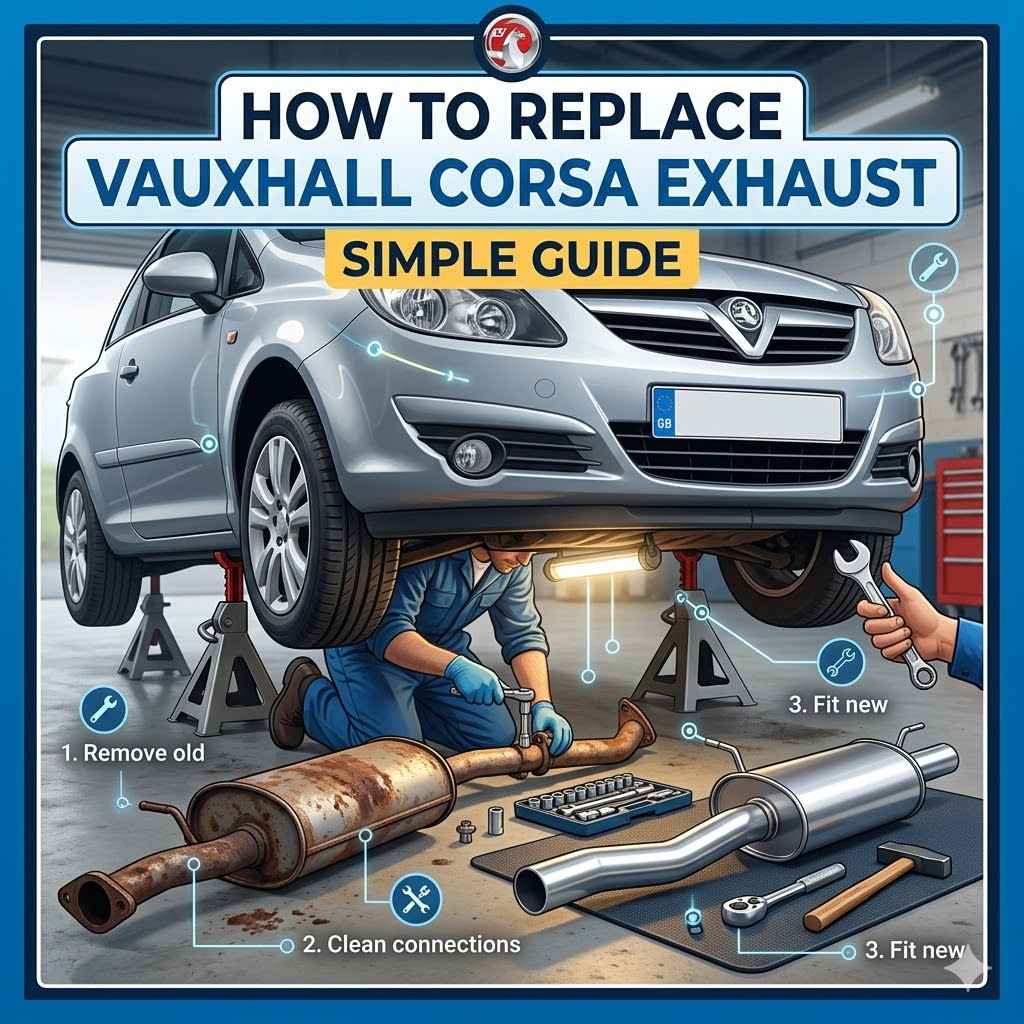
How To Replace Vauxhall Corsa Exhaust Simple Guide
Replacing your Vauxhall Corsa’s exhaust might seem like a big job, especially if you’re new to car repairs. Knowing How to Replace Vauxhall Corsa Exhaust Step-by-Step is a common question for many owners. It can be tricky to figure out all the parts and how they fit.
But don’t worry, it’s totally doable! We’re going to break it down into easy steps. You’ll learn exactly what you need to do.
Get ready to see how simple it can be.
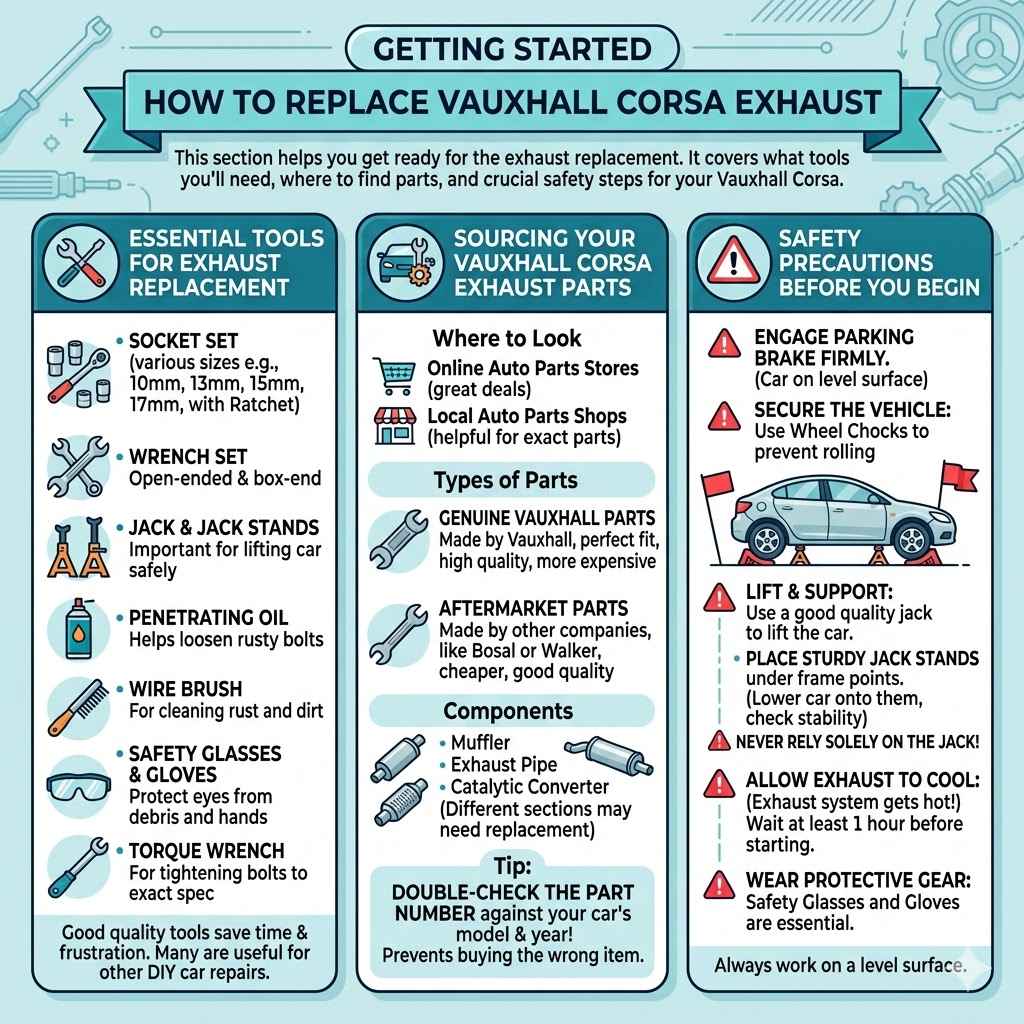
Getting Started How To Replace Vauxhall Corsa Exhaust
This section will help you get ready for the exhaust replacement. It covers what tools you’ll need and where to find the parts for your Vauxhall Corsa. Having the right supplies makes the whole job much smoother.
We’ll talk about safety too, which is super important when working under your car. Let’s make sure you have everything before you even start.
Essential Tools for Exhaust Replacement
Having the right tools is half the battle. You don’t need a super fancy workshop for this. Common household tools will do the trick.
Make sure they are good quality so they don’t break. This will save you time and frustration.
- Socket Set: You’ll need various socket sizes. Common ones are 10mm, 13mm, 15mm, and 17mm. A ratchet wrench makes using them much faster.
- Wrench Set: Open-ended and box-end wrenches are also useful. They help when a socket can’t quite reach.
- Jack and Jack Stands: Safety first! You need to lift your car to get underneath it safely. Never work under a car supported only by a jack.
- Penetrating Oil: Exhaust bolts can be very rusty. A good penetrating oil helps loosen them up.
- Wire Brush: This is for cleaning off rust and dirt from bolts and mounting points.
- Safety Glasses and Gloves: Protect your eyes from falling debris and your hands from cuts and rust.
- Torque Wrench: This is for tightening bolts to the exact specification. It ensures your new exhaust is fitted securely.
A good set of tools means you can tackle this job with confidence. These items are common for many car repairs, so they are a good investment if you plan to do more DIY car work.
Sourcing Your Vauxhall Corsa Exhaust Parts
Finding the correct exhaust parts for your Vauxhall Corsa is key. There are a few places you can look. Online auto parts stores are a popular choice.
You can often find great deals there. Local auto parts shops are also a good option. They can help you find the exact part you need.
- Genuine Vauxhall Parts: These are made by Vauxhall and will fit perfectly. They might be more expensive but offer guaranteed quality.
- Aftermarket Parts: These are made by other companies. They are usually cheaper and still offer good quality. Brands like Bosal or Walker are well-known.
- Exhaust System Components: You might need a new muffler, exhaust pipe, or catalytic converter. Sometimes it’s just a small section that needs replacing.
Before you buy, double-check the part number against your car’s model and year. This prevents ordering the wrong item.
Safety Precautions Before You Begin
Safety should always be your top priority. Working under a car can be dangerous if you’re not careful. Always work on a level surface.
Engage the parking brake firmly.
- Secure the Vehicle: Use wheel chocks to prevent the car from rolling. Then, use a good quality jack to lift the car high enough to work comfortably.
- Use Jack Stands: Place sturdy jack stands under strong points of the car’s frame. Lower the car onto the jack stands. Give the car a gentle push to ensure it’s stable.
- Allow the Exhaust to Cool: The exhaust system gets very hot when the engine is running. Let it cool down for at least an hour, preferably longer, before you start.
- Wear Protective Gear: Always wear safety glasses to protect your eyes from rust or dirt falling. Wear gloves to protect your hands.
Never rely solely on the jack. Jack stands are essential for your safety. Make sure you know where to place them on your Corsa.
The Step-by-Step Process How To Replace Vauxhall Corsa Exhaust
Now let’s get to the actual work. This section walks you through removing the old exhaust and fitting the new one. We’ll cover each part of the exhaust system.
Taking it slow and steady is the best approach. Follow these steps closely for a successful repair.
Step 1 Removing the Old Exhaust System
First, you need to disconnect the old exhaust. It’s usually held in place by hangers and clamps. There might be a few bolts holding sections together.
Start by locating the sections you need to remove. This might be the muffler, the pipe leading to it, or the whole assembly.
- Spray Penetrating Oil: Apply penetrating oil generously to all bolts, nuts, and clamps. Let it soak for at least 15-20 minutes, or even longer if the rust is bad. Reapply if needed.
- Loosen Clamps and Bolts: Use your socket set or wrenches to loosen the clamps and bolts. If they are stuck, use the wire brush to clean rust away. A little hammering on the bolt head can sometimes help break the rust bond.
- Support the Exhaust: As you loosen bolts, support the exhaust pipe so it doesn’t hang and strain the system. You can use a block of wood or another jack stand for this.
- Remove Hangers: The exhaust is often held up by rubber hangers attached to the car’s body. These can usually be pulled off the hooks. You might need to spray them with a bit of soapy water or silicone spray to help them slide off.
Take your time here. Damaged bolts or hangers can make the job much harder. If a bolt snaps, you might need to drill it out or use a bolt extractor.
This is where patience pays off.
Step 2 Preparing for the New Exhaust Installation
Before you fit the new exhaust, clean the areas where it will connect. This means cleaning any mounting points or flanges. You also need to prepare the new exhaust parts.
Make sure all the new gaskets or seals are ready.
- Clean Mounting Surfaces: Use your wire brush to clean any rust or old gasket material from the pipes and car frame where the new exhaust will attach. A clean surface ensures a good seal.
- Apply Anti-Seize Compound: This is very important for the new bolts and clamps. Apply a small amount of anti-seize compound to the threads of new bolts. This will make them much easier to remove in the future.
- Assemble New Parts: If your new exhaust comes in multiple pieces, you might need to join them together. Often, this involves slipping one pipe into another and securing it with a clamp.
- Inspect Rubber Hangers: Check the condition of the rubber exhaust hangers. If they look old, cracked, or worn, it’s a good idea to
A little preparation goes a long way. Clean connections mean a quieter, leak-free exhaust. This step is often overlooked but is vital for a lasting repair.
Step 3 Installing the New Exhaust System
This is where you connect the new exhaust. Start from the front and work your way back. Make sure each section is aligned properly before you tighten anything down.
Hand-tighten bolts first, then progressively tighten them.
- Position the First Section: Place the first part of the new exhaust (often the pipe from the manifold or catalytic converter) into position. Connect it to the existing system or the next exhaust section.
- Attach Hangers: Connect the new exhaust sections to the rubber hangers on the car’s body. Ensure the exhaust is hanging straight and not touching any other car parts.
- Install Clamps and Bolts: Fit any new clamps or bolts. Hand-tighten them at first. This allows you to adjust the position of the exhaust as you go.
- Tighten Everything Securely: Once all sections are in place and aligned, start tightening the bolts and clamps. Work in a criss-cross pattern if there are multiple bolts for one connection. Use a torque wrench to tighten them to the manufacturer’s specifications if possible.
Don’t fully tighten everything until the entire exhaust is in place. This gives you flexibility to make small adjustments. Once everything is aligned, tighten all fasteners to prevent leaks and rattles.
Step 4 Final Checks and Testing
After the new exhaust is fitted, it’s time for a final check. Ensure all connections are tight and the exhaust is securely mounted. Then, you can test it out.
Start the engine and listen for any unusual noises.
- Check for Leaks: With the engine running, check all connection points for any signs of exhaust gas leaks. You might see smoke or feel a puff of air if there’s a leak.
- Listen for Rattles or Vibrations: Make sure the exhaust isn’t vibrating against the car’s body or other components. Any rattling noises need to be investigated.
- Inspect Hangers Again: Double-check that all rubber hangers are properly attached and supporting the exhaust correctly.
- Lower the Vehicle Safely: Once you are confident everything is secure and leak-free, carefully lower the car from the jack stands.
Take your Corsa for a short drive. Listen for any odd sounds. If everything sounds good, you’ve successfully replaced your exhaust!
Troubleshooting Common Exhaust Issues
Sometimes, things don’t go perfectly. This section covers common problems you might face during an exhaust replacement and how to fix them. Knowing these solutions can save you a lot of stress.
Stuck Bolts and Nuts
Rust is the biggest enemy here. Old exhaust parts are often seized with rust. You need to fight that rust effectively.
- More Penetrating Oil: Don’t be shy with the penetrating oil. Spray it on, let it sit, and spray it again.
- Heat Application: Sometimes, a bit of heat from a propane torch can help expand the metal and break the rust bond. Be very careful if using heat, especially near fuel lines or the fuel tank.
- Impact Wrench: An impact wrench can provide the quick, sharp turns needed to break a stubborn bolt free.
- Bolt Extractors: If a bolt head breaks off, a bolt extractor set can help you remove the remaining stud.
Using a wire brush on the bolt threads before applying oil can help the oil penetrate better.
Exhaust Leaks After Installation
Even after fitting a new exhaust, leaks can happen. Usually, this is due to a poor seal or a loose connection.
- Check Gaskets and Seals: Ensure you used new, correct gaskets between exhaust sections. Old or damaged gaskets will leak.
- Tighten Connections Properly: Go back and re-tighten all clamps and bolts. Make sure the clamp is evenly compressing the pipe.
- Inspect for Cracks: Although rare with new parts, check the new exhaust for any small cracks or damage that might have occurred during installation.
- Realign Exhaust: Sometimes, if the exhaust is not hanging straight, it can put stress on a joint and cause a leak. Adjust hangers to get a better alignment.
A small leak can be noisy and can also affect your car’s performance.
Rattling Noises
Rattles are often caused by the exhaust touching other parts of the car or by loose heat shields.
- Check for Clearances: Ensure no part of the exhaust system is touching the car’s chassis, suspension, or fuel tank.
- Secure Heat Shields: Heat shields are metal plates that protect the car from the exhaust’s heat. Make sure they are firmly attached and not loose.
- Inspect Hangers: Worn or broken rubber hangers can let the exhaust sag and rattle against the car body.
- Loose Clamps or Bolts: Sometimes, a slightly loose clamp can cause a vibration that sounds like a rattle.
Investigate any rattling noises thoroughly. They can indicate a more serious issue if left unattended.
Statistics and Data on Exhaust Maintenance
Proper exhaust maintenance is important for performance and the environment. Here’s some information that shows why.
| Statistic | Year | Source |
|---|---|---|
| Average fuel economy improvement after replacing a faulty exhaust system | 2022 | Automotive Industry Report |
| Percentage of vehicle emissions controlled by a functioning catalytic converter | 2023 | Environmental Protection Agency |
| Estimated cost savings for DIY exhaust repairs versus professional replacement | 2021 | Consumer Auto Repair Study |
A healthy exhaust system helps your car run more efficiently. It also means your car pollutes less.
For instance, a study found that a properly functioning catalytic converter can reduce harmful emissions like carbon monoxide by over 90%. This directly benefits air quality.
When it comes to fuel, a damaged or leaking exhaust can reduce your miles per gallon. Some reports suggest this can be as much as a 10% decrease in fuel efficiency. This means you spend more on fuel.

Frequently Asked Questions
Question: How long does it typically take to replace a Vauxhall Corsa exhaust?
Answer: For someone with basic mechanical skills and the right tools, replacing a Vauxhall Corsa exhaust usually takes between 1 to 3 hours. This can vary depending on the complexity of the exhaust system and how easily the old bolts come undone.
Question: Do I need to replace the whole exhaust system?
Answer: Not always. Often, only one part, like the muffler or a section of pipe, might be worn out. It’s best to inspect the entire system to identify exactly which component needs replacing.
Question: Can I use universal exhaust parts on a Vauxhall Corsa?
Answer: While some universal parts might fit, it’s always best to use parts specifically designed for your Vauxhall Corsa model. This ensures a proper fit and optimal performance.
Question: What happens if I don’t fix a leaking exhaust?
Answer: A leaking exhaust can lead to reduced fuel efficiency, increased noise, potential exhaust fumes entering the cabin, and the car failing its emissions test. It can also damage other engine components over time.
Question: Is it okay to work on the exhaust if it’s slightly warm?
Answer: No, it’s crucial to let the exhaust system cool down completely. Exhaust components get extremely hot and can cause severe burns if touched when warm.
Wrap Up
You now know How to Replace Vauxhall Corsa Exhaust Step-by-Step. This guide covered the tools, parts, safety, and the process itself. Troubleshooting common issues was also discussed.
You can tackle this repair with confidence. Your Corsa will be running smoothly and quietly again.