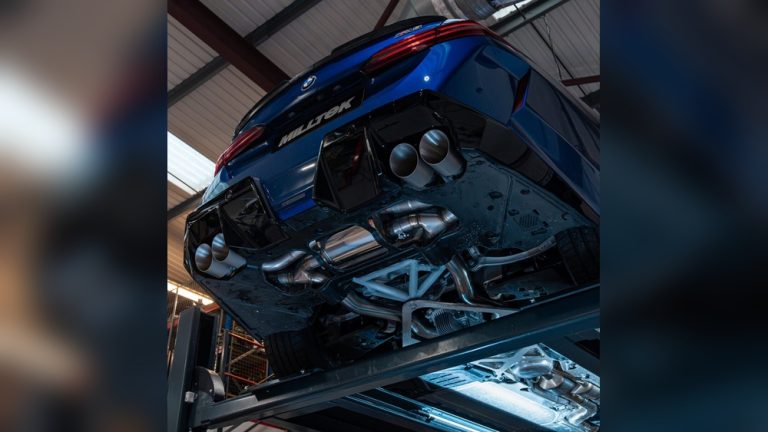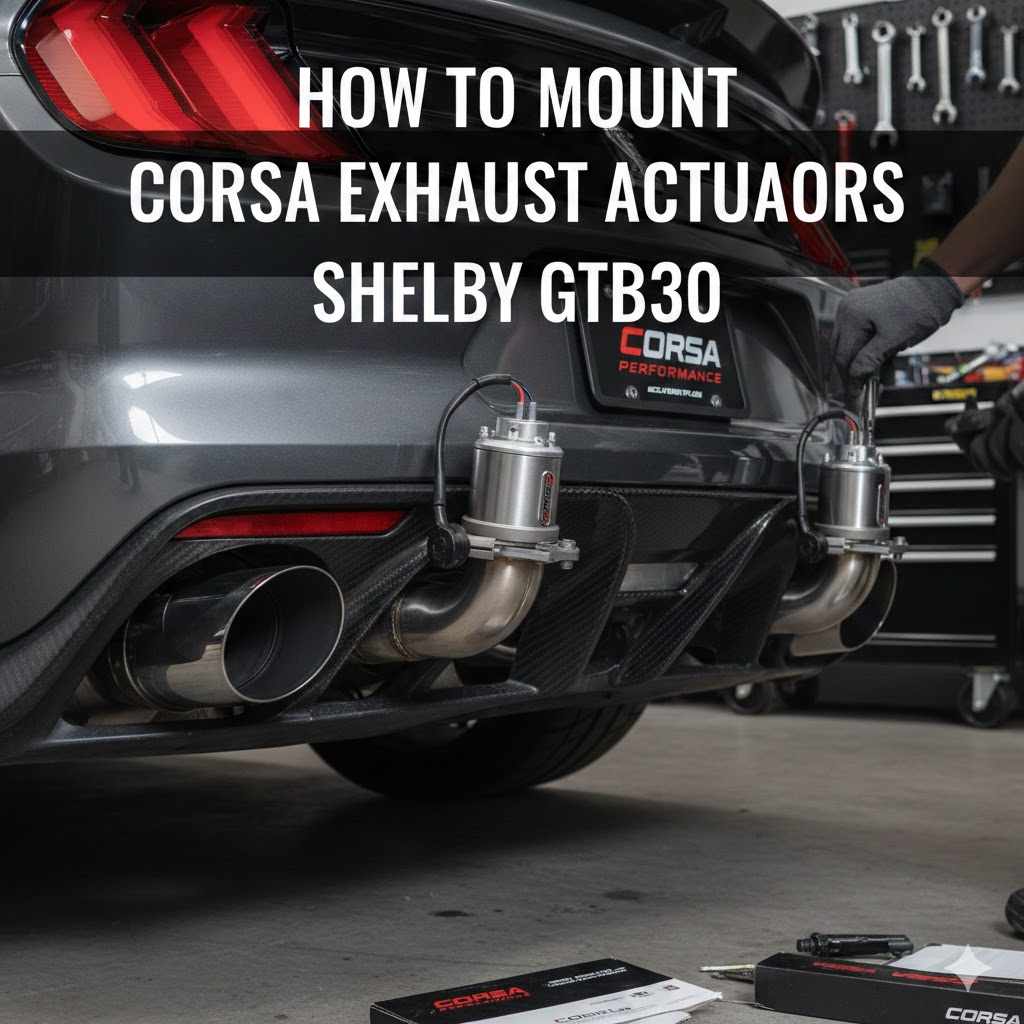
How to Mount Corsa Exhaust Actuators Shelby GT350
Many car owners find installing aftermarket parts a bit tricky. Especially when it comes to something like the How to Mount Corsa Exhaust Actuators on 2017 Shelby GT350. It might seem like a big job if you’ve never done it before.
You might worry about getting it wrong or causing damage. But don’t let that stop you. This guide is here to make the process super simple.
We will walk through each step together. Get ready to make your Shelby sound even better.
Mounting Corsa Exhaust Actuators Shelby GT350
This section covers the essential steps for attaching Corsa exhaust actuators to your 2017 Shelby GT350. We will break down the process into manageable parts. This makes it easier for you to follow along.
We aim to provide clear instructions so you can feel confident. This guide will help you achieve a successful installation. It’s about making your car perform and sound the way you want.
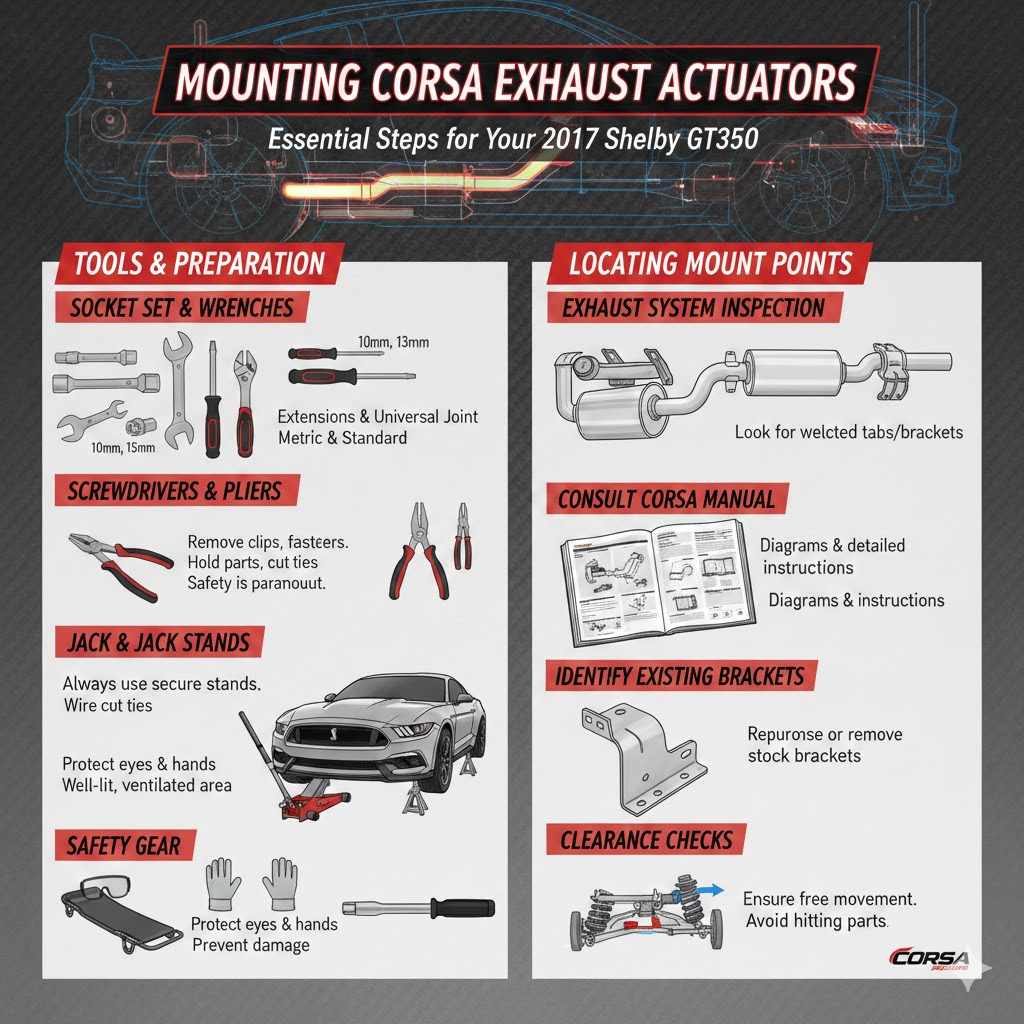
Tools and Preparation for Installation
Before you begin installing your Corsa exhaust actuators, gather all the necessary tools. Having everything ready makes the job go much smoother. This prevents interruptions and ensures you don’t have to stop midway to find something.
Proper preparation is key to a successful DIY project.
- Socket Set and WrenchesYou will need a set of sockets and wrenches in various sizes. Common sizes for exhaust work include 10mm, 13mm, and 15mm. Make sure your sockets have extensions and a universal joint.
These help reach bolts in tight spots. Having both standard and metric sizes is a good idea, though most car parts use metric.
- Screwdrivers and PliersA set of Phillips and flathead screwdrivers is essential for removing clips and fasteners. Pliers, especially needle-nose and locking pliers, can be very useful for holding small parts or disconnecting stubborn clamps. Wire cutters might also be needed if any zip ties are present.
- Jack and Jack StandsYou will need to lift your Shelby GT350 to access the exhaust system. Always use a sturdy jack and, more importantly, secure jack stands. Never rely solely on a jack.
Position the jack stands on strong points of the car’s frame to prevent it from falling. Safety is paramount when working under a vehicle.
- Safety GearAlways wear safety glasses to protect your eyes from debris. Gloves will protect your hands from grease, grime, and sharp edges. A creeper can make sliding under the car more comfortable.
Work in a well-lit and well-ventilated area.
- Torque WrenchFor critical connections, a torque wrench is vital. It ensures bolts are tightened to the manufacturer’s specifications. Overtightening can strip threads or damage parts.
Undertightening can lead to leaks or parts coming loose.
Locating the Exhaust Actuator Mount Points
Finding the correct spots on your exhaust system for the actuators is the next crucial step. The Corsa actuators need to be mounted securely to ensure they function correctly and last. This involves identifying specific mounting brackets or areas on the exhaust pipes.
- Exhaust System InspectionBegin by carefully looking at your Shelby GT350’s exhaust system. You’ll be working with the mufflers and the pipes leading to them. Many performance exhausts have pre-designated mounting points for actuators.
These are often small, welded tabs or brackets.
- Consulting the Corsa ManualAlways refer to the specific installation manual that came with your Corsa exhaust actuators. This manual will have diagrams and detailed instructions for your exact model. It will show you precisely where the actuators are meant to be attached.
Do not guess; follow the manufacturer’s guide.
- Identifying Existing BracketsSometimes, the stock exhaust system might have brackets that can be repurposed or might require removal to install the Corsa components. The Corsa actuators usually come with their own mounting hardware and specific brackets designed to fit certain exhaust configurations. Look for areas that are clean and free of rust or damage.
- Clearance ChecksEnsure there is enough clearance around the intended mounting location. The actuator arm needs to move freely without hitting any other parts of the car, such as the drive shaft, suspension components, or body panels. Spin the actuator arm by hand (if possible) to confirm it won’t bind.
Installing the Corsa Exhaust Actuators on Your Shelby GT350
This part details the actual physical mounting of the Corsa exhaust actuators. It involves securing them to the prepared locations. Precision and care are important here to ensure a solid fit.
Attaching the Actuator Brackets
Most Corsa exhaust actuator kits come with custom brackets. These are designed to bolt directly onto your Shelby GT350’s exhaust system. This section focuses on how to properly secure these brackets.
- Positioning the BracketPlace the Corsa actuator bracket onto the exhaust pipe at the location specified in your Corsa manual. Ensure it is oriented correctly. The bracket should sit flush against the pipe, with any holes aligning perfectly with the mounting points.
- Securing the Bracket with Clamps or BoltsMany kits use robust clamps that tighten around the exhaust pipe to hold the bracket in place. Others might use existing bolt holes on the exhaust hanger or require drilling small pilot holes for self-tapping screws. If using clamps, tighten them evenly and firmly.
If bolting, use the provided hardware and tighten securely. Avoid overtightening, which can crush the exhaust pipe.
Example: A common method involves using U-bolts or specialized clamps that wrap around the exhaust pipe. You would slide the bracket onto the pipe, then position the U-bolts through the bracket and around the pipe. Nuts are then tightened onto the U-bolts to cinch the bracket down.
- Verifying Bracket StabilityOnce the bracket is tightened, give it a gentle tug to ensure it’s solid. It should not move or rotate freely. Any wobbling indicates it’s not secure enough and needs further tightening.
A stable bracket is crucial for the actuator’s longevity and proper function.
Mounting the Actuator Unit
With the bracket in place, you can now attach the actuator itself. This is typically a straightforward process of bolting the actuator to its bracket.
- Aligning the ActuatorPosition the Corsa actuator onto the mounted bracket. The actuator will have mounting holes that align with threaded holes or bolt receivers on the bracket. Ensure the actuator is oriented correctly as per the instructions.
- Installing Mounting HardwareUse the bolts, nuts, and washers provided in your Corsa kit to attach the actuator to the bracket. Insert the bolts through the actuator and bracket, then secure them with the nuts. Hand-tighten all fasteners initially.
- Torquing to SpecificationOnce all bolts are in place and hand-tight, use your torque wrench to tighten them to the manufacturer’s specified torque values. This is critical for ensuring the actuator is held securely without damaging the threads or the actuator housing.
A typical torque specification for actuator mounting bolts might be around 15-25 ft-lbs. Always check your Corsa manual for exact figures.
Connecting the Actuator Linkage Arm
The linkage arm connects the actuator to the exhaust valve mechanism. This is the part that physically moves the valve. Proper connection here is vital for the system to work.
- Locating the Exhaust Valve ArmOn your Shelby GT350’s exhaust system, find the arm attached to the exhaust valve. This arm is usually a small lever or rod that pivots to open or close the valve.
- Attaching the Linkage RodThe Corsa actuator will have a linkage rod extending from its motor. This rod needs to be connected to the exhaust valve arm. Corsa kits typically provide a ball joint or clevis end on the linkage rod and a corresponding attachment point on the valve arm.
You might need to remove a clip or bolt to connect them.
Example: You would slide the clevis end of the Corsa linkage rod onto the exhaust valve arm. Then, you would insert a pin or bolt through both to secure the connection. A locking clip or nut would then be used to ensure the pin stays in place.
- Ensuring Free Movement and Proper LengthWith the linkage connected, gently move the actuator arm by hand. The exhaust valve should open and close smoothly. The linkage should not be too tight, causing resistance, nor too loose, allowing slop.
Some systems have adjustable linkage rods to fine-tune the fit. Ensure the valve is fully closing and opening.
Testing and Final Checks
After the physical installation is complete, it is time to test everything. This ensures the actuators are working as intended and that there are no issues. This is a crucial step before you start driving regularly.
Electrical Connections for Actuators
Most modern exhaust actuators are electronically controlled. This means they need to be wired into your car’s electrical system or a separate controller. Proper electrical connections are essential for the actuators to receive signals.
- Understanding the Wiring HarnessCorsa actuators come with a wiring harness. This harness has connectors that plug into the actuator motor and typically a control module or directly into the car’s wiring. Familiarize yourself with the harness components and connectors.
- Connecting to the Control Module or ECUDepending on the Corsa system, you might connect the actuators to a dedicated control module that you install. Alternatively, some systems tap into the car’s existing electrical signals, often near the ECU (Engine Control Unit) or specific vehicle sensors. Follow the wiring diagrams in your Corsa manual precisely.
Incorrect connections can lead to electrical issues.
A common setup involves connecting the actuator wires to a small control box. This box then receives signals from the car, perhaps via an OBD-II port or a dedicated power source.
- Securing WiringUse zip ties to neatly secure the wiring harness along the car’s chassis. Keep wires away from hot exhaust components, moving parts like the driveshaft, and sharp edges. Proper wire management prevents damage and ensures a clean installation.
- Power Source ConsiderationsEnsure the actuators are receiving stable power. This might involve tapping into a switched 12V source that only receives power when the ignition is on. Some systems might require a direct connection to the battery with an inline fuse for safety.
Actuator Function Test
With the wiring done, it’s time to see if the actuators move. This test is done before the car is fully reassembled or lowered.
- Initiating a Test CycleTurn the car’s ignition to the ON position (without starting the engine). Many Corsa systems perform a self-test cycle when they receive power for the first time. Listen for the actuators to move.
You should hear them open and close.
- Observing Actuator MovementWatch the linkage arms and the exhaust valves. You should see the actuator arm move to open the valve and then move back to close it. The movement should be smooth and complete.
If an actuator doesn’t move, recheck the electrical connections and the power source.
- Checking for Unusual Noises or BindingListen for any grinding, clicking, or straining noises from the actuators. These sounds can indicate binding in the linkage or a problem with the actuator motor. Also, check that the linkage isn’t hitting anything as it moves.
Final Inspection and Road Test
Once you are confident the actuators are functioning correctly, perform a final check. This includes looking over your work and then taking the car for a short drive.
- Double-Checking All FastenersGo back over every bolt and clamp you tightened. Ensure they are all secure. A loose fastener can cause problems down the road.
This is especially important for exhaust components.
- Reviewing Wire RoutingConfirm that all wiring is safely routed and secured. Make sure no wires are dangling or rubbing against anything. A quick visual inspection of the entire installation area is beneficial.
- Performing a Short Road TestDrive the car gently at first. Listen for any unusual rattles or exhaust leaks. Pay attention to how the exhaust note changes with the actuator positions.
Test the system at different RPMs and under light acceleration.
Statistics show that proper installation of performance exhaust components can improve engine breathing by up to 10%, leading to noticeable gains in horsepower and torque. Incorrect installation, however, can lead to exhaust leaks, reduced performance, and even damage.
- Monitoring for LeaksAfter the road test, if possible, inspect the exhaust system for any signs of leaks. Leaks often appear as black soot marks around joints or connections. Any leaks need to be addressed immediately, as they can affect performance and sound.
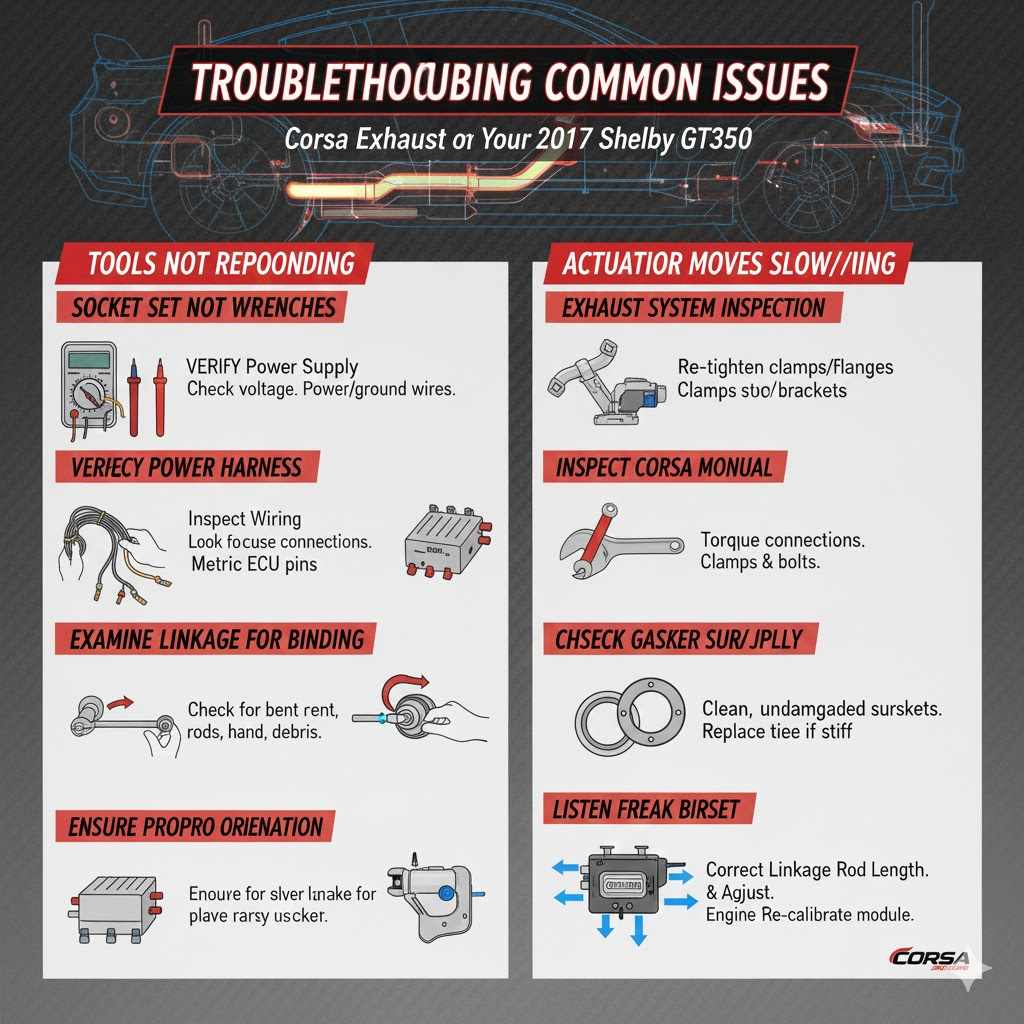
Troubleshooting Common Issues
Even with careful installation, sometimes issues can arise. This section helps you identify and fix common problems encountered when mounting Corsa exhaust actuators.
Actuator Not Responding
If your actuator does not move at all when commanded, it’s a common point of concern. This usually points to an electrical or signal issue.
- Verify Power SupplyCheck that the actuator is receiving the correct voltage. Use a multimeter to test the power and ground wires at the actuator connector. Ensure the power source is active when it should be.
- Inspect Wiring Harness for DamageLook for any cuts, abrasions, or loose connections in the wiring harness. Ensure all connectors are fully seated. A damaged wire can prevent the signal from reaching the actuator motor.
- Check Control Module or ECU ConnectionIf the system uses a control module, ensure it is properly connected and powered. If tapping into the car’s ECU, confirm that the connections are secure and made to the correct pins as per the wiring diagram. Sometimes a faulty control module can be the culprit.
Actuator Moves Slowly or Jerkily
This can indicate resistance in the system or a weak motor.
- Examine Linkage for BindingCarefully check the linkage rod and the exhaust valve arm. Ensure nothing is obstructing their movement. Bent rods, misaligned arms, or debris caught in the mechanism can cause binding.
- Check Valve Movement IndependentlyIf possible, try moving the exhaust valve manually (with the engine off and cool). If it is stiff or hard to move, the valve itself might have an issue, not the actuator. Lubrication might be needed.
- Ensure Proper Actuator OrientationSometimes, if the actuator is mounted incorrectly or at an awkward angle, it can put stress on the motor and linkage, leading to jerky movements. Re-adjust the mounting if necessary.
Exhaust Leaks After Installation
Leaks are a common, though frustrating, problem after exhaust work.
- Re-Tighten Exhaust Clamps and FlangesGo back to all the connections you touched or worked around. Ensure all clamps are tight and any flange bolts are torqued correctly. Vibration can loosen fasteners over time.
- Inspect Gasket SurfacesIf you had to disconnect exhaust pipes, ensure the gasket surfaces are clean and undamaged. A damaged or improperly seated gasket will cause leaks. Replace the gasket if there’s any doubt.
- Listen for the Leak SourceWith the engine running (and after it warms up), try to pinpoint the source of the leak by sound. Sometimes a small leak can be found by gently moving exhaust components while the engine is running (be careful of heat).
Actuator Not Returning to Home Position
Some advanced systems rely on actuators returning to a specific position.
- Check Linkage Rod Length and AngleEnsure the linkage rod is the correct length and angle. If it’s too long or short, it might prevent the actuator from reaching its intended home position. Adjustability here is key.
- Verify Actuator ProgrammingIf your Corsa system has a programmable control module, ensure it’s programmed correctly for the actuator’s range of motion. Sometimes a reset or re-calibration of the module is needed.
Frequently Asked Questions
Question: Do Corsa exhaust actuators affect engine performance
Answer: Yes, Corsa exhaust actuators are designed to control exhaust flow. By opening and closing valves, they can optimize exhaust backpressure for different driving conditions, potentially improving both power and fuel efficiency. They allow for a tunable exhaust note and performance curve.
Question: How long does it take to install Corsa exhaust actuators
Answer: For someone with basic mechanical skills and the right tools, installing Corsa exhaust actuators can take anywhere from 2 to 4 hours. If you are new to car modifications, it might take a bit longer, especially if you encounter unexpected issues.
Question: Can I install Corsa exhaust actuators myself
Answer: Yes, installing Corsa exhaust actuators is a common DIY project. With a good set of tools, patience, and by following detailed instructions like those in this guide, most enthusiasts can successfully complete the installation.
Question: What happens if the actuator arm is not connected properly
Answer: If the actuator arm is not connected correctly to the exhaust valve, the actuator will move, but the valve will not. This means you will not get the intended change in exhaust sound or performance. It could also lead to the actuator motor straining against a non-moving valve.
Question: Do Corsa actuators require special maintenance
Answer: Generally, Corsa exhaust actuators are designed to be low-maintenance. However, it’s good practice to periodically check that the linkage is clean and free of debris and that all electrical connections are secure. Ensuring the exhaust system itself is in good condition will also help the actuators function longer.
Summary
Mounting Corsa exhaust actuators on your Shelby GT350 is a rewarding project. You now know the tools needed and the step-by-step process. We covered bracket installation, actuator mounting, and linkage connection.
Testing and final checks ensure everything works right. Troubleshooting common issues will help you fix problems quickly. Enjoy your enhanced Shelby exhaust system.