How to Remove a Motorcycle dB Killer
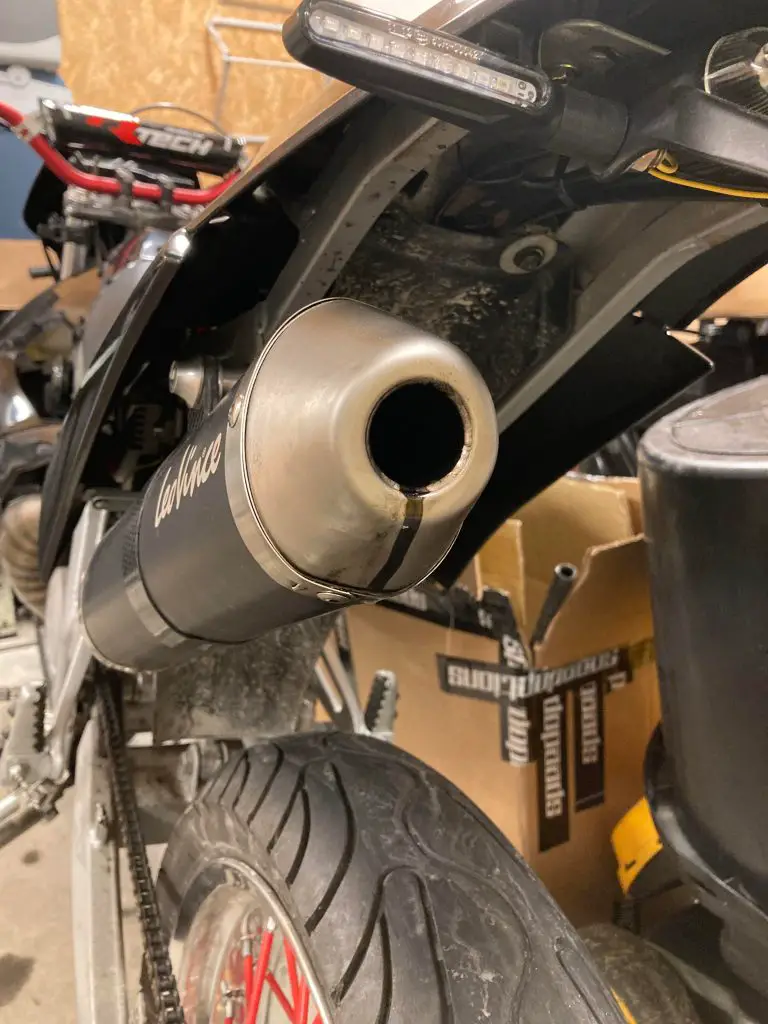
Many motorcycle dB killers are held by one hex bolt, rivet, or circlip at the muffler outlet. Remove the fastener, soak seized threads, then pull the insert straight out. Forcing it can strip the can, crack packing, or leave you with an exhaust that fails inspection and runs louder than local limits. This guide shows how to identify the insert, remove it cleanly, inspect the fit, and check whether your exhaust still meets homologation or road-use rules.
What a dB killer


A dB killer is a small noise-reducing insert or baffle inside the exhaust outlet. It works by pushing exhaust gas through perforations and chambers, which lowers sound and can preserve the backpressure the muffler was designed around. Some designs are removable. Others are fixed or welded in place.
On a homologated motorcycle exhaust, the insert is part of the approved setup. SC-Project says the dB-killer is part of homologated exhaust compliance for Euro 3, Euro 4, Euro 5, and Euro 5+. KO Lightning describes the unit as a compact device installed inside the exhaust system, often removable or adjustable.
How to tell whether your exhaust is removable
The first check is physical, not legal. Look at the outlet for a visible retaining screw, small rivet, circlip groove, or a threaded plug at the tip. Then check the exhaust body for a homologation code and compare the bike’s paperwork. A removable insert is common. A welded or fixed baffle is different.
The same source says sound emission limits may vary by engine displacement, and the applicable limits are reported on the vehicle registration certificate and the vehicle identification plate. If the can is type-approved, those documents should generally match the exhaust’s approved setup. TÜV Italia appears in the homologation context through TÜV SÜD Auto Service GmbH.
dB killer removal checklist
| Branch | Required tools | Expected fastener type | Likely failure points | Legal-use check before riding |
|---|---|---|---|---|
| Removable insert | Correct hex key or socket, penetrating oil, pliers, magnetic pick-up tool, torque wrench for refit | Hex bolt, small screw, rivet, or circlip | Rounded head, seized threads, stripped insert mount, damaged packing, bent retaining tab | Confirm the exhaust’s homologation code, then verify the registration certificate and vehicle identification plate still match the approved noise limit |
| Seized insert | Penetrating oil, heat shield protection, soft mallet, locking pliers, left-hand drill bit or screw extractor if the retainer fails | Usually a small bolt or screw that has corroded in place | Broken fastener, damaged outlet lip, twisted baffle tube, torn packing, scarred finish | Do not ride until the insert is either refitted securely or you confirm the exhaust remains legal in the current setup |
| Fixed or homologated baffle | Inspection light, mirror, model documentation, no-force hand tools only | Welded joint, peened edge, factory rivet, or non-serviceable insert | Cracked weld, warped outlet, voided approval, broken internal packing, permanent noise increase | Assume removal is not intended; a homologated exhaust may fail inspection without the approved insert or setup |
How to remove a removable dB killer
If the insert is designed to come out, the job is usually simple. Identify the retainer, free it without damaging the outlet, then pull the insert straight out. If the exhaust is homologated, keep every removed part. You may need them to refit the system exactly as approved.
-
Cool the muffler fully.
Work only on a cold exhaust. Heat makes threads tighter, softens sealants, and can distort thin outlet metal. -
Find the retainer.
Check the outlet lip and the first few centimetres of the tip for a set screw, small bolt, pop rivet, or circlip. If the head is painted over or packed with carbon, clean the area first so you do not round the fastener. -
Soak the fastener.
Apply penetrating oil to the screw or rivet interface and let it work. Give it time if corrosion is visible, because dry force is what usually strips the insert mount. -
Remove the retainer.
Use the exact driver size and steady pressure. If the fastener is a rivet, drill only the head and avoid wandering into the outlet wall. Keep the drill slow and centered. -
Break the carbon seal.
Twist the insert gently with pliers protected by tape or soft jaws, then pull it straight out. A light wiggle is fine. Side-loading the tube can scratch the can or bend the baffle. -
Inspect the outlet.
Look for cracked packing, warped metal, loose welds, or scored contact points. If the insert came out hard, the damage is often at the retaining hole or the lip that seats the baffle. -
Refit or secure parts.
If you plan to reinstall the insert, keep the old hardware only if it is undamaged and still clamps firmly. Replace the fastener if the head is rounded, the thread is stretched, or the retainer no longer locks.
Suppose a slip-on has a 3 mm hex screw at the outlet and it moves only a quarter turn before binding. Stop there. More force often turns a small service job into a stripped outlet, which can make refitting harder than the original removal.
What to do if the insert is seized
A seized dB killer usually means carbon buildup, corrosion, or a fastener that has galled into the outlet. Do not keep twisting the head once the driver slips. At that point the goal is to save the exhaust body, not win against the screw.
-
Recheck the fastener type.
Confirm whether you are dealing with a screw, rivet, or circlip. People often mistake a peened retainer for a removable bolt and damage the hole trying to back it out. -
Clean exposed threads.
Brush soot away and reapply penetrating oil directly at the joint. A second application after a few minutes is often more useful than dry force. -
Use controlled heat.
Warm the outer can gently if the exhaust design allows it, while avoiding the finish and any nearby plastic. The aim is to expand the outer shell slightly, not to scorch the packing. -
Extract without twisting hard.
Use soft-jaw pliers, a hooked puller, or a small slide motion if the insert has a lip. If the retainer breaks, stop and switch to extraction methods suited to the failed fastener rather than prying at the outlet. -
Inspect for hidden damage.
Check for broken welds, loose packing, or a cracked inner tube after the insert moves. A seized part often leaves behind a second problem that is easy to miss.
A common first-timer mistake is to drill the center of a seized screw with a bit that is too large. That can oval the hole, weaken the retainer, and leave the insert loose after refit. Start small and only enlarge the hole if the fastener design truly requires it.
Is it legal to ride without a dB killer?
Sometimes, but not by default. On a homologated road-use exhaust, removing the dB killer can make the system non-compliant. The same source states that a homologated exhaust may become non-compliant if its dB-killer is removed, and points to Delegated Regulation (EU) No. 134/2014 as the relevant European legislation. Local enforcement still decides what happens on the road.
SC-Project also says non-compliance may lead to fines, withdrawal of the vehicle registration certificate, and a mandatory vehicle inspection. That is why the legal check comes before a ride, not after the first traffic stop. A homologated exhaust may be legal only in its approved setup, and the same can be true for the insert.
What changes after removal
Removing the insert usually raises noise, often enough to make the bike sound sharper at idle and much louder under load. It can also change low-speed response, increase popping on overrun, and reduce the muffler’s ability to control drone. Performance gains are not guaranteed, and on some bikes the change is mainly noise.
Example outcomes vary by exhaust design. A straight-through slip-on may become harsh and droney. A baffled can may lose some backpressure and sound less controlled. The real question is not whether it sounds more aggressive. It is whether the bike still matches its approved setup and local noise limit.
Will your motorcycle pass inspection without the insert? That depends on the homologated setup, not on the brand name stamped on the can. SC-Project’s FAQ says whether an exhaust passes inspection depends on homologated configuration. If the approved setup includes the dB-killer, removing it can cause a roadworthiness check to fail.
Post-removal checks
- Check the outlet for leaks with the engine idling only after all loose hardware is secured.
- Re-torque any replacement fastener to the manufacturer’s spec if one is supplied.
- Inspect packing for scorching, collapse, or loose fibers near the outlet.
- Confirm the insert can be refitted cleanly without new hardware before the next ride.
- Verify the registration certificate and vehicle identification plate against the exhaust’s approved setup if the bike is road legal.
Can a homologated exhaust be legal without a dB killer? In some cases, only if the specific exhaust was approved to run that way, such as a racing product where the FAQ says the dB-killer can be removed where applicable. For a road-use homologated muffler, assume the approved insert stays in place unless the documentation says otherwise.
Frequently asked questions
What is a dB killer?
A dB killer is a noise-reducing insert or baffle inside a motorcycle exhaust. It reduces exhaust noise through perforations and chambers, and it may also support the backpressure the muffler was designed around. Some are removable. Others are fixed or welded in place.
Can you remove a motorcycle dB killer?
Yes, if the exhaust was built with a removable insert and the fastener is serviceable. If the baffle is welded, peened, or part of a homologated fixed design, removal may damage the muffler or void compliance. Check the code, the paperwork, and the outlet before you force anything.
How do you remove a dB killer from a motorcycle exhaust?
Find the retainer, soak seized threads, remove the fastener with the correct tool, then pull the insert straight out. If the screw strips or the insert binds, stop and switch to controlled extraction. Forcing the part is what most often cracks packing or ruins the outlet.
What tools do I need to remove a dB killer?
Most jobs need the correct hex key or socket, penetrating oil, pliers, and a light source. A seized fastener may also call for soft jaws, a drill, or an extractor. If the exhaust is homologated, keep a torque wrench ready for any refit hardware.
How do I know if my exhaust is homologated?
Look for a homologation code on the muffler, then compare the vehicle registration certificate and the vehicle identification plate. The same source says the sound emission limits are listed on both documents. If the approved setup includes a dB-killer, removing it can make the system non-compliant.
What happens if the dB killer is stuck?
A stuck insert usually means carbon, corrosion, or a damaged retainer. Use penetrating oil, careful heat if appropriate, and a controlled extraction method. Do not pry hard against the outlet lip. That is how thin cans crack, fasteners break, and refit becomes difficult.