How to Remove Silencer From Two Brothers Exhaust
Taking apart your exhaust can seem tricky at first, especially for beginners. You might be wondering How to Remove Silencer from Two Brothers Exhaust because you want a different sound or easier maintenance. It’s a common question, and many riders feel a bit unsure about where to start.
But don’t worry, it’s actually quite straightforward once you know the steps. We’ll walk you through it simply, so you can get your exhaust just the way you like it.
Understanding Your Two Brothers Exhaust Silencer
The silencer on your Two Brothers exhaust system is a key component designed to reduce the noise produced by your engine. It’s essentially a baffle or insert that dampens the sound waves before they exit the exhaust pipe. Many riders seek to remove or modify their silencers to achieve a louder, more aggressive exhaust note, or sometimes to perform maintenance or repacking of the exhaust packing material.
This section will explore the purpose of the silencer and why someone might choose to remove it from their Two Brothers exhaust. We’ll look at the basic construction of these systems and what makes the silencer removable in the first place.
What Is a Silencer and Why Remove It
A silencer, often called a baffle, is a part of your motorcycle’s exhaust system that helps to quiet down the engine’s noise. It works by deflecting and absorbing sound waves, making your ride less loud. Think of it like the muffler on a car, but usually smaller and more accessible on a motorcycle.
People often want to remove their silencer for a few reasons. The most common is to get a deeper, louder sound from their exhaust. For some riders, the roar of a performance exhaust is part of the riding experience.
Others might remove it to replace the sound-dampening packing material inside the exhaust. This packing can wear out over time, and replacing it can restore the exhaust’s performance and sound.
Removing the silencer is often designed into performance exhausts like those from Two Brothers. This makes it easier for owners to customize their bike’s sound profile. It’s a straightforward modification that can change the character of your motorcycle’s presence on the road.
How Two Brothers Exhaust Silencers Work
Two Brothers Racing exhausts are known for their performance and their distinct sound. The silencer in these systems is usually a perforated tube or a series of baffles that sit inside the main exhaust canister. As exhaust gases flow through, the perforations allow some sound to escape and interact with the packing material.
The packing, typically a fiberglass or mineral wool material, absorbs much of the sound energy.
The design aims to balance sound reduction with exhaust flow. A more restrictive silencer will reduce noise more but might slightly hinder exhaust gas velocity. Conversely, a less restrictive or removed silencer allows gases to flow more freely, producing a louder sound.
Two Brothers often provides different silencer options or inserts to allow riders to tune the sound level to their preference.
The removability of these silencers is a deliberate design choice. It allows for maintenance, such as repacking, and for riders to adjust the exhaust note without replacing the entire exhaust system. This feature is what makes a DIY removal possible for many owners.
Common Silencer Designs
- Perforated Tube Design: This is a very common design where a metal tube with many small holes runs through the center of the exhaust canister. The exhaust gases pass through these holes and then are directed through the sound-dampening packing material. The size and pattern of these perforations can affect both sound and performance.
- Baffle Plates: Some systems might use a series of metal plates or discs that the exhaust gases have to navigate around. These plates disrupt the flow of exhaust gases and create turbulence, which helps to break up sound waves. The arrangement and spacing of these plates are critical to their effectiveness in reducing noise.
- Combination Designs: Many modern performance exhausts, including some Two Brothers models, use a combination of perforated tubes and baffle plates, along with specialized packing materials, to achieve a desired sound profile and performance output.
Tools and Preparation for Silencer Removal
Before you start taking anything apart, it’s important to have the right tools and prepare your workspace. Having everything ready will make the process much smoother and prevent frustration. This section will cover the common tools you’ll need, safety precautions to take, and how to prepare your motorcycle and the exhaust system for removal.
Following these steps ensures you can safely and effectively remove the silencer without damaging your exhaust or your bike.
Essential Tools for Removal
- Socket Wrench Set: You will likely need a set of metric sockets. The most common sizes for exhaust bolts are 8mm, 10mm, and 12mm. Having a variety ensures you have the right fit for any fasteners you encounter. A good quality set will provide better grip and reduce the chance of stripping bolt heads.
- Screwdrivers: Flathead and Phillips head screwdrivers are often needed for any retaining clips or smaller screws that might be present on your exhaust system. Ensure you have a few different sizes to accommodate various screw types.
- Pliers: Standard pliers or needle-nose pliers can be helpful for removing stubborn clips or gently prying components. Sometimes, a small amount of leverage is all that’s needed.
- Penetrating Oil: If your exhaust has been on the bike for a while, bolts and fasteners can become seized due to heat and corrosion. Spraying a penetrating oil like WD-40 or PB Blaster onto the bolts and letting it soak can make removal much easier and prevent breakage.
- Gloves and Eye Protection: Always wear gloves to protect your hands from grease, dirt, and potentially sharp edges on the exhaust. Safety glasses are crucial to protect your eyes from debris that might fall or be dislodged during the process.
Preparing Your Motorcycle and Exhaust
It’s best to work on your motorcycle when the exhaust system is cool. A hot exhaust can cause serious burns. Let your bike sit for at least an hour, or ideally longer, after riding to ensure all components have cooled down.
Find a clean, well-lit workspace. A garage or driveway is ideal. Make sure you have enough space to move around the motorcycle freely and lay out your tools.
If you’re working on a driveway, consider putting down some cardboard or a mat to catch any drips of oil or exhaust residue.
Secure your motorcycle. If you have a motorcycle stand, use it to lift the rear of the bike. This gives you better access to the exhaust system and makes it easier to work on.
Ensure the bike is stable before you begin any work.
Inspect the exhaust system before you start. Look for any signs of damage, loose clamps, or corrosion. Note the position of all bolts and fasteners.
Taking a quick picture with your phone can be a good reference if you’re unsure about reassembly.
Safety First: What to Keep in Mind
- Cool Down Period: As mentioned, heat is a major hazard. Exhaust components can remain extremely hot for a significant time after the engine has been turned off. Always confirm the exhaust is cool to the touch before you begin. This is non-negotiable for safety.
- Secure Work Area: Ensure your motorcycle is stable. If using a stand, double-check its integrity. Avoid working on uneven surfaces. A stable bike prevents accidental drops or movements that could cause injury or damage.
- Protective Gear: Always wear safety glasses. Small metal shards or debris can become dislodged. Gloves are also important for grip and protection against sharp edges and grease. Consider wearing long sleeves and pants to protect your skin.
- Proper Tool Use: Use the correct size tools for each bolt. Forcing a bolt with the wrong tool can strip the head, making removal much harder and potentially damaging the fastener. If a bolt feels exceptionally tight, use penetrating oil and gentle pressure.
- Ventilation: If you are using penetrating oil or cleaning solvents, ensure you are in a well-ventilated area. Some of these products can have strong fumes.
Step-by-Step Guide: How to Remove Silencer from Two Brothers Exhaust
Now that you’re prepared, let’s get down to the actual removal process. This guide will break down the steps clearly. We will cover how to access the silencer, which often involves removing the end cap or a specific plate on the exhaust canister.
Following these instructions carefully will ensure you can complete the task efficiently and correctly, getting your Two Brothers exhaust sounding just the way you want it.
Locating the Silencer Fasteners
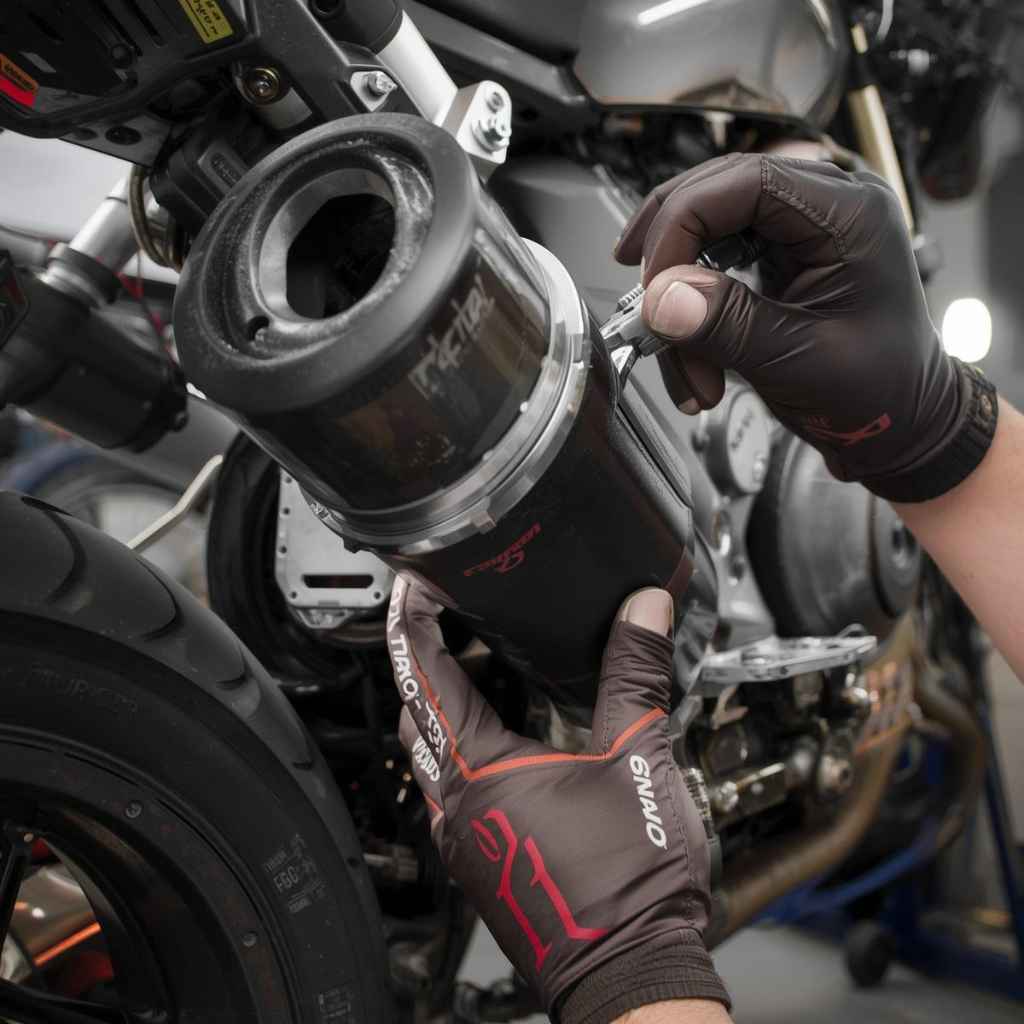
The first step is to identify where the silencer is secured within the exhaust canister. For most Two Brothers exhaust systems, the silencer is held in place by one or more bolts located on the very end of the exhaust canister. These bolts typically pass through the end cap and screw into the silencer itself or a bracket attached to it.
Look at the rear of your exhaust. You should see an end cap, which might be made of metal, carbon fiber, or plastic. This end cap is usually attached to the main canister with several small bolts.
These are the bolts you need to loosen and remove to gain access to the silencer. Sometimes, there might be a single large bolt in the center of the end cap, which acts as a retaining bolt for the entire assembly.
Take note of the type and size of these bolts. They are often hex bolts, but sometimes Torx or Allen bolts can be used. Having your socket set or appropriate driver ready is important.
If the bolts are difficult to see or reach, a flashlight can be very helpful.
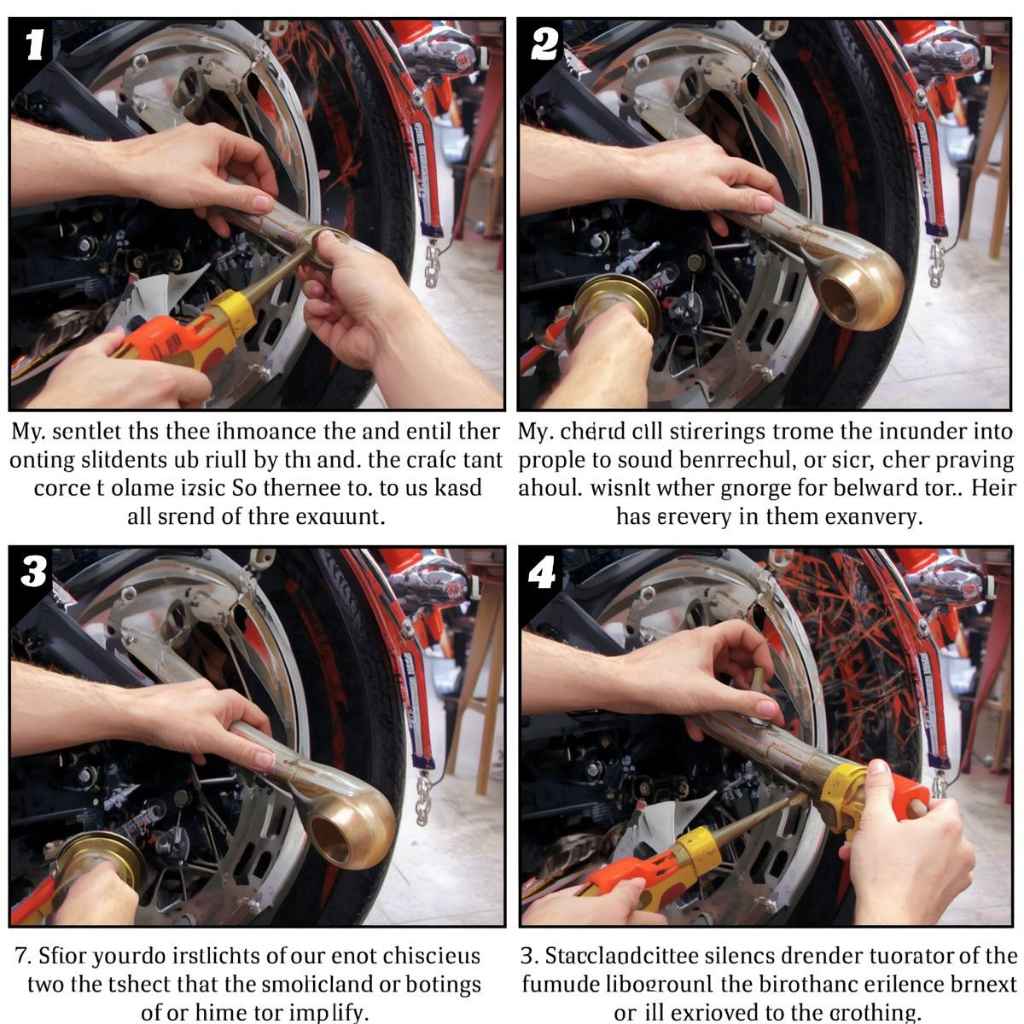
Removing the End Cap
Once you have located the bolts securing the end cap, carefully begin to loosen them. It’s often best to loosen them in a star pattern, much like you would tighten lug nuts on a car wheel. This helps to ensure the end cap comes off evenly and prevents any stress on the canister.
Do not remove all the bolts completely at once if they are holding significant tension. Loosen them a few turns each, working your way around the end cap. Once all bolts are loosened, you can carefully remove them completely.
Keep these bolts in a safe place, as you will need them for reassembly.
With the bolts removed, the end cap should now be loose. It may require a gentle wiggle or tap to separate it from the exhaust canister. Be careful not to force it.
If it’s stuck, check again for any missed bolts or retaining clips. Sometimes, a bit of penetrating oil applied around the seam can help.
Extracting the Silencer Insert
After the end cap is removed, you should be able to see the silencer insert. This is usually a metal tube, sometimes perforated, that runs into the exhaust canister. In some Two Brothers systems, the silencer is a single piece that slides out.
In others, it might be held in place by a retaining clip or a small set screw on the inside of the canister that you might need to access with a long extension or specialized tool.
Carefully grasp the silencer insert. You may need pliers or a similar tool to get a good grip. Gently pull it straight out of the exhaust canister.
If it feels stuck, avoid yanking it forcefully, as this could damage the insert or the canister. Try to twist it slightly while pulling.
Once the silencer is out, inspect it. If you are planning to repack your exhaust, this is the point where you would remove the old packing material and install new material around the perforated core of the silencer or inside the canister, depending on the exhaust model.
Reassembly After Silencer Removal
Reassembly is essentially the reverse of the removal process. Carefully slide the silencer insert back into the exhaust canister. Make sure it’s seated correctly and aligned with any mounting points or retaining clips.
Position the end cap back onto the exhaust canister. Ensure it aligns properly with the bolt holes. Insert the end cap bolts and tighten them by hand first to make sure they thread in correctly.
Once all bolts are started, tighten them gradually in a star pattern. Tighten them until they are snug, but avoid over-tightening, which could strip the threads or damage the end cap. A torque wrench is ideal for ensuring the correct tightness if specified by the manufacturer.
Example Scenario: Standard Two Brothers Removal
- Identify the bolts on the rear end cap of the Two Brothers exhaust. These are typically small hex head bolts.
- Using an 8mm or 10mm socket wrench, loosen these bolts evenly in a star pattern.
- Once all bolts are loose, carefully remove them and set them aside in a safe place.
- Gently pull the end cap away from the exhaust canister. It might need a little persuasion.
- Inside, you will see the silencer baffle. It’s usually a perforated metal tube.
- Grip the silencer with pliers and pull it straight out. If it’s tight, twist slightly while pulling.
- Reassembly is the reverse: slide the silencer back in, then reattach the end cap and tighten the bolts evenly.
Understanding Exhaust Packing (If Applicable)
Many performance exhausts, including Two Brothers, use packing material inside the canister to absorb sound. This material is usually a fiberglass or ceramic-based wool. Over time, this packing can burn away, break down, or become saturated, leading to increased noise and potential performance loss.
When you remove the silencer, you might also need to deal with the packing. If your silencer is a core with packing wrapped around it, you’ll have direct access. If the packing is loose inside the canister, you’ll need to remove it all.
New packing material is available from Two Brothers or aftermarket suppliers. It usually comes in a sheet or a roll.
When installing new packing, ensure it’s wrapped snugly around the silencer core or packed evenly within the canister, depending on your specific exhaust model. Don’t pack it too loosely, as this will reduce its effectiveness. Follow the manufacturer’s instructions for the specific amount and method of packing.
Tips for Handling Exhaust Packing
- Wear a mask and gloves: Exhaust packing material can be irritating to the skin and lungs. Always wear a dust mask and gloves when handling it.
- Wrap evenly: If your silencer has a core, wrap the new packing material around it evenly. Too much in one spot and not enough in another can affect sound and longevity.
- Secure the packing: Some systems use wire to hold the packing in place. Make sure the packing is secure and won’t shift inside the canister.
- Proper disposal: Old exhaust packing can contain residual carbon and other particles. Dispose of it responsibly according to local regulations.
Troubleshooting Common Issues
Even with a clear guide, you might run into a few hiccups during the silencer removal process. Common issues include seized bolts, stuck end caps, or difficulties with the silencer itself. This section provides solutions to these common problems, ensuring you can overcome any challenges and complete the job successfully.
We aim to address the most frequent frustrations riders face.
Seized or Stripped Bolts
If a bolt is seized, meaning it’s very difficult to turn, the first step is to apply penetrating oil. Spray a generous amount onto the bolt and the surrounding area. Let it soak for at least 15-30 minutes, or even longer for very stubborn bolts.
Tapping the bolt head gently with a hammer can also help the oil penetrate.
If the bolt head starts to strip, stop using the wrench. You can try using a bolt extractor tool. These tools are designed to grip the rounded-off head of a bolt.
You might need to drill a small pilot hole in the center of the bolt before using the extractor. Another option is to use a Dremel tool with a cutting disc to cut a new slot in the bolt head for a flathead screwdriver, or carefully cut off the bolt head entirely if replacement is an option.
Sometimes, heat can help. Carefully applying a heat gun or a small propane torch to the area around the bolt (not directly on the bolt itself for extended periods, as this can weaken the metal) can cause the surrounding material to expand, loosening its grip. Be extremely cautious when using heat near fuel lines or painted surfaces.
Stuck End Cap
If the end cap is stuck even after removing all the bolts, it’s likely due to carbon buildup or a slight deformation from heat cycles. A few gentle taps around the seam with a rubber mallet or the handle of your screwdriver can help break the seal.
Sometimes, a thin putty knife or a flat blade can be carefully inserted into the seam to gently pry it apart. Work your way around the seam slowly, applying even pressure. Avoid forcing it, as you could bend the end cap or damage the exhaust canister.
If there’s significant carbon buildup, you might need to use a cleaner designed for exhaust systems or a mild solvent. Apply it to the seam and let it work for a while before attempting to pry it apart again.
Difficult Silencer Removal
If the silencer itself is difficult to pull out, it might be due to carbon deposits or a slight sticking. As mentioned before, gentle twisting while pulling can help. If it’s very tight, you might need to use a strap wrench or specialized pliers to get a better grip without damaging the silencer.
In rare cases, a retaining clip or set screw might be overlooked inside the canister. Double-check the canister’s interior for any small screws or clips that might be holding the silencer in place. If you find one, you’ll need the appropriate tool to remove it.
If you plan on removing and re-installing the silencer regularly for packing, consider applying a small amount of high-temperature anti-seize compound to the silencer’s surface before reassembly. This will make future removals much easier.
Common Statistics and Facts
| Issue | Likelihood of Occurrence | Solution Approach |
|---|---|---|
| Seized Bolts | 30-40% (especially on older bikes) | Penetrating oil, heat, or specialized extractors. |
| Stripped Bolt Heads | 5-10% | Bolt extractors, cutting new slots, or replacing the bolt. |
| Stuck End Cap | 15-25% | Gentle tapping, prying, or using exhaust cleaners. |
| Difficult Silencer Extraction | 10-20% | Gentle twisting, grip enhancement, or checking for internal fasteners. |
Frequently Asked Questions
Question: Do I need special tools to remove the silencer from a Two Brothers exhaust?
Answer: Generally, no. Basic tools like a socket wrench set (common sizes are 8mm, 10mm, 12mm), screwdrivers, and pliers are usually sufficient for removing the end cap and silencer. Penetrating oil can also be very helpful.
Question: Will removing the silencer void my Two Brothers exhaust warranty?
Answer: It is possible. Modifying or removing components from an exhaust system can sometimes void the manufacturer’s warranty. It’s best to check the specific warranty terms provided by Two Brothers Racing.
Question: How much louder will my exhaust be after removing the silencer?
Answer: Removing the silencer will significantly increase the volume of your exhaust. The exact increase depends on the specific Two Brothers exhaust model and other factors like engine configuration, but expect a much more aggressive and noticeable sound.
Question: Can I remove the silencer on any Two Brothers exhaust model?
Answer: Most Two Brothers performance exhaust systems are designed with removable silencers for this purpose. However, it’s always a good idea to consult your specific exhaust model’s manual or check Two Brothers Racing’s website to confirm removability.
Question: Is it legal to ride with the silencer removed?
Answer: This varies greatly by location. Many areas have noise regulations for vehicles. Riding without a silencer or with an excessively loud exhaust can result in fines or citations.
Always check your local laws and regulations regarding exhaust noise levels.
Summary
Removing the silencer from your Two Brothers exhaust is a manageable task for most riders. By gathering the right tools and following a simple step-by-step process, you can achieve a different exhaust note or prepare for repacking. Remember to prioritize safety by working on a cool exhaust and using proper protective gear.
Enjoy the new sound and feel of your motorcycle.