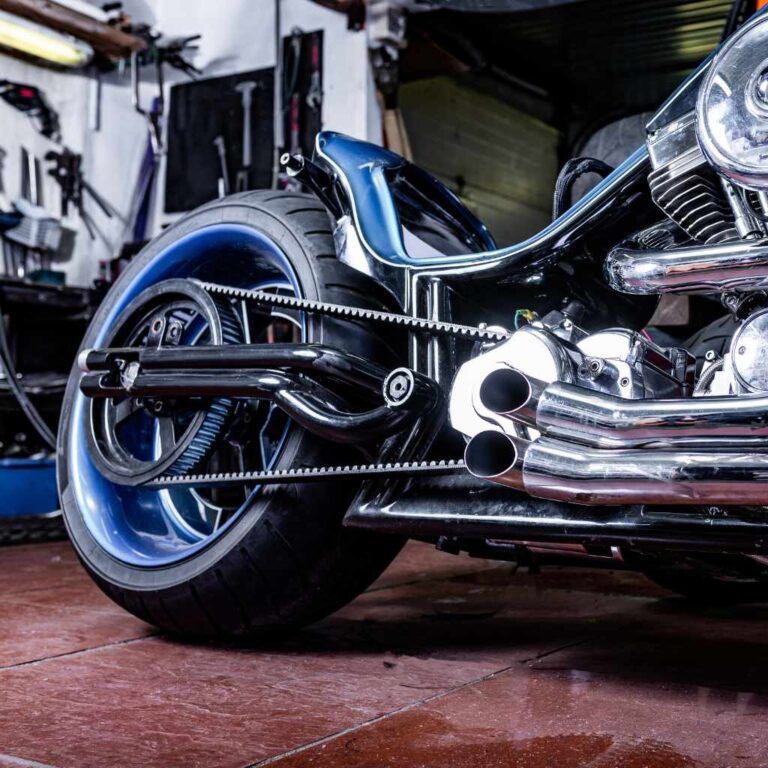
How to Repack Vance & Hines Exhaust Properly
Sometimes, your motorcycle’s exhaust can get a little loud or not sound quite right. This is often because the packing material inside your Vance & Hines muffler needs to be replaced. For beginners, knowing How to Repack Vance & Hines Exhaust Properly can seem tricky.
But don’t worry! It’s a straightforward process that will save you money and get your bike sounding great again. We’ll walk you through each step so you can do it yourself easily.
Understanding Exhaust Repacking Basics
Repacking your Vance & Hines exhaust is a key maintenance task that keeps your pipes performing at their best. Over time, the fiberglass or synthetic packing material inside your muffler breaks down. This leads to a louder, often raspier exhaust note, and can even affect engine performance.
Knowing how to repack Vance & Hines exhaust properly ensures you get back that deep, satisfying rumble and optimal backpressure. This process is simpler than many people think, making it a great DIY job for any rider.
Why Repacking is Important
The packing inside your Vance & Hines muffler serves a vital purpose. It’s designed to absorb sound and heat. When this material is fresh, it effectively muffles the loud explosions from your engine, creating that signature Vance & Hines sound.
It also helps manage the exhaust gases and maintain proper backpressure, which is essential for your engine to run smoothly and efficiently.
As the packing degrades, it loses its ability to do its job. The sound-deadening qualities diminish, making your exhaust much louder. You might notice popping or crackling on deceleration, too.
Furthermore, worn-out packing can lead to reduced performance because the engine isn’t getting the right backpressure. This can feel like a loss of power or responsiveness.
Think of it like the stuffing in a pillow. Over time, it gets flat and less comfortable. The exhaust packing is similar; its density and ability to absorb vibrations decrease with use.
This is why regular repacking is so important for maintaining your motorcycle’s sound and performance.
Common Signs Your Exhaust Needs Repacking
Several signs indicate it’s time to repack your Vance & Hines exhaust. The most obvious is a significant increase in the volume of your exhaust note. If your bike suddenly sounds much louder than it used to, or louder than other bikes with similar pipes, repacking is likely in order.
You might also notice a change in the tone. Instead of a deep, resonant sound, it could become tinny or excessively raspy. Popping and backfiring during deceleration are other common symptoms.
These occur because the unburned fuel in the exhaust isn’t being properly muffled as it exits the pipe.
Another indicator, though less common for beginners, is a slight loss of low-end torque or overall engine performance. This is because the engine’s backpressure has been compromised. If you’re experiencing any of these issues, learning How to Repack Vance & Hines Exhaust Properly is a practical solution.
Here are some key indicators:
Significantly louder exhaust sound
The most obvious sign is a sudden or gradual increase in how loud your exhaust is. This happens because the sound-absorbing material has broken down and can no longer do its job effectively.
Changes in exhaust tone
The sound might become higher pitched, raspier, or less deep than it was before. The rich rumble you expect from Vance & Hines might be replaced by a harsher noise.
Popping or backfiring on deceleration
This is a very common symptom where unburned fuel ignites in the exhaust system when you let off the throttle. It’s a clear sign the packing is no longer effectively silencing the exhaust.
Reduced performance or throttle response
While sometimes subtle, worn packing can affect the engine’s backpressure, leading to a feeling of less power, especially at lower RPMs. The engine might not feel as responsive.
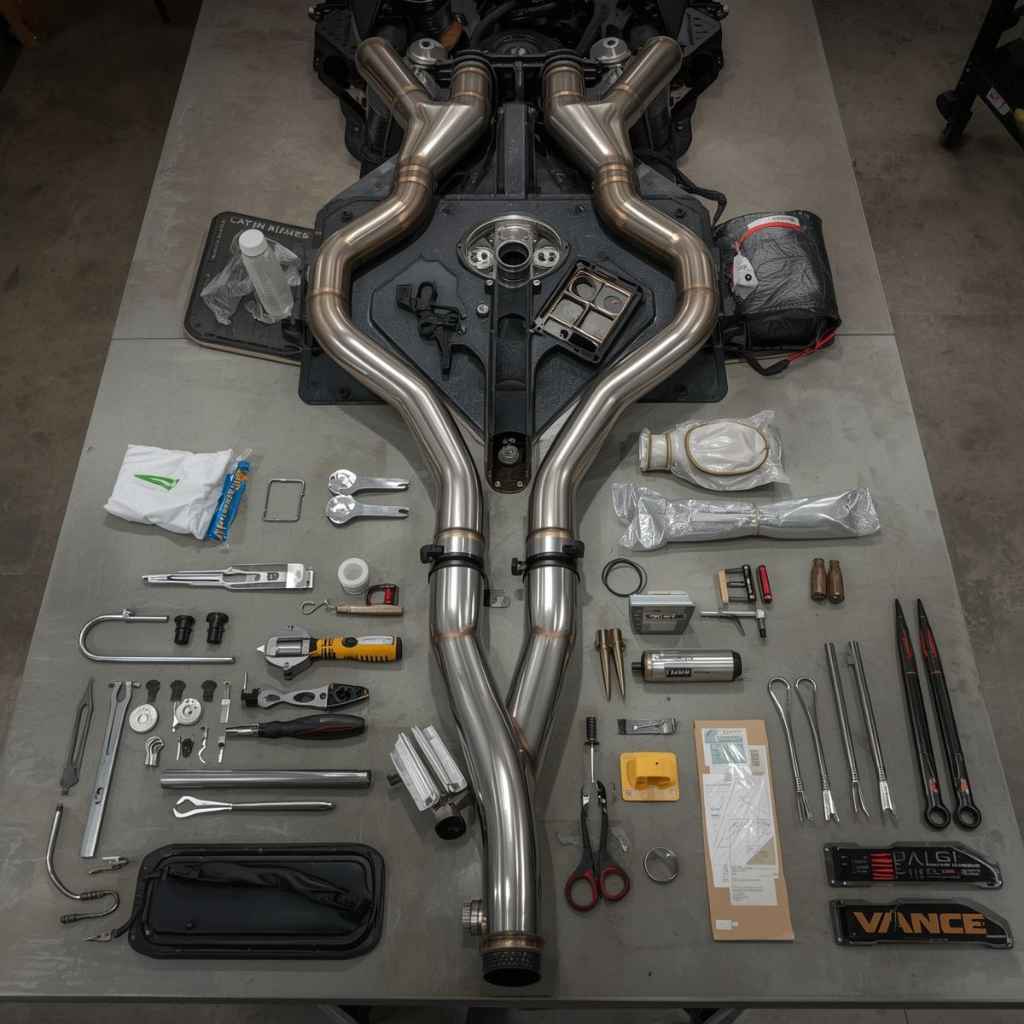
Gathering Your Tools and Materials
Before you start learning How to Repack Vance & Hines Exhaust Properly, it’s essential to have everything you need ready. This makes the process smooth and efficient. You’ll need a few basic tools that most motorcycle owners already have in their garage.
The most important material is the repacking kit itself. Vance & Hines offers specific kits for their mufflers, which contain the correct type and amount of packing material. It’s crucial to use a kit designed for your specific exhaust model to ensure a proper fit and optimal performance.
Generic materials might not work as well or could even be damaging.
Having the right tools prevents frustration and ensures you don’t damage your exhaust. Small issues can become big problems if you’re fumbling for the right wrench or using the wrong tool. Having a clean workspace also helps tremendously.
Essential Tools for Repacking
You’ll need a few common tools to disassemble and reassemble your Vance & Hines muffler. Having these on hand will make the job much easier and prevent potential damage to your exhaust system.
First, you’ll need a socket set or combination wrenches. The exact sizes will depend on your specific Vance & Hines model, but common sizes like 10mm, 12mm, and 13mm are often used for end caps, mounting brackets, and internal components. Make sure you have a ratchet to go with your sockets.
A screwdriver set, including both Phillips and flathead types, is also necessary. These are often used to remove any retaining screws that hold the end cap or internal baffle in place. You might also need a small pry tool or flathead screwdriver to gently loosen stubborn seals or gaskets.
For stubborn parts, penetrating oil can be a lifesaver. Spray it on bolts and connections that might be rusted or seized, and let it soak for a while before attempting to loosen them. Safety glasses are also a must to protect your eyes from debris.
Here’s a list of what you’ll likely need:
Socket set or combination wrenches
You’ll need a range of common metric sizes (e.g., 10mm, 12mm, 13mm) to remove bolts holding the end cap and internal components. A ratchet makes these faster to use.
Screwdriver set (Phillips and flathead)
These are essential for removing any screws securing the end cap or internal baffle. Ensure you have a variety of sizes to fit different screws.
Allen keys (hex wrenches)
Some Vance & Hines systems use Allen bolts, so having a set of metric Allen keys is important. Check your specific exhaust model to confirm which fasteners are used.
Pry tool or flathead screwdriver
A small, flat tool can help gently separate the end cap or loosen a stuck baffle without causing damage. Be careful not to scratch the chrome or paint.
Penetrating oil
If your exhaust has been on your bike for a while, bolts might be seized. Spraying penetrating oil and letting it soak can make them much easier to remove.
Work gloves and safety glasses
Protect your hands from grease and sharp edges, and your eyes from any falling debris or dust. Safety is always important when working on your motorcycle.
Vance & Hines Repacking Kits
The most crucial item for How to Repack Vance & Hines Exhaust Properly is the correct repacking kit. Vance & Hines designs these kits specifically for their mufflers. Using the right kit ensures the material is the correct density, size, and type for your specific exhaust model.
These kits typically contain high-quality fiberglass or advanced synthetic packing material. They often come pre-cut or in a large sheet that you can cut to size. Some kits also include new gaskets or seals, which are highly recommended to replace during the repacking process to ensure a good seal and prevent leaks.
The benefits of using an official Vance & Hines kit are numerous. The material is engineered to provide the optimal balance of sound dampening and exhaust flow for their pipes. This helps maintain the intended sound profile and performance characteristics of your Vance & Hines exhaust.
Trying to use aftermarket or generic materials can lead to unsatisfactory results, premature wear, or even damage to your muffler.
Always check your Vance & Hines model number to order the correct repacking kit. You can usually find this information on the exhaust itself or in your motorcycle’s manual. Ordering online from reputable dealers or directly from Vance & Hines is the safest bet to ensure you get the genuine product.
Step-by-Step Guide to Repacking
Now that you have your tools and kit, it’s time to learn How to Repack Vance & Hines Exhaust Properly. This guide breaks down the process into simple, manageable steps. Remember to work in a clean, well-lit area.
Taking your time will ensure the best results.
The first few steps involve disassembling the muffler. This usually means removing the end cap. Be patient, as these parts can sometimes be stuck due to heat and carbon buildup.
Once the end cap is off, you’ll access the baffle and the old packing material.
Removing the old packing is usually as simple as pulling it out. You might need a tool to help extract any stubborn pieces. Once that’s done, you’ll clean the inside of the muffler before installing the new packing.
This ensures a clean surface for the new material.
The final steps involve reassembling the muffler and reinstalling it on your motorcycle. It’s important to ensure everything is sealed correctly to prevent leaks and maintain the proper sound.
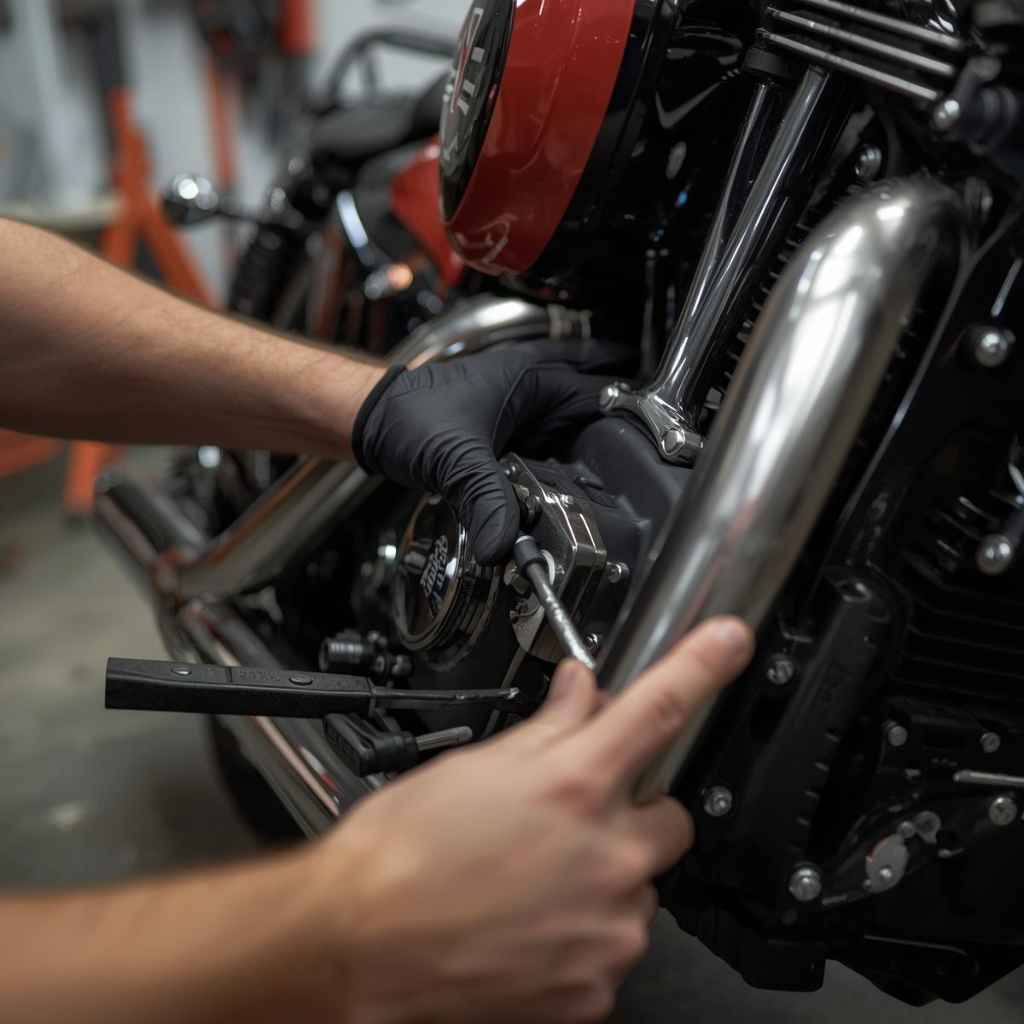
Removing the End Cap
The first physical step in How to Repack Vance & Hines Exhaust Properly is removing the end cap of your Vance & Hines muffler. This is typically where the packing material is accessed.
Locate the bolts that secure the end cap. These are often on the rear of the muffler. Use the appropriate size socket or wrench to carefully remove these bolts.
Keep them in a safe place, like a magnetic tray, so you don’t lose them.
Once the bolts are removed, the end cap might slide off easily. However, carbon buildup and heat can cause it to stick. If it doesn’t budge, try gently tapping it with a rubber mallet or carefully prying it away with a flathead screwdriver or pry tool.
Work your way around the edge, applying gentle, even pressure.
In some Vance & Hines models, there might be an internal retaining clip or a screw that needs to be removed before the end cap can be pulled free. Consult your specific model’s manual if you encounter difficulty. Once the end cap is off, you will see the baffle and the old packing material.
Here’s how to get that end cap off:
Locate and remove end cap bolts
These are usually on the back of the muffler. Use the correct size socket or wrench. Keep them somewhere safe, like a small container.
Gently tap or pry the end cap
If it’s stuck, a rubber mallet or a careful pry with a flathead screwdriver can help loosen it. Work around the edges.
Check for internal fasteners
Some models have a hidden screw or clip holding the end cap. Look for these before forcing it.
Inspect gaskets and seals
Note the condition of any gaskets. It’s usually best to replace them when reassembling.
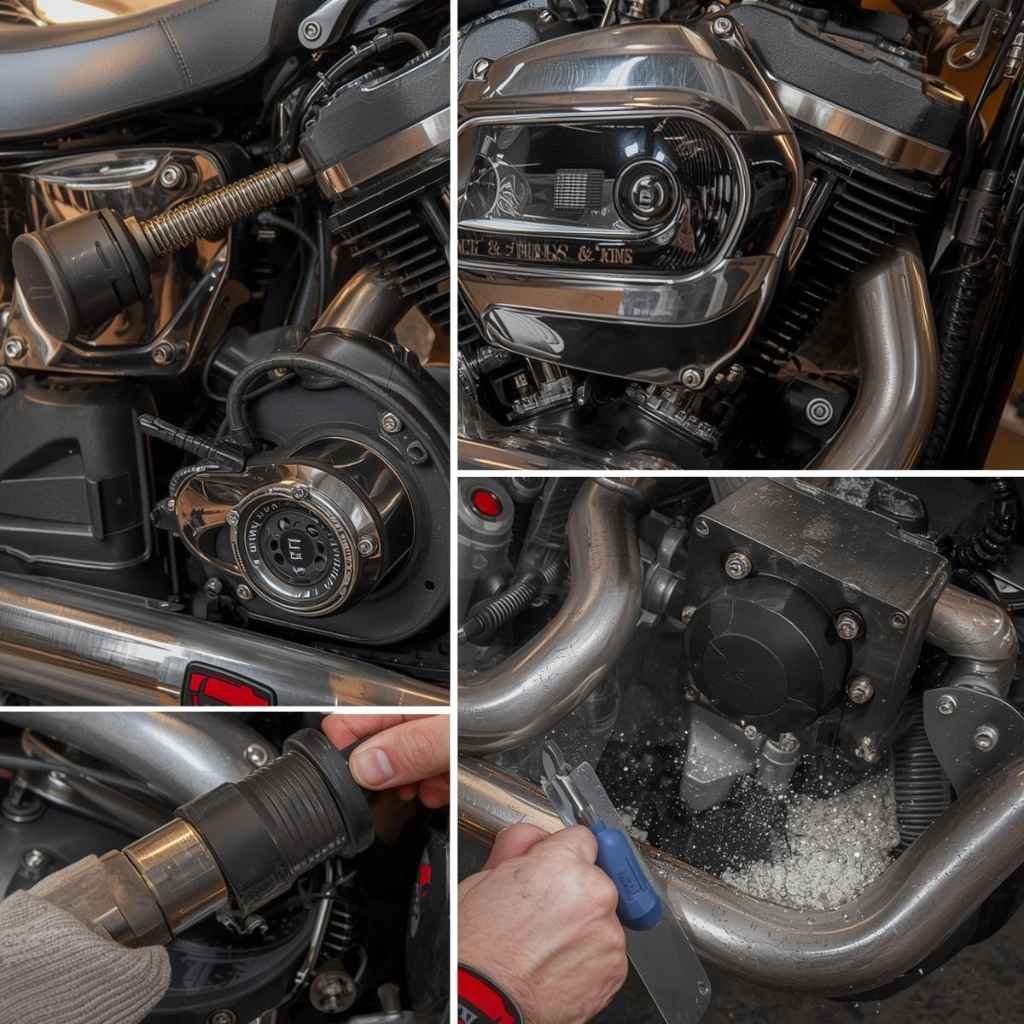
Removing Old Packing Material
With the end cap removed, you’ll see the old packing material. This is often a dense layer of fiberglass or similar material wrapped around the inner baffle. Your next step in How to Repack Vance & Hines Exhaust Properly is to remove this old material.
Often, the old packing can be pulled out by hand or with the help of pliers. It might be brittle and break apart easily. Be prepared for some dust and debris to fall out, which is why wearing safety glasses and gloves is important.
If the packing is very dense or stuck, you might need to use a long screwdriver or a hook tool to gently tease it out from around the baffle. Work your way around the baffle, pulling out sections of the old material until it’s all removed.
After removing the bulk of the packing, inspect the inside of the muffler and the baffle for any remaining debris or carbon buildup. You can use a rag or a brush to clean these areas. A clean interior will help the new packing sit properly and perform better.
The old material is usually quite dirty and compressed. It will look very different from the fresh material in your repacking kit. This contrast highlights why the repacking is necessary for restoring the sound and performance.
Removing the old packing is generally straightforward:
Pull out the old material
The old fiberglass packing is often loose enough to pull out by hand. Use gloves as it can be dirty and irritating.
Use pliers or tools if needed
For tightly packed or stubborn material, use pliers or a long screwdriver to grab and pull it out. Be careful not to scratch the baffle.
Clean out remaining debris
Once the bulk of the packing is out, brush or wipe away any loose bits or carbon buildup from inside the muffler and baffle.
Inspect the baffle
Ensure the baffle is clean and free of damage. This is the core component around which the packing is wrapped.
Installing New Packing Material
This is the core of learning How to Repack Vance & Hines Exhaust Properly: installing the fresh packing material. Your kit will contain the new material, which needs to be wrapped snugly and evenly around the inner baffle.
Unpack your new material. If it’s a large sheet, you might need to cut it to the correct size according to your kit’s instructions. The goal is to wrap the baffle completely, ensuring there are no gaps or overlaps that are too thick.
The material should be snug but not overly compressed.
Carefully wrap the new packing material around the baffle. Start at one end and work your way along, ensuring the material is distributed evenly. Some people find it helpful to use tape to temporarily hold the material in place as they wrap, but be sure to remove it before reassembling.
Once the baffle is fully covered, secure the packing material. This might involve tucking the ends under, or your kit might include wire or ties to hold it in place. The aim is for the packing to stay in place when the muffler is upright, without being able to shift around.
The correct way to pack is crucial for optimal sound and longevity. Too little packing will result in a louder exhaust, while too much can restrict flow and potentially overheat the packing.
Here’s how to install the new packing:
Prepare the new packing material
Unroll or cut the new fiberglass packing to the size recommended by your kit. Ensure it’s enough to wrap the baffle completely.
Wrap the baffle evenly
Start at one end of the baffle and wrap the material around it. Make sure it’s snug and covers the entire surface without gaps or thick overlaps.
Secure the packing
Tuck the ends of the material, or use any ties provided in the kit to keep it in place. It should feel firm around the baffle.
Check for proper fit
Ensure the packed baffle will slide back into the muffler body without excessive force. Adjust packing if needed.
Reassembling the Muffler
The final stages of How to Repack Vance & Hines Exhaust Properly involve putting everything back together. This is the reverse of the disassembly process, but with some important checks to ensure a good seal.
Carefully slide the packed baffle back into the muffler body. It should slide in relatively easily. If you encounter resistance, check that the packing isn’t bunched up or that the baffle is aligned correctly.
Once the baffle is in place, reattach the end cap. If your kit came with new gaskets or seals, be sure to install them now. These are critical for preventing exhaust leaks.
Align the end cap with the muffler body and reinsert the bolts. Tighten them gradually and evenly in a criss-cross pattern to ensure the cap seats squarely. Do not overtighten, as this can strip the threads or crack the end cap.
After the end cap is secured, double-check all connections. Make sure all bolts are tightened appropriately and that there are no obvious gaps. You have now successfully learned how to repack Vance & Hines exhaust properly!
Putting it all back together:
Slide the packed baffle back into the muffler
Make sure it fits smoothly. If it’s tight, gently adjust the packing.
Install new gaskets or seals
If your kit included them, use new gaskets for a leak-free seal. Place them where the old ones were.
Reattach the end cap
Align the end cap and insert the bolts. Tighten them in a star pattern to ensure an even fit.
Final check of all fasteners
Ensure all bolts are snug and that the end cap is secure. No wobbling should be present.
Testing Your Repacked Exhaust
After completing the repacking and reassembly, the most satisfying part is testing your work. Learning How to Repack Vance & Hines Exhaust Properly is rewarding when you hear the difference. This step confirms that your efforts have paid off.
Before starting your motorcycle, it’s a good idea to double-check all the bolts and connections one last time. Make sure everything is secure. Then, prepare to start your bike.
When you first start the engine, it might sound slightly different than usual. This is normal, as the new packing needs a short period to heat up and settle in. The exhaust note should be noticeably quieter and deeper than before.
Take your motorcycle for a short ride. Listen for any unusual noises, rattles, or leaks. Pay attention to how the engine performs.
If everything sounds good and the performance feels right, you’ve succeeded!
Initial Startup and Sound Check
The moment of truth for understanding How to Repack Vance & Hines Exhaust Properly is the initial startup. Find a safe spot outdoors, away from distractions, to start your motorcycle. Ensure the bike is in neutral and the area is clear.
Turn the ignition on and press the start button. Listen carefully as the engine comes to life. The exhaust note should be significantly different from before.
It should be much quieter, with that familiar Vance & Hines deep tone returning.
You might hear a slight crackling or hissing sound initially as the new packing material heats up for the first time. This is completely normal and usually dissipates as the exhaust system reaches its normal operating temperature. Avoid revving the engine excessively during this initial startup.
Spend a few minutes letting the bike idle. Listen for any rattles coming from the muffler, which could indicate loose parts or improperly secured packing. If the sound is significantly different, and in a good way, you’re on the right track.
Key points for the initial startup:
Start the engine in a safe, open area
Make sure the motorcycle is in neutral and there’s plenty of space around you. This ensures you can focus on the sound.
Listen for a quieter, deeper tone
The main goal is to restore the original sound. It should be much less raspy and loud than before.
Expect some initial settling sounds
A bit of hissing or light crackling is normal as the new material heats up. This should fade quickly.
Check for rattles or vibrations
Any unusual rattling could mean something is loose. Listen carefully while the engine idles.
Performance and Riding Observations
After the initial sound check, take your motorcycle for a test ride. This is where you’ll truly assess How to Repack Vance & Hines Exhaust Properly worked. Ride at various speeds and throttle positions to get a good feel for the exhaust’s performance.
Pay attention to how the engine responds. You might notice improved throttle response, especially at lower RPMs, due to the restored backpressure. The popping and crackling on deceleration should be significantly reduced or eliminated.
Feel the power delivery. If you noticed a slight loss of power before, it should feel more consistent and strong now. The bike should feel more responsive to your inputs.
The overall riding experience should be smoother and more enjoyable.
If you notice any leaks around the end cap, you may need to re-tighten the bolts. If the sound is still too loud or there are performance issues, the packing might not have been installed correctly, or the kit might not have been the right one. However, for most people, this step confirms a successful repacking.
What to observe during your ride:
Throttle response
Feel if the bike is more responsive when you twist the throttle. Improved backpressure often makes a difference.
Deceleration behavior
The popping or backfiring when you let off the throttle should be greatly reduced or gone entirely.
Engine power delivery
Does the engine feel smoother and stronger throughout the RPM range? This indicates the backpressure is optimized.
Absence of new noises
Listen for any new rattling or unusual sounds that might suggest a loose component. The goal is a clean, deep sound.
Frequently Asked Questions
Question: How often should I repack my Vance & Hines exhaust?
Answer: The frequency depends on your riding style and the specific exhaust model. Typically, you might need to repack every 10,000 to 20,000 miles, or when you notice the exhaust getting significantly louder. Some riders repack annually as preventative maintenance.
Question: Can I use generic packing material instead of a Vance & Hines kit?
Answer: While possible, it’s not recommended. Vance & Hines kits are designed with specific densities and materials to match their exhaust systems for optimal sound and performance. Generic materials might not fit well, perform correctly, or could even damage your muffler over time.
Question: Do I need to remove the exhaust from the motorcycle to repack it?
Answer: In most cases, no. Many Vance & Hines mufflers are designed so you can remove the end cap while the muffler is still attached to the bike, allowing you to access and
Question: Will repacking affect my bike’s warranty?
Answer: Performing routine maintenance like repacking your exhaust typically does not void your motorcycle’s warranty, especially if you use genuine parts and follow proper procedures. However, it’s always best to check your specific warranty terms.
Question: What if my Vance & Hines exhaust is still loud after repacking?
Answer: If your exhaust is still excessively loud, ensure you used the correct repacking kit for your model, that the packing was installed evenly and snugly, and that there are no leaks. In some cases, the baffle or muffler might be damaged, or the packing material might have settled quickly.
Summary
Learning How to Repack Vance & Hines Exhaust Properly is a valuable skill for any motorcycle owner. By following these steps, you can restore your exhaust’s deep sound and optimal performance. Gather your tools and kit, then systematically remove the old packing, install the new, and reassemble carefully.
This simple maintenance ensures your ride sounds and feels its best.