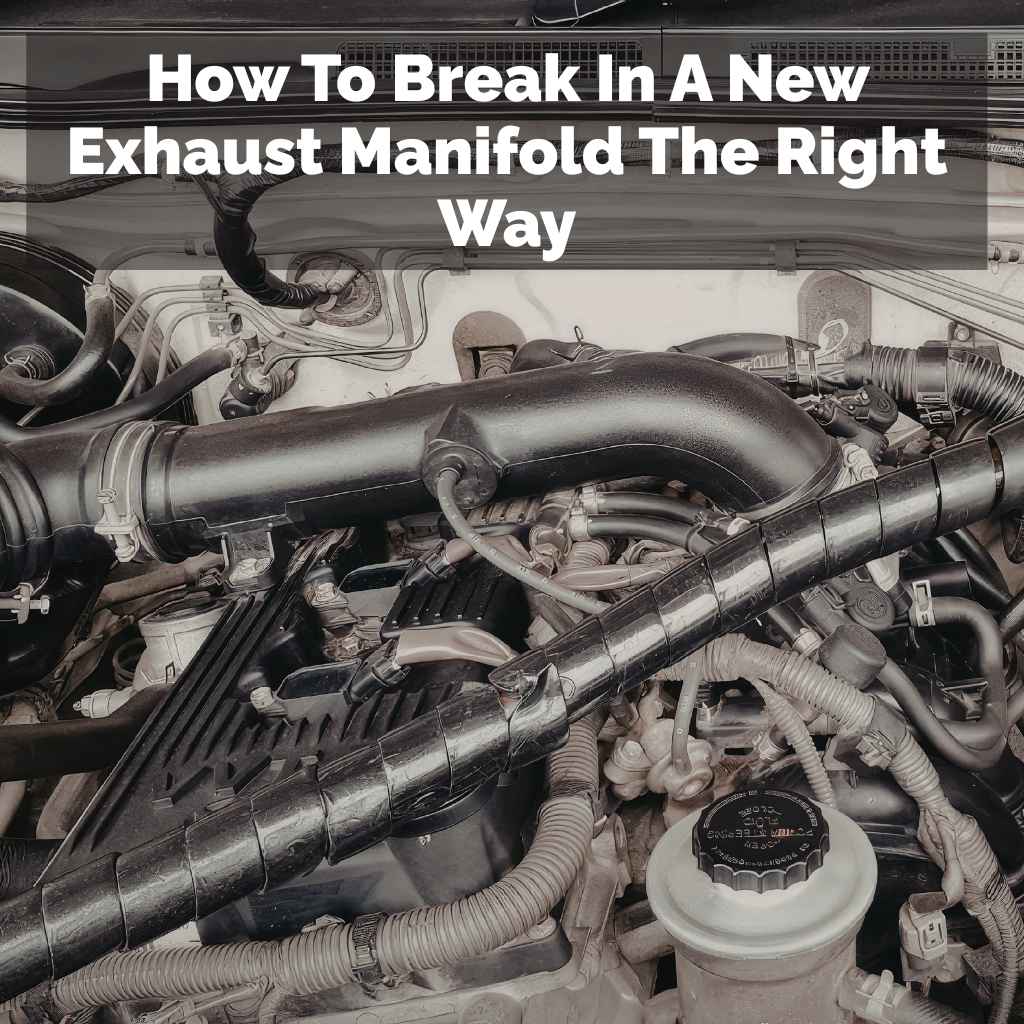
How To Break In A New Exhaust Manifold The Right Way
It’s a feeling many car lovers know. That new part finally arrives. You’re excited to bolt it on.
Especially something as important as an exhaust manifold. But then comes the question: what do I do now? Do I just drive normally?
Or is there a special way to get it ready?
Many people wonder about this. It can feel a bit confusing. There’s a whole process called “breaking in” a new exhaust manifold.
This is key for it to work its best. It also helps it last a long time. Getting this step right matters.
It makes a difference down the road. Let’s walk through it together.
A new exhaust manifold needs a specific break-in procedure. This usually involves running the engine at specific RPMs for set periods. It helps the metals expand and contract properly. This prevents premature cracks and ensures a good seal. Driving normally right away can cause issues. Proper break-in ensures long life.
What is Exhaust Manifold Break-In?
An exhaust manifold connects your engine’s cylinders to the exhaust pipe. It collects hot exhaust gases. These gases then flow out of your car.
New manifolds are often made of cast iron or steel. These materials will expand when they get hot. Then they shrink when they cool down.
The break-in process is all about managing this heating and cooling cycle. It helps the new metal parts get used to the temperature changes. Think of it like getting new shoes.
You don’t run a marathon in them right away. You wear them a bit first. This lets them mold to your feet.
An exhaust manifold needs a similar gentle start.
This process is also called “curing” or “seasoning” the manifold. It’s especially important for cast iron manifolds. They can be more brittle.
They might crack if heated too quickly or unevenly. The goal is to build heat slowly. Then let it cool down slowly too.
This helps the metal relax. It prevents stress from building up.
The manifold bolts to the engine head. It also connects to the rest of your exhaust system. Getting a good seal at these points is vital.
The break-in helps the gasket material seat properly. This means fewer leaks later. Leaks can cause bad sounds.
They can also affect engine performance.
Modern exhaust manifolds often have catalytic converters or oxygen sensors attached. These parts can also be sensitive to extreme heat. A proper break-in helps ensure they function correctly from the start.
It protects your investment in new parts. It ensures your car runs smoothly.
My First Time Breaking In an Exhaust Manifold
I remember the first time I replaced an exhaust manifold on my old pickup truck. It was a clunky, old diesel. It had a nasty crack in the original manifold.
I’d ordered a shiny new cast iron one. It looked so solid and clean. I was so excited to get it on.
I bolted it up myself. I torqued everything down just right. I felt pretty proud.
Then I started the engine. It sounded so much better! No more ticking sound.
I was ready to go get some coffee to celebrate. But my buddy, who’s a mechanic, saw me getting ready to drive off.
He called me over. “Hold on there, hotshot,” he said with a grin. “You can’t just drive that thing like normal.
You gotta break it in first.” I was confused. “Break it in? It’s a manifold, not a race horse!” He laughed and explained the whole process.
He said if I just drove it hard, the sudden heat could warp it. Or worse, crack it. He told me about the temperature cycles.
How important it was to go slow at first. I felt a little silly for not knowing. But I was grateful he stopped me.
That new manifold lasted for years after we followed his advice.
New Manifold vs. Old Manifold
Old Manifolds Often Show Signs Of:
- Cracks
- Warping
- Corrosion
- Exhaust Leaks
New Manifolds Require:
- Proper Installation
- Torque Sequence
- Break-In Period
Why is a Break-In So Important?
Think about what happens inside your engine. The combustion process creates intense heat. This heat is what the exhaust manifold has to handle.
Every time you run your engine, the manifold heats up. When you shut it off, it cools down.
This constant cycle of expansion and contraction puts stress on the metal. Especially when the part is brand new. The metal grains haven’t settled into their routine yet.
They are more sensitive to stress.
If you go from a cold start to high heat too fast, you can cause problems. The metal might expand unevenly. This creates weak spots.
Over time, these weak spots can turn into cracks. A cracked manifold is a big headache. It can be costly to fix or replace.
A proper break-in period allows the manifold to heat up gradually. This lets the metal expand in a controlled way. It also cools down gradually.
This helps the metal contract without building up too much internal stress.
It’s like tempering steel. You heat it and cool it in specific ways. This makes it stronger and more flexible.
The break-in process for an exhaust manifold does something similar. It helps the material stabilize.
This is also crucial for the gasket seal. The gasket sits between the manifold and the engine head. It needs to compress evenly.
Running the engine at different RPMs during the break-in helps the gasket seat well. This prevents exhaust leaks. Leaks can lead to noise and performance loss.
Some people skip this step. They think it’s just an old wives’ tale. But in my experience, and for many mechanics I know, it’s a real thing.
I’ve seen brand new parts fail early because of it. I’ve also seen them last for ages when done right.
Break-In Benefits
Benefit: Longer Lifespan
Explanation: Reduces stress on new metal.
Benefit: Prevents Cracks
Explanation: Manages initial expansion and contraction.
Benefit: Better Seal
Explanation: Helps gasket seat evenly.
Benefit: Optimal Performance
Explanation: Ensures gases flow freely without leaks.
The Standard Break-In Procedure (Step-by-Step)
There isn’t one single rule for every single vehicle. Always check your specific car’s service manual. Or the instructions from the manifold manufacturer.
But most procedures follow a similar pattern. The core idea is controlled heat cycles.
Here’s a common method used for many cars and trucks:
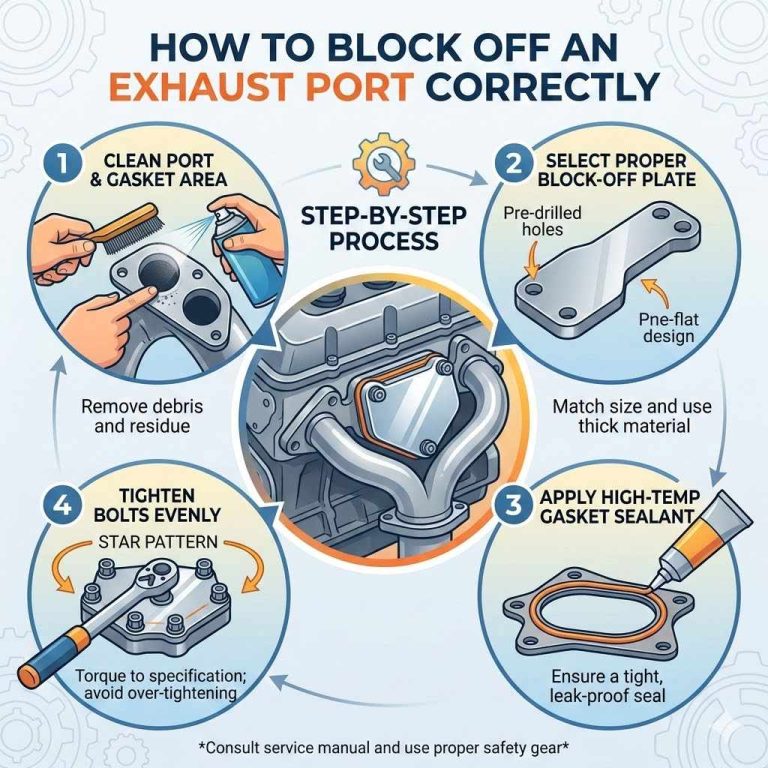
Step 1: Initial Installation
Make sure the manifold is installed correctly. Use new gaskets. Tighten the bolts in the proper sequence and to the correct torque specification.
Do not overtighten. This can warp the manifold or damage the gasket.
Step 2: First Heat Cycle (Low RPM)
Start the engine. Let it idle for about 5 minutes. Keep the RPMs very low, around 1000-1500 RPM.
This allows the engine to warm up slowly. It also gets the manifold slightly warm.
Turn the engine off. Let it cool down completely. This can take an hour or more.
This first cool-down is important. It lets the metal settle.
Step 3: Second Heat Cycle (Medium RPM)
Start the engine again. This time, run it for about 10-15 minutes. Keep the RPMs in a medium range, around 2000-2500 RPM.
Avoid revving the engine hard.
You want to get the manifold hotter. But still in a controlled way. You might notice a slight smell as the gasket cures.
This is often normal.
Turn the engine off. Let it cool down completely again. Just like before.
Step 4: Third Heat Cycle (Slightly Higher RPM)
For the third cycle, start the engine. Run it for another 10-15 minutes. You can push the RPMs a bit higher now, maybe 2500-3000 RPM.
Still avoid flooring it.
This is getting closer to normal operating temperatures. You are really encouraging the metal to expand and contract fully.
Turn the engine off. Let it cool down completely one last time.
Step 5: Post Break-In
After the third cool-down, you can usually start driving normally. It’s still a good idea to be a bit gentle for the first few drives. Avoid aggressive acceleration or high-speed runs immediately.
Just drive like you normally would.
It’s also wise to check for any exhaust leaks after a few days of driving. Listen for unusual sounds. If you hear any hissing or puffing from the engine bay, you might have a leak.
Some people suggest repeating the cycle a few times. Or holding higher RPMs for longer. But for most common vehicles, 3 cycles are enough.
Overdoing it can also cause stress.
Quick Scan: Break-In Cycle Summary
| Cycle | Run Time | RPM Range | Action |
|---|---|---|---|
| 1 | 5 minutes | 1000-1500 | Idle, then complete cool-down |
| 2 | 10-15 minutes | 2000-2500 | Medium run, then complete cool-down |
| 3 | 10-15 minutes | 2500-3000 | Higher run, then complete cool-down |
Real-World Context: Why Some Cars Need It More
The type of engine and the manifold material play a big role. For instance, older, naturally aspirated engines with thick cast iron manifolds often benefit the most. Cast iron is dense and expands significantly when heated.
Turbocharged engines also get very hot. The exhaust gases are even hotter due to the turbocharger. This means a higher risk of thermal stress.
So, a break-in is often recommended for these too.
Some performance engines use stainless steel manifolds or headers. These materials are different. They might expand differently.
Some stainless steel headers don’t strictly require a break-in in the same way cast iron does. However, it’s still good practice to heat cycle them gently.
Modern engines often have integrated exhaust manifolds. They are part of the cylinder head itself. These are usually very robust.
But if you’re replacing a section or dealing with a cracked one, the principles still apply.
Consider the climate. In very cold climates, the initial heat-up can be more drastic. The metal has more to expand.
This makes a slow, controlled break-in even more important. It prevents shock to the material.
Also, think about the gasket. The gasket is a crucial part of the seal. It’s usually made of composite materials or metal alloys.
It needs to compress evenly against the manifold and the engine head. The varying temperatures and RPMs during break-in help this seating process. It ensures a tight seal that lasts.
When is Break-In Most Crucial?
- Cast Iron Manifolds: These are prone to cracking if heated too fast.
- Turbocharged Engines: Extreme heat requires careful management.
- Performance Applications: When pushing the engine hard, a good seal is vital.
- Older Vehicles: Materials and designs may be less forgiving.
Common Mistakes to Avoid
Even with the best intentions, people can make mistakes. Understanding these can save you a lot of trouble.
Mistake 1: Just Driving Normally
This is the most common mistake. You bolt on the new part and assume you’re good to go. As we’ve discussed, this can lead to premature failure.
It’s tempting to hear that new engine sound and want to enjoy it fully. But hold back for a few hours.
Mistake 2: Revving the Engine Too High Too Soon
During the break-in, you are controlling the heat. Revving the engine past the recommended RPMs too early sends too much heat into the manifold too fast. This defeats the purpose of the controlled cycle.
Stick to the RPM ranges provided.
Mistake 3: Not Letting It Cool Down Completely
The cool-down period is just as vital as the heat-up. It allows the metal to shrink back. This relieves the stress built up during expansion.
If you don’t let it cool, you are essentially repeating the stress cycle without a break.
Patience is key here. Rushing the cool-down means rushing the entire process. Give it at least an hour, sometimes more, depending on engine size and ambient temperature.
Mistake 4: Overtightening Bolts or Using Old Gaskets
This isn’t directly part of the driving break-in, but it’s critical for success. If the manifold is installed incorrectly, the break-in won’t matter. Overtightening can warp the manifold even before you start the engine.
Always use new gaskets. They are designed to seal once. Reusing them is asking for leaks.
Mistake 5: Ignoring Strange Noises or Smells
During the break-in, you might smell something a bit funny. This can be the gasket curing or anti-seize burning off. But if you hear loud hissing, puffing, or rattling, stop the engine.
Investigate immediately. Something might be wrong with the installation or the part itself.
Common Pitfalls to Sidestep
Pitfall: Skipping the cool-down.
Why it’s Bad: Metal stress builds up without relief.
Pitfall: Too much throttle.
Why it’s Bad: Causes rapid, uneven heating.
Pitfall: Reusing old gaskets.
Why it’s Bad: Leads to inevitable exhaust leaks.
What This Means for You
So, what’s the takeaway? It means a little bit of time and effort now can save you a lot of trouble later. When you replace your exhaust manifold, remember this process.
If you’re having a shop do the work, you can ask them about their break-in procedure. A good shop will know this. They might even do it as part of their service.
If they don’t, you can discuss it with them.
It’s not about being overly cautious. It’s about respecting the materials. It’s about giving your new part the best possible start.
A properly broken-in exhaust manifold will perform better. It will be quieter. And most importantly, it will last much longer.
Think of it as an investment in your vehicle’s health. For most car owners, this process is straightforward. You just need to know it’s required.
And be willing to spend an extra hour or so in your garage.
Quick Fixes & Tips
While there aren’t really “fixes” for a break-in, here are some tips:
- Read the Manufacturer’s Instructions: If your new manifold came with specific break-in directions, follow them exactly.
- Have a Helper: If possible, have someone help you. One person can monitor the engine while the other watches the time or RPMs.
- Monitor for Smells: A little exhaust smell during the first few heat cycles can be normal. If it’s very strong or acrid, investigate.
- Check Torque Again: After the first few drives, it’s good practice to re-check the torque on the manifold bolts. Sometimes they can loosen slightly as things settle.
- Listen Carefully: Pay attention to your car’s sounds. Any new ticking or hissing could indicate a leak that needs attention.
Top Tips for a Smooth Break-In
Tip: Always follow specific product guides.
Tip: Monitor engine temperature during cycles.
Tip: Be patient; don’t rush cooling.
Tip: Listen for unusual noises post-installation.
Frequently Asked Questions
Do all exhaust manifolds need a break-in?
Most cast iron exhaust manifolds benefit greatly from a break-in. Stainless steel headers or those integrated into cylinder heads may have different requirements. Always check the manufacturer’s recommendations for your specific part.
How long does the break-in process take?
The entire process, including heat cycles and cool-downs, typically takes a few hours. Each heat cycle is about 5-15 minutes of running time, plus the significant time for the engine to cool down completely between cycles.
Can I drive my car normally after the break-in?
Yes, after completing the recommended heat cycles and cool-downs, you can generally drive your car normally. Some recommend a gentle first drive, avoiding hard acceleration for a short period.
What if I smell burning during break-in?
A slight burning smell can be normal. It might be excess anti-seize compound or gasket material curing. However, if the smell is very strong, acrid, or accompanied by smoke, shut off the engine and investigate for leaks or installation errors.
My new manifold made a clicking noise after a few days. What is it?
A clicking or ticking noise usually indicates an exhaust leak. This can happen if the gasket didn’t seal properly, or if bolts have loosened. It’s important to address this promptly.
Check the torque and inspect for any visible signs of gas escaping.
Is it okay to rev the engine during the break-in?
You should not rev the engine excessively during the break-in. Stick to the specified RPM ranges. High RPMs generate much more heat quickly, which can defeat the purpose of a slow, controlled heat cycle and potentially stress the new manifold.
What are the risks of not breaking in a new manifold?
The main risks are premature cracking of the manifold, warping of the metal, and exhaust leaks due to improper gasket seating. These issues can lead to reduced engine performance, increased noise, and costly repairs.
Conclusion
Breaking in a new exhaust manifold might seem like an extra step. But it’s a vital one for durability. It ensures your new part performs well.
It helps it last for many miles to come. Following these simple steps gives your manifold a strong start. You’ll thank yourself later.