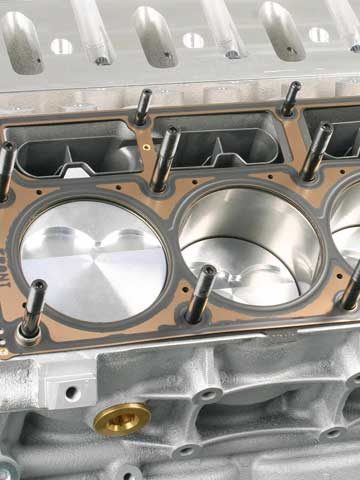
Chevy 350 Exhaust Manifold Bolt Pattern
The chevy 350 exhaust manifold bolt pattern is a square, four-bolt pattern. The bolts are spaced evenly across the width of the manifold and are placed in the middle of each port.
The Chevy 350 is a workhorse of an engine, known for its reliability and performance. When it comes time to replace the exhaust manifold, it’s important to know the correct bolt pattern. The good news is, the bolt pattern for the Chevy 350 is relatively simple.
There are only eight bolts that need to be removed in order to take off the old manifold and install a new one.
If you’re looking to upgrade your exhaust system, or simply need to replace a worn-out manifold, knowing the correct bolt pattern is essential. The last thing you want is for your new manifold not to fit properly because you didn’t follow the right instructions.
So save yourself some time and frustration by following this guide on how to correctly remove and install a Chevy 350 exhaust manifold.
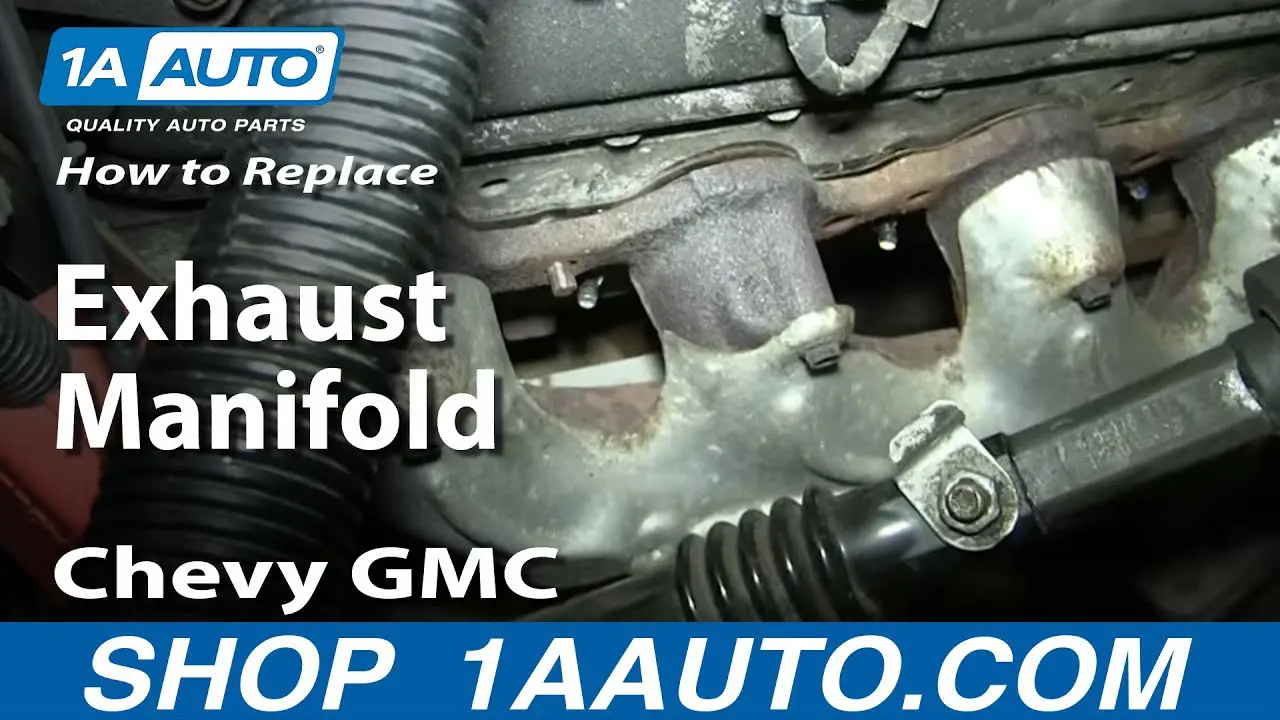
How to Replace an Exhaust Manifold Gasket – Chevy 350
What Size are Chevy 350 Exhaust Manifold Bolts?
The exhaust manifold bolts on a Chevy 350 are 3/8” x 16. There are usually 8 or 10 of them, depending on the model year. The bolts attach the exhaust manifold to the cylinder head.
What Size are Small Block Chevy Exhaust Manifold Bolts?
The exhaust manifold bolts on a small block Chevy engine are 3/8-inch in diameter. There are usually between 8 and 12 bolts that secure the manifold to the cylinder head. In some cases, there may be as many as 16 bolts.
The number of bolts will vary depending on the model and year of the engine.
Why Do Chevy Exhaust Manifold Bolts Break?
If you own a Chevy and have had to replace the exhaust manifold bolts, you’re not alone. It’s a common problem with these vehicles. There are several reasons why the bolts break, and we’ll discuss them all in this blog post.
One of the main reasons Chevy exhaust manifold bolts break is because they’re made of cast iron. Cast iron is prone to breaking and shattering under stress, which is why it’s not used in many high-stress applications. The other reason cast iron breaks so easily is because it rusts quickly.
When cast iron rusts, it becomes brittle and breaks easily.
Another reason Chevy exhaust manifold bolts break is because they’re often over-tightened. If the bolts are too tight, they can snap when the engine starts up or when it’s under load.
This is why it’s important to follow the manufacturer’s torque specifications when installing these bolts.
Finally, Chevrolet has issued a service bulletin for some models that states that corrosion can cause the exhaust manifold bolts to break. If your vehicle is affected by this bulletin, be sure to have the dealership check it out and replace any corroded parts.
As you can see, there are several reasons why Chevy exhaust manifold bolts break. Be sure to follow the manufacturer’s instructions carefully to avoid breaking them yourself!
Do You Put Anything on Exhaust Manifold Bolts?
If you’re talking about putting anything on the bolts that hold the exhaust manifold in place, then the answer is no. There’s really no need to put anything on these bolts because they don’t get exposed to any extreme conditions that would cause them to loosen up or break. The only time you might consider putting something on these bolts is if you were going to be doing some off-roading or driving in harsh conditions where vibrations could potentially loosen them up.
Other than that, there’s really no need to put anything on these bolts.

Credit: www.amazon.com
Chevy 8.1 Exhaust Manifold Bolt Torque
If you’re working on a Chevy 8.1 engine, you’ll need to know the torque specs for the exhaust manifold bolts. These bolts are critical to the performance of your engine, so it’s important to get them just right.
The good news is that there’s no special trick to torquing these bolts – just use a good quality torque wrench and follow the manufacturer’s recommendations.
In general, you should torque these bolts to between 15 and 20 ft-lbs.
Once you have the bolts tightened down, be sure to check them periodically to make sure they haven’t loosened up. If they have, simply retighten them to the correct torque specification.
454 Exhaust Manifold Bolt Torque
When it comes to bolting down your 454 engine’s exhaust manifold, you’ll want to make sure you torque the bolts to the correct specification. Over- or under-tightening the bolts can lead to problems, so it’s important to get it right.
The recommended torque for the 454 exhaust manifold bolts is 70 ft.-lbs.
Most mechanics will use a torque wrench to ensure that they’re applying the correct amount of force when tightening these bolts. If you don’t have access to a torque wrench, you can still achieve the proper bolt tension by using a regular socket wrench and following this simple formula:
Bolt Diameter (in inches) x Bolt Tension (in lb./ft.) = Torque (in lb./ft.)
For example, if you’re using 1/2″ diameter bolts with a tension of 70 lb./ft., you would multiply 1/2 by 70 to get 35 lb.
/ft. of torque. Therefore, you would tighten each bolt until it feels like there’s 35 lb.
/ft. of resistance when turning with a socket wrench.
Chevy 350 Exhaust Manifold Bolt Size
If you’re hoping to upgrade the exhaust on your Chevy 350, you’ll need to know the right bolt size. After all, a faulty or incorrect installation could lead to big problems down the road.
The good news is that most aftermarket exhaust systems will come with specific instructions on what size bolts to use.
But if you’re looking for a general guideline, here it is:
For Chevrolet 350s made between 1967 and 1980, you’ll need 1/2-inch bolts. For 1981 and later models, 3/8-inch bolts should suffice.
It’s always best to err on the side of caution and go with slightly larger bolts if you’re unsure – they can always be trimmed down but it’s much more difficult to make smaller ones fit.
Keep in mind that these are just general guidelines – always consult your specific aftermarket system’s instructions before starting any work. With the right parts and a little bit of elbow grease, you’ll have that Chevy 350 sounding great in no time!
Chevy 350 Bolt Pattern
The Chevrolet 350 engine is a small block V8 with a 4.00-inch bore and 3.48-inch stroke. It was introduced in 1967 as a 1968 model, replacing the Chevy II/Nova’s inline six-cylinder engine. The 350 went on to power the vast majority of General Motors’ rear-wheel drive cars through the early ’80s before being replaced by the smaller 305 and 265 engines.
The 350 was available in a wide variety of configurations, including carbureted and fuel injected, two-bolt main and four-bolt main bearing caps, cast iron and aluminum heads, and even turbocharged versions. Despite its many variations, all Chevrolet 350 engines have one thing in common: A standard 4.00 x 3.48 inch bore and stroke combination that provides an excellent foundation for performance upgrades.
One of the most popular upgrade paths for the 350 is increasing displacement through stroker kits that increase both the bore and stroke dimensions.
Chevy 350 Intake Manifold Bolt Pattern
When it comes to Chevy 350 intake manifolds, there are a few different bolt patterns that you may encounter. The most common is the standard pattern, which has 8 bolts in a 2-4-2 configuration. However, there are also 6-bolt and 4-bolt patterns out there.
Here’s a quick rundown of each:
8-Bolt Pattern: The 8-bolt pattern is the most common and is used on most stock applications. It’s easy to identify because it has 8 bolts evenly spaced around the perimeter of the manifold.
6-Bolt Pattern: The 6-bolt pattern is less common, but still fairly easy to find. It uses 6 bolts in a 2-3 configuration. You’ll typically see this pattern on aftermarket intakes meant for high performance applications.
4-Bolt Pattern: The 4-bolt pattern is the least common of the three, but can still be found on some intakes (usually older models). It uses 4 bolts in a square configuration.
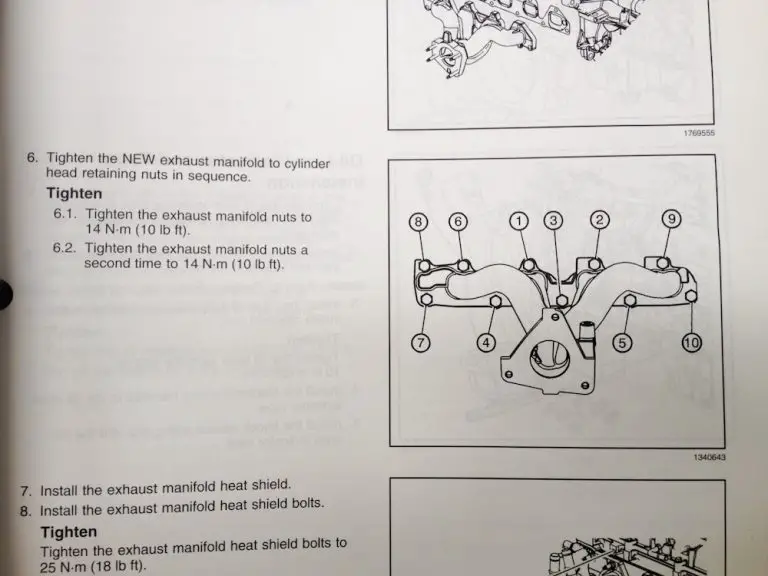
Mercruiser 4.3 Exhaust Manifold Torque Sequence
If you’re looking to replace or repair your Mercruiser 4.3 exhaust manifold, it’s important to follow the proper torque sequence. This will ensure that everything is properly tightened and won’t come loose over time. Here’s the recommended torque sequence for a Mercruiser 4.3:
1. Start by tightening the bolts in the center of the manifold first. Torque these to 25 ft-lbs.
2. Next, move outwards and tighten the remaining bolts in a star pattern.
Torque these to 30 ft-lbs.
3. Finally, retighten all of the bolts one more time in the same pattern. This time, torque them to 35 ft-lbs.
Conclusion
The Chevy 350 exhaust manifold bolt pattern is a very popular design for many different types of engines. This particular bolt pattern is used in many different makes and models of cars, trucks, and SUVs. It is also used in some marine applications as well.
The main reason that this bolt pattern is so popular is because it provides a good seal between the engine block and the exhaust manifold. This helps to prevent any leaks or other problems that can occur with other types of designs.